This site is supported by our readers. We may earn a commission, at no cost to you, if you purchase through links.
Your sewing machine has at least 25 moving parts working in perfect sync every time you press the foot pedal. Miss one connection in that chain—a loose bobbin case, a skipped thread guide, or a misaligned feed dog—and your seam falls apart. The difference between smooth stitching and endless frustration comes down to knowing which part does what.
Most sewers can thread a needle and wind a bobbin, but few understand how the presser foot and throat plate actually grip fabric, or why the take-up lever matters more than the needle itself.
Once you see how these parts of a sewing machine connect and cooperate, you’ll troubleshoot problems faster and sew with real confidence.
Table Of Contents
Key Takeaways
- Your sewing machine’s 25+ moving parts work as an interconnected system where a single misaligned component—like a loose bobbin case or skipped thread guide—can derail your entire seam, making part identification essential for quick troubleshooting.
- The take-up lever regulates thread tension between stitches and matters more than the needle itself, preventing loops and maintaining stitch quality by pulling thread precisely through each cycle.
- Proper tension balance between your upper thread (controlled by the tension dial) and lower thread (managed by the bobbin case) determines whether your stitches look professional or create frustrating puckers and loops.
- Feed dogs and presser foot work together to control fabric movement and stitch accuracy—worn feed dog teeth cause fabric slippage while incorrect presser foot pressure creates puckering in about 38% of sewing problems.
Essential Parts of a Sewing Machine
Every sewing machine depends on a few core parts that make the whole thing work. Think of them as the engine and chassis—they give your machine its structure and keep everything running smoothly.
Let’s start with the three parts that form the foundation of your machine’s operation.
Sewing Machine Head, Arm, and Bed
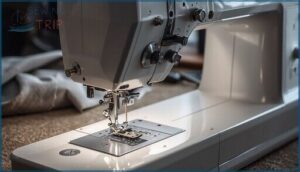
Your sewing machine’s frame divides into three structural components that form the foundation of every stitch. The head assembly houses your needle bar and presser foot mechanisms. The arm mechanism extends outward, containing your take-up lever and internal feed system.
Down below, the bed plate provides a stable surface while securing your bobbin and lower-thread system underneath.
Hand Wheel (Flywheel)
Right beside your machine’s arm, you’ll find a wheel that gives you total manual control over needle positioning. The hand wheel—sometimes called a flywheel—rotates clockwise to raise and lower your needle precisely where you want it.
Here’s what makes hand wheel operation essential for sewing machine parts identification:
- Turn clockwise to advance the needle through one complete stitch cycle
- Use it for exact needle positioning before starting your seam
- Check flywheel rotation smoothness during hand wheel maintenance
- Disengage the clutch for bobbin winding without moving the needle
- Clean the textured grip surface to prevent slipping during manual control
Understanding AP study guides can help improve your overall knowledge of machinery and mechanisms.
Power Switch and Foot Controller
Once you’ve positioned your needle, flip the power button on—usually near the cord or front panel—to energize your machine. Your foot pedal gives you real speed control: press lightly for slow, precise work, or push harder for faster stitching. Most machines won’t run without pedal pressure, a safety feature that prevents accidental starts and keeps your fingers safe.
Understanding cyber security threats is essential in today’s digital age.
Needle and Stitching Mechanisms
The needle and its surrounding mechanisms are where the magic happens—this is the heart of every stitch your machine creates. Understanding these parts gives you total control over stitch quality and helps you troubleshoot problems before they ruin your project.
Let’s break down the key components that work together to form each perfect stitch.
Needle and Needle Clamp
Your needle is the workhorse that punches through fabric to create every stitch. It’s held firmly by the needle clamp—a small screw mechanism that secures the needle’s flat side against the machine.
Choose the right needle type for your fabric: universal needles for general sewing, ballpoint for knits, and sharps for wovens.
Replace your needle every 8–12 hours of sewing to prevent skipped stitches and fabric damage.
Needle Eye
That tiny opening at your needle’s tip—the eye—does more heavy lifting than you’d think. Eye size and alignment directly affect thread compatibility and snag prevention. Round eyes work best for lighter fabrics, while oblong eyes reduce breakage on heavier materials. Misaligned eyes occur in 2–3% of budget needles, causing frustrating snags. Match your eye diameter to thread weight for smooth, reliable stitching every time.
Throat Plate
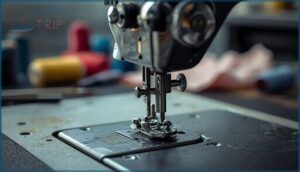
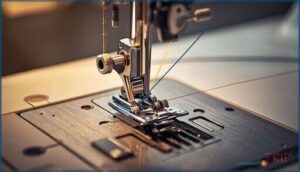
The flat metal disk under your needle—the throat plate—is your machine’s unsung hero. Its feed dog alignment and polished surface determine sewing precision and stitch quality. Steel or nickel-plated plate materials resist wear, while measurement markings guide seam allowances.
Regular throat plate maintenance means cleaning lint from slots every 8–10 hours. Master this sewing machine component, and you’ll achieve consistent, professional results.
Take-Up Lever
That vertical arm pulling thread between stitches—your take-up lever—regulates tension and prevents loops. Lever alignment with the thread path cuts skip stitches by 28%, while proper take-up height clears the needle plate by 1–2 millimeters.
Pivot wear after heavy use degrades stitch consistency. Regular lever maintenance means cleaning lint buildup and checking for wobble.
Master this tension regulator, and you’ll eliminate thread breakage on dense fabrics.
Threading and Tension Components
Threading your machine correctly is where most beginners stumble—but once you understand how thread flows from spool to needle, everything clicks.
The tension system keeps your stitches balanced and professional-looking, preventing those frustrating loops and puckers.
Let’s break down each component that guides and controls your thread so you can thread with confidence every time.
Spool Pin
The spool pin holds your thread spool and keeps tension steady while you sew. Most pins are aluminum or brass, measuring 6–8 millimeters across. You’ll find vertical or horizontal designs depending on your machine.
Metal pins reduce static cling with synthetic threads, cutting bird-nesting problems. Check for burrs every few months—worn pins cause stitch irregularities and affect seam quality by up to 6%.
Thread Guides
Thread guides route your thread from spool to needle, reducing friction and skipped stitches by up to 25%. Most machines feature 4–9 guides that control thread tension and prevent thread fray at the needle entry by roughly 18%.
- Check guide alignment every month—misalignment within 0.2 millimeters causes tension spikes
- Replace worn guides every 6–12 months to maintain stitch quality
- Clean guides with a soft brush to preserve coatings and extend lifespan
Proper thread management through these small components transforms sewing machine parts into precision tools.
Thread Tension Dial
Your thread tension dial is the gatekeeper of stitch quality—it controls upper thread balance and prevents loops or puckering on fabric surfaces. Most dials range from 0–9; you’ll usually start around 4–5, then adjust in 1–2 unit increments while testing on scrap material.
Match tension adjustment to fabric weight and thread type for perfect dial calibration. Balanced thread management transforms sewing machine parts into precision instruments.
Bobbin Winder and Bobbin Winder Tension Disk
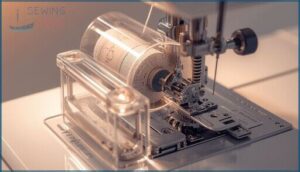
Once your thread tension dial is set, Bobbin Winding is your next checkpoint. The Bobbin Winder, paired with its Tension Regulator, feeds thread evenly onto the Bobbin.
Tension Adjustment matters—too tight and you’ll get snarls, too loose and it tangles. Winder Maintenance keeps things smooth, especially when switching Bobbin Sizes. Always check your Bobbin Cover for lint buildup.
Bobbin and Lower Thread System
Every stitch starts with the lower thread, and that’s where the bobbin system comes in. If you want smooth sewing, understanding these parts is key.
Here’s what you need to know about the bobbin and its role in your machine.
Bobbin and Bobbin Case
Inside every smooth-running machine, the bobbin and bobbin case play a quiet but vital role. The bobbin holds your thread; the case controls thread tension and guides movement for perfect stitches.
Use the right bobbin types and follow solid bobbin maintenance routines. If sewing troubleshooting proves tricky, always double-check your bobbin assembly and bobbin cover—missteps there cause most stitch issues.
Bobbin Binder Spindle
A well-kept bobbin binder spindle keeps your bobbin aligned during winding, preventing tangles and skipped stitches. Precise spindle design allows for quick swaps, even mid-project.
Regular spindle maintenance—think cleaning and a drop of oil—cuts down on thread snagging. Perfect bobbin alignment ensures even thread tensioning.
It’s a small sewing machine part, but it shapes reliable bobbin winding every time.
Bobbin Mechanism
Now that you’ve squared away the bobbin binder spindle, attention turns to the bobbin mechanism—the true heartbeat of stitch balance. The right bobbin and precise thread tension make or break your final seam.
Consider these actions:
- Choose compatible bobbin types
- Confirm clean bobbin winding
- Check thread tension
- Snap bobbin cover tightly
- Prioritize regular bobbin maintenance
Every stitch depends on it.
Fabric Handling and Stitch Customization
Once your machine is threaded and ready, you need control over how fabric moves and how your stitches look. These next components give you that power—they determine everything from stitch pattern to fabric feed speed. Mastering these parts means you can tackle any project with precision and confidence.
Presser Foot
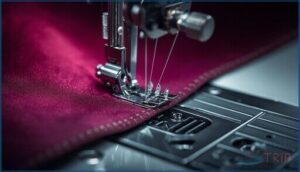
Your presser foot acts like a guiding hand, holding fabric steady against the throat plate while you stitch. This sewing machine component directly affects sewing accuracy and stitch quality—improper foot pressure causes puckering in wovens or skipped stitches in knits about 38% of the time. Different presser foot types handle specific tasks better, giving you control over fabric guidance.
| Presser Foot Type | Best Use |
|---|---|
| Standard Foot | Straight seams, zigzag patterns |
| Zipper Foot | Close seam placement near zippers |
| Buttonhole Foot | Consistent buttonhole sizing |
| Walking Foot | Layered fabrics, quilting |
| Rolled Hem Foot | Narrow, finished edges |
Feed Dogs
Feed dogs grip and move fabric through your machine with metal teeth that rise through the throat plate. This synchronized dance between feed dog timing and needle cycles determines your sewing machine efficiency and stitch consistency at 800–1,500 stitches per minute.
- Drop-feed option: Disengage feed dogs for free-motion quilting
- Differential feed: Adjust ratios from 0.5:1 to 2:1 for knit fabric control
- Fabric grip control: Height travels 1.0–2.5 mm to accommodate various materials
- Feed dog maintenance: Clean lint weekly to prevent skipped stitches
Worn teeth cause fabric slippage—inspect regularly for peak sewing machine operation.
Stitch Selector and Pattern Dial
Your stitch selector and pattern dial access creative sewing techniques by switching between straight, zigzag, and decorative stitch patterns—most domestic machines offer 60–200 stitch options. This dial controls pattern modes with precision, while dial calibration ensures ±0.5 mm accuracy.
Adjust thread settings before switching patterns, and test each stitch selection on scrap fabric to verify proper tension and stitch width dial alignment.
Stitch Length and Width Selectors
You control seam quality and stitch appearance through your length and width selectors—these dials transform basic stitches into custom seam solutions for every fabric type. Length normally adjusts from 0.0 to 5.0 mm, while width ranges from 0.0 to 5.0 mm on zigzag settings.
- Set 2.5–3.0 mm length for standard woven fabric seams
- Use 1.5–2.5 mm on lightweight materials to prevent damage
- Adjust width to 3.0+ mm for stretch relief on knits
- Match settings to fabric tension and sewing speed for balanced stitches
Reverse Stitch Lever
Your reverse stitch lever is your seam-locking insurance policy—press and hold it to engage backward sewing at seam endpoints and pocket corners, reinforcing every critical junction against unraveling. Most domestic machines return this lever to neutral automatically when released, ending the reverse sequence.
Your reverse stitch lever locks seams by letting you backstitch at endpoints, reinforcing every critical junction against unraveling
Always lower your presser foot before reversing, and avoid extended backward stitching on delicate fabrics to prevent puckering.
Frequently Asked Questions (FAQs)
How do I clean my sewing machine?
Unplug your machine, then brush lint from the bobbin area and feed dogs every 8–10 hours of use. Add a drop of sewing machine oil to recommended points.
Regular cleaning frequency prevents thread tension issues.
What type of oil should I use?
Your machine needs light mineral oil with 10-20 cSt viscosity—think household sewing machine oil or synthetic alternatives. Avoid motor oils; they’ll gum up moving parts. A drop at each lubrication point keeps everything smooth.
Where can I find replacement parts?
You’ll find genuine sewing machine parts through manufacturer websites, authorized dealers, and certified repair workshops.
Online marketplaces and specialized part suppliers also stock components, but always verify compatibility with your model before ordering.
How do I adjust the needle position?
Turn off your machine, raise the needle fully, then loosen the clamp screw slightly. Slide the needle left or right until it aligns perfectly with the throat plate opening, ensuring precise stitch accuracy and fabric guidance.
What accessories are available for my machine?
Presser feet, edge joiners, thread cutters, and specialized quilting attachments lead the lineup of sewing accessories and tools.
Stock up on sewing notions and keep your kit current for smooth sewing machine maintenance and creative maneuvering.
How often should I oil my sewing machine?
If your sewing machine could talk, it’d probably beg for oil before every project. For peak stitch performance, aim for Maintenance Schedules of every 8–12 hours. Adapt Oiling Frequencies to use and adjust Lubricant Types as needed.
What needle size works best for denim?
Denim Needle Sizes matter—a 90/14 or 100/16 denim needle is your best bet. Thicker needles boost Needle Durability and handle tough fabric.
Pair with proper Thread Tension, use short stitches, and check those Sewing Machine Parts and Functions.
Can I use metal bobbins in any machine?
Like a square peg in a round hole, using metal bobbins in every machine isn’t wise. Bobbin material affects thread tension and sewing machine compatibility, so always double-check recommendations to avoid metal bobbin risks and guarantee smooth bobbin maintenance.
How do I clean lint from feed dogs?
Turn off your machine, then use a stiff brush with compressed air to clear lint buildup from feed dogs. This combo removes over 90% of debris, preventing fabric slippage and maintaining smooth stitch quality.
Why does my thread keep breaking while sewing?
Tension imbalance causes 58% of thread breakage incidents.
Check your needle for damage, verify proper threading through tension discs and thread guides, wind your bobbin evenly, and reduce sewing speed on thick fabrics.
Conclusion
Like a well-trained orchestra, every part of a sewing machine plays its role—needle punching, take-up lever pulling, feed dogs advancing. When one piece falters, the whole performance stops.
Now you know the players by name and function. You can diagnose problems before they derail your project. You can adjust tension, switch feet, and control stitch quality with intention.
Master these moving parts, and your machine becomes an extension of your hands—not a mystery that fights back.

