This site is supported by our readers. We may earn a commission, at no cost to you, if you purchase through links.
 To fix pants crotch fit issues, you’ll need to assess where the problem lies—whether it’s length, curve, or depth.
Pattern alterations for fitting pants crotch typically involve lengthening or shortening the curve by slashing and spreading the pattern or folding excess fabric.
Look for telltale drag lines: horizontal wrinkles mean it’s too short, while diagonal lines point to curve problems.
You can add fabric where needed or remove excess by pinching and marking adjustments on a muslin toile first, remembering to maintain the grainline when redrawing seams.
The perfect crotch fit is like finding treasure—once you’ve got it, your patterns will serve you faithfully for years, and it involves understanding the importance of a good fit.
Table Of Contents
Key Takeaways
- You’ll need to identify specific fit issues before making alterations – horizontal wrinkles indicate excess fabric requiring shortening, while diagonal drag lines show insufficient crotch length needing extension.
- You can lengthen your pants’ crotch curve by slashing the pattern perpendicular to the grainline above the crotch point, creating a hinge, and inserting the exact amount of pattern paper needed.
- You’ll save time and fabric by creating a toile or muslin first, which lets you test pattern alterations and precisely pinpoint crotch fit issues before cutting your final fabric.
- When shortening the crotch curve to eliminate bagginess, you’ll need to rotate the top section of your pattern to align with your marked reduction point while maintaining proper grainline alignment.
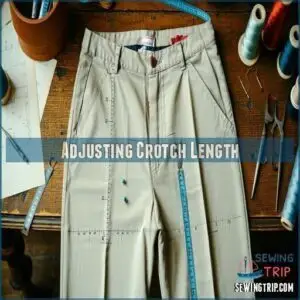
Adjusting Crotch Length
You’ll need to add or remove length from the crotch curve when horizontal wrinkles form or the pants pull uncomfortably at your seat.
This targeted adjustment alters the front and back crotch curves independently while maintaining the side seams, resulting in pants that fit your unique body shape perfectly.
Identifying Fit Issues
Five telltale signs reveal pants crotch fitting issues before you reach for your scissors.
Watch for:
- Horizontal folds across the front or back
- Drag lines radiating from the crotch area
- Uncomfortable crotch pull when sitting
- Side seams hanging straight while crotch feels tight
- Fabric bunching uncomfortably between your legs
A full-length mirror assessment is essential for diagnosing these common pants fitting problems correctly.
Addressing these issues may require products for adjustment.
Using Toiles for Assessment
Now that you’ve spotted potential fit issues, a toile is your secret weapon for assessment.
You’ll need one to properly diagnose crotch fitting issues before making permanent alterations.
| Toile Fabric Choice | Marking Toile Adjustments | Toile Fit Analysis |
|---|---|---|
| Medium-weight cotton | Use contrasting thread | Check standing position |
| Muslin | Mark with chalk or pins | Assess sitting comfort |
| Similar weight to final fabric | Note amount of adjustment | Look for stress points |
| Inexpensive denim | Transfer to pattern | Verify grainline placement |
To ensure a proper fit, it’s essential to follow these steps and analyze the toile fit carefully, making adjustments as needed to achieve the best results.
Common Crotch Length Problems
Now that your toile is ready, let’s examine what’s actually happening in the crotch area. You’ll likely encounter these common crotch length problems:
- Soft horizontal folds below the seat indicate excess crotch length
- Drag lines radiating upward mean insufficient length
- Crotch pull toward your body requires lengthening
- Sagging wrinkles around the front or back suggest improper measurements
These comfort issues often cause ill-fitting pants that bunch or bind. Addressing the fabric’s drape and stretch is essential for achieving a better fit. With proper diagnosis, you’ll know exactly whether to shorten crotch or lengthen crotch.
Lengthening Crotch Curve
You’ll add comfort and eliminate those annoying upward drag lines by lengthening your pants’ crotch curve with this precision technique.
Simply mark a perpendicular line to the grainline above the crotch curve, create a hinge cut, and insert the exact amount of pattern paper needed to achieve that perfect fit.
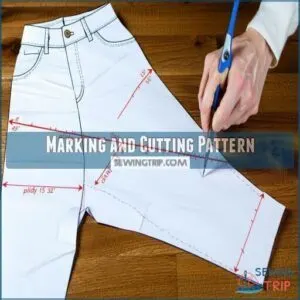
Marking and Cutting Pattern
Now that you’ve identified your crotch length issues, it’s time to make precise changes to your pattern.
First, draw a perpendicular line (A) to the grainline about 5 inches below the waistline but above the crotch curve.
Cut along this line with sharp scissors, stopping 1-2mm from the seam allowances to create a hinge.
Understanding pants pattern alterations is vital for achieving a perfect fit.
This careful cutting accuracy preserves your pattern’s integrity during crotch depth adjustment.
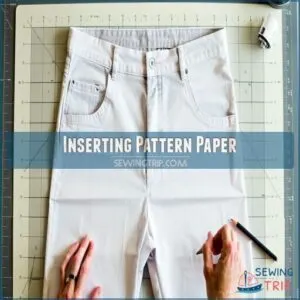
Inserting Pattern Paper
After slashing your pattern, you’ll need to add the appropriate amount of pattern paper to increase the crotch length. Insert paper between the separated sections, ensuring the width equals your desired length increase.
- Maintain perfect grainline accuracy by aligning paper parallel to original markings
- Use clear tape on both sides for secure paper alignment
- Overlap paper by at least 1/2 inch for stability
- Press paper flat before taping to prevent bubbling
- Mark registration points with pencil to guarantee precise positioning
When performing this vital step of your crotch length alteration, take your time. Proper paper insertion creates the foundation for successful pants fitting. The pattern paper acts like a bridge, connecting the separated pattern while adding exactly the space needed for your crotch depth adjustment.
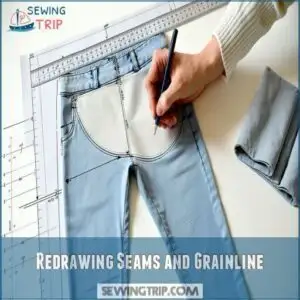
Redrawing Seams and Grainline
After your pattern’s pivot points are established, you’ll need to redraw the seams and grainline with precision.
Start by smoothing the crotch curve adjustment using a French curve ruler. Maintain grainline accuracy by guaranteeing it remains perpendicular to the waistline.
Understanding what is grainline guarantees garments retain their shape.
Blend the new curves seamlessly where they meet original pattern lines. Remember, your redraw order matters—tackle the crotch length alteration first, then address connecting seams for professional pants crotch alterations.
Shortening Crotch Curve
You’ll need to shorten the crotch curve when horizontal wrinkles appear at the front or back of your pants, indicating excess fabric in this sensitive area.
By rotating the top section of your pattern piece and realigning the crotch seamline, you’ll eliminate that uncomfortable bagginess that no amount of tugging can fix.
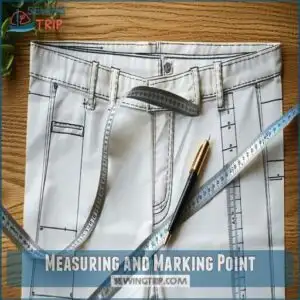
Measuring and Marking Point
To guarantee accurate measurements during your pants crotch alteration, start by locating the precise crotch point on your pattern.
Measure and mark point B directly on the stitch line, making it equal to the amount you need to remove. Use fine-tip marking tools to maintain consistent points relative to the grainline.
When transferring marks, precision matters – even a 1/8" difference in crotch depth can dramatically affect your final fit.
Achieving proper fit also relies on accurate body measurements, especially the back waist length.
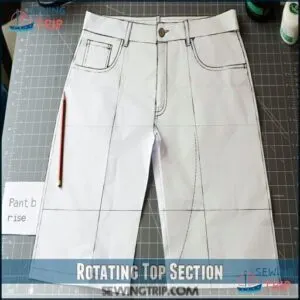
Rotating Top Section
Now that you’ve marked point B on the stitch line, it’s time for the magic moment! Grab the top section of your pattern and carefully rotate it to align point B with line A.
This rotation angle is key to successful crotch seam alteration. Once positioned correctly, secure with tape.
The hinge placement allows for proper pants rise alteration while maintaining grainline impact. Remember, curve matching guarantees seamless seam blending.
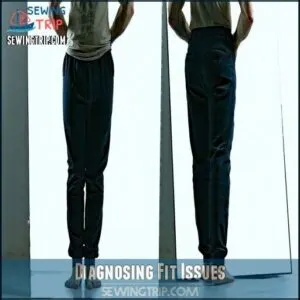
Diagnosing Fit Issues
You’ll need to identify specific crotch fit problems before making any pattern alterations, looking for telltale signs like soft horizontal folds indicating excess fabric or upward drag lines suggesting insufficient length.
A full-length mirror becomes your most valuable fitting tool, helping you spot exactly where adjustments are needed while checking both front and back views for proper diagnosis.
You should use it to check for these signs and make adjustments accordingly, ensuring a full-length mirror is used to get both front and back views.
Soft Horizontal Folds
Many soft horizontal folds across your pants front or back indicate excess fabric in the crotch depth area.
When analyzing your toile, these wrinkles signal that your crotch point alteration should involve shortening the curve.
Three key indicators of excess crotch depth include:
- Droopy fabric under the buttocks
- Horizontal wrinkles running from side to side
- Pants feeling like they’re hanging too low
Your posture impact might exaggerate these comfort issues.
It is essential to address these problems to ensure a proper fit, and one key factor is the crotch point alteration.
Drag Lines and Pulling
While horizontal folds signal excess fabric, the opposite problem shows up as diagonal draglines.
You’ll spot these radiating upwards from your crotch area—a clear sign of a crotch length deficit.
When pants pull in the direction of your body, they’re literally begging for more room.
This tension in the crotch curve creates uncomfortable pressure and unflattering lines.
Resolving pull lines requires lengthening the pattern where your body needs extra space.
Side Seams and Crotch Pull
Those drag lines radiating from your crotch reveal just one part of the fitting puzzle.
Now, take a close look at your side seams. When they hang perfectly straight but you’re still experiencing crotch tension, you’ve isolated the problem to the crotch curve alone.
This consistent fit pattern confirms you need specific crotch adjustments rather than overall pattern modifications. Fabric distortion at the center while maintaining seam alignment is your clear diagnostic signal.
Making Toiles and Muslins
You’ll save hours of frustration and fabric waste by creating a toile or muslin mockup before cutting into your final pants fabric.
These practice versions let you test your pattern alterations and pinpoint exact crotch fit issues that need fixing, ensuring your finished pants will fit perfectly through the most critical area, specifically the crotch.
Essential for Close-Fitting Trousers
Toiles aren’t optional in the context of close-fitting trousers.
You’ll save yourself countless hours of frustration by making a muslin first, especially during crotch and rise adjustments.
The pattern accuracy in your test garment reveals exactly where you need those vital fit adjustments.
Consider fabric grain alignment for superior results.
Remember, it’s much easier to modify paper than unpick finished seams in your precious fabric.
Wearable Toile Options
When tight budgets meet fitting challenges, wearable toiles offer the perfect solution.
You can create practice garments from inexpensive fabrics that still look good enough to wear. Choose simple patterns with minimal pattern matching requirements for your first attempts.
Consider color choices that complement your wardrobe while allowing you to mark fit adjustments. This approach gives you both a pants fitting opportunity and a potentially wearable garment.
You can even source wearable toile fabric for this purpose.
Comprehensive Guidance
A thorough guide to pants fitting awaits you at every step of your pattern adjustment journey.
When diagnosing fit issues, follow detailed muslin testing procedures that reveal exactly where your crotch needs tweaking.
You’ll find step-by-step techniques in online resources summarizing advanced pattern alteration steps.
These sewing techniques guarantee your garment fitting success—transforming those frustrating pants into your most comfortable pair ever, ensuring garment fitting success.
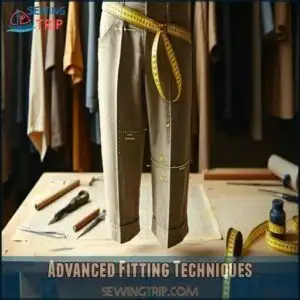
Advanced Fitting Techniques
You’ll master these specialized crotch adjustments with precise pattern modifications that target specific body shapes for customized pants that fit flawlessly.
These advanced techniques transform ill-fitting trousers by addressing flat pelvis, round pelvis, full seat, and flat seat variations through strategic curve reshaping and seam repositioning, allowing for customized pants.
Flat Pelvis Adjustment
Now that you’ve prepared your toile, you might notice horizontal lines across your front crotch area—a telltale sign of a flat pelvis needing adjustment.
The flat pelvis adjustment involves shallowing the crotch curve to eliminate those pesky horizontal lines. Here’s how to achieve proper crotch depth with precision:
- Redraw the inner leg seam to taper into the original cutting line
- Close outer and inner leg seams together
- Straighten the grainline completely
- Add deleted amount back to the outer leg seam to achieve the desired crotch depth with precision.
Round Pelvis Adjustment
While flat pelvis adjustments remove extra fabric, round pelvis issues create the opposite problem.
If you’re noticing smile wrinkles or "camel toe" pulling up from the crotch area, your pubic bone needs more room.
To fix this fitting adjustment, scoop out the front crotch curve by deepening it 1/8-1/4" at a time, creating a deeper curve that accommodates your body’s natural shape.
This creates a shape that eliminates those vertical lines that signal discomfort.
Full Seat and Flat Seat Adjustments
Behind every pair of perfectly fitting pants lies the secret of proper seat adjustments.
If diagonal lines point to your back crotch seam, you’ll need a full seat adjustment to accommodate your curves.
For bagginess under the buttocks with upward wrinkles, try a flat seat adjustment by taking in the back crotch seam.
Both techniques involve curve manipulation to match your unique seat shape, preventing common mistakes in pants fitting.
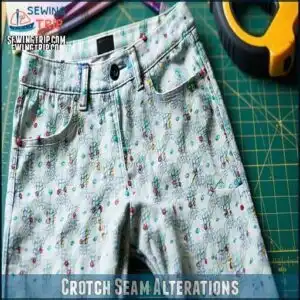
Crotch Seam Alterations
You’ll transform the fit of your pants by adjusting the crotch seam precisely where it matters most, typically five inches below the waistline.
When you shorten with a strategic tuck or lengthen by slashing and spreading your pattern, you’ll eliminate those embarrassing wrinkles and pulling that have plagued your handmade pants.
Shortening and Lengthening
Two essential pattern alterations for crotch length involve precise mathematics and careful measurement.
When you’re shortening or lengthening your pants pattern, you’ll need to work with both front and back pieces independently.
This targeted approach addresses specific fit issues without disturbing side seams.
The adjustment typically happens about 5 inches below the waistline, ensuring your rise adjustment maintains proper comfort considerations while fixing those troublesome fitting pants problems, which require careful measurement.
Folding Excess Length
When you’re wrestling with excess fabric in your pants, folding the crotch length into a tuck is your best solution.
To fix those fit issues, create a horizontal tuck that extends from the side seam to the center seam.
Position this tuck approximately 5 inches below your waistline.
This pattern manipulation technique efficiently removes excess fabric while maintaining the overall shape.
Remember, proper tuck placement guarantees your pants won’t bag or sag uncomfortably.
Slashing and Spreading Pattern
While folding works well for shortening, lengthening requires a different approach.
To add crotch length, slash your pattern horizontally about 5 inches below the waistline, and create a pattern hinge point by not cutting completely through.
Spread the pieces apart to add your desired length while maintaining grainline alignment, then insert fabric or pattern paper between sections.
Next, focus on seam redrawing, carefully matching the curve when connecting parts for smooth fitting pants after these pattern modifications, ensuring a proper fit by maintaining the original curve.
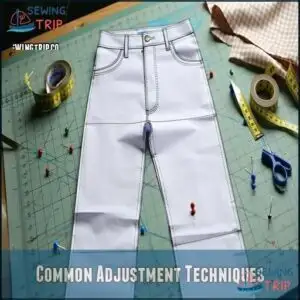
Common Adjustment Techniques
You’ll need these essential pattern adjustment techniques to transform those problem-fitting pants into your perfect pair.
From pivot methods that precisely reshape the crotch curve to strategic fabric addition at side seams, these modifications address common issues like full calves and swayback without compromising the overall balance of your garment.
Full Calf and Swayback Adjustments
While adjusting your crotch seam is critical, don’t overlook other common fitting adjustments that can transform your pants.
Full calf and swayback adjustments address specific body features that cause frustrating fit issues.
Looking at full calf adjustments first, those telltale lines around your calves signal the need for more room.
For swayback fitting problems, excess fabric pooling in your lower back requires pattern modifications.
Before making adjustments, consider creating a wearable toile to test the fit.
Here’s why these adjustments matter:
- They eliminate uncomfortable pulling that restricts movement
- They create a balanced silhouette that flatters your unique shape
- They prevent embarrassing fabric bunching in all the wrong places
- They transform ill-fitting pants into your most comfortable wardrobe staples
Pivot and Slash Methods
When tackling challenging fit issues, pivot and slash methods offer precise pattern modifications.
With pivot techniques, you’ll use a hinge point as your anchor while rotating pattern pieces to adjust crotch length.
For abdomen adjustments, the slash method lets you cut and spread the pattern, creating needed space.
Both techniques require careful attention to curve matching and rotation amount to maintain balanced alterations.
Your fitting pants journey becomes simpler with these strategic approaches.
Adding Fabric for Balance
While pivot and slash methods reshape your pattern, sometimes you’ll need to add fabric for balance.
When taking in the crotch seam, add an equal amount at the side seam to maintain the balanced silhouette.
Different fabric types respond uniquely to pattern adjustments, so consider grainline considerations during alterations.
For challenging fits, try crotch gusset insertion—this technique adds space where needed while keeping seam matching consistent throughout your pants fitting project.
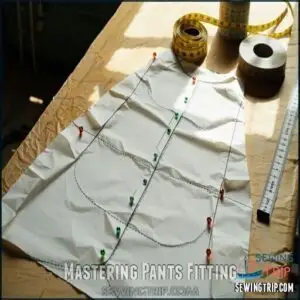
Mastering Pants Fitting
You’ll perfect your pants fit by measuring carefully and making precise crotch adjustments on your pattern before cutting any fabric.
With focused attention to proper crotch curve measurements and a willingness to test your alterations on a toile, you’ll eliminate those frustrating wrinkles and achieve comfortable, professional-looking results.
Trial and Error Approach
While fine-tuning adjustment techniques, remember that perfect pants fitting is rarely achieved on the first try. You’ll likely need multiple attempts before nailing that ideal crotch fit.
Perfect pants fitting takes patience—small tweaks, multiple muslins, and persistence transform ill-fitting trousers into your most comfortable, custom-made wardrobe treasure.
When pattern tweaking, follow this iterative fitting process:
- Make small, gradual adjustments (5-10mm) at a time
- Sew another muslin to test your changes
- Assess and document what improved and what didn’t
This methodical approach prevents overcorrection and helps identify exactly which alterations fix your ill-fitting pants, leading to a better understanding of how to achieve a well-fitting garment.
Redrawing Seams and Smoothing Lines
While trial and error helps you pinpoint fit issues, the magic happens when you redraw seams and smooth lines.
After making crotch fitting adjustments, your pattern might look jagged. Use a French curve to blend those seams for visual harmony and line consistency.
Smooth shifts between sections create curve perfection, ensuring your pants look professionally made. Remember, seamless blending prevents awkward bumps in your final garment.
Achieving Precise Adjustments
Now that your seams look smooth on paper, it’s time for precision in real life.
Achieving precise adjustments requires accurate measurements and careful execution. Take your time with pivoting techniques when transferring pattern changes to fabric.
Test each alteration with muslin verification before cutting into your final fabric. The iterative fitting process might take a few tries, but when those pants finally hug your curves just right, you’ll know it was worth it.
Frequently Asked Questions (FAQs)
Can a tailor alter the crotch of pants?
Nearly 70% of tailors can professionally alter pant crotches.
Yes, your tailor can adjust the crotch length and curve to improve fit, eliminate wrinkles, and increase comfort.
You’ll need to wear them during fitting.
How to adjust for asymmetrical body shapes?
For asymmetrical body shapes, make separate pattern adjustments for each side.
Take individual measurements of both sides, create different left and right pattern pieces, and mark them clearly to avoid confusion during cutting and sewing, focusing on complete concepts and separate pieces.
When should crotch depth be adjusted separately?
While your fitted pants tell tales of comfort and restriction, you’ll need separate crotch depth adjustments when front and back fit issues differ.
Make independent changes when drag lines appear in only one area, as this will allow you to address fit issues effectively.
Can ready-made pants be retrofitted successfully?
You can successfully retrofit ready-made pants by adjusting the crotch seam.
Take them in where there’s excess fabric or let them out where they’re tight, always working with the existing seam allowances.
How to determine optimal crotch point placement?
Measure your body from waist to crotch while seated.
Place the crotch point where your legs naturally divide.
Test with a toile, watching for drag lines or discomfort that indicate incorrect placement, especially noting drag lines.
What fabrics require different crotch curve treatments?
Stretchy fabrics need gentler curves, while woven fabrics require more defined crotch shaping. You’ll want to adjust curves tighter for rigid denims and looser for knits, jersey, and lightweight linens.
Conclusion
Like a tailor with treasured techniques passed through generations, you now possess the keys to pants perfection.
With these pattern alterations for fitting pants crotch issues, you’ll transform uncomfortable garments into your most reliable wardrobe staples.
Whether lengthening curves, adjusting depth, or eliminating those telltale drag lines, your newfound skills will serve you faithfully.
Remember, patience during fitting pays dividends—your comfort and confidence are worth every pinch, pin, and careful measurement you make.
- http://www.janelookerphoto.com/
- https://www.sewalongs.com/clover/clover-large-calf-adjustments/
- https://curvysewingcollective.com/tutorial-a-basic-swayback-adjustment/
- https://www.youtube.com/watch?v=wEHV6n7H29o&pp=ygUMI2JhY2twYXR0ZXJu
- https://www.tillyandthebuttons.com/2020/05/common-trouser-fitting-adjustments.html

