This site is supported by our readers. We may earn a commission, at no cost to you, if you purchase through links.
In this article, we’ll guide you through the key steps to get delicate fabrics ready for sewing, avoiding those common sewing disasters.
From picking the right fabric to tweaking your machine settings, we’ll help you master sewing delicate fabrics with ease.
Let’s take a closer look at our top ten tips for preparing delicate fabrics and conquer your desire for mastery and control.
Table Of Contents
- Key Takeaways
- Preparing Delicate Fabrics for Sewing
- Cutting Delicate Fabrics
- Stabilizing Delicate Fabrics
- Sewing Delicate Fabrics
- Pressing Delicate Fabrics
- Hemming Delicate Fabrics
- Troubleshooting Common Issues
- Tips for Working With Satin Fabric
- Tips for Working With Sequin Fabric
- Additional Tips for Sewing Delicate Fabrics
- Frequently Asked Questions (FAQs)
- Conclusion
Key Takeaways
- Delicate fabrics demand special treatment. From choosing natural fibers like Cotton or silk to avoiding irritating wool and linen, you’re setting the stage for success.
- Prep work is key. Tissue paper, starch, and a stabilizer keep fabric slip-free and stable. Fine pins, sharp scissors, and the right needles and threads are your tools for precision cutting and sewing.
- Adjust your machine settings. Lower the pressure foot, shorten stitch lengths, and fine-tune thread tension for a smooth, pucker-free finish.
- Embrace the slow lane. Hand basting, testing on fabric scraps, and using a seam ripper with caution give you control and help you avoid disasters.
Preparing Delicate Fabrics for Sewing
Choosing the right fabric is essential when preparing delicate fabrics for sewing. Opt for natural fibers like cotton or silk, especially if you have sensitive skin, and steer clear of wool and linen, which can be irritating.
Choosing the Right Fabric
When preparing delicate fabrics for sewing, choosing the right fabric is essential. Here are some key considerations:
- Fabric choice: Select a fabric that suits your project’s purpose. For instance, wool is ideal for winter garments, while cotton is perfect for breathable summer pieces.
- Texture and weight: Delicate fabrics like silk have distinct textures and weights. Keep these characteristics in mind to make sure your fabric choice aligns with your project’s requirements.
- Needle compatibility: When working with delicate fabrics, use the correct needles, such as microtex needles, to prevent damage.
- Practice: Test your techniques on a fabric sample first. This will help you refine your skills and build confidence in handling delicate materials.
Natural Fibers for Sensitive Skin
If you’re dealing with sensitive skin, natural fibers like cotton or silk are your best bet.
These fabrics are gentle and less likely to irritate your skin, unlike their synthetic counterparts which can sometimes cause discomfort.
A cotton blend, for example, is a great option as it combines the breathability of cotton with the durability of synthetic fibers.
Silk, on the other hand, offers a luxurious feel and is known for its hypoallergenic properties, making it ideal for those with skin sensitivities.
Avoiding Wool and Linen
If you have sensitive skin, it’s best to avoid certain types of wool and linen. These fabrics can be coarse and irritating, causing discomfort. Opt for alternatives like cotton or silk, which are gentler on the skin. Remember, fabric preparation is key to a successful project.
Thread and Needle Selection
When sewing delicate fabrics, it’s really important to select the right thread and needle. Opt for a standard or slightly smaller needle size, especially when working with satin. A Microtex needle is ideal for preventing damage to delicate fabrics.
The weight and type of thread matter, too. Choose a lightweight thread for satin and other delicate fabrics. Using the wrong thread weight can cause sewing machine problems, like thread breakage.
Avoiding Dyes and Detergents
Sewing for sensitive skin? You gotta be careful about things that can irritate your skin, like dyes, detergents, and sizing. These can cause problems, especially if you’re prone to allergies or have sensitive skin.
Always prewash new fabrics to get rid of any irritants. Use dye- and fragrance-free detergents. If you’re dyeing fabrics, go for natural dyes and test them out on fabric samples first to make sure they won’t cause any reactions. To be extra safe, use gentle fabric starch to stabilize your fabric before sewing.
Cutting Delicate Fabrics
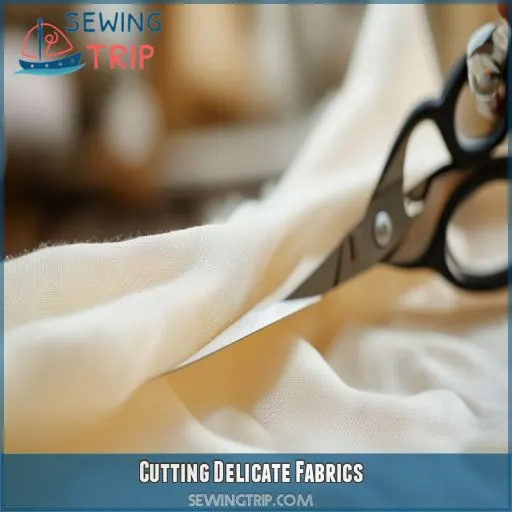
When cutting delicate fabrics, using the right tools and techniques is key to avoiding snags and tears. We’ll show you how to cut with precision and keep your fabric smooth and slip-free.
Using Fine Pins and Needles
When preparing delicate fabrics for sewing, it’s important to select the right tools for the job.
Fine pins are essential to avoid marking the fabric. Opt for thin, fine pins that leave minimal marks, especially on lightweight fabrics.
Additionally, choosing the correct needle size is key. Microtex needles are ideal for delicate fabrics as they prevent snags and damage during the sewing process.
Sharp Scissors for Clean Cuts
Sharp scissors are your best friend when you’re cutting delicate fabrics. Here’s why:
- Clean Cuts: Sharp scissors give you precise, clean cuts without pulling or snagging the fabric.
- Smooth Edges: They create smooth, even edges, which helps prevent fraying and gives you a professional finish.
- Accuracy: With sharp scissors, you can cut along your marked lines accurately. This means your fabric pieces will fit together perfectly when you sew them.
Tissue Paper for Accurate Cuts
For cutting delicate fabrics, tissue paper is your secret weapon for getting accurate cuts. Here’s the deal: place tissue paper under your fabric and sewing pattern. This simple trick prevents slipping, ensuring your cuts are precise. It’s like having a built-in stabilizer, giving you the control you need for those intricate cuts.
Think of tissue paper as your cutting sidekick, especially when working with slippery fabrics like satin. It’s the ultimate tool for making sure your pattern placement is on point. You’ll avoid the frustration of fabric slippage and end up with accurate cuts every time.
Avoiding Fabric Slippage
Now that you’ve got your cutting setup ready, let’s tackle the issue of fabric slippage. This can be a real headache, especially with delicate fabrics that tend to shift and slide all over the place. Here are some tips to keep your fabric in check:
- Stabilize with starch: A light spritz of starch can work wonders to add stability to slippery fabrics. Think of it like giving your fabric a little extra grip. Just be mindful not to overdo it, especially with silk, as too much starch can cause damage.
- Use a stabilizer: For embroidery or overlocking, a water-soluble stabilizer is your best friend. It provides a temporary base to keep your fabric in place without leaving any residue behind.
- Baste it, don’t risk it: Hand basting every seam might seem tedious, but it’s a surefire way to secure your fabric and prevent slippage. Think of it as a temporary stitch that you can easily remove once you’re done sewing.
Stabilizing Delicate Fabrics
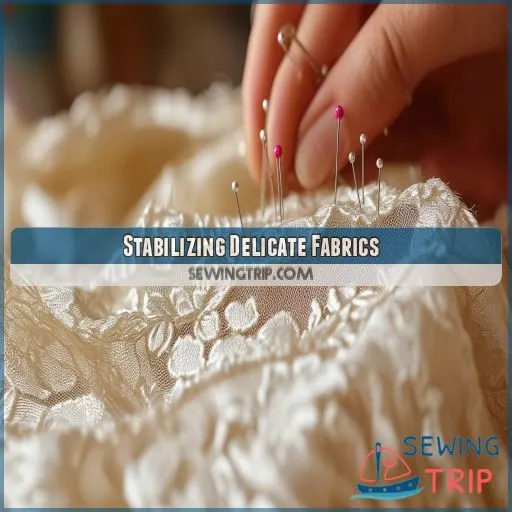
Stabilizing delicate fabrics is key to avoiding mishaps. Using a walking foot, fine paper under the fabric, water-soluble stabilizer, and hand basting every seam will give you the control you need to sew with precision and confidence.
Using a Walking Foot
When sewing delicate fabrics, a walking foot is a game-changer. It’s like having an extra pair of hands, ensuring both layers of fabric move at the same pace under the needle. No more stretching or warping!
Walking feet are especially useful for quilting fabrics and projects, as they provide an even feed, improving stitch quality and fabric tension.
| Sewing Machine Part | Impact on Sewing |
|---|---|
| Walking Foot | Stabilises fabric |
| Needle Type | Prevents snags |
| Sewing Machine Foot Pressure | Controls fabric movement |
Fine Paper Under Fabric
When sewing delicate fabrics, fine paper placed underneath can be a game-changer for achieving stability. Here’s how it works:
- Stability for Sewing Machines: When working with slippery fabrics like satin or thin materials prone to shifting, placing a layer of fine paper underneath adds the stability needed to guide the fabric smoothly through your machine.
- Precision for Hems: Fine paper helps you create precise hems, especially when working with lightweight fabrics that tend to stretch or distort easily.
- Pressing Cloth Alternative: If you’re concerned about direct heat damaging delicate fabrics, fine paper can act as a protective barrier, similar to a pressing cloth.
- Versatile Fabric Support: Whether you’re sewing taffeta, satin, or any other delicate fabric, fine paper is a versatile tool that adds stability during cutting, sewing, and pressing.
- Troubleshooting Tool: If you’re experiencing issues like fabric puckering or snagging, fine paper can be a simple yet effective solution by providing the necessary stability for your project.
Water-Soluble Stabilizer
When working with delicate fabrics, water-soluble stabilizers are a must-have in your sewing arsenal. These stabilizers provide essential support, ensuring your embroidery or overlocking stitches are precise and snag-free.
| Stabilizer Type | Benefits |
|---|---|
| Water-Soluble | Temporary support, easily removable with water |
| Felt | Provides structure for sturdier projects |
| Vinyl | Offers a clear, smooth surface for detailed work |
| Soluble | Dissolves away, leaving no residue |
| Water-Soluble (Embroidery) | Ideal for delicate fabrics, washes away easily |
With these stabilizers, you can confidently tackle projects with delicate fabrics, knowing your creations will be both beautiful and durable.
Hand Basting for Security
Hand basting is a simple, effective way to secure seams and add stability to delicate fabrics.
It’s like a temporary stitch that holds everything in place until you’re ready to sew.
This extra step might feel tedious, but it gives you peace of mind, ensuring straight stitch lines and precise seams.
It’s especially helpful when working with slippery fabrics like satin or lightweight materials that tend to shift during sewing.
Think of it as an insurance policy for your delicate fabrics, preventing potential disasters and giving you more control over the final outcome.
Sewing Delicate Fabrics
When sewing delicate fabrics, you need to tweak your machine settings. This means lowering the pressure foot, reducing stitch length, and decreasing thread tension to avoid puckering and get a smooth finish on your project.
Adjusting Machine Settings
When sewing delicate fabrics, adjusting your machine settings is really important. Lower the pressure foot to avoid seam waves, especially when working with slippery fabrics like satin or vinyl. Reduce the stitch length to 1.8mm-2.4mm for better control and precision.
Fine-tune the thread tension to match the fabric. For example, satin requires less tension, while corduroy fabric demands more due to its thicker nap. Test your settings on a fabric sample first to make sure you get the best results.
Lowering Pressure Foot
Lowering the pressure foot on your sewing machine is really important when working with delicate fabrics like taffeta, satin, sequin, felt, or vinyl.
This simple adjustment prevents seam waves and puckering, making sure your stitches are smooth and even.
It’s a small but mighty setting to tweak, giving you more control over your machine and the final outcome of your project.
Reducing Stitch Length
When sewing delicate fabrics, it’s important to reduce your stitch length to improve quality.
A shorter stitch length, between 1.8mm and 2.4mm, will give you more control over the fabric and help you achieve a professional finish.
This is especially important when working with lightweight or slippery materials, as it prevents the fabric from puckering or bunching up.
Reducing stitch length is also beneficial when sewing curves or intricate details, as it allows for smoother, more precise stitching.
Reducing Thread Tension
Reducing thread tension is key when sewing delicate fabrics. It improves the quality of your stitching and prevents puckering.
Here are some tips to reduce thread tension:
- Use a quilting needle for delicate fabrics to prevent snagging.
- Opt for a lightweight thread, especially when working with satin.
- Adjust your machine’s tension settings, especially when working with fabrics like satin that don’t handle tension well.
- Practice on a fabric sample to get your tension right before starting your project.
Pressing Delicate Fabrics
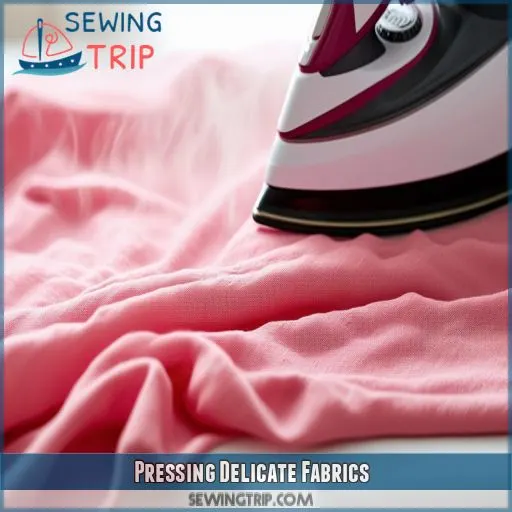
When pressing delicate fabrics, it’s really important to lower the temperature to avoid scorching the material. Use a pressing cloth as a protective barrier between the iron and the fabric to prevent direct heat exposure.
Lowering Pressing Temperature
When pressing delicate fabrics, it’s really important to lower the temperature to avoid damaging your fabric. A cool pressing temperature is key to success here. Test your iron’s settings on a scrap of fabric first to find the sweet spot that won’t scorch your material. This simple step will make sure your project doesn’t end up a hot mess.
Using a Pressing Cloth
When pressing delicate fabrics, a pressing cloth is your best friend. It acts as a protective barrier between the iron and the fabric, making sure the heat is distributed evenly. Here are some tips to keep in mind:
- Use a pressing cloth to protect your fabric from direct heat.
- Choose a pressing cloth made from natural fibers, like cotton or silk.
- Dampen the pressing cloth slightly to create steam and help set the fibers.
- Test the iron’s temperature on a scrap of fabric first to make sure it’s not too hot.
- Avoid higher temperatures, even with a pressing cloth, as delicate fabrics can scorch easily.
Avoiding Higher Temperatures
When pressing delicate fabrics, remember that heat is the enemy. You don’t want to scorch your fabric or cause any damage, so it’s important to keep the iron’s temperature low. Even with a pressing cloth, you should avoid higher temperatures.
Practicing on Fabric Samples
You’ve learned about the importance of adjusting your pressing techniques for delicate fabrics, and now it’s time to put that knowledge into practice.
Before you start pressing your garment, it’s a good idea to test your techniques on a fabric sample.
This way, you can perfect your approach and make sure you don’t accidentally damage the fabric.
It’s always better to be safe than sorry, and practicing on a scrap of fabric gives you the confidence to tackle the real deal.
Hemming Delicate Fabrics
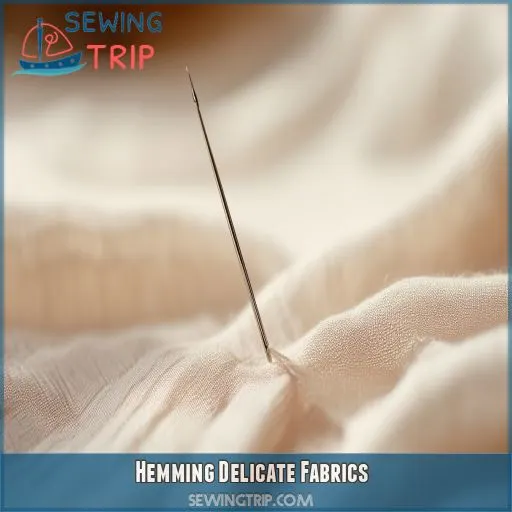
Before you start hemming, hang your garment for 24 hours to let the fabric relax and prevent stretching. Opt for narrow hems, like rolled hems, to reduce bulk and the risk of snagging.
Hanging Garment Before Hemming
Hanging your garment before hemming is a really important step in preparing delicate fabrics for sewing.
Why? Because it helps the fabric relax and prevents stretching.
This simple trick makes sure your fabric hangs evenly, allowing it to drape gracefully.
So, before you start hemming, hang your garment for 24 hours.
This small step can make a big difference in the final look of your delicate creation.
Keeping Hems Narrow
When hemming delicate fabrics, keeping hems narrow is really important to achieving a neat and professional finish.
Opt for narrow hemlines, such as rolled hems, to reduce bulk and minimize the risk of snagging.
This technique is especially useful for delicate fabrics that can be easily damaged or stretched.
Using Special Hemming Foot
Sewing delicate fabrics can be tricky, but your sewing machine might be your secret weapon. Here’s why:
- Special Hemming Foot to the Rescue: Some sewing machines have a special hemming foot designed specifically for delicate fabrics. This foot helps you get a precise hem without damaging the fabric.
- Know Your Foot Types: Get familiar with the different types of hemming feet available. There are various options, from rolled hem feet to blind hem feet, each serving a unique purpose.
- Practice Makes Perfect: Experiment with different hemming feet on scrap fabric before tackling your project. This way, you’ll gain confidence and precision in using these specialty feet.
Blind Hem Stitch for Invisible Hems
When you want an invisible hem, the blind hem stitch is your go-to. It’s perfect for delicate fabrics because it creates a nearly invisible finish, so all the focus stays on the beauty of your fabric. This hemming trick is a must-have in your sewing arsenal.
Troubleshooting Common Issues
If you’re tackling a project, you might run into a few hiccups. Snagging and puckering can be a pain, but using a fine needle and gently guiding the fabric can help prevent these issues. Fabric slipping and stretching are also common problems, but a non-slip surface or spray adhesive can keep your project in place.
Snagging and Puckering
To prevent snagging, use a fine needle and gently guide the fabric—no pushing or pulling. For puckering, adjust the sewing machine foot pressure and skip backstitching. Instead, secure seams with knotted thread tails. A stabilizer, like tissue paper or starch, prevents stretching and puckers.
Fabric Slipping and Stretching
Fabric slippage and stretching are common issues with delicate fabrics, but you can easily prevent them.
First, stabilize your fabric. Use tissue paper or a starch solution to add some grip and prevent slipping.
Next, use a walking foot to make sure your fabric feeds evenly through the machine.
Thread Breakage and Snags
Thread breakage can be frustrating when sewing delicate fabrics, but you can troubleshoot this issue with a few simple adjustments:
- Choose the right thread: Opt for a high-quality thread designed specifically for delicate fabrics. This makes sure that your thread can withstand the tension and stress of sewing without breaking.
- Check your needle: A damaged or bent needle can cause thread breakage. Make sure to use a new, fine needle of the appropriate size for your fabric.
- Adjust stitch length and tension: Reducing the stitch length and lowering the thread tension can help prevent thread breakage. Experiment with different settings on a scrap of fabric to find the ideal combination for your project.
Consulting a Sewing Expert
Sewing delicate fabrics can be tricky, and sometimes you might need a little extra help. That’s where consulting a sewing expert comes in. They can provide valuable advice and guidance to troubleshoot any issues you may encounter.
Here’s a handy table with some common problems and the expert help you can seek:
| Problem | Expert Help |
|---|---|
| Snagging, Puckering | Advice on needle type and fabric handling |
| Fabric Slipping, Stretching | Guidance on stabilizers and machine settings |
| Thread Breakage | Recommendations for high-quality threads |
Don’t hesitate to reach out to a local sewing expert or shop for assistance. They’re a wealth of knowledge and can offer specific solutions to your sewing dilemmas.
Tips for Working With Satin Fabric
Satin is a slippery fabric, so cut with care. Cut only one layer at a time to prevent shifting and snagging, and use a standard or slightly smaller needle with lightweight thread to avoid puckering and pulling.
Cutting One Layer at a Time
When working with satin, it’s really important to cut one layer at a time.
Satin is a slippery fabric, and cutting multiple layers simultaneously can lead to shifting, snagging, and uneven cuts.
By focusing on a single layer, you maintain control over the fabric, ensuring precise and accurate cuts.
This technique prevents unsightly snags and helps you achieve the clean, crisp lines that satin fabric demands.
Using Right Size Needle and Thread
When working with satin, selecting the right needle and thread is really important.
Go for a standard or slightly smaller needle size to avoid leaving unsightly holes in the fabric.
As for thread, opt for a lightweight variety.
This combination will help you make sure your stitches are secure without causing any damage to the delicate nature of the satin.
Easing Up on Tension
Satin is a delicate fabric that demands a light touch.
You need to ease up on the tension settings to prevent puckering and pulling.
This fabric doesn’t handle tension well, so go easy on it.
It’s all about control—too much tension will cause the fabric to stretch and lose its shape.
You’ve got to keep it relaxed and under control.
Avoiding Water Spots
Satin is prone to water spots, so take extra precautions when ironing. Avoid spraying water directly onto the fabric. Instead, use steam to remove any wrinkles. Always test on a small area first to make sure you don’t damage the fabric.
Tips for Working With Sequin Fabric
Before you jump into a project with sequin fabric, it’s important to know what kind of fabric you’re working with and what makes it unique.
This is because different sequin fabrics have different ways of attaching the sequins, which will affect how you sew them.
Another thing to keep in mind is the direction of the fabric’s nap.
If your fabric has a nap, you’ll want to make sure all your pattern pieces are cut in the same direction to keep the look and feel consistent.
Identifying Fabric Type
When working with sequin fabric, knowing the fabric type is really important. Different types of sequin fabric have varying attachment methods, which directly impact your sewing techniques. Pay attention to the fabric’s texture, weight, weave, and drape. These factors will guide your approach to handling and sewing the fabric effectively.
Considering Nap Direction
When working with sequin fabric, it’s important to pay attention to the nap direction.
The nap refers to the texture or pile of the fabric, which can affect the overall look of your project.
All pattern pieces should be laid out in the same direction, following the grain of the fabric.
This helps keep the garment looking consistent.
Think of it like brushing your hair—you want all the sequins to "flow" in the same direction, creating a smooth and sleek finish.
Choosing Right Pattern
When choosing a pattern for sequin fabric, opt for something with clean, straight lines that will showcase the sequins. Think about the difficulty level, strength, and purpose of the garment, as well as the size of the pattern pieces. You don’t want intricate designs with lots of small pieces that will be a challenge to work with.
Marking Seam Line
When working with sequin fabric, marking the seam line is really important.
This step helps you make sure you have a clear path for stitching and prevents any accidental damage to the sequins.
It’s like having a roadmap that guides your needle through the fabric, making sure that your stitches are precise and on-point.
Mark the stitch line on the wrong side of the fabric, creating a clear path that keeps your sequins safe and your stitching accurate.
This simple trick makes sure that your sequin fabric remains intact and your sewing project shines—literally!
Additional Tips for Sewing Delicate Fabrics
Before diving into a project with delicate fabrics, it’s a good idea to practice your sewing techniques on a scrap of similar fabric. This way, you can perfect your skills without the risk of ruining your final project. When you’re removing stitches, use a seam ripper with caution to avoid damaging the delicate fabric.
Practicing on Scrap Fabric
Practice makes perfect, and that’s especially true when you’re working with delicate fabrics.
Before you start stitching, grab some scrap fabric and do a few sample runs.
This way, you can test out your machine settings and get a feel for the fabric’s behavior.
It’s a great way to refine your technique and avoid any potential mishaps on the actual project.
You’ll be glad you took the time to practice, and your final garment will thank you!
Using a Seam Ripper Carefully
Using a seam ripper takes a steady hand.
Work slowly and carefully to avoid accidentally cutting the fabric.
Gently lift the thread with the seam ripper, taking care not to snag or pull the fabric.
Always remove stitches in the direction of the seam to prevent fabric damage.
Try the seam ripper on a scrap of fabric first to get a feel for it and make sure it won’t damage your project.
Considering Hand Sewing
Hand sewing is a great alternative to machine sewing for intricate details and delicate areas.
It gives you more control over the fabric and allows you to focus on fine details and stitch quality.
When hand sewing, use a needle and thread that are appropriate for the fabric.
Work slowly and carefully to avoid fabric tension and pulling, which can distort the fabric.
Frequently Asked Questions (FAQs)
How do you prepare fabric before sewing?
Before sewing, consider the fabric type, the garment’s purpose, and your skill level. Prepare your workspace with the right tools and stabilize the fabric with starch or tissue paper to prevent slipping.
What fabrics need to be washed before sewing?
Cotton, linen, denim, rayon, silk, wool, and other natural fibers should be washed before sewing to prevent shrinkage. Synthetic fabrics should also be pre-washed to check for color bleeding.
How to sew very fine fabrics?
When sewing fine fabrics, use the right tools: fine pins, sharp scissors, and Microtex needles. Adjust machine settings: lower the pressure foot, reduce stitch length, and thread tension. Practice on a fabric sample first.
Should you iron fabric before sewing?
It’s generally recommended to press, not iron, your fabric before sewing to avoid stretching and creasing. Pressing helps achieve a flat, smooth surface, making it easier to join pieces accurately and get clean lines.
What are the best fabrics for beginners?
Cotton, muslin, quilting cotton, ponte, and polyester are all great options for beginner sewers. These fabrics are versatile, lightweight, and easy to work with.
How do I choose the right fabric for my project?
You need to be a fabric whisperer to choose the right fabric for your project. Patterns often recommend specific fabrics, ensuring the correct fit and flow. Consider the difficulty level, strength, purpose, and pattern sizes. For sensitive skin, choose natural fibers like cotton or silk, and avoid wool and linen.
How do I avoid irritating sensitive skin?
Choose natural fibres like cotton or silk. Avoid wool and linen, which can irritate. Use natural-fibre thread and finish seams with French seams to prevent rubbing. Wash new garments to remove potential allergens.
What are the best needles and threads for satin?
For satin, a standard or slightly smaller needle is ideal. Try a size 80/12 or 90/14 needle for most satins, or a 70/10 for lighter-weight satin. A jeans/sharp needle is best to avoid snags. For thread, use lightweight thread.
How do I stop sequins from falling off?
To stop sequins from falling off, never cut the loose thread. Instead, use a needle to gather and re-stitch the sequins. If the thread is too short, use a new thread of the same colour to stitch it down, then fix the sequin. You can also use fray-stop glue along the seams.
Conclusion
Preparing delicate fabrics for sewing doesn’t have to be a scary task.
Like learning to dance in the rain, it’s all about embracing the right techniques and a little prep work.
We’ve shared our top ten tips to guide you through the process, from choosing the right fabric to adjusting your machine settings.
By following these guidelines, you’ll be well on your way to mastering the art of sewing with delicate fabrics, avoiding common pitfalls along the way.

