This site is supported by our readers. We may earn a commission, at no cost to you, if you purchase through links.
Uneven stitching is often caused by improper tension, needle size, or thread type.
To overcome this, you’ll need the right tools and techniques, including choosing the correct needle and thread for your leather project.
You’ll also need to adjust your sewing machine settings, including tension and stitch length, to master leather sewing.
With the right approach, you can achieve professional-looking results, and there’s more to explore on how to troubleshoot common issues and improve your skills.
Table Of Contents
- Key Takeaways
- Needle and Thread for Sewing Leather
- Tools and Techniques for Cutting Leather
- Sewing Machine Settings for Sewing Leather
- Buying and Preparing Leather for a Project
- Pressing Leather Seams
- Benefits of a Heavy-Duty Sewing Machine
- Sewing Leather With a Hand Needle
- Types of Leather and Faux Leather
- Tips for Successful Leather Sewing
- Common Challenges and Troubleshooting
- Frequently Asked Questions (FAQs)
- Conclusion
Key Takeaways
- You’ll need to choose the right needle and thread for your leather project, considering factors like leather type and thickness, to achieve professional-looking results and prevent common issues like skipped stitches and breaks.
- Adjusting your sewing machine settings, including tension and stitch length, is crucial for sewing leather, as it requires a specific setup to handle the material’s unique properties and prevent problems like uneven stitching and machine jams.
- Using the right tools and techniques, such as a walking foot or Teflon foot, and mastering skills like saddle stitching and edge finishing, will help you overcome common challenges and achieve a polished finish on your leather projects.
- To ensure success, you should prepare your leather carefully, including cutting and fitting, and be prepared to troubleshoot common issues like glue mishaps and stitch problems, by having the right knowledge and techniques to fix them and get back on track with your leather project.
Needle and Thread for Sewing Leather
You’re about to learn how to choose the right needle and thread for sewing leather, which is vital for achieving perfect results.
By selecting a heavy-duty leather needle and thread that matches your leather type, you’ll guarantee durability and a professional finish for your projects.
Choose a heavy-duty leather needle and matching thread for long-lasting durability and a flawless, professional finish every time.
Special Sewing Machine Presser Feet
One smart move to master leather sewing is investing in the right presser feet. The Teflon foot’s benefits are hard to beat—it glides over sticky or thick leather seams and helps you maintain precise stitching.
The roller foot uses also stand out, as the tiny wheels help keep the fabric moving without drag. Need to insert a zipper? The zipper foot for leather gives close, neat seams, while the invisible zipper foot is ideal for clean finishes on leather garments.
Don’t overlook the compensating presser foot for even edge stitching. If feeding leather feels tricky, swap in a walking foot—it’s essential for smooth layers on a leather sewing machine. Using the right foot, like a specialized sewing foot, can solve specific sewing challenges.
Regular cleaning keeps all sewing machine accessories working trouble-free.
Choosing The Right Thread for Leather
For leather sewing, your thread choice matters—think about Thread Material and Thread Weight.
Bonded nylon thread is popular for its strength and smooth Stitch Appearance, while heavy linen adds classic style.
For superior stitch integrity, consider using high-quality nylon options.
Match thread size to your project for good Project Durability.
Watch your thread tension; too tight or loose throws things off.
Fine-tune Tension Adjustments for lasting, professional results.
Notions for Basting Leather Pieces
When tackling leather sewing problems, using the right basting alternatives can save you a world of trouble.
Stitch marking and secure joining make all the difference. Instead of pins, try these:
- Temporary adhesives for clean holds.
- Double-sided tape—perfect for tricky seams.
- Precision techniques like basting with tailor’s chalk.
With careful leather preparation and smart leather sewing techniques, your seams stay straight, neat, and frustration-free.
Tools and Techniques for Cutting Leather
Cutting leather calls for sharp tools, steady hands, and a clear plan for your pattern pieces, since each hide is unique and can’t be folded or doubled like fabric.
Mastering the right techniques and tools guarantees every edge is clean, making the rest of your leather project much easier, with clean edges being a key factor.
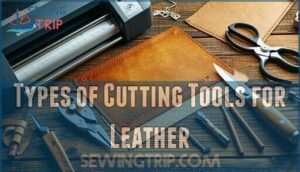
Types of Cutting Tools for Leather
Ever wondered why your leather cuts end up jagged or uneven? The secret often lies in picking the right cutting tool for your project.
Rotary cutters glide through leather like butter, giving you clean edges on curves and patterns. If you prefer working in straight lines, high-quality leather shears offer accuracy and control.
For precision holes or mark-ups, awl usage is essential—it’ll help avoid those dreaded leather damage or thickness problems. Skiving knives thin out stubborn spots, while die cutters give perfect shapes fast.
For ideal results, consider using titanium-coated blades for enhanced durability. Each tool below serves a unique purpose in handling leather cutting and fixing common leather sewing difficulties:
| Tool | Best For | Common Issue Solved |
|---|---|---|
| Rotary Cutters | Curves, patterned cuts | Avoids leather damage |
| Leather Shears | Straight lines | Controls leather thickness |
| Awls | Marking, punching | Precise holes, no fraying |
| Skiving Knives | Thinning edges | Reduces bulk, easier sewing |
| Die Cutters | Repeated shapes | Consistent, fast results |
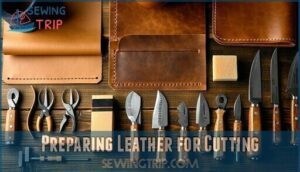
Preparing Leather for Cutting
Before you start cutting leather, think about more than just grabbing a blade. Strong pattern placement will help you work around any blemishes or marks, giving you cleaner results.
Wetting leather makes it easier to shape and slice, especially if you’re working with thicker or stiffer leather types. Follow these steps for a solid foundation:
- Check for leather grain and thickness before cutting.
- Use a firm leather lining to support your project.
- Sharpen tools before tackling any leather cutting job.
- Practice on scraps to adjust to different leather types.
A proper project needs leather lining support and a good understanding of leather grain to ensure a successful outcome with cleaner results and a solid foundation.
Sewing Machine Settings for Sewing Leather
When sewing leather, your machine settings make the difference between professional results and frustrating failures.
You’ll need to adjust tension, stitch length, and often add specialized feet to handle leather’s unique properties without damaging your project or machine.
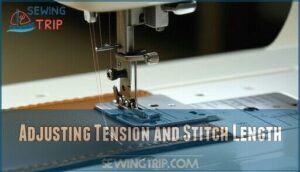
Adjusting Tension and Stitch Length
Precision becomes your best friend when dialing in machine tension and stitch length for leather projects.
Set your bottom tension first by pulling the bobbin thread until it feels firm but not tight. Adjust your pressure foot screw to guarantee adequate pressure against the leather thickness.
Test with a new needle that matches your thread weight, considering a smaller size if needed. Make tension adjustments in small 1/8th turn increments until the thread knot centers perfectly within the leather layers.
Use longer stitch lengths to reduce perforation density and ease machine strain. Using leather sewing needles is vital for penetrating the material without damage.
This systematic approach to sewing machine settings prevents uneven stitching while guaranteeing maximum machine compatibility with your specific leather thickness and thread combination.
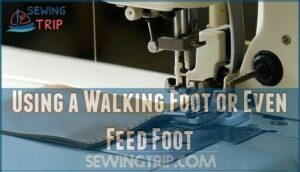
Using a Walking Foot or Even Feed Foot
A walking foot machine transforms leather sewing by synchronizing top and bottom fabric layers.
This prevents uneven stitches and skipped stitches leather sewers commonly face.
The walking foot benefits include consistent fabric feed control, eliminating bunching that creates leather thickness problems.
Even feed advantages shine when handling multiple layers or varying thicknesses.
Foot pressure adjustment helps manage different leather weights effectively.
The mechanism grips leather from above while feed dogs work below, creating stitch consistency improved results.
This dual-action prevents the top layer from shifting, solving frustrating sewing challenges that plague standard presser feet.
For projects requiring even feeding, a walking foot can act as a dual feed sewing tool, providing improved results with consistent fabric feed and even feed advantages.
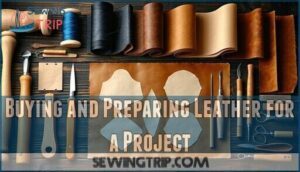
Buying and Preparing Leather for a Project
Getting the right amount of leather for your project starts with understanding that leather comes in unique skins, not uniform fabric bolts like you’re used to.
You’ll need to plan your pattern pieces carefully and often buy more than calculated since soft, thin leather skins suitable for most projects are typically small and harder to find online, which requires careful consideration of leather skins.
Calculating How Much Leather You Need
When planning leather sewing projects, accurate measurements prevent costly mistakes and material waste.
Start by laying out your pattern pieces on paper to visualize the leather skin shape and optimize project layout efficiency.
Most leather skins are irregular, unlike fabric bolts, so you’ll need extra material beyond your pattern piece size requirements.
Calculate 20-30% additional leather for waste minimization strategies, accounting for leather thickness variations that affect how pieces fit together.
Different leather types require different allowances – thin garment leather needs less extra material than thick upholstery leather.
Test your leather thickness with calipers before finalizing quantities.
Consider cost estimation factors like leather quality and source when budgeting for leather sewing projects, including the impact of leather quality and leather thickness on overall project costs.
Where to Buy High-Quality Leather
Whether you’re figuring out how much leather you need or already holding your project pattern, knowing where to shop is half the battle.
Leather Suppliers come in many forms: Online Retailers, trusted Local Tanneries, and even specialty Auction Houses.
Shopping these sources gives you access to top-tier leather skins, a range of leather grades, and premium leather sewing materials.
Look for online leather sewing stores that carry reputable leather sewing brands.
They often offer guides and customer support—so you don’t feel lost amid swatches and hides.
- Local Tanneries for unique finds
- Online Retailers for fast delivery
- Auction Houses for rare leathers
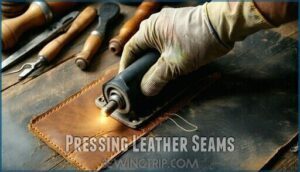
Pressing Leather Seams
Pressing leather seams takes patience and the right tools so your work looks smooth and professional.
You’ll need controlled heat, steady pressure, and gentle handling to avoid marks while making seams lay flat.
Using a Leather Pressing Tool
From boning folders to wooden dowels, the right leather pressing tool can smooth seams and tackle puckering with ease.
A leather press, paired with a solid Heat Setting Guide, keeps projects crisp and polished.
Use gentle, steady pressure—don’t rush it—to unfurl seams without stretching the leather.
Leather Protection Tips include placing a cloth between the tool and leather, while regular tool maintenance means inspecting for splinters or build-up.
A reliable pressing technique guarantees even flattening and supports durable, good-looking topstitching every time, ensuring a polished finish.
Tips for Pressing Leather Seams
After sewing your leather seams, achieving a crisp, professional finish means pressing them the right way. Rely on your leather press, a bone folder, or even a wooden dowel to flatten those stubborn seams.
Seam flattening isn’t just about brute force—use the mallet technique gently for the best effect, especially on thicker hides. If adhesives are in play, try glue alternatives to keep residue at bay and preserve a clean surface.
Mist your leather lightly with water before pressing to prevent cracks, but beware of heat concerns—too much can distort or damage the finish. Adjust your stitch length and needle size to fit your project’s needs, and always knot threads securely at the end.
For edge finishing, a quick pass with the bone folder gives your seams a neat, tidy look.
- Mist leather ahead of pressing seams
- Tap seams with a mallet, not just pressure
- Use glue alternatives for residue-free sticking
- Choose the right stitch length each time
- Finish edges for a smooth, clean result
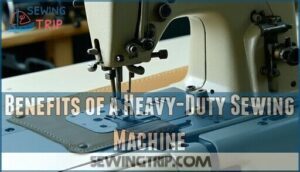
Benefits of a Heavy-Duty Sewing Machine
You’ll find that a heavy-duty sewing machine is essential for sewing leather, as it provides the power and control you need to handle thick, tough materials.
By investing in a heavy-duty machine, you’ll be able to sew leather with ease and precision, achieving professional-looking results that will last.
Industrial Vs. Home Sewing Machines
When pressing leather seams becomes routine, you’ll face a bigger decision: which sewing machine can handle your leather projects. Industrial sewing machines pack serious power – motors up to 550 watts compared to home machines’ 60 watts. That’s a Power Comparison that matters when you’re pushing through thick leather layers.
Speed Differences are dramatic too. Industrial machines cruise at 2,000-5,500 stitches per minute while home models max out around 1,100. For Stitch Quality, industrial walking foot systems prevent leather from shifting, creating professional seams that home machines can’t match.
- Cost Analysis: Industrial machines start around $1,500-$8,000 vs. $200-$800 for home models
- Maintenance Needs: Industrial units require regular oiling but parts last longer
- Sewing Machine Compatibility: Industrial models use round shank needles, home machines use flat shank
However, home sewing machine enthusiasts shouldn’t despair. For light leather work, proper sewing machine settings and difficult leather sewing techniques can produce decent results. Industrial sewing machine users get consistency, but home sewing machine operators can still create beautiful leather pieces with patience.
Features to Look for in a Heavy-Duty Machine
A powerful motor strength separates heavy-duty machines from basic models.
You’ll need robust frame material—preferably metal construction—for stability during leather projects.
The feed mechanism should include walking foot capabilities for consistent stitching through thick materials.
Look for precise stitch control with variable speeds and lengths.
Needle compatibility matters; your heavyduty sewing machines should handle leather needles effortlessly.
These industrial sewing machine features guarantee your walking foot machine investment delivers professional results on demanding projects.
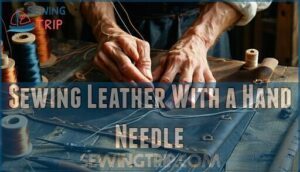
Sewing Leather With a Hand Needle
Hand sewing leather gives you complete control over tension and stitch placement, making it ideal for detailed work and repairs.
You’ll need specialized tools like pricking irons, a stitching pony, and heavy-duty needles, but the process requires patience and proper technique to achieve professional results.
Pros and Cons of Hand Sewing Leather
Hand sewing leather offers unmatched control over each stitch, creating distinctive character that machines can’t replicate. You’ll achieve superior stitch appearance with traditional saddle stitching, where each hole gets locked by two opposing threads.
Hand sewing leather brings every stitch to life, giving your project strength and personality you just can’t get by machine.
This technique delivers exceptional durability concerns – hand-sewn leather often outlasts machine work by decades. However, the time investment is substantial. What takes minutes on a machine requires hours by hand.
The skill requirement is steep too – mastering consistent tension and straight lines demands practice. Cost comparison favors hand sewing initially since you’ll only need needles, thread, and awls rather than expensive machines.
Hand sewing leather excels for small projects, repairs, and when you want that authentic leather crafting feel. For leather stitching enthusiasts, it’s therapeutic and rewarding. Just remember – leather sewing by hand isn’t practical for large items like jackets or bags.
Tips for Hand Sewing Leather
Beyond mastering the basics, you’ll want to perfect your hand sewing leather technique for professional results. Success depends on proper preparation and consistent execution.
Here are three key tips for flawless hand sewing leather:
- Master saddle stitching – This technique creates the strongest, most durable seams using two leather awls and hand sewing needles working simultaneously
- Control thread tension – Keep consistent pressure to prevent loose or overly tight stitches that can tear the leather
- Focus on edge finishing – Clean, polished edges separate amateur from professional leather crafting work
When leather stitching by hand, choose quality leather thread that matches your project’s weight. Waxed thread glides smoothly through punctures while maintaining proper tension. Practice your sewing techniques on scraps first – this prevents costly mistakes on your final piece.
Types of Leather and Faux Leather
You’ll encounter different leather types that behave uniquely under your sewing machine, from buttery-soft garment leather to thick upholstery hides.
Faux leather presents its own challenges with heat sensitivity and synthetic backing that can jam your machine if you’re not prepared, particularly due to its heat sensitivity.
Understanding Real Leather
After mastering hand sewing techniques, you’ll want to understand what makes real leather unique for your projects. Real leather comes from animal hides through specific tanning processes that create distinct characteristics affecting your sewing experience.
Key aspects of real leather include:
- Leather Grades: Full-grain offers maximum durability, while genuine leather provides budget-friendly options with different sewing requirements
- Tanning Processes: Chrome-tanned leather feels softer and more flexible, while vegetable-tanned leather is firmer and holds crisp edges
- Leather Finishes: Smooth finishes glide easier under presser feet, while textured surfaces can cause fabric bunching
- Animal Source: Cowhide thickness varies substantially from supple lambskin, affecting needle penetration and stitch formation
- Leather Durability: Dense fibers resist needle damage but require proper threading techniques to prevent leather puckering
Real leather’s natural grain patterns and thickness variations create sewing machine issues you won’t face with synthetic materials. Thread breakage leather problems often stem from using standard cotton threads instead of heavy-duty options. Tension problems leather sewing encounters include uneven stitches when machine settings aren’t adjusted for material density.
Considering options like nubuck’s rugged appeal can broaden your project possibilities. These leather sewing challenges require understanding your material’s specific properties before threading your machine.
Working With Faux Leather
You’re working with faux leather, considering Faux Durability and Faux Aesthetics.
- Explore eco-friendly options
- Consider Faux Cost and Faux Cleaning for lasting results, using proper leather sewing tips to avoid common leather crafting issues and sewing machine issues when sewing leather.
Tips for Successful Leather Sewing
You’re about to learn the essential tips for successful leather sewing, which will help you achieve perfect results.
By following these tips, you’ll be able to choose the right needle, compare roller foot and Teflon foot, and fit and test your leather before sewing, making the process easier and more efficient.
Choosing The Right Needle for Leather
You’ll need a heavy-duty leather needle with a sharp point and large eye.
Choose the right needle size using a Needle Size Guide to match leather thickness, avoiding skipped stitches and breaks, and guarantee needle compatibility for smooth sewing.
Needle material matters for durability and compatibility.
Comparing Roller Foot and Teflon Foot
You’re now considering the best presser foot for sewing leather.
Here are 3 key points to compare Roller Foot and Teflon Foot:
- Foot pressure and material grip affect stitch quality.
- Foot durability varies, with some feet suited for heavy use.
- Cost comparison is necessary, as prices differ greatly.
When sewing leather, a walking foot machine can help. Adjusting sewing machine settings and troubleshooting common presser foot problems can also improve results.
Fitting and Testing Before Sewing
Just after learning about presser feet, let’s look over the value of fitting and testing before sewing leather.
Start by making pattern adjustments, trimming seam allowance, and checking machine compatibility.
Mock-up testing with scrap leather practice reveals where your sewing technique might need tweaking, try lightly moistening leather samples for flexibility.
Switch up tension and stitch length until your sewing tips pay off, this hands-on approach helps with leather sewing troubleshooting and gives you sturdy, professional results—no surprises, just solid leather sewing advice.
Common Challenges and Troubleshooting
You’ll run into trouble with skipped stitches, jammed machines, or glue mishaps while sewing leather, but there’s always a clear way to fix things.
With the right adjustments and careful attention, you’ll be back on track before your leather project suffers.
Dealing With Back Side Stitches
Every sewing leather project has its backside stitch story: a tale of Tension Balance and Needle Interaction.
Consistent Stitching and crisp Stitch Appearance rest on small tweaks.
Take control with these strategies:
- Adjust thread tension until you avoid skipped stitches
- Inspect stitch quality on scrap leather
- Check thread looping on the backside
- Maintain your sewing machine
- Try slow, purposeful stitching
Mastery comes stitch by stitch, with practice and patience being key to achieving consistent stitching.
Using Glue for Leather Sewing
Proper Surface Preparation is key before using any leather adhesives in leather crafting.
Test your Glue Types on scrap leather to gauge Adhesive Strength and fit.
Use Application Techniques like tilting your project and applying glue slowly to spot bubbles early.
Preventing Bubbles helps you get strong, smooth bonds that last, setting a solid foundation for sewing leather projects.
Cutting Techniques for Leather
With leather sewing, sharp tools are your secret weapon. Reach for leather shears or rotary cutters for clean lines across your leather projects—dull blades can ruin an afternoon’s work.
Trace your pattern placement carefully, and never use pins. For stitching prep, awl punching creates neat holes.
Regularly sharpen tools with a whetstone. Skiving leather edges takes time but delivers pro results.
Apply clips over pins for lining, giving your finished project a flawless look. The saddle stitch is essential for a professional finish.
Frequently Asked Questions (FAQs)
Do you need a sewing machine to sew leather?
You don’t necessarily need a sewing machine to sew leather, but it’s highly recommended for efficiency and precision, especially for thicker or larger projects.
Can a 99 sew through leather?
You can sew through leather with a 99, but it may struggle with thicker materials, so choose your leather wisely for best results.
Can you sew clothes from leather?
You can create clothes from leather, such as hats, dresses, and jackets, by choosing the right leather type and using suitable sewing techniques and tools.
What makes a fabric difficult to sew?
Like wrestling with a stubborn puzzle piece that won’t fit, certain fabric properties create sewing challenges.
Weight, stretch, slipperiness, thickness variations, and fiber structure all affect how smoothly you’ll stitch, requiring specific needles, tensions, and techniques for success, particularly due to thickness variations.
What should I know before sewing a sewing machine?
You should know your machine’s capabilities, thread, and needle requirements before starting to guarantee a smooth and successful sewing experience with your sewing machine.
What stitches can you use on a sewing machine with leather?
You can use a straight stitch with a slightly longer length, typically 3-5 mm, and reduced thread tension for the best results when sewing leather with a machine.
Why is it hard to sew leather?
You’ll find sewing leather challenging due to its thickness, density, and potential for needle breaks, skipped stitches, and machine jams, requiring special techniques and equipment.
What tension should my sewing machine be on for leather?
For leather, set your machine tension to 1, with a slightly longer stitch length, around 3-5 mm, to achieve precise and elegant stitches without breaking the leather.
Can I sew leather with a regular sewing machine?
You can sew leather with a regular machine, but it may struggle with thicker materials, so choose the right needle and thread for best results and less frustration.
What is the best stitch to sew leather?
You’ll master leather sewing with a straight stitch, slightly longer length, and reduced thread tension, perfect for a durable and professional finish on your projects.
Conclusion
Are you still struggling with problems sewing leather?
You’ve now got the tools to overcome common issues.
By applying these tips, you’ll master sewing leather and achieve professional results, solving your problems sewing leather with ease and confidence, every time.
- https://leatherworker.net/forum/topic/37226-problems-sewing-leather-with-my-machine-advice/
- https://www.youtube.com/watch?v=wmcqf9cbCv4
- https://www.reddit.com/r/sewhelp/comments/sn4d64/tips_for_sewing_with_leather/
- https://blog.closetcorepatterns.com/how-to-sew-leather-and-faux-leather/
- https://undergroundcrafter.com/2019/10/31/tools-tips-sewing-with-leather-for-first-time/

