This site is supported by our readers. We may earn a commission, at no cost to you, if you purchase through links.

These frustrations stem from velvet’s unique structure, but professional seamstresses have developed specific techniques that transform these obstacles into manageable steps, turning your velvet projects from stressful battles into smooth, successful creations.
Table Of Contents
- Key Takeaways
- Common Challenges When Sewing Velvet
- Tips for Sewing Velvet Successfully
- Sewing Velvet Tutorial
- Step-by-Step Instructions for Sewing Velvet
- Avoiding Common Mistakes When Sewing Velvet
- Troubleshooting Tips for Sewing Velvet
- Sewing Velvet With Different Types of Fabrics
- Finishing Techniques for Velvet Projects
- Frequently Asked Questions (FAQs)
- Conclusion
Key Takeaways
- You’ll need specialized tools and techniques – Use sharp Microtex needles (70/10-80/12), walking foot attachments, and pattern weights instead of pins to handle velvet’s slippery, delicate nature without damaging the pile.
- Respect the nap direction consistently – Cut all pattern pieces in the same direction to prevent color variations, and always work with velvet’s directional pile rather than against it for professional results.
- Control fabric shifting through proper preparation – Hand-baste seams before machine stitching, reduce presser foot pressure, and use longer stitch lengths to prevent puckering and uneven seams.
- Master gentle pressing methods – Steam lightly from the wrong side using a pressing cloth, avoid direct heat contact, and never apply heavy pressure that’ll permanently crush velvet’s luxurious pile texture.
Common Challenges When Sewing Velvet
Working with velvet can test even experienced sewers because this luxurious fabric demands special handling techniques. You’ll face unique challenges like fabric slippage, cutting difficulties, and pressing problems that don’t occur with standard materials.
Slippage and Shifting
With velvet’s slippery nature, fabric creep becomes your biggest enemy during sewing. Here’s how to tackle shifting while sewing:
- Use pinning strategies – Place pins perpendicular to seam lines within seam allowances to avoid permanent marks on the pile surface.
- Apply basting stitches – Hand-baste layers together with contrasting thread before machine stitching for maximum control over fabric slippage.
- Install a walking foot – This attachment feeds both fabric layers evenly, preventing the top layer from sliding ahead during stitching.
- Add fabric stabilizers – Temporary spray adhesives or tissue paper between layers eliminate shifting without damaging velvet’s delicate pile.
Difficulty in Cutting and Marking
Marking and cutting velvet fabric presents unique challenges that can make even experienced sewists pause. You’ll need to master these cutting techniques to avoid costly mistakes and achieve professional results.
- Pattern Placement: Plan your layout carefully, ensuring all pieces follow the same nap direction for consistent color and texture
- Accurate Marking: Use tailor’s tacks or chalk instead of tracing wheels, which can damage the pile
- Cutting Challenges: Cut single layers with sharp scissors to prevent fraying and shifting between fabric layers
- Preventing Fraying: Thread-trace long edges like hems rather than relying on traditional marking methods
Pressing Issues
Pressing velvet often becomes a nightmare when you don’t understand the fabric’s unique needs. The delicate pile crushes easily under standard heat and pressure, leaving permanent flat spots that destroy velvet’s luxurious appearance. Steam application works better than direct heat—hold your steam iron above the fabric rather than pressing down.
Velvet’s delicate pile demands gentle handling—one wrong move and those luxurious fibers are crushed forever
Use pressing cloths between the iron and velvet for pile protection, preventing direct contact that flattens fibers. Temperature control is essential; keep settings low to avoid heat and pressure damage. When pressing velvet seams, finger-press first, then lightly steam from the wrong side.
To further protect the delicate fabric, consider using a needle board surface. Velvet finishes require gentle handling—crushed or flattened pile rarely recovers from aggressive pressing techniques.
Tips for Sewing Velvet Successfully
You’ll transform your velvet sewing experience from frustrating to fabulous with the right approach and techniques. Success starts with understanding that velvet demands respect, patience, and specific methods that work with its unique properties rather than against them.
Choosing The Right Pattern and Fabric
Your success hinges on selecting simple, loose-fitting patterns that work with velvet fabric characteristics. Choose semi-fitted designs with minimal seams, avoiding heavily structured styles that fight velvet’s natural drape. Cotton velvet suits jackets, while silk velvet excels in flowing garments.
Pattern complexity should match your experience level, ensuring design compatibility with fabric weight and project suitability for best results.
When cutting, remember to account for the velvet’s nap direction to prevent color variations.
Proper Preparation Techniques
Preparation mastery transforms challenging velvet projects into stunning successes. You’ll want to prewash your fabric to prevent shrinkage, then use proper cutting techniques and respect the nap direction. Pattern weights beat pins every time, while careful marking and pressing preserve velvet’s luxurious texture. When sewing, it’s important to stabilize velvet fabric to prevent shifting.
- Prewash Benefits: Machine wash cotton/polyester velvet, hand wash silk varieties, and steam dry-clean-only types
- Cutting Techniques: Use sharp scissors, cut single layers from the wrong side, follow nap direction consistently
- Pattern Weights: Replace pins with weights to avoid permanent holes, position carefully on seam allowances
- Pressing Velvet: Iron the wrong side only, use low heat, protect the pile with a pressing cloth
Sewing Techniques for Velvet
Your needle selection makes or break velvet projects. Use a sharp Microtex 70/10 needle for lightweight velvet or 75/11 for medium weights. Always follow proper nap layout, cutting all pattern pieces in the same direction to avoid color variations.
Pattern weights prevent pin holes that damage the pile. Increase seam allowances to 5/8 inch for better handling. Reduce presser foot pressure and lengthen stitches to avoid puckering while handling slippage and shifting through careful basting. Consider using a specialized needle type for superior results.
Sewing Velvet Tutorial
You’ll master velvet sewing when you understand the fabric’s unique properties and gather the right supplies. This tutorial covers velvet’s characteristics and shows you exactly what tools you need for professional results.
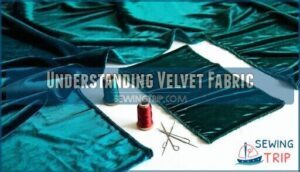
Understanding Velvet Fabric
Understanding velvet fabric means getting familiar with different velvet types and their unique characteristics. Each fiber content—whether silk, cotton, or synthetic—affects how the fabric behaves during sewing. The thick pile creates that signature luxurious texture, but it also determines fabric drape and weight. Pay close attention to nap direction, as pile direction dramatically changes the fabric’s appearance when light hits it.
Understanding the fabric’s unique properties is essential for successful sewing. This knowledge helps you avoid common problems sewing velvet before you even start your project.
Supplies for Sewing Velvet
Quality tools make all the difference when tackling velvet fabric. Your sewing machine needs a sharp Microtex needle, with needle size 70/10 for lightweight velvet or 75/11 for medium-weight varieties. Thread choice matters—use high-quality polyester or silk thread that won’t snag the delicate pile. A walking foot prevents fabric shifting, while silk pins won’t leave permanent marks. Essential pressing tools include a pressing cloth and steam iron. Consider fabric glue for hems and stabilizers for stretch velvet. These needle types and accessories transform frustrating projects into professional results. Certain retailers offer specialty velvet needles.
Characteristics of Sewing Velvet
Working with velvet fabric means grappling with its thick pile and slippery surface that loves to shift during stitching. The stretching and shifting tendencies make velvet notoriously difficult to control under your presser foot.
You’ll notice how pile direction affects the fabric’s appearance – stroke it one way and it looks darker, stroke the opposite direction and it lightens. This nap sensitivity demands attention when cutting pieces, ensuring all pattern pieces face the same direction.
Fiber content determines fabric weight and velvet drape, with silk versions behaving differently than cotton or polyester blends.
Step-by-Step Instructions for Sewing Velvet
You’ll need to follow these five steps to sew velvet properly and avoid common pitfalls. Each step builds on the previous one, so don’t skip ahead or you might end up with shifting fabric and uneven seams.
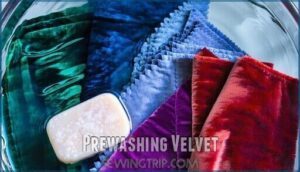
Prewashing Velvet
Before you start cutting your velvet fabric, proper preparation is key to avoiding future headaches. Different velvet types require specific washing methods, so check your fabric’s care label first. Cotton and polyester velvets can handle machine washing with cold water and gentle detergent, while silk velvet often needs dry cleaning.
Shrinkage concerns make prewashing velvet fabric important if your finished project will ever be cleaned. Dye bleeding can occur with darker colors, so test a small piece first. For machine-washable types, use cold water and air dry flat to prevent pile damage. These proper preparation techniques prevent costly mistakes later.
To minimize fraying, consider serging raw edges before washing.
Cutting Velvet Fabric
Along with proper nap direction awareness, cutting velvet fabric requires patience and precision. Place your velvet fabric on a cutting mat, ensuring the pattern layout respects the single layer approach. Sharp cutting tools like fabric shears or a rotary cutter work best for clean edges.
Secure fabric with pattern weights rather than pins to avoid pile damage. Cut slowly through one layer at a time, maintaining steady pressure. This methodical approach prevents shifting and guarantees accurate pieces for your velvet project.
Marking Velvet
Once you’ve cut your velvet pieces, marking velvet requires the right approach to preserve that precious velvet pile. Tailors chalk works best as your go-to marking tool because it brushes away cleanly without leaving permanent marks. Water-soluble pens offer another reliable option, disappearing completely when dampened.
For precision work, tailors tacks provide the most accurate marking method. Thread these small loops through both fabric layers at key points like darts or pocket placements. They won’t damage the pile and remove easily after construction.
When using fabric markers or fabric pens, test them first on scraps. Some leave residue that shows through velvet’s surface. Always mark on the wrong side when possible to protect the visible pile.
Pay attention to nap direction while marking. Your markings should follow the same directional flow as your cut pieces. Small snips in seam allowances work perfectly for creating alignment notches without compromising the fabric’s integrity.
Remember, light touches work best. Heavy-handed marking can crush the pile permanently, creating visible damage that won’t brush out later.
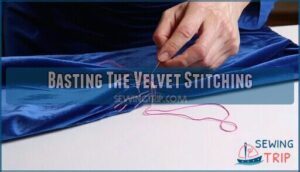
Basting The Velvet Stitching
Basting prevents velvet’s notorious shifting during construction. **Use hand basting techniques with contrasting basting thread along seam lines before machine stitching.
** These temporary stitches secure velvet layers together, providing essential seam control.
Hand basting works better than pins for handling slippage and shifting, since pins can damage velvet’s delicate pile and create permanent marks.
Sewing Velvet
Now that you’ve basted your velvet pieces, you’re ready to sew velvet fabric permanently. Proper needle selection and stitch length prevent pile damage and seam puckering during this stage.
Consider fabric weight when adjusting machine tension. Watch pile direction carefully, and don’t rush—fabric slippage happens when you hurry. Test your settings on scraps first to avoid problems sewing velvet.
- Remember this golden rule: You can’t undo pile damage once it’s done, so take your time with each seam.
Avoiding Common Mistakes When Sewing Velvet
Even experienced sewers make costly mistakes when working with velvet, turning beautiful projects into frustrating disasters. You can avoid these common pitfalls by understanding the three critical errors that trip up most people: using incorrect needles and thread, ignoring nap direction, and applying wrong pressing techniques.
Using The Wrong Needle and Thread
Choosing the right needle and sewing thread combination prevents most velvet disasters. Universal needles snag pile fibers, creating permanent damage. Use Schmetz Microtex needles (70/10-80/12) for precise piercing.
Match thread fiber content to your velvet base—polyester thread works best for durability. Silk thread glides smoothly through dense pile, while cotton thread catches and leaves lint.
Proper needle point types and tension adjustments guarantee quality stitches without fabric damage prevention issues.
Ignoring The Nap Direction
Velvet’s nap direction affects your entire project’s visual impact. When you ignore nap consistency and cut pattern pieces without considering pile orientation, you’ll end up with fabric sections that catch light differently.
Always use a nap layout with all pieces facing the same direction. Mark your fabric’s pile orientation before cutting to guarantee proper nap management and uniform fabric appearance throughout your finished garment.
Overpressing or Underpressing
Pressing velvet incorrectly can instantly destroy your project’s luxurious appearance. Here’s how to avoid pressing disasters:
- Test your ironing temperature and heat setting on fabric scraps first, using a pressing cloth to prevent pile crushing and heat and pressure damage.
- Control steam usage carefully – light steam on the wrong side protects the pile while preventing wrinkles and pressing issues.
- Allow velvet recovery time between pressing sessions, letting the pile bounce back naturally before resolving pressing issues with additional steaming.
Troubleshooting Tips for Sewing Velvet
Even experienced sewers hit snags when working with velvet’s tricky nature. These targeted solutions will help you tackle the most frustrating velvet problems and get your projects back on track.
Handling Slippage and Shifting
When your velvet fabric starts acting like it has a mind of its own, you need strategies that actually work. Slippery surfaces make layers shift constantly during sewing, but targeted pinning techniques can solve this headache.
Smart Pinning Strategies:
- Use pattern weights instead of pins when possible to avoid permanent holes
- Pin within seam allowances only, placing pins perpendicular to stitching lines
- Try fabric clips on thick seams where pins won’t penetrate properly
Hand basting becomes your secret weapon for tricky areas. Walking foot attachments help feed both fabric layers evenly through your machine. Pay attention to grain direction when cutting—velvet’s nap affects how pieces move together. Fabric stabilizers work well under particularly slippery sections, giving you better control during construction.
Dealing With Puckering and Seam Allowances
Puckering transforms beautiful velvet into a wrinkled mess, but proper tension adjustment and technique prevent this frustration. Velvet creep causes seam puckering when fabric layers shift during stitching, creating uneven seam allowances that compromise your project’s finish.
Master these four essential techniques:
- Reduce thread tension – Lighter tension prevents fabric bunching and minimizes seam puckering in delicate velvet fibers
- Increase stitch length – Longer stitches accommodate velvet’s dense weave, reducing pulling and distortion along seams
- Adjust presser foot pressure – Less pressure prevents pile crushing while maintaining even fabric feed through the machine
- Grade seam allowances – Trim one layer shorter than the other to eliminate bulk and achieve professional seam finish quality
To further avoid puckering, consider how fabric structure impacts seams.
Resolving Pressing Issues
After addressing puckering problems, proper Steam Application becomes your next challenge. Temperature Control prevents pile damage while maintaining professional Velvet Finishes.
Here’s your pressing cloth strategy:
- Use steam iron on wrong side only – Direct heat flattens pile permanently
- Place pressing cloth between iron and fabric – Protects delicate velvet surface
- Apply gentle iron pressure – Heavy pressure crushes pile beyond repair
- Finger press seams first – Reduces bulk before steam treatment
- Test temperature on scraps – Prevents heat damage to your project
- Steam lightly, press minimally – Embrace velvet’s natural drape instead
Smart pressing issues require patience, not force. When cutting velvet, remember to maintain nap direction for consistent results.
Sewing Velvet With Different Types of Fabrics
Mixing velvet with other fabrics can create stunning texture contrasts, but you’ll face unique challenges with each combination.
Understanding how different materials behave together helps you choose the right techniques and avoid common pitfalls that can ruin your project.
Velvet and Silk
Silk velvet blend fabrics require extra attention when you’re tackling problems sewing velvet fabric. Hand-baste seams to prevent shifting, as silk thread choice matters—polyester works better than cotton for strength. Use a walking foot and tissue paper between layers to control slippage. When pressing, steam lightly without direct contact to preserve the pile.
| Challenge | Solution |
|---|---|
| Fabric shifting during sewing | Hand-baste seams or use temporary spray adhesive |
| Seam puckering issues | Choose lightweight silk velvet lining materials |
| Pressing without pile damage | Steam without direct pressure, avoid fusible interfacing |
| Clean edge cutting | Cut singly with sharp scissors, never fold layers |
| Prewashing concerns | Dry clean silk velvet, prewash silk separately |
Silk thread choice and preserving the pile are crucial when working with these delicate fabrics. Always handle with care and follow the recommended techniques for the best results.
Velvet and Cotton
Cotton’s natural breathability makes it an ideal partner for velvet fabric in mixed-material projects. Cotton Velvet Blends offer exceptional Velvet Cotton Durability compared to synthetic combinations, while heavyweight cotton holds velvet panels without sagging issues. When problems sewing velvet arise, cotton’s stability helps control shifting during construction.
For Project Ideas, try velvet-trimmed cotton jackets or cushions combining both textures. Cotton velvet proves more forgiving than silk varieties, allowing easier pinning and machine sewing.
Washing Velvet Cotton requires separate prewashing since cotton shrinks while velvet usually needs dry cleaning. This pairing delivers both Velvet Cotton Comfort and visual appeal.
Velvet and Rayon
Working with a rayon velvet blend requires finesse, as rayon’s softer nature increases slippage and distortion compared to cotton velvet. Use larger seam allowances and careful basting to control the rayon velvet drape, which has a propensity to stretch at bias seams. Choose fine needles and polyester thread to minimize pile pull while addressing problems sewing velvet like static electricity and seam puckering.
Rayon velvet care demands gentle steaming rather than water exposure, which can damage the fabric and affect velvet rayon durability, making the velvet rayon cost investment worthwhile when handled properly.
Finishing Techniques for Velvet Projects
Once you’ve mastered the basics of sewing velvet, you’ll need to finish your project properly to achieve that professional look you’re after. The right finishing techniques will prevent fraying, maintain the fabric’s luxurious appearance, and guarantee your velvet creation lasts for years to come.
Seam Finishes for Velvet
When finishing velvet projects, choosing the right seam technique prevents fraying edges and creates professional results. Overlocked seams with differential feed minimize stretching, while bound seams using lightweight bias tape reduce bulk.
- Serged edges: Use three-thread overlocking to prevent excessive fraying while maintaining clean finish
- Bound seams: Apply silk bias tape over raw edges for neat, professional appearance
- French seams: Enclose edges completely, ideal for lightweight velvet requiring durability
Hem Finishes for Velvet
You’ll want to choose hem finishes that preserve your velvet fabric’s luxurious drape and texture. Blind hemming works perfectly for velvet, creating invisible blindstitched hems that maintain clean lines. The blind hem stitch prevents visible topstitching that can flatten velvet’s pile.
Try rolled hems for lightweight velvet pieces, or serged hems when you need durability. Bound hems using bias tape add elegance, while weighted hems help heavier velvet hang beautifully.
**These hem finishes for velvet guarantee professional results every time.
Frequently Asked Questions (FAQs)
How to sew Velvet?
Use sharp needles, walking foot, and longer stitches. Cut single layers with pattern weights, not pins. Baste seams to prevent shifting. Press gently with steam and protective cloth.
Why is velvet fabric so hard to cut?
Ever wrestled with fabric that seems to have a mind of its own? Velvet’s slippery texture and directional pile make it shift unexpectedly while cutting. Plus, its delicate fibers can catch on scissors, creating jagged edges instead of clean cuts.
How do you Keep Velvet from shifting on a sewing machine?
Pin your velvet layers together in seam allowances only, use a walking foot to grip both layers evenly, and consider hand-basting longer seams first to prevent shifting during machine stitching.
How much tension do you need to sew Velvet?
Most sewers reduce tension by 20-30% when sewing velvet. You’ll want to loosen your machine’s tension setting and increase stitch length to prevent puckering and fabric damage while maintaining proper seam formation.
Can Velvet be pressed from the wrong side?
Yes, you can press velvet from the wrong side using low heat. Always place a pressing cloth between the iron and fabric to protect the delicate pile, preventing crushing or flattening the texture.
Do you need a sewing machine to sew Velvet?
Like a master craftsman choosing their chisel, you don’t need a sewing machine to sew velvet—hand-sewing works beautifully. However, machines make the process faster and more consistent, especially with proper needles and walking feet for professional results.
How do I prevent the pile of velvet from matting or crushing during sewing?
Use a pressing cloth or velvet board when ironing, keep presser foot pressure light, and sew with the nap direction. Store pieces flat between tissue paper to prevent crushing.
Are there any special considerations when it comes to sewing velvet with other fabrics?
Like mixing oil and water, combining velvet with other fabrics requires careful choreography. You’ll need matching thread weights, similar stretch properties, and gentle handling to prevent the velvet from overpowering lighter fabrics during construction.
Can you sew velvet by hand effectively?
Hand-sewing velvet works well with proper techniques. You’ll need sharp needles, silk thread, and gentle handling.
Use longer stitches, avoid pulling tight, and work slowly to prevent pile damage and fabric shifting.
What thread weight works best for velvet?
Premium-quality polyester or cotton thread, weighing 40-50, becomes your velvet’s best companion. This weight won’t overwhelm delicate fibers while providing enough strength to secure seams beautifully without creating unwanted bulk or tension.
Conclusion
Mastering these specialized techniques transforms the challenging aspects of working with this luxurious fabric into manageable skills. You’ve learned to work with velvet’s unique characteristics rather than against them, from proper cutting methods to specialized pressing techniques.
The problems sewing velvet presents become opportunities to hone your craftsmanship when you apply these expert solutions. With patience and practice, you’ll create beautiful velvet garments that showcase both the fabric’s elegance and your improved sewing abilities.
- https://sewguide.com/sewing-with-velvet/
- https://www.sewingworkshop.com/new-blog/sewing-with-velvet
- https://www.reddit.com/r/sewing/comments/h092l4/velvet_is_horrible_and_my_life_is_ruined/
- https://thefashionarchaeologist.com/blog/working-with-velvet-the-beautiful-but-challenging-textile
- https://weallsew.com/sewing-with-the-irresistible-but-tricky-velvet/


