This site is supported by our readers. We may earn a commission, at no cost to you, if you purchase through links.
You can sew a queen-sized quilt top in under an hour using a jelly roll and one simple technique. That’s the kind of speed quilters discovered when Moda Fabrics introduced these coordinated fabric bundles back in 2006, and they’ve been changing the way people approach quilting techniques using jelly rolls ever since.
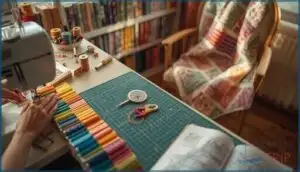
Each roll contains 40 to 42 strips of perfectly matched fabric, already cut to 2.5 inches wide and ready to sew. No more spending hours at your cutting mat or wrestling with coordinating colors from different fabric lines. These precut strips let you skip straight to the creative part—piecing together blocks, experimenting with patterns, and actually finishing projects.
Whether you’re drawn to classic Rail Fence patterns or want to try the surprisingly addictive Jelly Roll Race, mastering a few key techniques opens up dozens of quilt designs.
Table Of Contents
- Key Takeaways
- What Are Jelly Rolls in Quilting?
- Essential Tools for Jelly Roll Quilting
- Preparing Jelly Rolls for Quilting Projects
- Popular Jelly Roll Quilting Techniques
- Step-by-Step: Sewing a Jelly Roll Quilt
- Creative Jelly Roll Quilt Patterns
- Top 3 Tools and Patterns for Jelly Roll Quilting
- Tips for Success With Jelly Roll Quilting
- Frequently Asked Questions (FAQs)
- Conclusion
Key Takeaways
- Jelly rolls contain 40-42 precut fabric strips (2.5 inches wide) that eliminate hours of cutting and color coordination, letting you complete a queen-sized quilt top in under an hour using techniques like the Jelly Roll Race or Rail Fence patterns.
- Strip piecing, quilt-as-you-go methods, and careful seam pressing transform jelly roll strips into fast, accurate quilt blocks while minimizing fabric waste and reducing the complexity of traditional piecing.
- Success with jelly rolls depends on maintaining a consistent ¼-inch seam allowance, handling pinked edges gently to prevent fraying, and organizing strips by color or value before you start sewing.
- Jelly rolls work for both traditional patterns (Log Cabin, Rail Fence) and modern designs, making them versatile for everything from seasonal quilts to DIY gifts like tote bags and table runners.
What Are Jelly Rolls in Quilting?
Jelly rolls are a staple in the quilting world, bringing together color-coordinated strips for all sorts of creative projects. Knowing what sets them apart helps you choose the right supplies for your next quilt.
Here’s a closer look at what makes jelly rolls so useful in quilting.
Definition and Characteristics of Jelly Rolls
Jelly rolls are a revelation in quilting, blending tradition and modern convenience. Each roll bundles precut, coordinated strips, saving you time and cutting hassle while boosting creativity. Born from the quilting industry’s need for efficiency, these bundles highlight the Precut Benefits and impact industry trends.
Their Historical Origin traces back to early piecing methods, but today’s jelly rolls simplify fabric selection and expand your quilting techniques toolkit. These convenient bundles of fabric strips, known as jelly roll fabrics, were first introduced by Moda Fabrics in 2006.
Common Sizes and Fabrics Included
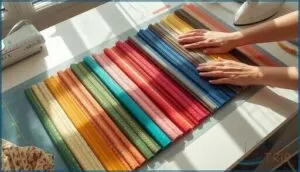
Now that you understand what jelly rolls are, let’s look at what’s actually inside each bundle. Standard strip dimensions measure 2.5 inches wide by 42 to 44 inches long, and most rolls contain 40 to 42 strips.
You’ll find impressive fabric variety in each pack:
- 100% quilting-weight cotton content in most rolls
- Up to 40 unique prints from one cohesive design collection
- Batik or solid-color specialty options
- Pinked edges on precut strips
- Clear packaging details listing strip count and dimensions
These coordinated fabrics simplify fabric selection while expanding your quilting techniques toolkit.
Benefits of Precut Strips for Quilting
With so many coordinated fabrics in a tidy roll, you skip the hassle of cutting and matching. These precuts let you jump right into quilt making, saving time and keeping your sewing space tidy. Beginners quickly find confidence, since every strip fits together seamlessly.
This approach doesn’t just slash fabric waste, but it opens up quilting techniques for everyone with fewer tools and less material prep. These convenient rolls are considered Moda packs and contain at least one of each print in a collection.
Essential Tools for Jelly Roll Quilting
Getting started with jelly roll quilting means having the right tools by your side. The basics make every step smoother and your finished quilt neater.
Here’s what you’ll want on your quilting table.
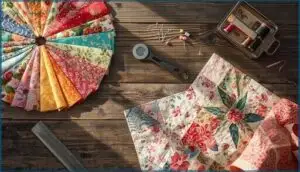
Rotary Cutters and Cutting Mats
When you’re aiming for crisp, even strips, nothing beats using rotary cutting tools alongside a self-healing cutting mat. These mats, made of sturdy PVC, protect your work surface and keep blades sharp.
Proper mat maintenance means longer mat life and smoother cutting efficiency. Be mindful of rotary cutter safety and blade replacement, since a dull blade slows you down and risks damaging your quilting patterns.
Accurate Rulers for Strip Cutting
Precision is a quilter’s secret weapon. Accurate rulers make all the difference in strip cutting—especially when using rotary cutting and quilting tools for jelly roll projects. Stripology Benefits shine with slotted guides, while Non-Slip Grips prevent shifting. Enjoy clear Visibility Features to spot 2.5-inch marks fast. Layer Cutting means slicing multiple strips at once, speeding up your path from fabric stack to masterpiece.
- Ruler Precision boosts block consistency
- Stripology rulers enable quick, error-free cuts
- Non-Slip Grips help stabilize rulers during cutting
- Visibility Features improve measuring on busy fabrics
Sewing Machines and Needles for Strip Piecing
The heart of strip piecing beats in your choice of sewing machines and needle types. Larger machine throat size makes it easier to handle long jelly roll strips, especially with intricate quilting patterns. Choose quilting needles sized 75/11 to 90/14 for dense layers. Reliable stitch settings and strong motor power matter. Replace needles every 8–10 hours—good maintenance protects your fabric and keeps quilting techniques crisp.
| Machine Throat Size | Needle Types | Stitch Settings |
|---|---|---|
| Wide (e.g., 24”) | 75/11 or 90/14 | 2.0–2.5 mm |
| Mid-range | Topstitch, Quilting | Moderate Pressure |
| Standard | Titanium-coated | Consistent Speed |
| Portable | Universal | Use Walking Foot |
Preparing Jelly Rolls for Quilting Projects
Before you start sewing, a little prep work goes a long way with jelly rolls. The way you handle your strips can make a real difference in your finished quilt.
Here’s what you need to know before you begin.
Sorting and Organizing Fabric Strips
Sorting jelly roll strips before you start transforms chaos into control. Organize by color family—78% of quilters do this to balance their design. Use a value scale to group strips from light to dark, which improves contrast. Keep strips from the same fabric line together for pattern continuity. Group sets of three or four for block construction.
Smart storage methods, like labeled bins, save time and preserve your fabric crafting supplies.
Handling Pinked Edges and Minimizing Fraying
Ever notice how those zigzag edges on jelly roll strips look like a tiny sawblade? That pinked edge care isn’t just for show—it’s your first line of defense against fraying. For best results, use these fraying prevention tips:
- Gentle handling practices
- Store strips in original packaging
- Avoid excess fabric crafting before use
- Choose quality quilting tools and machines
- Match seam allowance accuracy to your pattern
Paying attention to fabric type impact means your quilting techniques and patterns stay sharp.
Prewashing and Pressing Considerations
Think prewashing is a must for every quilting project? Not always with jelly rolls. Since fabric shrinkage and color bleeding can impact quilt finishing, many quilters avoid prewashing these strips to prevent fraying and twisting.
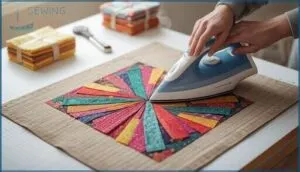
Instead, focus on pressing techniques: press after piecing, use steam if needed, and aim for seam accuracy. That careful handling of fabric and pressing seams ensures your quilting techniques and patterns stay sharp.
Popular Jelly Roll Quilting Techniques
Jelly rolls open the door to a range of creative quilting techniques that are both fun and beginner-friendly. You can use these strips to build classic patterns or explore new approaches that save time at the sewing machine.
Here’s a look at some of the most popular ways to put your jelly roll stash to work.
Strip Piecing for Fast Block Creation
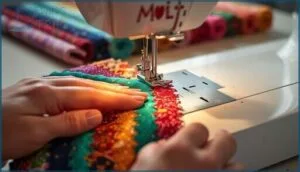
Sewing long strips side by side lets you build quilt blocks in record time, turning jelly roll quilting into both a practical and creative adventure. By maintaining a steady seam allowance, you’ll nail block patterns with accuracy, save fabric, and skip unnecessary steps—bringing essential time savings and smart quality control to every quilt. This quilting technique is patchwork simplified.
Rail Fence and Log Cabin Methods
Once you’ve got those strips pieced, the Rail Fence and Log Cabin quilt patterns let you play with block orientation for striking effects. Pressing seams thoughtfully keeps everything flat and sharp.
Both quilting techniques minimize fabric waste and adapt to beginner quilting projects or modern designs. Adjust your block sizes or layout for homemade quilts suited to any style.
Jelly Roll Race Quilt Technique
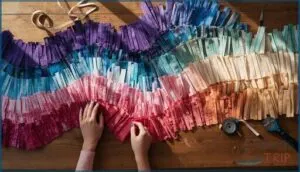
Just like Rail Fence blocks let you shift perspective, the Jelly Roll Race Quilt technique takes speed quilting challenges up a notch. Imagine this: you sew those strips end to end, fold and stitch, watching the quilt grow with every line. To master Race Quilt Variations, remember these keys:
- Mind seam alignment tips.
- Avoid common beginner mistakes.
- Focus on fabric waste reduction.
Quilt-As-You-Go With Jelly Rolls
If speedy strips spark excitement, quiltasyougo projects are your shortcut to both beauty and efficiency gains. Jelly rolls make panel joining and sashing strips simple—each panel quilted on its own, batting choice layered in, and seam direction managed for flat results. Here’s how core elements compare:
| Panel Joining | Batting Choice | Seam Direction |
|---|---|---|
| Sashing Strips | Fusible or Cotton | Alternate |
| Edge-to-edge | Light Basting | Avoid Distortion |
| Stability | Scrim Supported | Match Seams |
| Individual | Per Panel | Press Flat |
| Fast Assembly | Adjustable | Consistent |
Step-by-Step: Sewing a Jelly Roll Quilt
Ready to sew your own jelly roll quilt? Here’s a step-by-step look at how to turn those strips into something special.
Let’s walk through what you’ll do next.
Planning Your Quilt Layout
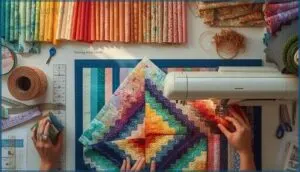
Your quilt design starts before you thread the needle. Lay your jelly roll strips on a design surface—a table, floor, or even a design wall—to visualize your finished quilt.
- Arrange strips by color arrangement, alternating lights and darks for visual balance
- Plan layout dimensions based on strip orientation and desired finished size
- Step back frequently to assess your quilt patterns and make adjustments before cutting
Joining Strips and Assembling Rows
After finalizing your row layout, align your first two strips right sides together. Pin edges carefully to prevent shifting. Sew with a consistent 1/4 inch seam allowance—accuracy here determines how well your blocks fit.
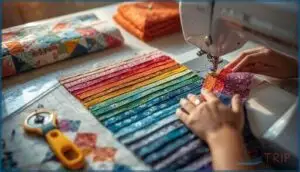
Chain piecing speeds up the process: feed multiple strip pairs through your machine without cutting threads between them, a time-saving quilting technique that reduces waste while maintaining strip alignment for precise patchwork.
Pressing Seams for Flat Blocks
When pressing seams for flat blocks, start by seam setting: press the stitched seam flat first, letting the fibers settle before opening. Decide whether to press seams open or to the side—each has its place depending on your quilting technique.
Grading allowances, using proper pressing tools, and spinning seams at intersections are essential sewing techniques that keep your quilt making crisp and smooth.
Adding Borders and Sashing With Jelly Rolls
When it’s time to frame your project, jelly roll strips shine for both border and sashing techniques. Consider these essentials for success:
- Choose border width to suit your pattern vision
- Join strips with consistent ¼” seam allowances
- Mind fabric utilization—plan your lengths
- Handle bias edges gently to prevent stretching
- Coordinate sashing techniques for cohesive quilt projects
Creative Jelly Roll Quilt Patterns
There’s more than one way to turn a stack of jelly rolls into something special. From time-honored designs to fresh, seasonal favorites, creativity runs wild with these strips.
Take a look at some fun patterns and ideas you can try next.
Modern and Traditional Pattern Ideas
Curious how Modern Aesthetics blend so effortlessly with Traditional Techniques in today’s quilting patterns? You can try geometric, minimalist quilt design with bold blocks from trending sources or reach for time-tested favorites like Rail Fence and Log Cabin.
Pattern Sizes range from crib to queen, while Design Elements like strip piecing and clever block direction give your patchwork projects an unmistakable edge.
Seasonal and Holiday-Themed Jelly Roll Quilts
Looking for a way to weave the spirit of each season into your quilting? Seasonal and holiday-themed jelly roll quilts are your ticket. Holiday Fabric Trends like curated color palettes—think winter blues or Christmas reds—improve even simple patterns.
Collectible jelly rolls timed for festive quilt projects fly off shelves, especially as gift-giving demand rises. Holiday crafting ideas and festive quilt patterns mean every project feels like a celebration.
DIY Gift Ideas Using Jelly Rolls
Jelly rolls turn DIY gift ideas into reality faster than you’d think. Nine strips plus batting create tote bag gifts ready for any occasion, while five strips assemble table runner decor in minutes.
Consider these sewing projects:
- Baby quilt ideas using Rail Fence patterns
- Handmade tote bags selling around $20
- Eight table toppers from one jelly roll
- Home decor items like pillows and coasters
- Over 30 free craft ideas online
Pattern project variety keeps quilt projects exciting.
Top 3 Tools and Patterns for Jelly Roll Quilting
If you want your jelly roll quilting to go smoothly, having the right tools and patterns makes all the difference. The three essentials below give you everything from classic designs to up-to-date equipment that saves time and effort.
Let’s look at what you need to take your projects to the next level.
1. Red and White Quilting Block Patterns
Contrast is the secret weapon in red white quilting. This color combination ranks second among American antique quilts, and for good reason—strong visual impact showcases complex quilt making and patterns beautifully.
You’ll find historical significance meets modern adaptations when you work with jelly rolls for these projects. Block arrangement matters here: alternating solid centers with prints maximizes texture.
Fabric selection includes various shades and prints within your palette, creating depth through strategic color contrast in your quilting techniques.
Best For: Quilters of all skill levels who want to create timeless, high-contrast designs using red and white fabric combinations, especially those interested in traditional American quilting patterns with modern adaptations.
- Strong visual contrast between red and white fabrics makes complex patterns and piecing techniques stand out beautifully, perfect for showcasing your quilting skills.
- Jelly roll precuts (2½-inch strips) simplify the cutting process and reduce fabric waste, making projects faster to start and more efficient overall.
- The classic color palette works with any home decor style and has proven staying power—these quilts look just as good today as antique versions did decades ago.
- Limited to a two-color palette, which might feel restrictive if you prefer working with multiple colors or more varied fabric selections.
- Some quilters report that instructional materials don’t always include enough photos or visual examples to follow complex block patterns easily.
- Requires careful fabric organization and pressing techniques to maintain the intended contrast pattern—color misplacement can disrupt the overall design impact.
2. Mountain Mist Historical Quilts Made New
Mountain Mist Historical Quilts brings mid-century designs into today’s quilting workspace with modern adaptations that honor cultural legacy. This book preserves pattern preservation through detailed quilting instruction, connecting you with historical significance that spans decades.
You’ll discover 14 classic quilts reimagined for contemporary techniques—perfect companions to your jelly roll projects. The quilt pattern eBooks format makes mastering these timeless quilting techniques accessible, whether you’re drawn to heritage projects or fresh interpretations of Mountain Mist Historical Quilts.
Best For: Quilters who love mid-century designs and want to recreate classic Mountain Mist patterns using modern techniques and contemporary fabrics.
- Includes 14 historic quilt designs with step-by-step instructions, detailed illustrations, and templates for select patterns like Tulip Bowl and Cherry Ripe.
- Offers time-saving tips and alternative piecing methods that work well with modern precut fabrics like jelly rolls.
- Connects you to quilting history while providing practical guidance on fabric selection, batting choices, and updated construction techniques.
- Some readers report the font size is too small and the grey ink color makes the text hard to read.
- Focuses on a specific collection of Mountain Mist quilts rather than providing a comprehensive history of the entire pattern line.
- Not every quilt pattern included will appeal to all quilters, so the selection may feel limited depending on personal taste.
3. Olfa Quick Change Rotary Fabric Cutter
Sharp cutting performance begins with the right tool. The Olfa Quick Change Rotary Fabric Cutter features a 45mm tungsten steel blade that slices through eight layers of fabric, making quick work of jelly roll projects.
Its ergonomic design reduces hand fatigue during extended quilting sessions, while safety features like automatic blade guards protect you between cuts.
The quick blade replacement system keeps your quilting techniques flowing smoothly without downtime.
Best For: Quilters and crafters who work on multi-layer fabric projects and want a reliable, comfortable cutter that makes blade changes quick and hassle-free.
- Cuts through up to 8 layers of cotton fabric in one pass, saving time on large quilting projects
- Quick-change blade system lets you swap blades in seconds without tools or fumbling
- Ergonomic handle with finger grooves reduces hand strain during long cutting sessions
- Requires a self-healing cutting mat to protect your work surface and extend blade life
- Blades need periodic replacement, adding to long-term costs
- Not designed for extremely thick or hard materials beyond standard quilting fabrics
Tips for Success With Jelly Roll Quilting
You’ve learned the basics, but success with jelly roll quilting comes down to knowing what to watch for and how to get the most from your materials. Even small adjustments can make a big difference in your finished quilt.
In this section, you’ll find practical advice on fixing common issues, stretching your fabric supply, and connecting with other quilters who share your passion.
Troubleshooting Common Mistakes
Even experienced quilters hit snags with jelly rolls, but you can solve most problems quickly. Tension problems often cause skipped stitches through thick layers—adjust your machine and practice first. Fraying edges? Use starch and lint rollers before sewing. Check strip widths, since they sometimes vary, and use a scant ¼-inch seam for better seam alignment. Always press seams to one side, not open, for stronger quilting.
| Common Issue | Quick Fix | Prevention Tip |
|---|---|---|
| Tension Problems | Adjust settings and test stitch | Practice on scraps first |
| Fraying Edges | Apply starch, use lint roller | Handle strips gently |
| Seam Alignment | Use scant ¼-inch seams | Press with steam to set |
Maximizing Fabric Usage and Reducing Waste
Since jelly rolls already come precut, you can stretch every inch with smart planning. Efficient cutting and fabric repurposing turn scraps into borders, bindings, or smaller projects like coasters. Here’s how to embrace sustainable practices and zero-waste quilting:
- Sew strips before cross-cutting to reduce handling errors
- Save leftover segments for scrappy patchwork pillows
- Plan your layout to minimize trimming waste
- Use scrap utilization for quilt borders
- Organize strips by color for better fabric art decisions
Joining Quilting Communities for Inspiration
Where do quilting ideas grow fastest? In communities where beginner quilters and expert quilters swap tricks. Guild benefits include workshops, show-and-tell nights, and collaborative projects that spark creativity.
Online forums connect you 24/7 for skill sharing when you hit a snag. Event participation—like QuiltCon or local meetups—exposes you to fresh techniques.
The crafting community turns solo stitching into shared joy, pushing your jelly roll work to the next level.
Quilting communities transform solitary work into collective inspiration, elevating every jelly roll project through shared creativity and support
Frequently Asked Questions (FAQs)
How do you store leftover jelly roll strips?
You can store leftover strips in clear 12×12-inch plastic bins or specialized strip storage boxes.
Organization methods include grouping by color, fabric line, or size.
Rolling strips before storage keeps them neat and accessible.
Can jelly rolls be mixed with yardage fabric?
You can absolutely combine jelly rolls with yardage fabric—it’s like adding complementary colors to a painting.
Fabric compatibility, design aesthetics, and practical techniques ensure your quilting ideas blend beautifully, offering cost efficiency while expanding creative possibilities in modern sewing projects.
What batting works best for jelly roll quilts?
Cotton batting works best for traditional quilts—it’s breathable and shrinks slightly for that crinkly look.
Polyester blends cost less and stay puffier, while bamboo batting offers hypoallergenic softness perfect for sensitive skin.
How do you bind a jelly roll quilt?
Binding transforms raw edges into a polished finish.
Start by measuring your quilt’s perimeter, then join jelly roll strips at a 45-degree angle. Fold lengthwise, attach with a 1/4-inch seam allowance, and hand-stitch for durability.
Are jelly rolls suitable for curved piecing techniques?
Jelly rolls can work for curved piecing, but their straight grain and pinked edges create fabric distortion issues.
You’ll need careful seam allowance control, bias strip usage, and specialized curve cutting methods to manage these challenges effectively.
Conclusion
What once took days of cutting and color-matching now happens in an afternoon. That’s the shift jelly rolls bring to your craft room.
You’ve learned the essential quilting techniques using jelly rolls—from strip piecing to the addictive Jelly Roll Race.
Now grab a bundle, fire up your machine, and watch those coordinated strips transform into something finished and beautiful. Your next quilt top doesn’t need to wait for someday. It can happen this weekend.
- https://bryanhousequilts.com/2025/06/how-to-make-jelly-roll-strips/
- https://www.quiltingboard.com/main-f1/how-many-jelly-rolls-would-take-make-quilt-t261726.html
- https://www.patchworkposse.com/how-many-jelly-rolls-to-make-a-quilt-lap-twin-queen-king/
- https://sarahmaker.com/jelly-roll-quilt-patterns/
- https://nancysnotions.com/incorporating-strip-piecing-into-modern-quilting-designs/

