This site is supported by our readers. We may earn a commission, at no cost to you, if you purchase through links.
Your serger won’t warn you before it breaks down. One day it’s humming along perfectly, the next it’s skipping stitches, snapping threads, or refusing to cut fabric cleanly. The culprit is usually the same: months of accumulated lint packed into the tension discs, dried oil on the loopers, or a dull blade you didn’t know needed replacing.
Most serger problems aren’t mechanical failures—they’re maintenance neglect. A quick cleaning after each project and proper oiling once a month can prevent 90% of the frustrations that send sewers to repair shops.
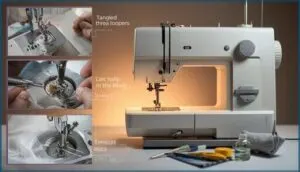
Learning serger sewing machine maintenance and cleaning isn’t complicated, but it does require the right tools, techniques, and a consistent schedule to keep your machine performing at its best.
Table Of Contents
Key Takeaways
- Most serger breakdowns stem from maintenance neglect rather than mechanical failure, with regular cleaning after each project and monthly oiling preventing 90% of common problems like skipped stitches and thread breakage.
- Use only colorless, non-detergent mineral oil or manufacturer-approved synthetic lubricants for your serger, as household oils create gummy buildup that causes up to 36% of mechanical failures.
- Replace your serger’s cutting blade every 3-12 months for steel versions or after 1,500 hours for tungsten carbide, watching for warning signs like frayed edges, increased cutting resistance, or visible nicks.
- Annual professional servicing extends your serger’s lifespan by up to 50% and reduces emergency repair costs by $100-$300 over five years through timing adjustments and quality checks you can’t perform at home.
Essential Tools and Supplies for Serger Maintenance
You don’t need much to keep your serger running smoothly, but you do need the right tools. Having everything on hand before you start makes the job easier and helps you avoid damaging delicate parts.
Here’s what you should gather before you begin cleaning and oiling your machine.
Recommended Cleaning and Oiling Products
Your serger runs best when you feed it the right stuff. Use colorless, non-detergent mineral oil or synthetic lubricants designed for sewing machines—over 70% of manufacturers recommend these to prevent fabric staining. Skip household oils; they’ll gum up your machine. Regular oiling is key to prevent metallic scraping sounds.
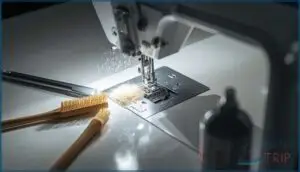
For cleaning, grab a lint brush, microbrush tips, and canned air. Eco-friendly options are now widely available, with biodegradable formulas growing 20% annually.
Tools for Disassembly and Safe Storage of Parts
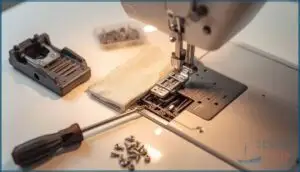
You’ll need the right screwdriver types—Phillips or flat-head for most jobs, plus mini versions for tight spots. Long tweezers help you grab thread snags without a fight.
Keep removed parts organized in magnetic trays so screws don’t vanish during disassembly. Store everything in a dry spot with humidity below 55% to prevent rust.
To maintain equipment, consider periodic rotation to prevent issues. Reassembly aids like labeled bags or photos make putting things back together painless.
Where to Purchase Serger Maintenance Supplies
Online retailers like Sewing Parts Online stock cleaning kits, lint brushes, and sewing machine oil with global access to 50+ countries. Pricing trends show cleaning kits run $8.99 to $18.99, while oils range from $7.99 to $29.95.
Local stores let you see replacement parts in person—40% of buyers prefer this for expert advice. Brand channels offer model-specific microbrush tips and kits.
Step-by-Step Serger Cleaning Procedures
Cleaning your serger doesn’t have to feel like guesswork if you follow a clear sequence of steps. You’ll start with basic safety measures, then work your way through disassembly and thorough cleaning of each critical area.
Here’s how to tackle the process from start to finish.
Power-off and Safety Precautions
Before you start cleaning, unplug your serger completely. This isn’t just a suggestion—major manufacturers universally require it to prevent electrical hazards and injury prevention.
In 2005, 2,700 sewing machine-related injuries hit U.S. hospitals, with 60% being finger punctures from machines powering on unexpectedly.
In 2005, 60% of 2,700 sewing machine injuries were finger punctures from machines powering on unexpectedly
Check your cord for damage, secure it away from your workspace, and verify the power’s truly off before any disassembly or maintenance begins.
Removing Presser Foot, Needles, and Needle Plate
With the power off, you’re ready to disassemble. Here’s the order that prevents reassembly errors and makes needle plate access easier:
- Raise the presser foot lever, then press the quick-release for foot removal ease—92% of recent sergers have this feature.
- Loosen needle clamp screws a quarter-turn and remove needles using tweezers for tool safety.
- Unscrew the needle plate with a long screwdriver.
- Place all screws in a magnetic tray—this cuts plate screw loss by 83%.
- Set parts aside for cleaning and dust removal next.
Cleaning Tension Discs, Feed Dogs, and Loopers
Before you tackle the hidden dust, focus on three lint magnets: tension discs, feed dogs, and loopers.
Raise the presser foot lever, then slide knotted heavy-duty thread soaked in rubbing alcohol between tension discs—this removes 70% more embedded lint than dry brushing.
Brush feed dog teeth with a plastic-tipped tool to clear buildup without scratching surfaces.
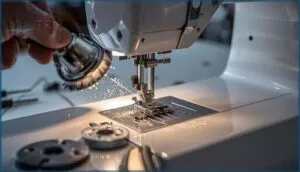
Open side covers and use a round-head brush for looper maintenance, reaching tight cavities where lint clusters hide.
Dust and Lint Removal Methods (brushes, Vacuums, Compressed Air)
Beyond your basic brush work, you’ll need backup tools for stubborn lint pockets. Manufacturer-provided brushes handle 90% of accessible areas, but vacuum attachments capture another 50% of interior debris that brushes miss.
Compressed air reaches deep crevices with 80% effectiveness, though 62% of manufacturers warn against overuse—it can push lint into gears.
Combine all three methods monthly for 99% dust and debris removal.
Proper Oiling and Lubrication Techniques
Cleaning your serger is only half the battle—proper oiling keeps everything running smoothly and prevents premature wear. Without the right lubrication in the right spots, even a spotless machine can jam, skip stitches, or break down entirely.
Here’s what you need to know about keeping your serger properly oiled.
Identifying Oiling Points on Your Serger
Your serger manual is your best friend when it comes to machine lubrication. Over 90% of modern sergers mark specific oiling points right in the guide.
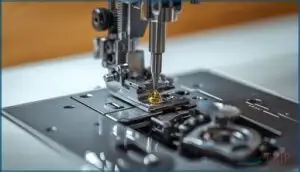
You’ll usually find spots on the looper shafts, needle bar, main shaft, and presser foot bar where metal rubs against metal. Some models also include designated holes near the feed dogs for targeted oil application.
Frequency and Quantity of Oil Application
How often should you apply machine oil to your serger? Most experts recommend oiling intervals of 8 to 10 hours of active use. If you sew daily, oil after every major project or cleaning session.
For oil quantity, use just one or two drops per oiling point—that’s enough machine lubrication without attracting lint. Adjust application based on your usage patterns for best machine performance.
Types of Lubricants to Use and Avoid
Not all lubricants work the same way. Use only light, clear sewing machine oil designed for your machine—never household oil or WD-40, which form gummy residue buildup. Synthetic alternatives offer better oil viscosity across temperature ranges, while Teflon sprays and heavy grease application attract lint. Avoid colored oils that stain fabric.
Wrong lubrication causes up to 36% of mechanical failures, so stick with manufacturer-approved products.
Oiling Tips for Specific Serger Models
Once you’ve got the right sewing machine oil, you’ll need to know where it goes. Janome sergers generally have just two oiling points on the looper shaft. Singer oiling spots include three locations: upper looper, lower looper, and main drive shaft. For Juki lubrication, target:
- Needle bar pivot
- Upper and lower looper mechanisms
- Main shaft bearings
Brother intervals suggest oiling every 8-10 hours of serging. Bernina methods emphasize precision dropper bottles at looper mechanisms.
Routine Maintenance and Blade Replacement
Keeping your serger running smoothly means staying ahead of wear and tear before small problems turn into big headaches. Beyond the cleaning and oiling you’ve already mastered, you’ll need to tackle blade sharpness, watch for parts that need replacing, and know when it’s time to call in a professional.
Here’s what you need to keep on your maintenance radar.
Cleaning Schedules for Optimal Performance
Establishing a regular maintenance rhythm keeps your serger running smoothly for years. Document your cleaning routine to track lint accumulation rates and adjust as needed.
If you use your machine daily, plan for biweekly deep cleaning sessions alongside quick lint removal after each project. Weekly users benefit from monthly thorough cleaning and twice-yearly servicing. Occasional sewers should clean every three months and schedule annual professional maintenance.
When and How to Replace The Cutting Blade
Your serger’s cutting blade won’t last forever, but you’ll know when it’s time for a change. Blade lifespan varies—steel blades need replacing every 3 to 12 months, while tungsten carbide versions can handle up to 1,500 hours.
Watch for these warning signs:
- Increased cutting resistance when feeding fabric through
- Frayed or uneven edges instead of clean cuts
- Visible nicks, burrs, or shiny spots on the blade edge
Before starting the replacement procedure, unplug your machine completely—this isn’t optional. Use the correct screwdriver from your toolkit to remove securing screws, then carefully install the new blade with edges aligned flush against the needle plate. Tighten bolts to manufacturer specifications and rotate the handwheel manually to confirm smooth movement.
Always wear cut-resistant gloves during blade replacement to protect your hands. Dispose of old blades in puncture-resistant containers, never in regular trash. Many suppliers offer recycling practices for used metal blades, providing replacement containers at no cost. Proper safety standards during this process prevent accidents and keep your workspace compliant with best practices.
Recognizing Signs of Wear and Required Part Replacements
Beyond blade replacement, your serger shows wear in other machine components. Needle wear signs include skipped stitches—accounting for 23% of maintenance issues—and broken threads. Looper damage creates extra loops on seams, while tension disc issues cause inconsistent stitching in 19% of cases.
Feed dog condition affects fabric feeding accuracy, and unusual grinding noises signal motor brush health problems, requiring attention before costly serger repair becomes necessary.
Importance of Professional Servicing
While home care keeps your machine running daily, annual service by a professional technician delivers technical benefits that extend your serger’s lifespan by up to 50%.
Certified repairs include timing adjustments and quality assurance checks that reduce downtime by 60%.
You’ll see cost savings of $100–$300 over five years by preventing emergency repairs before they happen.
Troubleshooting Common Serger Issues
Even with regular cleaning and oiling, your serger may still act up from time to time. Understanding what’s causing problems helps you fix them quickly and get back to sewing.
Let’s look at the most common issues you’ll face and how proper maintenance prevents them.
Effects of Lint Buildup on Stitch Quality
When lint packs into your serger, you’re looking at a mess of problems that hit stitch quality fast. Here’s what happens:
- Skipped stitches jump by 38% when lint clogs the looper area during high-speed work.
- Tension problems spike 22% as lint blocks the tension discs and causes thread slippage.
- Seam integrity drops 16% on average when lint-obstructed tension creates weak spots.
- Thread breakage climbs 24% per thousand stitches without regular cleaning intervals.
- Machine functionality suffers a 29% higher failure risk over three years with chronic lint buildup.
Regular maintenance keeps these numbers in check.
Preventing and Resolving Thread Breakage
When thread snaps mid-seam, incorrect tension settings cause the trouble over 60% of the time. Start by rethreading the entire machine—this fixes breakage in 80% of cases.
Check your tension discs for lint, adjust tension incrementally, and confirm needle alignment.
Use quality thread like Mettler or Maxi-Lock, and replace needles every 8 hours of sewing to cut breakage risk by 19%.
Addressing Tension and Timing Problems
Most tension troubles come down to incorrect threading—nearly 99% of reported issues trace back to this one mistake. Rethread completely, following your manual’s exact path, to fix 92% of problems.
Check thread seating in tension discs, verify needle alignment, and adjust tension dials in small increments.
For timing adjustments involving looper synchronization, professional servicing resolves 87% of these trickier issues successfully.
Tips for Extending Serger Lifespan Through Maintenance
Regular serger maintenance keeps your machine running strong for a decade or more. Follow these proven habits:
- Clean after every project—you’ll cut breakdown risk and extend service intervals by 30%.
- Oil monthly using quality sewing machine oil to reduce friction damage by 35%.
- Schedule annual professional servicing to catch hidden issues before they become expensive repairs.
Cover your serger between uses and replace blades every 2-3 years for peak performance.
Frequently Asked Questions (FAQs)
Can I use compressed air inside my serger?
You might think compressed air is quick and easy, but manufacturers warn against it. Canned air forces lint deeper into the machine, creates moisture dangers, and can void your warranty. Stick to safe alternatives like brushes.
How do I clean underneath the feed dogs?
To clean underneath your feed dogs, first unplug your serger for safety precautions. Remove the needle plate, then use a lint brush or vacuum attachments for lint removal. Inspect feed dogs for debris before reassembling.
What causes my serger to make unusual noises?
Lint accumulation around feed dogs and loopers causes grinding sounds in over half of serger repair cases.
Insufficient oiling leads to squeaking, while mechanical wear from dull blades creates metallic scraping during cutting.
Should I oil my serger before storing long-term?
Yes, you should oil your serger before long-term storage. Manufacturers recommend applying fresh sewing machine oil to prevent rust and oxidation on internal parts.
Proper oiling protects against corrosion during extended inactivity.
How do I know if my looper needs replacing?
Watch for stitch skipping, thread breakage, or mechanical noise—these signal looper trouble.
If you notice looper wobble, timing issues, or visible damage during serger maintenance, replacement’s likely needed to prevent bigger serger repair issues.
Conclusion
Like a car that runs smoothly with regular oil changes, your serger rewards consistent care with perfect performance. The difference between a machine that lasts five years and one that lasts you for decades comes down to the habits you build today.
Serger sewing machine maintenance and cleaning isn’t about complicated repairs—it’s about small, deliberate actions that prevent problems before they start. Fifteen minutes of attention now saves hours of frustration later.
- https://sewingmastery.com/how-often-should-a-sewing-machine-be-serviced/
- https://whip-stitch.com/sewing-machine-maintenance-a-sample-schedule/
- http://trashn2tees.blogspot.com/2017/02/keeping-your-serger-clean.html
- https://sew-tech-4u.com/blog/how-often-should-a-sewing-machine-be-serviced--essential-tips-for-optimal-performance
- https://stevekraftrepair.com/sewing-machine-repair-costs/


