This site is supported by our readers. We may earn a commission, at no cost to you, if you purchase through links.
Pull a well-made skirt inside out and you won’t find a single visible stitch on the hem. That’s not luck, and it’s not a factory secret either. It’s a technique tailors have relied on for generations, done right at your own sewing table.
The trick lies in catching only a few threads of fabric, never the full weave. Skip that detail and your hem puckers, or worse, shows every stitch from the outside.
Grab your needle and thread, or dust off that machine foot you never use. You’re about to learn how to sew a blind hem stitch that looks like it came from a tailor’s shop, whether you work by hand or machine.
Table Of Contents
Key Takeaways
- The secret to an invisible hem is catching just a few threads of fabric, never the full weave, whether you’re sewing by hand or machine.
- Good prep work makes or breaks your hem, so mark, trim, press, and test on scraps before you ever stitch the real thing.
- Machine hemming wins on speed and works best on stable fabrics, while hand stitching gives you more control for delicate or curved edges.
- Loose, even tension is what keeps your hem from puckering, so let the fabric breathe between stitches instead of pulling thread tight.
What is a Blind Hem Stitch?
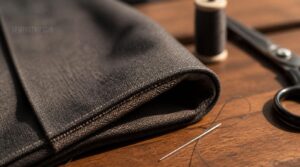
A blind hem stitch is that clean, professional finish you see on ready-to-wear pants and skirts, with no visible stitching on the outside. Before you pick up a needle or sit down at your machine, it helps to know exactly what you’re aiming for and why it works. Here’s what you need to understand first.
This step-by-step blind hem stitch guide for beginners walks you through the folds, tools, and stitch settings that make the technique so seamless.
Invisible Hem Finish
Picture a hem with zero visible stitches on the right side—that’s the whole point. An invisible hem finish catches only tiny threads from the outer fabric, leaving the surface clean. This method relies on the blind stitch technique for a smooth look.
You’ll get there by:
- Matching thread color exactly
- Using a blind hem presser foot
- Applying the invisible stitch technique
- Preserving fabric drape
Hand sewing or machine sewing both work.
Best Garment Uses
So where does this technique really shine? Skirt hemming and pants bottoms top the list, especially when the fabric has real drape to protect.
A dress hem on chiffon or crepe gets that smooth, invisible finish too. Trousers benefit most, since a blind hem stitch for pants keeps each pant leg clean without stiff, visible thread.
Ideal fabrics stay lightweight to medium weight for that professional hem finish.
Blind Hem Versus Slip Stitch
So how does a blind hem stitch differ from a slip stitch? Both hide stitches, but a slip stitch works purely by hand, passing thread through the fold’s back line. Fabric type suitability matters: slip stitches suit delicate curves; blind hem stitches suit straight hems.
- Thread color matching stays critical either way
- Stitch length control differs by method
- Hand technique advantages shine on tricky fabric
Machine Versus Hand Stitching
Now, machine versus hand: which wins? Speed comparison favors the machine hands down, while hand sewing technique wins on delicate fabric.
| Method | Best For |
|---|---|
| Machine | Speed, uniformity |
| Hand | Silk, lace, control |
| Machine | Stable wovens |
| Hand | Curved or slippery hems |
Stitch uniformity, durability, and aesthetic outcome all depend on your fabric and patience.
Taking time to master these fundamentals pays off, and this beginner’s guide to hand sewing techniques breaks down the essential skills every stitcher should build first.
Prepare Fabric for Blind Hemming
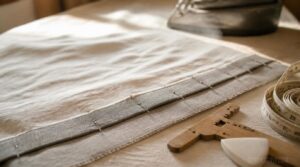
A great blind hem starts long before you touch the sewing machine. Good prep work is what makes those stitches disappear later. Here’s how to get your fabric ready, one step at a time.
Mark The Hemline
Good hems start with good marks. Grab your tailor chalk or a watersoluble pencil, stand still, and pin the fold line at your true hem height. Mark two guide lines equidistant above and below, keeping them level with the floor.
Check for symmetry at the side seams before you press or trim anything.
Trim Excess Fabric
Before you fold anything, take those sharp scissors and clear away the excess. Trim close to your marked line, angling the blade slightly rather than cutting straight across, this keeps the raw edge from fraying against the grain. On scrap fabric, test your bulk reduction method first. If you’re unsure about blade angle or grain direction, this step-by-step guide to cutting fabric straight and even walks through proper shear technique before you commit to the cut.
- Check fabric grain alignment
- Confirm seam allowance cut depth
- Keep nail scissors handy for tight corners
Press The Raw Edge
Grab your hot iron and work from the wrong side, that’s your secret weapon against shine. Use short steam burst technique bursts, not a steady stream, so you don’t over-wet the raw edge.
A pressing cloth protects delicate fabrics, while a tailors ham works well on curved seam allowance areas. Test heat control methods on scraps first.
Fold and Press Again
This second fold is where a sloppy hem gets rescued or a good one gets ruined. Fold Crease Setting happens now: turn the pressed edge under again, then use your Steam Press Technique to lock it flat.
Run an Edge Alignment Guide along the fold so it stays parallel to the hemline. A tailor’s clapper presses the crease bone-dry and crisp.
Test on Fabric Scraps
Never stitch blind on your good fabric first. Cut small 2×2 scraps and run Weight Matching Samples against your final piece. Test Scrap Fold Retention, a Thread Visibility Test, and a Slippery Fiber Check on your sewing machine or by hand sewing. A quick Wash Durability Test catches surprises early. Practice here—not on the actual hem.
Sew a Machine Blind Hem
Once your hem is pressed and pinned, it’s time to let the machine do the heavy lifting. This method is fast, sturdy, and looks just as clean as hand stitching once you get the hang of it. Here’s exactly how to set up your machine and stitch it right.
Attach Blind Hem Foot
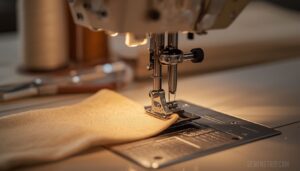
Think of this little foot as your invisibility cloak’s tailor. Raise the presser foot, line it up with your machine’s shank, and snap it into place. Check for foot compatibility with your model first. Most feet fit universal shanks fine. Test on a scrap, confirming the guide sits snug against your fold with no wobble before stitching for real.
Select Blind Hem Stitch
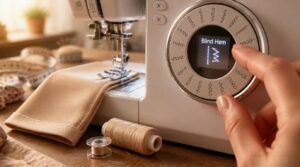
With the foot snapped on, check your machine’s stitch dial or screen for the blind hem stitch symbol, usually a long dash paired with tiny zigzag peaks. Select it. Some machines label it "BH1" or "BH2," so check your manual if you’re unsure.
Match your bobbin thread to the fabric, too. Invisible only works when color matching goes both ways.
Set Stitch Width
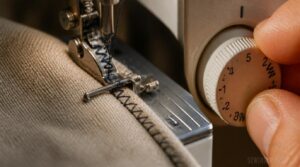
Now dial in your stitch width setting. Keep it narrow, between 2-3mm, so the zigzag only nips the fold instead of chewing through it.
- Lightweight fabrics need smaller widths
- Heavier fabrics tolerate wider settings
- Stretch fabrics need width tweaked for elasticity
Width and stitch length work together here. Test scraps first with your blind hem presser foot before committing.
Position The Folded Edge
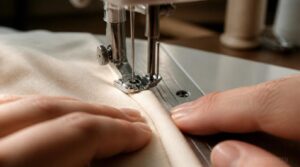
With your width set, it’s time to line up that fold. Align the folded edge just left of the needle, feeding it under the vertical plate.
Position fold under foot so only a sliver catches. Keep the fold flat, no rippling. Check fold alignment every few inches, since a wandering fold means visible stitches later.
Stitch Slowly and Evenly
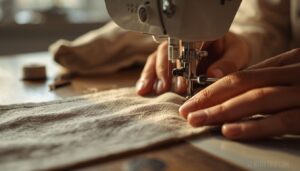
Now comes the part where patience pays off. Stitch slowly and evenly, letting the sewing machine’s feed dogs pull fabric at a steady travel speed. Rushing causes puckering.
Keep steady hand pressure guiding the fold, checking thread tension adjustment every few inches. A slow, even rhythm beats speed every time, my grandmother always said, and she was right.
A slow, even rhythm beats speed every time, my grandmother always said, and she was right
Sew a Hand Blind Hem
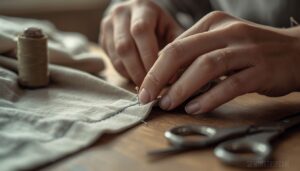
No sewing machine? No problem. A hand-stitched blind hem takes more patience, but it gives you total control over every stitch. Grab a needle and thread, and let’s walk through it step by step.
Thread a Fine Needle
A tiny eye can turn threading into a wrestling match, so set yourself up right. Snip the thread at an angle, moisten the tip, and use a needle threader for stubborn fine threads.
Match needle strength to fabric weight, keep the eye aligned to the light, and pull thread through slowly to avoid fraying.
Hide The Starting Knot
Bury that knot where nobody looks: 6 to 12 mm inside the seam allowance, tucked into the fabric folding method’s inner layer. Tie it wrong-side, backstitch tiny, and press flat with a needle-nose tool.
| Step | Action | Purpose |
|---|---|---|
| 1 | Knot inside fold | Concealment |
| 2 | Backstitch light | Secures without bulk |
| 3 | Press flat | Invisible finish |
Trim close—no bulges.
Catch Tiny Fabric Threads
Once your knot’s buried, work a fine size 7-9 needle just under the folded edge, grabbing a whisper of fabric fiber—no more than two or three threads. Catch only the fibers, never the full weave. Keep spacing even, tension light, and let the fabric folding method hide your work completely. This is where matching thread earns its keep.
Keep Stitches Loose
Too tight, and your hem will pucker the second you sit down. Keep tension loose by letting the fabric breathe between stitches, never pulling thread taut. A finer needle helps here, reducing drag on the weave. Pause every few inches, flip the fabric over, and check that stitches lie flat, not cinched.
Secure The Final Stitch
How you end matters as much as how you started.
Skip the traditional knot and try a through-the-loop finish: slip the needle through your last stitch, then through the folded tail, and draw it snug. This locks threads flat with no bulk.
Give the seam a gentle tug to confirm no slippage, then trim tails close.
Finish and Inspect The Hem

Your stitches are in, but the job isn’t done yet. A few final checks separate an amateur hem from one that looks tailor-made. Here’s how to press, inspect, and troubleshoot your way to a perfect finish.
Press The Finished Hem
Your hem isn’t done until the iron says so. Press the finished hem on both sides, using moderate heat to avoid scorching. This flattens the fold, sets the stitches, and smooths puckers along the edge.
Good pressing technique gives you an even drape and hides the hemline’s edge—crisp, clean, and ready for its final seam finishing check.
Check Exterior Visibility
Once pressed, flip the garment right side out and check the exterior in good light. A well-sewn blind hem stitch stays nearly invisible.
Matching thread on plain fabric hides best; darker color thread blends nearly as well if you couldn’t find an exact match.
Like a car’s exterior visibility depends on window placement and pillar design working together.
Fix Missed Stitches
Even careful stitching leaves gaps sometimes. Check your needle tension adjustment first, then inspect the bobbin winding.
Common culprits:
- Dull or bent needle
- Wrong thread-fabric pairing
- Uneven bobbin tension
- Fabric feeding problems
- Skipped loops on dense weaves
Rethread completely, test on scraps, then hand-stitch any gaps to restore that invisible finish before laundering.
Remove Marking Lines
Once every stitch checks out, those chalk lines still need to go. Water-based removal works best—just spritz distilled water and press.
| Marking Type | Removal Method | Test First? |
|---|---|---|
| Chalk | Water-based | Yes |
| Pen | Spot check | Yes |
| Pencil | Wash cycle | Yes |
Skip harsh chemical agents; a final surface inspection confirms your fabric’s clean.
Troubleshoot Bulky Fabrics
Denim and coats fight back at the fold. When your blind hem presser foot skips, try these fixes:
- Switch to a walking foot for even feed dog grip
- Balance pressure and grade seams to cut bulk
- Widen your blind hem stitch width slightly
Clip corners, slow down, and press each layer flat before stitching thick fabric sections.
Frequently Asked Questions (FAQs)
Can a regular sewing machine do a blind stitch?
Yes, most machines handle this job fine. You’ll need a blind hem presser foot and the right stitch pattern (narrow zigzag or dedicated blind hem stitch), plus correct thread tension and fold alignment for invisible results.
What is the best stitch length for a blind hem?
There’s no single magic number here. Set your stitch length between 2 and 3, but let fabric weight guide the final call: lighter cloth wants shorter stitches, heavier fabric tolerates slightly longer ones without puckering.
How do I secure the end of a blind hem?
Lock it with 4 to 6 tiny backstitches hidden in the hem allowance, matching your thread color for stitch concealment. Machines often have a securing function for this. Tug gently to test, then trim close and press.
What is the difference between a blind hem and a slip stitch?
A blind hem uses machine stitching or tight hand stitches for near-total stitch invisibility, while a slip stitch is always hand-sewn, catching only thin threads for flexible, slightly softer invisible stitching with more give.
How to make a blind hem on a sewing machine?
Attach a blind hem presser foot, select the blind hem stitch, and set stitch length and width to 2- Align the fabric fold under the foot’s guide, balance thread tension, then stitch slowly with matching thread.
How to use blind hem stitches on a sewing machine?
Set your blind hem presser foot, dial in the blind hem stitch setting, and check needle position control. Adjust thread tension, stitch length, and fold guidance with matching thread, then stitch slowly along the fabric fold.
What is a blind hem stitch?
Think of it as a hidden hem technique: a folded edge and tiny zigzag bites catch only a few threads, so with matching thread, the stitch pattern stays nearly invisible while still giving your hem real durability.
What hem stitch do you use on a sewing machine?
Look for the blind hem stitch setting on your machine’s stitch menu, paired with a blind hem foot, matching thread, narrow width, and slight stitch length adjustment for your fabric’s weight.
How to do a blind hem stitch?
Fold precisely, match thread color to fabric, then guide the fold under your blind hem foot. Sew five straight stitches, one shallow catch stitch, adjusting tension so it hides on the right side, then press flat.
What is the best thread for blind stitch?
Reach for nylon blind stitch thread or fine monofilament, 60-120 denier, for near invisibility. Match your thread color to the fabric, or go clear. Cotton-wrapped polyester suits medium woven fabrics needing extra body.
Conclusion
Hemming and hawing over which method to choose? Don’t. Once you sew a blind hem stitch, the choice becomes instinct, not indecision.
Hand stitching rewards patience; the machine rewards speed. Both deliver the same quiet magic: stitches that vanish.
Your grandmother’s needle and your machine’s blind hem foot are just two paths to one perfect truth. Trust your fingers, check your tension, and let that hemline hang like it was never touched at all.