This site is supported by our readers. We may earn a commission, at no cost to you, if you purchase through links.
Try a zigzag stitch for seaming, as it stretches and won’t snap under pressure—think of it as yoga pants for stitches. Keep your tension low to avoid any unsightly puckering; it’s all about a smooth finish here!
For hems, a twin needle can give your dress a professional look without the hassle. Remember, practice makes perfect, so grab some scrap fabric and start testing these tips—you’ll be sewing like a pro in no time!
Table Of Contents
Key Takeaways
- Choose the Right Needle and Stitch: Start your knitting adventure by picking a ballpoint or stretch needle, like finding the right dance shoes for your moves. Use a zigzag stitch for that extra stretchiness, ensuring your project doesn’t fall apart like a loose sweater thread.
- Play with Tension Settings: Consider your sewing machine’s tension settings as the secret sauce in your homemade recipe. Adjust them to avoid puckering, giving your dress the professional finish you’ve always craved. Your stitches should hug the fabric without leaving scars.
- Don’t Skimp on Pins and Feet: Equip yourself with ballpoint pins and a walking foot. Think of them as your trusty sidekicks in a fabric adventure, preventing fabric from stretching out like over-chewed gum and keeping everything aligned as you sew.
- Perfect the Hem with a Twin Needle: Adding a twin needle for hems is like putting the cherry on top of your sewing sundae. It gives your dress that polished, store-bought look. Just remember, practice makes perfect—so don’t be shy with your scrap fabric!
Choosing the Right Needle
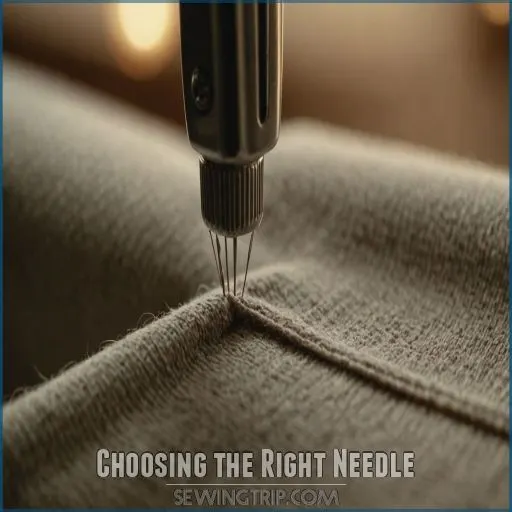
When sewing a knit dress without a serger, choosing the right needle is really important to getting professional results.
Use a ballpoint needle for most knit fabrics,
but if you’re working with something stretchy like spandex,
consider a stretch needle to prevent your project from becoming a tangled mess!
Ballpoint Needles for Knit Fabrics
For sewing knits, ballpoint needles are your secret weapon! They’re perfect for knit fabrics, offering:
- Various sizes
- Diverse brands
- Reduced skipped stitches
Happy sewing!
Stretch Needles for Knits With Spandex or Lycra
Stretch needles are a must for knits with spandex or Lycra. They glide through the fabric, preventing skipped stitches and holes.
Experiment to find the perfect needle size for your fabric.
| Fabric Weight | Lycra Content | Needle Size | Stitch Length |
|---|---|---|---|
| Light | 5-10% | 70/10 | 2.5-3.0 |
| Medium | 10-15% | 80/12 | 2.5-3.5 |
| Heavy | 15-20% | 90/14 | 3.0-4.0 |
Adjust sewing tension as needed for a smooth, stretchy finish.
Twin Needles for Topstitching and Hemming
Using twin needles for topstitching and hemming adds a professional touch to your knits. Here’s the gist:
- Twin needle types vary.
- Thread choice matters.
- Adjust stitch length.
Needle Size and Type for Different Knit Fabrics
Selecting needle types for different knit fabrics is like choosing shoes for dance: you need the right fit. Consider fabric weight and project type with this handy table:
| Fabric Type | Needle Size | Stitch Type | Recommended Needle | Project Example |
|---|---|---|---|---|
| Lightweight Knits | 70/10 | Zig Zag Stitch | Stretch Needle | T-shirts |
| Medium Knits | 80/12 | Faux Overlock Stitch | Ballpoint Needle | Dresses |
| Heavy Knits | 90/14 | Reinforced Straight | Universal Needle | Coats |
| Stretchy Knits | 75/11 | Zig Zag Stitch | Stretch Needle | Leggings |
| All Knit Types | Varies | Referenced Stitches | Twin/Universal Needle | Hems/Topstitching |
Trust this guide, tackle your knit projects confidently—smooth sailing ahead!
Adjusting Tension for Knit Fabrics
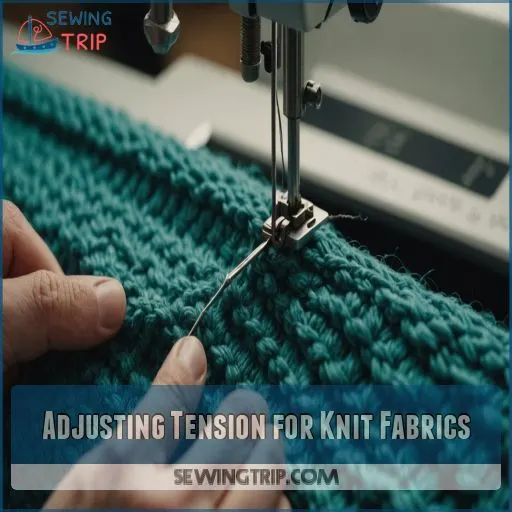
When sewing a knit dress without a serger, adjusting your tension can make the difference between a professional-looking project and a puckered mess.
Don’t let your fabrics intimidate you; lower that tension setting and watch as your knit dress takes shape beautifully.
Reducing Tension to Prevent Puckering
When sewing knits, lower your tension to prevent puckering. This allows the fabric’s natural stretch to shine through for a smooth, professional finish every time.
- Experiment with tension settings of 1-2
- Adjust based on knit fabric weight and desired stitch
- Avoid over-tensioning, which can distort the fabric
- Loosen bobbin tension to prevent tunneling
- Test on scrap before sewing your project
Experimenting With Different Tension Settings
As you reduce tension to prevent puckering, try different settings for best results.
Test on scraps, adjust stitch length, needle size, and watch how your fabric dances smoothly without a hitch.
Adjusting Tension Based on Knit Fabric Type
Knit fabrics each have their unique personalities! Try adjusting tension and stitch length based on the fabric’s weight and stretch. Heavier knits love a looser tension; lighter ones need finesse.
Common Tension Settings for Knit Fabrics
Finding the tension sweet spot is like striking gold! Typically, setting tension at 1-2 works wonders. Adjust based on fabric weight, stitch length, needle size, and desire for puckering prevention.
Seaming Knit Fabrics
Sewing knit fabrics without a serger may seem tricky, but with the right techniques, you can achieve professional-looking results on your regular sewing machine.
From using a faux overlock stitch for medium to heavy weight knits to reinforcing seams with a straight stitch for thicker fabrics, this guide will walk you through the steps to seam your knit dress like a pro.
Faux Overlock Stitch for Medium to Heavy Weight Knits
Reducing tension sets the stage for using a faux overlock stitch on your medium to heavy weight knits. Adjust stitch length to 2.5 and width to 5 for stretchy magic!
Reinforced Straight Stitch for Thicker Knits
After exploring faux overlock stitches, consider a reinforced straight stitch for thicker knits. Use appropriate needle size and fabric weight for a sturdy seam that complements your project’s unique characteristics.
Backstitching to Secure Seams
When you’re sewing those lovely knit dresses, remember three key steps to secure seams:
- Start with backstitching techniques.
- Adjust stitch length for strength.
- Mind tension control.
Trimming Seam Allowance for a Neat Finish
Trim seam allowances close to stitching for a professional look – no need to bulk up your seams.
Grab sharp scissors or a rotary cutter to get that clean, refined finish.
Handling Knit Fabrics While Sewing
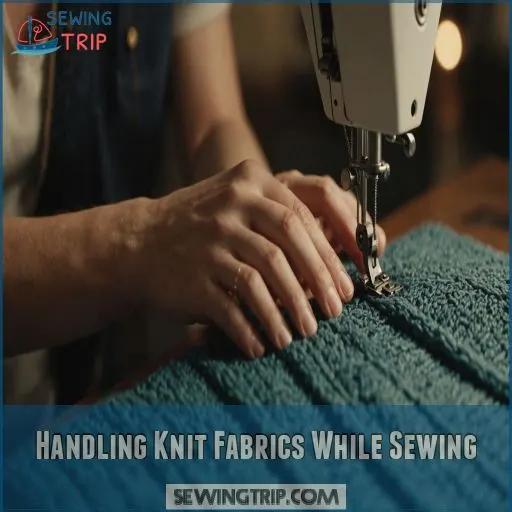
When sewing a knit dress without a serger, keeping everything under control can feel like a wrestling match with a stubborn sock.
Ballpoint pins are essential to avoid puncturing holes in the fabric.
Support the fabric’s weight like a true sewing hero to prevent stretching.
Let steam be your secret weapon to ease any unintended stretches.
Using Ballpoint Pins to Avoid Damaging Fabric
Get yourself ballpoint pins! They’re essential to prevent holes, keeping pins spaced evenly and safely. Elevate your knit-sewing game!
Supporting the Weight of the Project
Balance the project weight to avoid a tug-of-war with your machine. Use sewing aids and maintain ergonomic posture for a smoother experience.
Keeping the Fabric Flat and Aligned
Keep that knit fabric flat on your sewing table, using an extension if needed. Pause and realign as you sew to prevent any unwanted distortion.
Avoiding Stretching or Pulling the Fabric
Sewing knits without stretching feels like fighting a slippery fish—gentle hands win! Let Fabric Tension and Machine Feed do the heavy lifting.
Using Steam to Shrink Seams
Let’s steam those pesky seams into submission. It’s like giving your project a sauna day, resulting in a flawless finish without stress.
- Steam shrinks imperfections
- Choose the right iron
- Use fabric shrinkage ratios
- Master steam techniques
- Celebrate project success
Hemming Knit Fabrics
When you’re hemming a knit dress without a serger, it’s all about mastering the basics for a professional finish.
Grab your twin needle and some fusible webbing, and let’s make that hem look so good you’ll want to wear your dress inside out!
Using a Single Fold Hem for a Neat Finish
A single-fold hem is the way to go for knit fabrics – it avoids unnecessary bulk and keeps your hems looking sleek and professional.
| Hem Type | Fabric Weight | Recommended Stitch |
|---|---|---|
| Single Fold | Light to Medium Knits | Narrow Zigzag |
| Single Fold | Firm Knits | Reinforced Straight |
| Single Fold | Spongy Knits | Avoid Reinforced Straight |
Choosing the Right Stitch for the Hem
Choosing the right hem stitch types matters! Opt for a narrow zigzag or straight stitch for hem finish options, ensuring knit hem stability and success.
Using a Twin Needle for Fitted Knits
A twin needle creates parallel stitches that stretch. Mind your twin needle tension, selecting proper twin needle tips and threads for stunning knit hems.
Stabilizing Hems With Knit Stay Tape or Fusible Webbing
Stabilizing hems on knit fabrics is easy as pie with these steps:
- Choose appropriate fusible webbing weight.
- Apply stay tape.
- Use hemming tools.
- Admire results.
Loosening Bobbin Tension to Avoid Tunneling
Loosen that bobbin tension, friend – it’ll stop that pesky tunneling and keep your knit hems looking sharp. Gotta love a smooth, stretchy finish!
Preparing Your Sewing Machine
To sew a knit dress on your regular machine, equip yourself with an even feed foot or walking foot to prevent frustration and fabric chaos—like that one time you untangled Christmas lights.
Make sure the attachments match your machine’s model.
Reduce presser foot pressure for knit fabric, and you’ll be a step closer to sewing success.
Adjusting Presser Foot Pressure for Knit Fabrics
Adjusting presser foot pressure for knit fabrics is like fine-tuning a violin. A lower pressure helps prevent puckering. Different sewing machine models might vary, so always consult your manual.
- Check tension settings.
- Test on scrap fabric.
- Troubleshoot puckering issues.
- Match settings to knit fabric types.
Using an Even Feed Foot or Walking Foot
If you’ve tackled foot pressure adjustments, it’s time for the big guns: the even feed foot vs. walking foot.
These bad boys prevent fabric stretching and feeding issues while sewing knits like walking feet.
Ensuring Compatibility With Your Sewing Machine
Make sure your sewing machine can handle the specialized feet needed for knits – check your manual to confirm compatibility before attempting any tricky fabric maneuvers.
Using a Walking Foot or Dual Feed Foot Attachment
Using a walking foot is like having an extra set of hands.
It helps fabric feed evenly, solving common issues.
Before starting, check attachment compatibility with your machine for stitch perfection.
Finishing Knit Fabrics
When you’re finishing knit fabrics without a serger, you don’t have to worry about unraveling edges.
Use a zigzag stitch or try different techniques to give your knit dress a neat finish that would make even a serger jealous!
Optional Finishing of Raw Edges
Before finishing those raw edges, consider your options. Sure, a serger’s nice, but you’re the boss here. Even without one, you can prevent fraying and finish seams beautifully:
- Overcast stitch
- Seam finish comparison
- Using pinking shears
- Raw edge techniques
- Bias tape
You’re in control!
Using a Zigzag Stitch or Overlocker/Serger
No need to fuss with an overlocker! A simple zigzag stitch works wonders. Adjust the width and length to suit your fabric – experiment on scraps first. Seams will look polished in no time.
| Fabric Type | Zigzag Width | Zigzag Length |
|---|---|---|
| Light Knits | 2-3 mm | 1.5-2 mm |
| Medium Knits | 3-5 mm | 2-2.5 mm |
| Heavy Knits | 4-6 mm | 2.5-3 mm |
Pressing Seams for a Neat Finish
Mastering those pressing techniques can make your seams look sharp without a hitch.
Choose:
- Proper ironing tools
- Gentle seam direction
- Adequate steam settings
- Techniques fitting various fabric types
Experimenting With Different Finishing Methods
Now that your seams are pressed, it’s time to explore finishing techniques. You might surprise yourself by trying out raw edge finishes, stitch variations, and fusible options for seam treatments.
Frequently Asked Questions (FAQs)
Can you sew knit fabric without a serger?
You don’t need a serger—your trusty sewing machine can do just fine for knit fabrics!
Think of it as choosing a bicycle for the journey.
Use a ballpoint needle, adjust the tension, and zigzag away!
Can you make a dress without a serger?
Crafting a dress without a serger is a piece of cake.
Use a zigzag stitch to handle stretchy knits, and a twin needle for topstitching.
Experiment with tension settings to prevent fabric from behaving like a diva.
Do you need a serger to sew stretchy fabric?
For sewing stretchy fabric, a serger‘s like the icing on the cake, but not necessary when you learn how to sew jersey fabric!
Use a zigzag stitch or a stretch stitch on your sewing machine to handle it gracefully, no drama included.
Can I sew knit fabric with a straight-stitch?
How do I stabilize knit fabric for cutting?
Stabilizing knit fabric for cutting is like taming a wild horse — it requires patience and technique.
Lay it flat on a cutting mat,
use weights or pins to secure it,
and consider a rotary cutter for precision.
What type of interfacing works best for knit garments?
You’ll want a lightweight, fusible knit interfacing that stretches with your fabric—it’s your partner in crime!
This magic stabilizer maintains garment freshness without stiffening.
Remember, too many cooks spoil the broth; go easy on layers.
How can I prevent knit fabric from curling at the edges?
Tame those unruly edges by applying fusible knit interfacing or stay tape.
It’s like giving your fabric a little spa treatment!
This quick trick prevents curling and adds stability, so your sewing experience stays smooth and stress-free.
What are some tips for sewing knit collars and cuffs?
Collar and cuff sewing‘s a breeze when you use a twin needle – it mimics the look of a coverstitch and lets the fabric stretch.
Just take it slow, and don’t forget to backstitch for a professional finish.
How do I prevent knit fabrics from puckering at the seams?
Seams puckering? Loosen the tension and adjust your presser foot pressure to a gentle caress.
Test stitches on scraps, and try using a zigzag stitch or walking foot for more stretch-friendly glory.
You’ll thank yourself!
Conclusion
Picture sewing as a dance; the fabric flows like silk around you, and with patience and practice, you’ll lead it gracefully.
Tackling the challenge to sew a knit dress without a serger on a regular machine, you’ve got the right moves now.
Armed with ballpoint needles, zigzag stitches, and tips for tackling tension, you’re ready to waltz through any knit project.
Embrace the rhythm, keep experimenting, and remember—perfection comes with practice. Happy stitching!

