This site is supported by our readers. We may earn a commission, at no cost to you, if you purchase through links.
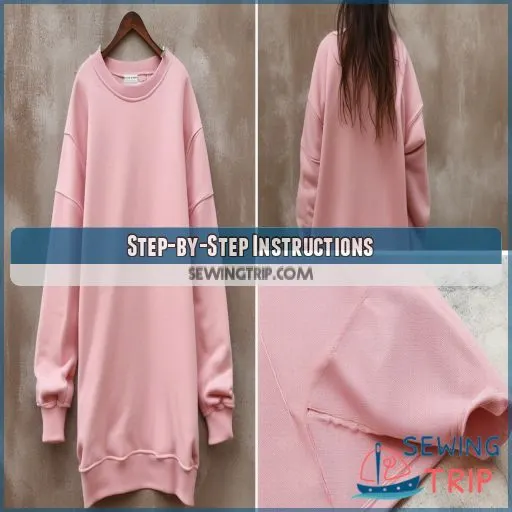
Lower the front neckline by 1-2 inches and decide on sleeve length. For extra warmth, line the hood.
Pin and sew the dress front and back at the shoulders first. Then, sew the neckline lining at the shoulders, stretch it to match the dress neck hole, and sew. Tuck the lining inside and stitch around the neckline.
Attach the sleeves, and press open seams. Add side pockets for convenience.
Stick around, and you’ll master making this cozy fashion piece!
Table Of Contents
Key Takeaways
- Dive into the cozy world of sweatshirt fleece and craft your own oversized sweatshirt dress, perfect for snuggling up on chilly days.
- Customize your dress to perfection by adjusting the neckline, sleeve length, and adding pockets to suit your style and comfort level.
- With a lined hood to keep the warmth in and side pockets to keep your essentials close, this dress is a practical and stylish choice for everyday wear.
- Embrace the DIY spirit and create a one-of-a-kind garment that reflects your unique style and keeps you comfortable all season long.
Pattern Features
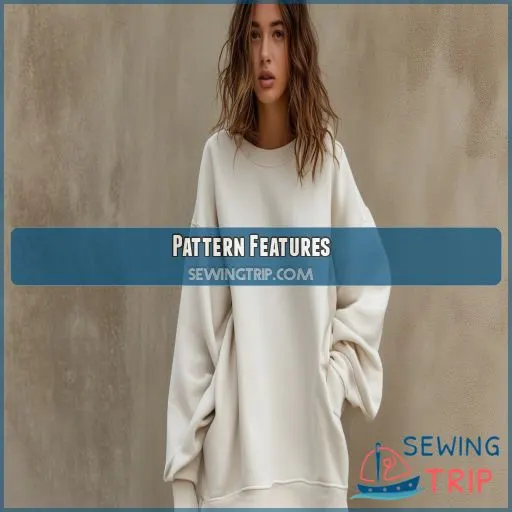
You’ll love the cozy features of this oversized hoodie sweatshirt dress pattern, including long cuffed sleeves and a lined hood for extra warmth. The easy-to-fit construction and convenient side pockets make this a practical and stylish choice for your DIY wardrobe project.
Oversized Hoodie Sweatshirt Dress
An oversized hoodie sweatshirt dress is your go-to for cozy comfort fashion. Its standout features include:
- Hoodie Design: The lined hood keeps you warm and stylish.
- Pocket Placement: Side pockets are perfect for a casual yet functional look.
- Easy DIY: Beginner-friendly with a PDF pattern, making it simple to create your cozy, personalized garment.
Long Cuffed Sleeves
You’ll love the long cuffed sleeves on your oversized sweatshirt dress. They’re the perfect blend of style and comfort.
The drop shoulder design gives you that relaxed, cozy feel.
Play with cuff width and design to suit your taste – go wide for a statement look or keep it snug.
Experiment with different knit fabrics for the cuffs to add texture and interest to your sleeves.
Lined Hood
You’ll love the cozy comfort of a lined hood on your DIY sweatshirt dress. It’s not just stylish, but practical too. Here’s why a lined hood is a game-changer:
- Extra warmth for chilly days
- Contrast lining adds a pop of personality
- Professional finish that elevates your homemade creation
The hood construction is straightforward, but pay attention to the shape and drape. With the right technique, you’ll achieve that perfect hooded sweatshirt look you’re after.
Side Pockets
After adding the cozy lined hood, let’s talk about those handy side pockets. You’ll love how they enhance your oversized sweatshirt dress’s wearability.
When sewing, choose a sturdy fabric that can handle daily use. Position the pockets along the side seams for easy access.
They’re perfect for stashing your phone or keeping your hands warm. Plus, side pockets add a stylish touch to your comfy creation.
Easy to Fit Construction
You’ll love how easy this hoodie dress is to fit and construct. The relaxed style accommodates various body types, making it perfect for beginners.
With its simple construction, you can transform a basic sweatshirt into a cozy casual dress in no time. Add pockets and a gathered skirt for extra flair.
It’s the perfect project to create warm, comfortable clothes that’ll become your go-to for lazy days.
Materials and Fabric
To create your oversized sweatshirt dress, you’ll need sweatshirt fleece material, matching thread, scissors, a sewing machine, and an iron with ironing board. These essential materials will guarantee you have everything on hand to cut, sew, and press your cozy new garment.
Sweatshirt Fleece Material
Now that you’ve got your pattern features sorted, it’s time to delve into the heart of your oversized sweatshirt dress: the fabric. You’ll want to choose a sweatshirt fleece material that’s both cozy and durable. The right fabric weight and thickness are essential for achieving that perfect oversized look while maintaining warmth.
- Medium to heavy-weight fleece offers great comfort
- Look for a blend of cotton and polyester for breathability
- Consider brushed fleece for extra softness against your skin
Matching Thread
When selecting thread for your oversized sweatshirt dress, don’t just stick to plain matching colors. Consider contrasting hues or textures to add a unique flair to your creation.
You’ll want a sturdy thread that can handle the weight of sweatshirt fleece and withstand frequent wear.
A well-chosen thread can elevate your dress from cozy to chic!
Scissors
Now that you’ve got your matching thread, let’s talk scissors. You’ll need a sharp pair to cut through your fabric choice cleanly. Remember, the right scissors can make or break your project.
When cutting out your pattern pieces, pay attention to selvage edges and the wrong side of the fabric. This’ll help with pattern alterations later, whether you’re adjusting sleeve length or creating a high-low hem.
Sewing Machine
Now that you’ve got your scissors ready, let’s talk about your trusty sewing machine. It’s the workhorse for this oversized sweatshirt dress project.
You’ll need it to stitch together your pattern pieces, from the French terry fabric to the adult t-shirt alterations. Make sure your machine’s set up correctly for the fabric weight.
Iron + Board
You’ll need a reliable iron and ironing board to create your cozy oversized sweatshirt dress. They’re your secret weapons for crisp seams and professional-looking results. When pressing, focus on seam allowances and the right side of your fabric.
Use gentle pressure and the appropriate heat setting to avoid scorching. A quality ironing surface will help you gather and shape your pattern pieces with precision, ensuring your DIY creation rivals factory-made stitches.
Creating Your Pattern
To create your pattern for the oversized sweatshirt dress, you’ll need to make a few key adjustments. Lower the front neckline by 1-2 inches for comfort, choose your desired sleeve length, and confirm that the neckline lining is 2 inches wide for a polished finish.
Lower the Front Neckline by 1-2 Inches
When creating your pattern, you’ll want to lower the front neckline by 1-2 inches for a comfortable fit. This neckline variation adds style and breathability to your oversized sweatshirt dress. Here’s why it’s important:
- Enhances the overall neckline design
- Allows for easier on/off without sacrificing coziness
- Creates a flattering neckline shape for various body types
Use your A4/US letter digital file and Adobe Acrobat Reader to make this adjustment, perfect for beginner sewing levels.
Sleeves Can Be Any Length
Now that you’ve lowered the neckline, let’s talk sleeves. The beauty of this Catrin sweatshirt-inspired dress is its versatility. You’re free to choose any sleeve length that suits your style. From short and sassy to long and cozy, the choice is yours.
Neckline Lining Should Be 2 Wide
Your neckline lining should be 2 inches wide. This width provides stability while adding a seamless finish. Cut the fabric with the stretch parallel to its width for a snug fit. The lining will dress it up, transforming your comfortable dress into a stylish dress. This unfinished neckline is perfect for a casual yet polished summer dress.
Cutting Out Your Pieces
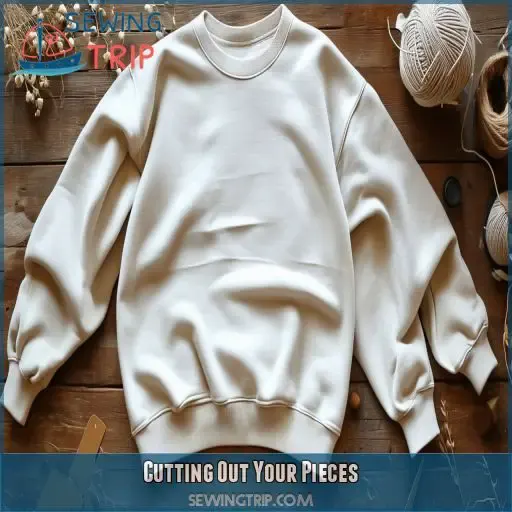
Pin your pattern pieces securely to the fabric, ensuring the stretch direction aligns across the hips and bust for maximum comfort. Cut around your pieces with a 1/2" seam allowance for neat and precise edges.
Pin Pieces to Fabric
Lay your pattern pieces on the fabric, making certain the stretch direction runs across the hips and bust. This ensures comfort and fit.
Pin the pieces securely, paying attention to sleeve openings and bottom lines, which can remain unfinished for a casual look.
This is essential for creating a comfy winter dress suitable for US sizes 12 months to 10 years or EU sizes 80-140.
Cut Around Pieces With 1/2 Seam Allowance
Use sharp scissors to cut around your pieces with a 1/2" seam allowance. Guarantee measuring accuracy; follow pattern instructions strictly. Consider the fabric type while cutting, especially for seam allowances and side slits. A seamless cut results in quality stitching and professional finishing. Attention to detail now saves time later—dress it down with precision.
Step-by-Step Instructions
Start by pinning and sewing the dress front and back pieces together at the shoulders. Then, pin and sew the neckline lining at the shoulders, stretch it to fit the neck hole, and secure it by sewing around the neckline, ensuring a smooth finish.
Pin and Sew Dress Front and Back at Shoulders
Pin the dress front and back pieces together at the shoulders, making certain the shoulder seams align. Carefully match the shoulder measurement to avoid any misalignment. Sew along the shoulder seam using a straight stitch. Check the shoulder width to ensure it fits comfortably and adjust if necessary. The shoulder drop and slope should align naturally for a good fit.
Pin and Sew Neckline Lining at Shoulders
Next, pin and sew the neckline lining pieces at the shoulders with a sturdy stitch, ensuring they align properly.
This step is critical in the lined hood construction, as the neckline lining needs to be secure for a snug fit.
Test the neckline lining stretch to make sure it fits comfortably before moving on.
A simple straight stitch should suffice here.
Stretch and Pin Neckline Lining to Dress Neck Hole
Stretch the neckline lining slightly as you pin it to the dress neck hole. Make certain it aligns properly for a smooth, comfortable finish. Don’t rush; take your time to get it right. Here are the steps:
- Stretch the lining gently
- Align it with the dress neck hole
- Pin securely around the neckline
- Double-check for smooth placement
Sew Neckline Lining to Dress
Align the neckline lining with the dress neck hole. Pin carefully, ensuring the edges match up precisely for a smooth finish. Using your sewing machine, stitch around the neckline, keeping a steady hand to avoid fabric bunching. This step requires attention to detail, ensuring your neckline design lays flat and complements your personal style.
Tuck Lining Inside Dress and Sew Around Neckline
Tuck the neckline lining inside the dress, making certain it lies flat against the fabric. Secure with pins to prevent shifting. Using a straight stitch, sew around the neckline, catching the folded lining underneath. Adjust for an even finish. This sewing technique ensures a smooth, professional appearance, essential for proper fit adjustments and clean pattern modifications.
Sew Sleeves to Dress
Pin and sew the sleeves to the dress by matching the sleeve length and lining up the sleeve design. Make certain the sleeve fabric aligns properly with the sleeve pockets and sleeve lining.
- Match the sleeve’s center to the shoulder seam.
- Pin around the armhole.
- Sew the sleeve to the dress, maintaining an even seam.
Press Open Seam Allowance and Pin Down
Press the seam allowance open using an iron, ensuring it lies flat for a professional finish. Be mindful of your fabric weight; heavyweight fabrics may need extra pressing. Pin down the seam allowance, maintaining an even hem width. Use matching thread to topstitch along the pinned edges, ensuring a neat seam finish that blends seamlessly.
Frequently Asked Questions (FAQs)
How much does a sew over it dress cost?
Ever wonder how much a "Sew Over It" dress costs? Typically, a "Sew Over It" dress pattern ranges from $10 to $ If you purchase a ready-made dress, it can cost anywhere from $80 to $
Where can I buy women’s sweater dresses online?
You can buy women’s sweater dresses online at websites like ASOS, Nordstrom, Amazon, and Zara. They offer a variety of styles, sizes, and prices to suit your preferences and budget.
How much fabric do I need to make a sweatshirt?
You’ll typically need 2-3 yards of medium-weight sweatshirt fabric to make an oversized sweatshirt. The exact amount depends on your size and desired fit, but this range should cover most adult projects comfortably.
What do you wear with a hooded sweatshirt?
You can pair a hooded sweatshirt with skinny jeans, leggings, or joggers. For added warmth, throw on a denim or leather jacket. Complete the look with sneakers or boots for a casual, stylish vibe.
How to wear a hoodie with a sweatsuit?
Pairing a hoodie with a sweatsuit is simple: wear the hoodie as your top and match it with sweatpants in a coordinating color. Finish the look with sneakers and optional accessories like a beanie or backpack.
How much fabric do I need to make a sweater?
To make a sweater, you need approximately 5 to 2 yards of fabric for adult sizes, depending on the pattern and fabric width. Always check your pattern’s fabric requirements for the most accurate measurement.
How do I adjust the pattern for petite sizes?
You’ll swim in fabric if you don’t shorten hems and sleeves. Decrease length proportionally from each pattern piece, maintaining original shapes. Scale down pockets and hoods as needed, ensuring they don’t overwhelm the petite frame.
Can I add extra pockets to the dress?
Sure, you can add extra pockets to the dress. Simply draft and cut additional pocket pieces, then sew them to your desired position on the dress. Confirm seam allowances are consistent with the rest of your pattern.
What is the best way to care for the fabric after sewing?
Treat your sweatshirt fabric like royalty: wash in cold water, tumble dry low to avoid shrinkage, and steer clear of ironing directly on the fabric to prevent scorching. Your cozy creation will stay pristine!
How can I modify the pattern to include a zipper?
To add a zipper, mark the center back of the sweatshirt dress, cut a seam, and attach the zipper facing outward. Make sure you use a sturdy zipper and reinforce the edges for durability.
What alternative fabrics can I use for a lighter feel?
For a lighter feel, consider using jersey knit, bamboo knit, or French terry fabrics. These materials offer breathability and drape, making your sweatshirt dress comfortable for warmer weather while retaining shape and structure.
Conclusion
Think of your needle and thread as the painter’s brush and palette. Crafting an oversized sweatshirt dress guided by these steps guarantees you’ll create a cozy, stylish masterpiece for your wardrobe.
By choosing the right materials, following careful measurements, and executing each sewing step with precision, you’ll master the art of sewing an oversized sweatshirt dress.
Embrace the process, enjoy the results, and cherish your handmade, comfortable fashion piece. Happy sewing!

