This site is supported by our readers. We may earn a commission, at no cost to you, if you purchase through links.
Hand sewing requires steady rhythm, while machine stitching needs correct thread tension and presser foot pressure. Practice on scrap fabric first to develop muscle memory and confidence.
Start with simple running stitches before progressing to backstitches for stronger seams. The key lies in keeping your stitching line straight using fabric guidelines or removable markers.
Perfect straight stitches form the foundation for countless sewing projects and advanced techniques.
Table Of Contents
Key Takeaways
- Master proper needle threading and tension control – You’ll create even stitches by maintaining consistent 2-3mm spacing and choosing the right needle size for your fabric type.
- Practice the backstitch method for durability – You’ll build stronger seams by working backward into previous stitches, creating overlap that prevents unraveling under stress.
- Use guidelines and seam guides for accuracy – You’ll achieve professional straight lines by marking fabric with removable tools and using magnetic seam guides on your machine.
- Develop muscle memory through regular practice – You’ll transform from a wobbly beginner to a confident sewer by practicing daily on scrap fabric before tackling actual projects.
Sewing Basic Stitches
You’ll master basic hand stitches faster than you think once you understand the simple techniques behind each one.
Every stitch you learn becomes a building block for your next amazing sewing adventure.
These fundamental stitches form the backbone of all sewing projects, whether you’re hemming pants or creating intricate embroidery designs, which are complete concepts that will help you in your sewing journey, and are the fundamental stitches.
Running Stitch Technique
Three essential elements make running stitch your go-to basic sewing technique.
This straight stitch creates uniform dashes across fabric using simple in-and-out needle movements.
Think of running stitch as your sewing superhero—always reliable, never lets you down when fabric needs rescuing.
Master your technique with proper Stitch Length and Tension Control:
- Thread your needle with 18-inch thread for ideal control
- Maintain consistent spacing of 2-3mm between stitches
- Choose appropriate Needle Size based on your Fabric Choice
- Practice straight line sewing before attempting curves
Perfect for Applications like seams, hems, and quilting on your sewing machine.
It’s an easy embroidery technique suitable for beginners.
Backstitch Method
Backstitch creates your strongest hand-sewn seam by working backward into previous stitches. This securing seams technique overlaps threads, preventing unraveling under stress.
Perfect for repairing fabric tears or backstitch uses in garment assembly. Backstitch variations include split stitch for embroidery outlines and whipped backstitch for decorative backstitch effects.
Unlike straight stitches from your sewing machine, backstitch requires sewing practice but delivers unmatched durability for sewing straight stitch applications. For a more textured effect, consider using a whipped backstitch technique.
Prickstitch Application
Prickstitch transforms your hand sewing into professional-grade work with invisible hems that rival couture craftsmanship.
You’ll catch only one or two threads on the fabric’s surface, creating tiny punctures that disappear into the weave.
This basic sewing technique offers superior prickstitch durability compared to machine topstitching while maintaining elegant prickstitch aesthetics.
Perfect fabric compatibility makes prickstitch variations ideal for delicate silks and sturdy woolens alike.
Pickstitch Usage
Elevate your sewing with pickstitch – the secret weapon of luxury tailoring. This straight stitch creates nearly invisible reinforcement while adding sophisticated pickstitch aesthetics to your garments.
Pickstitch applications shine in these areas:
- Lapel edges for crisp, professional structure
- Hem finishing that won’t roll or pucker
- Pocket flaps requiring subtle reinforcement
- Zipper installation in delicate fabrics
- Decorative topstitching with contrasting thread
Pickstitch variations range from barely-there functional stitching to bold decorative statements. The pickstitch definition involves catching just a few fabric threads per stitch, creating pickstitch durability without bulk. You’ll master sewing straight lines while building garments that last decades.
Overhand Stitch Guide
Think of the overhand stitch as your trusty sidekick for edge finishing and securing seams.
This easy sewing stitch works on most fabric types with consistent thread tension.
You’ll loop over fabric edges with even stitch spacing, making it perfect for sewing practice exercises.
It’s one of those basic sewing techniques that becomes second nature once mastered.
Hand Sewing Essentials
You’ll need the right tools and a steady hand to master straight stitches, but don’t worry—every sewing pro started with tangled thread and a few crooked lines.
With a sharp needle, strong thread, and a little patience, you’ll be stitching perfect lines in no time.
Threading Needles Correctly
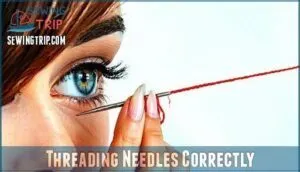
Threading needles gets easier once you learn the right approach. Most beginners struggle with needle eye size and thread type selection, but these tips will change everything.
Start with sharp, clean cuts. Slice your thread at an angle—this creates a pointed end that slides through smoothly. Your threading needles technique improves dramatically with this simple step.
Here’s your foolproof method:
- Choose the right combo – Match your needle size to your thread thickness for easier passage
- Use threading aids – Threading aids usage saves time and frustration, especially needle threaders for stubborn eyes
- Control tension – Keep steady pressure without pulling too hard, preventing thread breaks
When sewing machine threading, remember that hand threading builds muscle memory. Practice with cotton thread first—it’s forgiving and doesn’t slip like silk. Keep your lighting bright and your hands steady.
Thread type selection matters more than you think. Polyester threads work well for beginners, while silk can be slippery. Master cotton first, then experiment with other materials as your confidence grows. Selecting the right needle requires understanding specific eye dimensions.
Creating Knots Securely
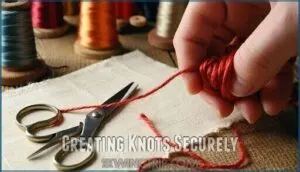
Your thread’s foundation starts with a bulletproof knot. After threading your needle, wrap the thread around your index finger and roll it forward with your thumb. Slide the loop off and pull tight—this creates your anchor point.
Leave a quarter-inch thread tail length for stability and preventing slippage. Position your knot close to your starting point on the fabric.
For slippery materials, double up your knot tying methods to guarantee secure backstitching. Many sewers also find specialized knot tools helpful.
These fundamentals keep your straight stitches locked in place, whether you’re hand-sewing or preparing fabric for your sewing machine. Master this, and you’ll never worry about sewing straight seams unraveling again.
Guiding Needle Through Fabric
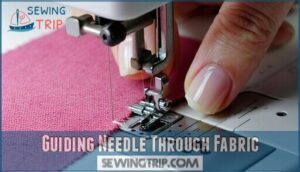
Mastering needle insertion feels like learning to dance with fabric. You’ll control every movement through precise hand placement and steady rhythm.
Perfect thread control transforms ordinary sewing straight stitches into professional results:
- Keep your needle insertion angle consistent at 90 degrees for clean entry
- Maintain gentle fabric tension without stretching—let the material guide you naturally
- Practice smooth, deliberate motions for flawless stitch consistency
Your sewing machine guide technique starts with confident hand placement and patient practice. Specialized tools can assist with precise needle placement.
Choosing Right Sewing Tools
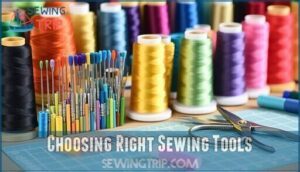
Your toolkit can make or break your sewing success, so let’s get you equipped right.
The right needle types paired with quality thread creates magic, while dull tools lead to puckered seams and frustration. Understanding needle size and fabric compatibility guarantees stitch quality and prevents fabric distortion.
- Sharp needles – Match needle size to fabric weight (70/10 for lightweight, 90/14 for heavy)
- Essential scissors – Invest in fabric shears that slice cleanly without fraying edges
- Fabric markers – Use chalk or washable pens for precise seam guides
- Thread quality – Choose strong thread that won’t snap mid-stitch on your sewing machine
Machine Sewing Basics
You’ll love how machine sewing transforms your projects from tedious hand-stitching marathons into quick, professional results.
Once you master your sewing machine’s basic functions, you’ll wonder how you ever survived without this speedy sidekick.
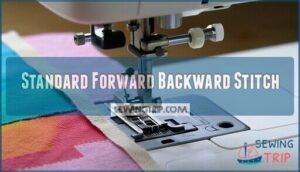
Standard Forward Backward Stitch
Every sewing machine has a superpower called forward-backward stitching that’ll make your seams bulletproof.
Start your straight stitch, then hit that reverse button for three quick stitches before continuing forward.
This stitch reinforcement technique is your insurance policy against unraveling disasters.
Think of it as giving your seam a firm handshake – it’s securing seams at stress points where fabric wants to come apart.
The seam strength you’ll gain makes this simple move worth mastering early.
This technique, also known as backstitching for seam security, prevents seams from unraveling.
Zigzag Stitch Technique
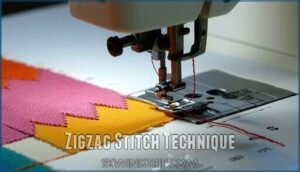
Ready to branch out from straight lines? The zigzag stitch is your ticket to tackling fraying edges and adding flair.
With your sewing machine stitch options, play with zigzag width for tight or bold lines. Adjust stitch density for fabric stability—looser for applique techniques, tighter for reinforcement.
Don’t let thread tension trip you up; keep an eye on sewing machine stitch settings. If your zigzag looks wonky, check these basics:
- Zigzag width
- Stitch density
- Fabric stability
- Thread tension
To ensure a smooth sewing experience, remember that fabric stability is crucial, and adjusting these settings will help you achieve the desired outcome.
Blind Hem Stitch Method
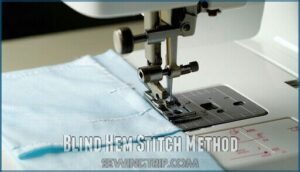
Using the blind hem foot transforms invisible hems from tricky to magical. This specialized attachment guides fabric while creating nearly undetectable stitches on your garment’s right side.
The blind hem stitch alternates between straight stitches and zigzag catches. Position your fabric with the fold against the foot’s guide, adjusting thread tension for different fabric types. Practice on scraps first—you’ll master this professional technique quickly.
| Setting | Light Fabrics | Heavy Fabrics |
|---|---|---|
| Stitch Length | 1.5-2.0mm | 2.5-3.0mm |
| Thread Tension | 3-4 | 4-5 |
| Needle Size | 70/10 | 90/14 |
| Foot Pressure | Light | Medium |
| Speed Control | Slow | Medium |
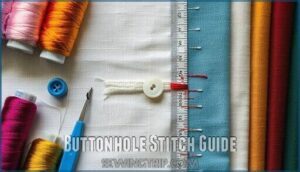
Buttonhole Stitch Guide
Perfect buttonholes aren’t just functional—they’re your garment’s finishing touch that screams "professional quality."
Your buttonhole stitch guide starts with selecting the right buttonhole variations for your project:
- Keyhole buttonholes accommodate thick button shanks on coats and jackets
- Bound buttonholes create elegant, custom finishes for blazers and formal wear
- Corded buttonholes add extra reinforcement using dense sewing machine stitches
Mark placement accurately, test your straight stitches on scraps, and adjust tension settings—your stitch guide becomes second nature with practice!
Straight Stitch Techniques
You’ll master straight stitches quickly when you learn these four key techniques that turn wobbly lines into perfect seams.
These methods work whether you’re hemming curtains or piecing together your first quilt project.
Creating Guidelines Accurately
Guidelines are your sewing compass – they’ll keep you on course when fabric wants to wander. Start with fabric preparation by smoothing wrinkles and laying material flat on a clean surface.
Choose your marking tools wisely. Chalk pencils disappear with heat, while washable fabric markers vanish in the wash. Test on scraps first – some markers love certain fabrics more than others.
Accurate measuring means using rulers, not eyeballing distances. Mark your seam allowances with light dots rather than heavy lines that’ll show through.
| Tool Type | Best For | Removal Method |
|---|---|---|
| Chalk | Cotton, wool | Heat or brush |
| Water-soluble pen | Most fabrics | Cold water |
| Tailor’s pencil | Delicate fabrics | Gentle wash |
Consistent spacing comes from planning, not luck. Create sewing straight lines by placing tape guides on your machine bed or using magnetic seam guides on the throat plate. A seam allowance guide can also help maintain consistent seams.
Test your creating guidelines method on scraps before tackling your project. This practice run prevents those "oops" moments when you’re working with good fabric.
Threading Machine Correctly
Once you’ve mastered creating guidelines, sewing machine threading tutorial success depends on your technique.
Threading your sewing machine correctly prevents skipped stitches and tension headaches that’ll drive you crazy.
Here’s your step-by-step roadmap:
- Place spool placement on the correct pin for smooth unwinding
- Follow all thread guides in sequence—don’t skip any stops
- Use a needle threader when your eyes need help
- Check bobbin winding is even and properly tensioned
- Test tension adjustment on fabric scraps first
Master this threading machine ritual, and you’ll save hours of frustration.
Adjusting Stitch Length Properly
Your stitch length setting can make or break your sewing straight lines—it’s that powerful.
For lightweight fabrics, dial in 2.0-2.5mm to prevent puckering. Medium-weight materials like cotton need 2.5-3.0mm for maximum seam strength.
Heavy fabrics require 3.0-4.0mm to avoid thread breakage. Decorative stitching benefits from longer settings, while curve sewing demands shorter ones for precision.
Always test on scraps first—your sewing machine will reward this simple habit with professional results.
Using Magnetic Seam Guides
Your sewing machine becomes remarkably precise with a magnetic seam guide attached to the needle plate. This clever tool acts like bumper rails at a bowling alley, keeping your fabric perfectly aligned while you’re sewing straight lines.
Guide placement matters – position it exactly at your desired seam allowance measurement.
Here’s what makes magnetic seam guide indispensable:
- Works with various fabric types from cotton to lightweight denim
- Improves straight stitch accuracy by maintaining consistent measurements
- Reduces hand fatigue during long sewing sessions
- Simple attachment to most sewing machine models
- Troubleshooting guides help fix fabric shifting issues quickly
If you don’t have a magnetic version, guide alternatives include tape markers or adjustable presser feet. The sewing machine seam guide transforms wobbly beginners into confident sewists who can tackle any project requiring precise seams.
Sewing Straight Lines
You’ll achieve perfect straight lines once you master the rhythm of guiding fabric through your machine while maintaining steady pressure on the foot pedal.
The secret lies in coordinating your hands with the machine’s forward and backward motion to create those crisp, professional seams that make your projects shine.
Setting Up Sewing Machine
Three simple steps transform your sewing machine from paperweight to precision tool.
Threading machine correctly prevents 90% of beginner headaches—follow your manual’s path from spool to needle.
Needle selection matters: 70/10 for lightweight fabrics, 90/14 for heavy materials.
Set tension adjustment to 4-5 and stitch settings to straight stitch mode.
| Component | Setting | Purpose |
|---|---|---|
| Presser feet | Lowered position | Secures fabric |
| Thread tension | 4-5 range | Balanced stitches |
| Stitch length | 2.5mm medium | Even spacing |
| Needle position | Center | Straight alignment |
| Speed control | Slow/medium | Better control |
Your sewing machine setup is complete when everything clicks into place—literally and figuratively!
Placing Fabric Under Pressure Foot
With your sewing machine ready, gently slide your fabric beneath the pressure foot. Think of this step like parking a car—alignment matters most. Position your fabric edge against your chosen seam guide for perfect needle position. Lower the foot lever to secure the material with proper pressure foot height.
This smooth placement creates the foundation for flawless straight stitches.
- Check fabric thickness against pressure foot height – thick materials need more clearance than delicate silks
- Align fabric edges with seam guides or markings – consistency here prevents wobbly lines later
- Test foot lever pressure on fabric scraps first – too tight bunches material, too loose allows shifting
- Position needle directly over your intended stitch line – small adjustments now save major headaches
- Ensure fabric lies flat without wrinkles or folds – bumps create uneven stitching and thread breaks
Pushing Foot Pedal Correctly
Your pedal’s like a car’s gas – gentle pressure beats flooring it every time. Think steady rhythm, not stop-and-go traffic jams that’ll leave your foot cramping.
Good sewing machine foot pedal technique starts with your heel planted firmly on the floor. This anchor point gives you the control needed for consistent stitch speed without developing foot fatigue.
- Rest your heel down for stable foot pedal control
- Apply light, steady pedal pressure control for even stitches
- Practice smooth pedal release to stop cleanly
- Avoid jerky movements that create uneven lines
- Keep consistent rhythm when pushing foot pedal
Avoiding pedal jerks takes practice, but you’ll learn to sew straight lines with confidence once you master this foundation skill.
Going Forward Backward Smoothly
Perfect smooth shifts between forward and backward stitching transforms your seam quality dramatically. Press your foot pedal gently, maintaining steady control throughout direction changes.
Use the reverse lever for secure seams at beginning and end points, preventing stitch reinforcement issues.
| Direction | Pedal Pressure | Purpose | Result |
|---|---|---|---|
| Forward | Light/Steady | Primary stitching | Clean straight lines |
| Backward | Gentle | Reverse stitching | Preventing unraveling |
| Stop | Release | Position change | Smooth control |
| Start | Gradual | Seam beginning | Professional finish |
This forwardbackward stitching technique guarantees your straight stitches won’t unravel, creating durable seams every time.
Mastering Straight Stitches
You’re about to take your straight stitching skills from wobbly beginner lines to perfectly precise seams that would make any sewing teacher proud.
With consistent practice and attention to key techniques like proper seam allowances and quality control, you’ll develop the muscle memory and confidence needed to tackle any sewing project with professional-looking results.
You will achieve this through developing muscle memory, which is essential for sewing.
Practicing Straight Stitches Regularly
Daily repetition transforms shaky beginners into confident sewers who create flawless straight stitches with ease.
Practice transforms unsteady hands into sewing superstars who stitch with machine-like precision.
Consistent practice builds muscle memory, allowing you to focus on project variety instead of basic technique.
Your sewing machine practice sessions will show remarkable speed improvement within weeks.
- Watch your wobbles disappear as mastering straight stitches becomes second nature
- Feel the thrill when complex patterns no longer intimidate your newfound abilities
- Experience pure satisfaction as sewing straight lines flows effortlessly from your fingertips
Using Seam Allowances Correctly
When you’re measuring seam allowance width, accuracy makes the difference between amateur and professional results.
Your fabric needs consistent seam guide placement to create straight stitches that look polished and hold strong.
Here’s how to nail seam allowance precision:
- Use your sewing machine’s built-in markings or attach a magnetic seam guide for foolproof measurements
- Keep fabric edges aligned with your chosen guide throughout the entire stitching process
- Practice trimming seam allowances on scraps first to perfect your curved seam allowances technique
Maintaining Sewing Quality High
Your consistent tension keeps stitches looking professional—adjust when threads feel too tight or loose.
Check your needle condition regularly since dull needles create uneven holes and snag fabric.
Smart fabric handling means supporting your material gently while maintaining steady speed through curves.
Focus on stitch evenness by practicing smooth pedal control rather than jerky stops and starts.
Quality seam finishes transform amateur work into polished projects, so trim threads and press seams flat.
To improve your results, practice consistently for skill enhancement.
These habits guarantee your sewing straight lines look crisp every time you create straight stitches on your sewing machine straight stitch setting.
Stitch consistency comes from maintaining quality through these simple practices.
Troubleshooting Common Errors
Most sewing machine troubleshooting starts with these five culprits that mess up your straight stitches:
- Skipped Stitches – Replace that dull needle immediately
- Uneven Tension – Check your threading path carefully
- Fabric Puckering – Lighten your presser foot pressure
- Needle Breaks – Match needle size to fabric weight
- Thread Bunching – Clean lint from your bobbin area
These fixes restore stitch consistency and get you back to sewing straight lines perfectly.
Frequently Asked Questions (FAQs)
How do you sew a straight stitch?
Like threading a needle through life’s fabric, you’ll create strong, lasting seams with this fundamental technique.
Set your machine to straight stitch, position fabric under the presser foot, and gently press the pedal while guiding fabric forward steadily, using a technique that helps you create strong seams.
How do you use a straight stitch?
You use a straight stitch to create seams, hems, topstitching, and repairs on most sewing projects.
Simply guide your fabric under the presser foot, maintain consistent seam allowances, and stitch forward in a straight line.
What is a straight stitch in sewing?
Picture trying to hem your first pair of jeans—you’ll need that fundamental straight stitch to create clean, professional-looking seams.
A straight stitch is your most basic sewing technique, creating a simple line of evenly spaced stitches that move forward in one direction through fabric.
How difficult is a straight stitch in sewing?
Straight stitching isn’t difficult at all—it’s the most basic sewing skill you’ll master first.
With proper machine setup and a little practice, you’ll create clean, even seams confidently within your first session.
How to sew a straight stitch on a sewing machine?
Ironically, mastering the "simple" straight stitch trips up many beginners who rush the basics.
Set your machine to straight stitch mode, lower the presser foot, align fabric edge with foot guide, and gently press the pedal while maintaining steady fabric control.
Can you learn a straight stitch in sewing?
Absolutely, you can master straight stitching with practice!
Start with simple exercises on fabric scraps, focusing on consistent speed and keeping your seam allowances even.
Within a few sessions, you’ll develop the muscle memory needed for professional-looking results.
What are the 10 basic stitches?
While you might think mastering just one stitch makes you a sewing expert, you’ll actually need ten fundamental techniques.
The basic stitches include straight, backstitch, running, blanket, overcast, slip, chain, French knot, satin, and whipstitch for complete sewing mastery.
What is the best stitch for straight lines?
The straight stitch is your go-to choice for perfect straight lines. It’s the most basic machine stitch, creating clean, secure seams with consistent spacing and excellent durability for construction projects.
What is a straight stitch?
Like the backbone of your favorite shirt, a straight stitch is the fundamental line of evenly spaced stitches that creates flat, secure seams by moving forward in one direction.
It forms the foundation for most sewing projects you’ll tackle, creating a straight stitch that is essential for any sewing project.
What stitches do you need to learn to sew?
You’ll need to master these essential stitches: straight stitch for seams, backstitch for strength, running stitch for basting, and zigzag for stretch fabrics.
Start with straight stitching—it’s your foundation for everything else in sewing, utilizing the backstitch for added strength.
Conclusion
Perfect stitches flow like a gentle river across your fabric, each one building confidence in your growing skills.
You’ve now mastered sewing basic straight stitches that’ll serve you for years ahead. Remember that consistent practice transforms wobbly beginnings into smooth, professional lines.
Your needle’s become an extension of your hand, creating beautiful seams with every project. Keep practicing these fundamental techniques, and you’ll soon tackle complex patterns with ease.
Those perfect straight stitches you’re creating today become tomorrow’s stunning garments and treasured handmade gifts.

