This site is supported by our readers. We may earn a commission, at no cost to you, if you purchase through links.

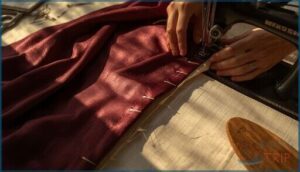
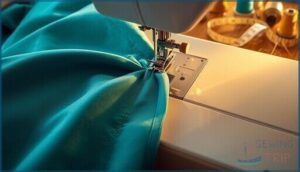
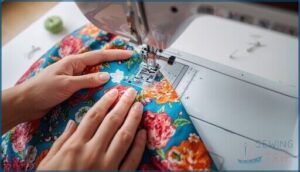
Set your machine to a shorter stitch length (1.8-2.0mm) with needle-down position for tight curves. Pin strategically, easing fabric without creating puckers.
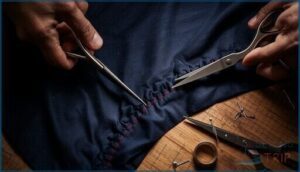
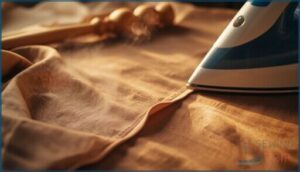
After sewing, clip concave curves and notch convex ones, then press using a tailor’s ham to shape the seam. The difference between amateur and professional results often comes down to these preparation and finishing steps that transform tricky curves into smooth, polished seams.
Table Of Contents
- Key Takeaways
- Essential Tools for Sewing Curved Lines
- 1. Fusible Knit Stay Tape Roll
- 2. Snap On Open Toe Presser Foot
- 3. Clear Open Toe Presser Feet
- 4. Quilting Walking Foot Sewing Guide
- 5. Premium Sewing Clips Assorted Colors
- 6. Fiskars Softgrip Fabric Pinking Shears
- 7. Singer zig zag fabric scissors
- 8. Prym Tailors Ham for Sewing Tools
- 9. Clear Starch Alternative Ironing Spray
- Preparing Fabric for Smooth Curves
- Marking and Cutting Curved Seams
- Pinning and Basting Curved Edges
- Setting Up Your Sewing Machine
- Step-by-Step Guide to Sewing Curves
- Clipping, Notching, and Grading Seams
- Pressing and Finishing Curved Seams
- Troubleshooting Common Curved Sewing Issues
- Frequently Asked Questions (FAQs)
- Conclusion
Key Takeaways
- Prepare your fabric first – You’ll get better results when you apply spray starch and press to stabilize the fabric, then use the right tools like an open-toe presser foot for clear visibility around curves.
- Adjust your machine settings properly – You’ll want to shorten your stitch length to 1.8-2.0mm for tight curves, use the needle-down position for control when pivoting, and slow your sewing speed to maintain precision.
- Pin strategically and handle seam allowances correctly – You’ll need to pin every quarter-inch on tight curves, then clip concave curves and notch convex ones after sewing to prevent puckering and bulk.
- Press with the right tools for professional results – You’ll achieve smooth, polished curves by using a tailor’s ham to shape seams and applying steam with proper pressure to set the stitches permanently.
Essential Tools for Sewing Curved Lines
You’ll need the right tools to transform challenging curves into professional-looking seams that lie perfectly flat.
Essential equipment like open-toe presser feet, fabric clips, pinking shears, and a tailor’s ham will give you the precision and control necessary to handle both tight concave curves and sweeping convex ones with confidence.
1. Fusible Knit Stay Tape Roll
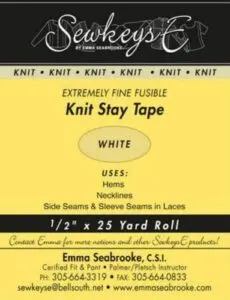
When working with curved seams, you’ll want fusible knit stay tape as your secret weapon against stretched-out necklines and wobbly armholes. This ½-inch white tape prevents knit fabrics from losing their shape during construction, maintaining that professional look you’re after.
Apply it along seam allowances on the wrong side, pressing section by section to follow curves smoothly. The tape’s thermal memory actually shrinks slightly with steam, pulling distorted edges back into line—like having a gentle correction system built right in.
Apply fusible knit stay tape along curved seam allowances—its thermal memory shrinks with steam to automatically correct stretched edges
Best For: Sewers working with knit fabrics who need to prevent curved seams like necklines and armholes from stretching out of shape during construction.
- Nearly invisible once applied, maintaining the soft drape and hand of knit fabrics
- Has thermal memory that shrinks slightly with steam to correct stretched edges automatically
- Easy to apply along curves without adding bulk or stiffness to the finished garment
- Can be difficult to identify which side is the fusible adhesive side
- May show slightly on very light or sheer fabrics, requiring testing first
- Requires careful heat and steam control to avoid puckering or poor adhesion
2. Snap On Open Toe Presser Foot
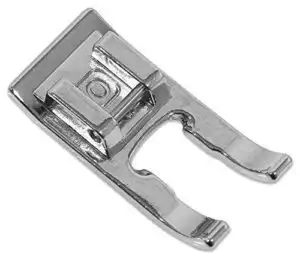
When precision matters most, you’ll want a snap-on open toe presser foot in your arsenal. This game-changing tool gives you crystal-clear visibility of your needle and stitching line, making curved seams feel less like guesswork and more like art.
The wide-open front eliminates blind spots that plague standard feet, while the smooth underside glides effortlessly over dense stitches without catching or puckering. You’ll snap it on in seconds—no screws, no fuss—and immediately notice how much easier it becomes to follow marked curves and maintain consistent seam allowances on both convex and concave shapes, using a snap-on open toe presser foot for better results with curved seams and achieving consistent seam allowances.
Best For: Sewists who work with curved seams, appliqué, decorative stitching, and quilting projects requiring precise stitch placement and enhanced visibility.
- Wide-open front provides crystal-clear visibility of needle and stitching line for accurate seam following
- Snap-on design allows quick foot changes without screws, saving time during multi-step projects
- Smooth underside glides over dense stitches and decorative work without catching or puckering
- Compatibility varies by sewing machine model and may require checking manufacturer specifications
- Not suitable for all sewing projects, particularly those requiring enclosed or specialty foot designs
- May provide less fabric control than standard feet for straight-line sewing on lightweight materials
3. Clear Open Toe Presser Feet
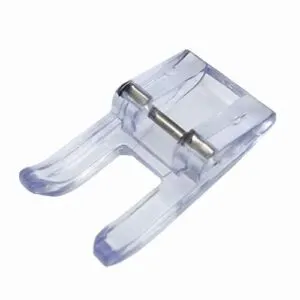
When visibility becomes your superpower, clear open toe presser feet transform your curve-sewing game completely. You’ll see exactly where your needle lands, eliminating guesswork on tight turns and intricate appliqué work.
The transparent plastic construction provides an unobstructed view while maintaining durability for regular use. Compatible with most snap-on low-shank machines, these feet accommodate up to 7mm stitch widths for decorative projects.
The enhanced sight lines reduce errors substantially, especially on layered fabrics where precision matters most. With clear open toe presser feet, you can achieve professional-looking results with ease.
Best For: Sewists who need precise visibility for appliqué work, decorative stitching, and navigating tight curves with accuracy.
- Transparent design provides clear view of needle and fabric for precise alignment
- Compatible with most low-shank snap-on machines and accommodates up to 7mm stitch width
- Reduces errors significantly on layered fabrics and complex curve work
- May not fit perfectly on all compatible machines, potentially causing loose attachment
- Can break needles if stitch width isn’t adjusted properly to avoid hitting the middle bar
- Not compatible with all Brother models and some machines may require additional adaptors
4. Quilting Walking Foot Sewing Guide
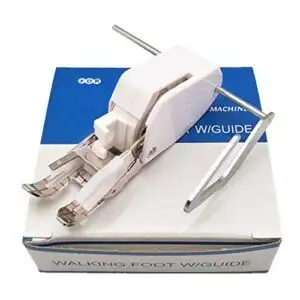
Several walking foot attachments transform curve sewing from challenging to manageable. The quilting walking foot sewing guide features an open-toe design that boosts visibility while maintaining even fabric feed through multiple layers.
You’ll attach this clear plastic guide to your walking foot’s back, creating consistent parallel spacing for echo quilting curved lines. It works perfectly on gentle to medium curves, though tight curves need careful marking.
Set your stitch length to 2.5-3.0mm and maintain slow, steady speeds for professional results on stretchy fabrics and thick quilt sandwiches.
Best For: Quilters who need consistent parallel spacing when sewing curves through multiple fabric layers, especially those working with stretchy fabrics or thick quilt sandwiches.
- Open-toe design provides excellent visibility while maintaining even fabric feed through multiple layers
- Adjustable guide creates consistent parallel spacing for professional echo quilting results
- Works effectively on gentle to medium curves with proper stitch settings (2.5-3.0mm)
- Limited to low shank machines and may not fit all sewing machine brands
- Requires careful marking for tight curves and may struggle with complex curved patterns
- Some users report durability issues with the plastic guide breaking or shifting during use
5. Premium Sewing Clips Assorted Colors

Beyond pins, premium sewing clips offer exceptional control when tackling curved seams. These colorful clips grip multiple fabric layers without creating permanent holes, making them perfect for delicate materials like silk or vinyl.
Their flat-backed design feeds smoothly under your presser foot, while the assorted colors help you organize different seam sections. Space clips closer together on tight curves—they’ll hold your fabric steady while you navigate those tricky turns with confidence, using curved seams as an example.
Best For: Quilters, seamstresses, and crafters who work with delicate fabrics, curved seams, or thick material layers that need secure holding without pin holes.
- No permanent holes in fabric like pins create, perfect for leather, vinyl, and delicate materials
- Flat-backed design feeds smoothly under presser foot without bulk or catching
- Assorted colors help organize different fabric sections and seam types during complex projects
- Some clips may require significant hand strength to open, making them difficult for children or those with limited dexterity
- Quality can vary between clips in the same pack, with some being defective or inconsistent
- Not suitable for all sewing tasks like precise zipper installation where pins may still be preferred
6. Fiskars Softgrip Fabric Pinking Shears
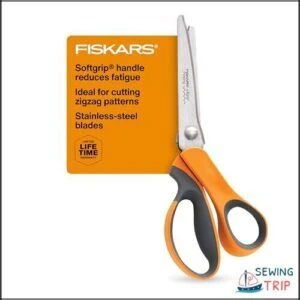
You’ll find these pinking shears invaluable for preventing fraying on curved seams. The zigzag cut substantially reduces unraveling on woven fabrics, keeping your finished curves crisp and professional-looking.
Their ergonomic Softgrip grips reduce hand fatigue during extended cutting sessions, while the bent design keeps fabric flat for precise cuts along curves. The high-grade stainless steel blades cut cleanly through multiple fabric layers, making them perfect for prepping curved edges before sewing and finishing seam allowances after construction.
Best For: Sewers and crafters who work with woven fabrics and need to prevent fraying on curved seams while maintaining precision and comfort during extended cutting sessions.
- Zigzag cut effectively prevents fabric fraying and unraveling on woven materials
- Ergonomic Softgrip handles reduce hand fatigue and provide excellent control
- High-grade stainless steel blades cut cleanly through multiple fabric layers with lasting sharpness
- Handle design may be uncomfortable for users with larger hands
- Not suitable for knit fabrics as the cutting motion can distort stretch materials
- Higher price point compared to standard fabric scissors
7. Singer zig zag fabric scissors
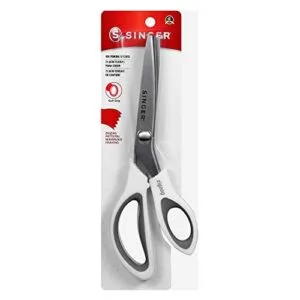
When precision meets practicality, Singer’s 9-inch zigzag fabric scissors become your secret weapon for curved seam finishing. You’ll cut fabric in precise zigzag patterns that minimize fraying on cotton, denim, and chiffon without needing a serger.
The heavy-duty stainless steel blades maintain their sharpness through countless projects, while the soft-grip handle reduces hand fatigue during extended cutting sessions. These scissors excel at finishing raw edges on curved seams, preventing unraveling that could compromise your curved construction work.
Best For: Sewers and crafters who need to finish fabric edges without a serger, especially those working with woven materials like cotton, denim, and chiffon.
- Heavy-duty stainless steel blades maintain sharpness through extended use and resist corrosion
- Soft-grip handle with ergonomic design reduces hand fatigue during long cutting sessions
- Creates precise zigzag cuts that effectively minimize fraying on various woven fabrics
- Some users find the scissors uncomfortable to hold during extended cutting sessions
- The weight can feel heavy for prolonged use, though most users adapt to it
- Not effective on knit fabrics due to limited stretch fray prevention capabilities
8. Prym Tailors Ham for Sewing Tools
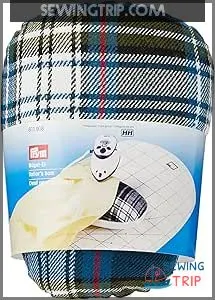
After pressing curved seams flat, you’ll need the Prym Tailor’s Ham to shape them properly. This rounded pressing tool aids curved areas like necklines and darts without flattening their natural contours.
The cotton side accommodates high-heat fabrics, while the wool side protects delicate materials. You’ll prevent unwanted press marks and puckers that plague flat ironing boards. It’s like having a professional tailor’s secret weapon in your sewing room, using a tool that helps with curved seams.
Best For: Sewers and tailors who work with curved seams, darts, and contoured garment pieces that need professional pressing without flattening.
- Dual-sided design with cotton for high-heat fabrics and wool for delicate materials
- Prevents puckering and unwanted press marks on curved seams that flat boards can’t handle
- Compact, durable construction that fits under garment surfaces for precise pressing
- Requires practice to master proper technique for best results
- Size may be smaller than expected at 20 x 14 x 10 cm dimensions
- Additional expense that some casual sewers may find unnecessary for basic projects
9. Clear Starch Alternative Ironing Spray
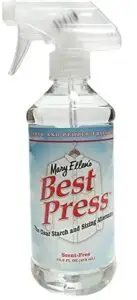
Clear starch alternatives transform your curve-sewing game by stabilizing fabric without the mess. You’ll eliminate stretching and distortion that plague curved seams, especially on bias edges.
These plant-based sprays create temporary stiffness, making precise cutting and handling easier. Unlike traditional starch, they won’t yellow, flake, or attract bugs.
Apply before cutting for sharper shapes and cleaner results. The soil guard feature protects finished seams from stains. Your curves will feed smoothly through the machine, preventing the bunching that drives sewers crazy, and with temporary stiffness making the process easier.
Best For: Quilters and sewers working with curved seams who need fabric stabilization without the mess and residue of traditional starch.
- Stabilizes fabric for precise curved cutting and sewing without stretching or distortion
- Plant-based formula won’t yellow, flake, or attract bugs like traditional starch
- Includes soil guard protection to repel stains from finished seams
- May not provide the same level of crispness as regular spray starch
- Can cause color bleeding on certain fabrics like red
- Spray nozzle may leak during use
Preparing Fabric for Smooth Curves
Before you start sewing those curves, you’ll need to prep your fabric properly to avoid frustrating puckers and wonky seams. Apply spray starch and press with a hot iron to stabilize the fabric fibers, then add lightweight interfacing to curved areas like necklines and armholes for extra support and control.
Starching and Pressing Techniques
Starch application transforms floppy fabric into a workable surface. Spray starch onto your fabric pieces, then use a hot pressing iron to activate it.
The steam helps the starch penetrate fibers for better fabric stabilization. Press flat in smooth, overlapping strokes.
This ironing technique creates crisp edges that won’t shift during sewing, giving you the control needed for perfect curves.
Choosing The Right Fabric
Fabric selection makes or breaks your curved seams. Cotton fabrics shine here – they’re forgiving, stable, and won’t fight you during manipulation. Weight consideration matters too; lightweight to medium-weight materials handle curves beautifully, while heavyweight fabrics resist bending and create bulk.
- Cotton blends give you that sweet spot of control without the drama
- Slippery satins will slide around like they’re auditioning for ice dancing
- Stretchy knits need extra TLC to prevent wavy, unpredictable results
For beginners, choosing the right fabric is vital, and understanding forgiving fabrics can make a significant difference in the sewing process.
Applying Interfacing for Stability
Lightweight interfacing becomes your secret weapon for taming unruly curved seams. Apply fusible interfacing types to necklines, armholes, and collar curves before stitching to prevent fabric distortion.
This fabric support creates curve stability by reinforcing the seam allowance area. Choose woven interfacing for firm fabric stabilization, knit varieties for stretch fabrics.
Remember: staystitching first, then interface for exceptional seam reinforcement and professional results.
Marking and Cutting Curved Seams
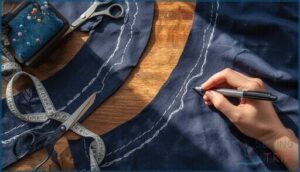
Accurate marking creates the foundation for smooth curves, so you’ll mark your seam allowances precisely before making the first cut.
Sharp fabric scissors and steady hands transform your marked lines into clean edges that’ll sew beautifully together.
Marking Seam Allowance Lines
Before you dive into cutting, take time to mark your seam allowance lines with precision—this step separates amateur work from professional results. Accurate fabric marking prevents costly mistakes and guarantees curve accuracy throughout your project.
Use these essential marking techniques:
- Choose the right marking tool – Water-soluble fabric markers work best for temporary lines
- Mark seam allowance consistently – Measure and mark every few inches along the curve
- Test your fabric marker – Always test on scraps to ensure marks disappear completely
- Double-check measurements – Verify seam allowance line placement before cutting begins
Pattern making demands sewing precision from the start.
Using Rotary Cutters and Scissors
Beyond marking, choosing the right cutting tool makes all the difference. Sharp fabric scissors give you precise control over curved seams, while rotary cutters excel at smooth, continuous cuts. Keep your blade maintenance current—dull blades create jagged edges that compromise your curves.
| Tool | Best For | Maintenance Tip |
|---|---|---|
| Fabric Scissors | Tight curves, detailed work | Regular scissor sharpening |
| Rotary Cutter | Long gentle curves | Replace blades frequently |
| Pinking Shears | Seam finishing | Clean fabric lint often |
| Electric Scissors | Thick fabrics | Check cord regularly |
| Craft Knife | Precision notches | Sharp blade replacement |
Tips for Accurate Fabric Cutting
Sharp tools make clean cuts—dull blades drag and distort fabric pieces. Keep your rotary cutter fresh and scissors razor-sharp.
Use pattern weights instead of pins to prevent shifting when cutting curves. Your fabric lay direction matters too—smooth curves need steady hands and quality cutting tools.
Check grain line accuracy before placing templates.
Pinning and Basting Curved Edges
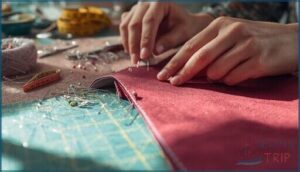
You’ll need strategic pin placement every quarter-inch along curved edges to prevent fabric shifting and maintain control throughout the sewing process.
Basting curved seams before final stitching allows you to test the fit and make adjustments, ensuring your curves lie flat without puckering or distortion.
Pin Placement for Control
Once you’ve marked and cut your curved seams, strategic pin placement becomes your best friend for maintaining control. Proper pinning frequency prevents fabric shifting while ensuring smooth curves throughout the sewing process.
- Pin every 1/4″ on tight curves – your fabric won’t dare misbehave
- Angle matters – position pins perpendicular to curved seams for maximum grip
- Match fabric types – lightweight fabrics need closer pin placement than heavy ones
- Strategic placement – pin at curve peaks and valleys first, then fill between
Basting Methods for Curves
After pinning, you’ll want to secure those curves before machine stitching. Hand basting works well for precise control, using long running stitches about 1/4″ from the seam line. Machine basting with a 4.0-5.0 stitch length speeds things up. Glue basting with a washable glue stick offers quick placement without thread.
Choose your basting method based on fabric weight and curve complexity for best curved seam sewing results.
Easing Fabric Without Distortion
Once you’ve basted your curves, you’ll need to ease excess fabric without creating distortion. This fabric manipulation requires grain consideration and strategic gathering techniques. Work slowly, distributing fullness evenly along the curve while maintaining the fabric’s natural bias properties.
- Gentle finger pressing – Work fabric into position without pulling
- Strategic gathering – Create tiny pleats at curve points for even distribution
- Bias techniques – Utilize fabric’s natural stretch on curved seam allowances
- Clipping techniques – Make small relief cuts before easing to prevent puckering
- Pressing techniques – Use steam to relax fibers during fabric distortion prevention
Setting Up Your Sewing Machine
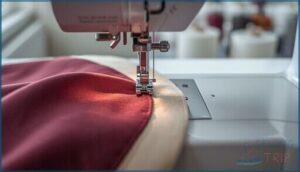
Your machine setup can make or break your curved seaming success, so start by switching to an open-toe or clear presser foot for better visibility around tight turns.
Adjust your stitch length to 1.8-2.0mm for sharp curves and activate needle down position to maintain control when you pause to pivot—trust me, your future self will thank you when those princess seams look professionally smooth instead of wonky.
Selecting Presser Feet for Curves
Your presser foot choice can make or break curved sewing success. The open toe presser foot offers an enhanced visibility boost for steering through tight curves, while the CurveMaster foot automatically eases fabric for challenging patterns. Match your presser foot pressure and feed dog compatibility to your curve complexity for ideal results. For sewing buttons by machine, consider using a specially designed button foot.
| Presser Foot Type | Best For |
|---|---|
| Open Toe/Clear View | Tight curves, precision work |
| CurveMaster | Quilting curves, auto-easing |
| Walking Foot | Knits, slippery fabrics |
Adjusting Stitch Length and Tension
With your presser foot selected, fine-tune your sewing machine settings for curve success. Shorter stitch length provides better control around tight curves, while standard length works for gentle ones. Adjust your sewing speed to match curve severity—slower for sharp turns.
- Prime Tension Settings: Test fabric thickness impact on your machine’s tension dial before starting your project
- Thread Type Matters: Match your thread weight to fabric weight for balanced stitches and smooth curves
- Troubleshooting Imbalance: If stitches pull or pucker, adjust tension gradually until short stitches lay flat
Using Needle Down and Speed Control
Your needle down feature is your secret weapon for Precise Pivoting around tight curves. Engage needle down so the needle stays embedded when you lift the foot pedal, preventing fabric shift.
Slow your sewing speed to maintain Machine Control—curves aren’t races. Adjust Speed Settings via your machine’s controls or ease off the Foot Pedal pressure. These Sewing Machine Techniques make for Consistent Stitching when sewing curves.
| Feature | Benefit |
|---|---|
| Needle Down | Locks fabric position |
| Slow Speed | Maintains precision |
| Speed Control | Prevents rushed mistakes |
| Foot Pedal Pressure | Controls stitch pace |
Step-by-Step Guide to Sewing Curves
Now you’ll master the actual stitching process, where your machine settings and fabric preparation pay off.
This step-by-step approach breaks down convex and concave curves into manageable techniques, helping you maintain consistent seam allowances while getting around tight corners and gentle sweeps.
Sewing Convex Vs. Concave Curves
Understanding curve types transforms your sewing game. When joining convex curves (outer edges) to concave curves (inner edges), position the convex piece on top. This seam manipulation technique prevents unwanted stretching.
Your fabric choice matters—stable materials resist distortion. Use clipping techniques on concave seams and notching on convex ones. Proper pressing methods set these curved seam techniques beautifully.
Techniques for Tight and Gentle Curves
Tight curves demand patience and precision. Shorten your stitch length to 1.8-2.0mm and reduce speed control for better fabric manipulation. Use curve pivoting with needle down, lifting your presser feet frequently around sharp turns.
For gentle curves, maintain 2.4-2.6mm stitch length at normal speed. Let the machine guide you—don’t fight it.
Maintaining Even Seam Allowances
Seam Allowance Guides become your best friend when tackling curved seams. Use Specialized Rulers or marking tools to maintain Consistent Width Techniques throughout your curve.
Visual Checks every few inches make sure you’re Pivoting Precisely without drift.
For Curved Seam Allowances, clip the seams at regular intervals to prevent bunching and maintain that smooth, professional finish you’re after.
Clipping, Notching, and Grading Seams
After you’ve sewn those beautiful curves, you’ll need to trim and manipulate the seam allowances so they’ll lay flat and professional-looking. Think of clipping and notching as giving your seam allowances breathing room—inner curves get small clips to release tension, while outer curves get small triangular notches removed to eliminate bulk.
Clipping Inner (Concave) Curves
After completing your curved seam, you’ll need to clip the seams on concave curves to prevent puckering. Make small perpendicular cuts into the seam allowance, stopping about 1/8″ from your stitching line.
Space clips closer together on severe curves. This releases tension in curved seam allowances, allowing them to lay flat when turned. Use sharp fabric scissors for clean cuts that won’t fray.
Notching Outer (Convex) Curves
Tackling convex curves requires strategic notch spacing to achieve bulk reduction and prevent bunching. Cut notches at 1/4-inch intervals along the seam allowance, making angled notches rather than straight cuts—they’re less likely to tear.
Alternative methods include pinking shears for gentle curves or small triangular wedges for tighter areas.
Grading Seam Allowances for Smoothness
Proper grading transforms bulky curved seams into smooth, professional finishes that’ll make your projects sing. You’ll trim each seam allowance to different lengths, creating a stepped effect that eliminates bulk and prevents unsightly ridges from showing through your fabric.
- Seam Allowance Width: Trim the longest layer to ⅜”, middle layer to ¼”, and shortest to ⅛”
- Layering Techniques: Keep interfacing closest to garment, facing second, then main fabric on top
- Bulk Reduction: Use sharp fabric scissors at a slight Angle of Trim for clean cuts
Pressing and Finishing Curved Seams
You’ve done the hard work of clipping and grading your curves, but pressing is where the magic happens—it transforms your seams from “homemade” to haute couture.
Heat, steam, and the right tools will set your stitches permanently, creating those crisp, smooth curves that separate professional work from beginner projects.
Pressing Tools and Techniques
After clipping and grading your seam allowances, proper pressing tools make all the difference. A tailor’s ham bolsters curved areas during seam pressing, while a pressing cloth protects delicate materials.
You’ll need a good steam iron with adjustable heat settings for different fabrics. Iron selection matters—choose one with strong steam output for curved seam finish work. Keep spray starch handy for extra crispness.
Setting Seams With Steam and Clappers
Beyond simply pressing curved seams, you’ll master the art of setting them permanently with strategic steam and clapper pressure. Steam temperature should match your fabric type, while seam dampness helps seams stay put.
- Apply controlled steam to curved seam allowances for 10-15 seconds
- Press down firmly with a tailor’s clapper while steam dissipates
- Hold pressure for 30 seconds to set the curved seam shape
- Repeat on stubborn areas that won’t lay flat properly
This technique locks your finish quality in place, preventing those annoying curved seams from popping back up later.
Achieving a Professional Finish
Once you’ve set those seams with steam and clappers, the real magic happens with professional finishing touches. Your curved seams deserve clean finishes that’ll make experienced sewists nod with approval.
| Technique | Purpose |
|---|---|
| Seam Grading | Reduces bulk in layered curves |
| Understitching Curves | Prevents facings from rolling out |
| Bias Binding | Encases raw edges beautifully |
| Topstitching Details | Adds structure and visual appeal |
| Curved Seam Finishing | Creates couture-quality results |
The secret? Layer these techniques thoughtfully—grade your seam allowances first, then understitch before adding any topstitching details.
Troubleshooting Common Curved Sewing Issues
Even experienced sewers encounter frustrating curve challenges, from stubborn puckers to wavy edges that refuse to behave.
You’ll master these common problems with targeted fixes that transform your curved seams from amateur to professional-looking results.
Preventing Puckers and Stretching
Puckers and stretching turn smooth curves into frustrating disasters. Staystitching importance can’t be overstated—apply it 1/8″ from curved edges before assembly.
Use interfacing solutions on bias areas for stability. Adjust machine tension to prevent fabric distortion.
Control seam allowance width consistently, and remember fabric grain awareness helps you anticipate problem areas before they happen.
Fixing Uneven or Wavy Curves
Wavy curves happen when tension balance issues throw off your stitching rhythm.
Start seam ripple correction by using fabric relaxation methods—gently stretch the curved seams perpendicular to the stitching line. For bias distortion repair, re-stitch problem areas with shorter stitches and consistent seam allowances.
Curve shape restoration requires patience: steam-press lightly, then reshape by hand while warm for smooth curves.
Tips for Consistent Results
Master consistent stitching by maintaining steady fabric handling and accurate pivoting around curves. Use the needle down feature with appropriate stitch length for directional sewing.
Focus on even seam allowance control while sewing curves. Remember, pressing matters—it sets your curved seams beautifully.
Practice these fundamentals until they become second nature.
Frequently Asked Questions (FAQs)
What kind of curves do you need to know about sewing?
Don’t put the cart before the horse – you’ll encounter two main curve types: convex curves that bow outward and concave curves that curve inward, each requiring different clipping techniques for professional results.
How to sew a curved fabric?
Slow your pace and shorten your stitch length to 0mm. Pin every quarter-inch, clip inner curves, and notch outer curves. Press seams flat after stitching for professional results.
How do you sew curves on a sewing machine?
Set your machine to a shorter stitch length around 0mm, then sew slowly while pivoting frequently. Use an open-toe presser foot for better visibility and clip seam allowances afterward.
How do you sew an outward curve?
Outward curves can be absolute fabric rebels! You’ll notch the seam allowance every half-inch to eliminate bulk, trim close to stitching, then press carefully to create smooth, professional curves.
How do you sew a curve & a circle?
When sewing curves and circles, you’ll shorten your stitch length to 0mm, sew slowly while pivoting frequently, and clip concave curves afterward to eliminate puckering and achieve smooth results.
What happens if you sew a curve?
When you sew curves, you’ll create smooth, professional-looking seams that add dimension to your projects.
However, without proper technique, you’ll face puckering, bunching, or wavy edges that ruin the finished appearance.
What fabric types work best for curved seams?
Cotton, linen, and lightweight wools are your best friends for curved seams. These fabrics cooperate beautifully, bending without fighting back.
Avoid thick denims or stiff canvases—they’ll turn your curves into wrestling matches.
How do you sew French seams on curves?
French seams on curves require extra finesse. First, sew wrong sides together with a narrow 1/8″ seam allowance. Trim close, flip right sides together, and stitch again at 1/4″. Clip curves carefully between stitches.
Can you use serger overlock for curved edges?
Approximately 70% of home sewists avoid curved seams due to difficulty. You can absolutely use a serger for curved edges, but you’ll need to sew slowly and guide fabric carefully around tight curves to prevent stretching.
Whats the difference between stay stitching and basting?
Stay stitching prevents fabric edges from stretching during construction—it’s permanent. Basting temporarily holds pieces together for fitting or alignment, then you’ll remove those loose, long stitches later.
Conclusion
Master sewing curved lines through consistent practice, proper preparation, and patience. Whether you’re tackling armholes, necklines, or decorative curves, these techniques transform challenging seams into professional results.
Steady hands, sharp tools, and methodical pressing create smooth curves every time. Your next project will showcase perfectly executed curves that would make any tailor proud—no more avoiding patterns with tricky seams!

