This site is supported by our readers. We may earn a commission, at no cost to you, if you purchase through links.
You’ll need proper tools like an open-toe presser foot for clear visibility and sharp fabric shears for clean cuts.
The secret lies in slowing down your stitching speed and maintaining consistent seam allowances.
For convex curves, clip the seam allowance at regular intervals to prevent puckering. Concave curves need strategic notching to lay flat.
Always staystitch curved edges before assembly to prevent stretching, and use a tailor’s ham when pressing to maintain the curve’s shape.
These foundational techniques reveal advanced methods that’ll transform your garment construction.
Table Of Contents
- Key Takeaways
- Sewing Curves Basics
- Top 9 Sewing Curves Tools
- 1. White Fusible Knit Stay Tape
- 2. Open Toe Appliqué Presser Foot
- 3. Clear Open Toe Embroidery Foot
- 4. Open Toe Walking Foot with Guide
- 5. Yalis Sewing Clips Assorted Colors
- 6. Fiskars SoftGrip Pinking Shears Fabric Shears
- 7. SINGER Pinking Shears Fabric Zig Zag
- 8. Prym Blue Tailors Ham for Pressing
- 9. Dritz Disappearing Ink Marking Pen
- Sewing Convex Curves
- Sewing Curved Seams
- Mastering Curve Sewing Techniques
- Frequently Asked Questions (FAQs)
- Conclusion
Key Takeaways
- Choose the right fabric for success – You will get better results with cotton and stable woven fabrics that bend naturally around curves, while heavyweight materials like denim will fight against you and create bulk.
- Slow down your stitching speed – You will achieve smoother, more professional curves by reducing your stitch length to 2.0mm and sewing slowly with consistent seam allowances rather than rushing through the process.
- Master clipping techniques for different curves – You will need to clip convex curves at regular intervals to prevent puckering, while concave curves require strategic notching to help the fabric lay flat when turned.
- Use proper tools and preparation methods – You will transform challenging curves into manageable projects by using an open-toe presser foot for visibility, staystitching curved edges before assembly, and pressing with a tailor’s ham to maintain the curve’s shape.
Sewing Curves Basics
You’ll master curved seams faster when you start with the right fabric foundation.
Cotton and other stable woven fabrics bend naturally around curves, while heavyweight materials fight against you and create bulky, uneven seams, making it important to choose the right fabric for a smooth curved seam.
Choosing Right Fabric
Your fabric choice makes or breaks curved seams.
Woven stability trumps everything—cotton and linen bend beautifully without fighting back.
Skip heavyweight materials that resist curves, and avoid slippery fabrics like satin that’ll slide around.
Check pattern compatibility first.
Natural fibers press better, while knit distortion can wreck your work.
Fabric drape affects how smoothly curves flow, so test scraps beforehand.
When working with woven fabrics, consider using a pinked seam finish to prevent fraying on curved edges, ensuring woven stability and natural fibers are key, with fabric drape and a pinked seam finish being crucial.
Cotton Fabrics
Working with cotton fabrics transforms your curve-sewing experience through their natural stability and manageable texture.
Cotton weaves provide excellent control during fabric manipulation, while proper fiber content selection guarantees predictable results when easing curves.
Cotton’s natural grip and stability make curve sewing predictable and professional-looking.
Here are five cotton fabric advantages for sewing curves:
- Cotton weaves maintain dimensional stability, preventing unwanted stretching during curved seam construction
- Thread count affects needle penetration – medium-weight cottons offer a balanced compromise for smooth stitching
- Pre-washing eliminates shrinkage concerns that could distort carefully sewn curved seams after completion
- Print direction remains consistent on cotton, helping you match patterns accurately across curved sections
- Fiber content in pure cotton provides natural grip, making it easier to guide fabric through tight turns
Cotton fabrics respond predictably to your sewing tips and techniques, creating professional-looking results even for beginners tackling their first curved project.
When sewing curves, it’s key to understand concave and convex shapes.
Avoiding Heavyweight Materials
Heavyweight materials like denim, canvas, and wool suiting fight against smooth curves.
These thick fabrics resist bending, creating bulk that distorts your garment silhouette.
Fabric weight directly impacts how well curves form—lightweight options like cotton and linen offer better drape and flexibility.
When fabric drape matters most, choose curve-friendly fabrics that bend willingly rather than wrestle with stubborn heavyweight materials.
Selecting Fabric for Smooth Curves
Your fabric choice makes or breaks curve success. While heavier materials resist bending, the right selection transforms challenging curves into manageable projects.
Smart fabric selection involves understanding how different materials behave under stress.
Consider these fabric characteristics for smooth curves:
- Woven Stability – Cotton and linen maintain shape better than stretchy knits, preventing unwanted distortion along bias cuts
- Natural Fiber Properties – These fabrics press beautifully and hold their curved shape after heat setting
- Pattern Compatibility – Match your fabric drape and fiber content to your project’s curve complexity
Slippery fabrics like satin demand extra patience and pinning, while knit distortion can ruin precise curved seams completely.
Top 9 Sewing Curves Tools
The right tools transform tricky curved seams from frustrating obstacles into manageable challenges.
With these nine essential items in your sewing kit, you’ll handle everything from gentle necklines to sharp princess seams with confidence and precision, and tackle tasks with confidence.
1. White Fusible Knit Stay Tape
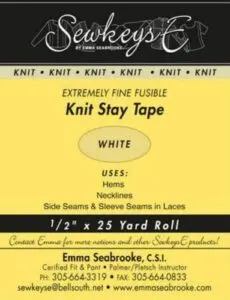
Precision becomes your secret weapon when mastering curved seams.
White fusible knit stay tape transforms tricky curves into professional-looking results by preventing stretching and distortion.
Apply this 1/2-inch tape to curved areas like necklines and armholes before sewing.
The knit construction flexes around curves while the fusible backing bonds permanently with your iron.
It’s virtually invisible once applied, maintaining your fabric’s natural drape.
Test on scraps first to avoid mishaps, and remember—this tape works best on lightweight to medium-weight fabrics where stability matters most.
Best For: Home sewists and garment makers who need discreet, flexible stabilization for curved seams on lightweight to medium-weight fabrics.
- Not necessary for very stable or heavyweight knits
- Over-ironing or improper heat settings can damage fabric or reduce adhesive effectiveness
- Must be tested on scraps first to avoid unexpected results
- Prevents stretching and distortion in curved seams for a smooth, professional finish
- Flexible knit structure easily conforms to curves without adding bulk
- Fusible backing bonds securely and is virtually invisible after application
2. Open Toe Appliqué Presser Foot
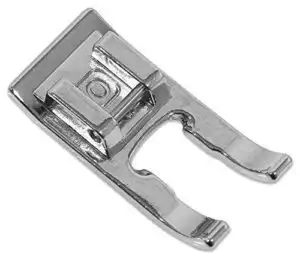
Beyond its clear design, this specialty foot transforms curve sewing into a manageable task.
You’ll see exactly where your needle lands, making precise placement effortless around tight corners and intricate shapes.
The wide groove underneath glides smoothly over dense stitches, preventing bunching that can ruin your work.
The right choice depends on fabric type considerations, ensuring ideal results.
Perfect for appliqué edges, this foot handles zigzag and satin stitches beautifully while maintaining fabric control on curves.
Best For: Sewists who want clear needle visibility and precision when working with appliqué, embroidery, or dense decorative stitches, especially on curves.
- May not be compatible with all sewing machines—check part numbers before purchase.
- Can require regular cleaning to maintain optimal transparency and prevent residue buildup.
- Not ideal for straight utility sewing where specialized features aren’t needed.
- Enhanced visibility for precise stitch placement, even on tight curves.
- Glides smoothly over dense stitches due to the wide channel, preventing fabric puckering.
- Versatile for a variety of techniques, including appliqué, monogramming, and cut work.
3. Clear Open Toe Embroidery Foot
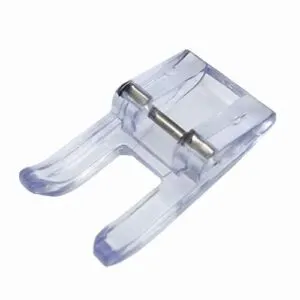
The clear open toe embroidery foot transforms curve sewing from guesswork into precision work.
Its transparent design lets you see exactly where your needle lands, while the wide-open front gives you a clear view of your stitching path.
The underside channel glides smoothly over dense stitches without snagging, preventing that annoying fabric drag that ruins your rhythm.
Red markings help align your stitches perfectly, making it ideal for decorative work and tight curves.
This foot turns tricky curved seams into manageable tasks.
Best For: Sewists and quilters who want precise, visible stitching on decorative, applique, or curved seams using low shank snap-on sewing machines.
- Clear, open toe design provides excellent visibility for accurate stitching on intricate designs.
- Underside channel lets dense or decorative stitches feed smoothly, preventing puckering or distortion.
- Compatible with most popular low shank sewing machine brands, boosting versatility.
- Not compatible with high shank machines, limiting use to specific models.
- Some Singer models require a separate adaptor for attachment.
- No included warranty or explicit durability guarantees mentioned.
4. Open Toe Walking Foot with Guide
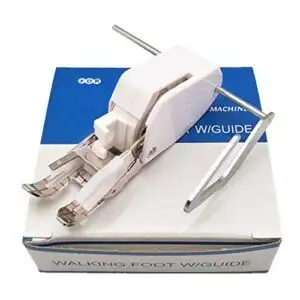
When you’re wrestling with multiple fabric layers on curves, this foot becomes your secret weapon.
The open toe design gives you crystal-clear visibility of your needle and stitching line, while the walking mechanism feeds all layers evenly to prevent pucking and shifting.
You’ll love the adjustable guide bar that lets you sew perfectly parallel curved lines – just set it and watch your spacing stay consistent.
It’s compatible with most low-shank machines and handles everything from lightweight cotton to thick denim with ease, making it a versatile tool for various sewing tasks, including working with low-shank machines.
Best For: Quilters and sewists who want precise, even stitching on curves and layered projects using a low-shank machine.
- Only fits low-shank, top-loading machines, so not universally compatible.
- Proper guide attachment and occasional adjustments are needed for best results.
- May require slower sewing speed and practice to master curved stitching techniques.
- Open toe design gives clear needle visibility for accurate curved seams.
- Walking foot mechanism feeds multiple layers evenly, reducing puckering and shifting.
- Adjustable guide bar helps sew consistent, parallel lines on curves.
5. Yalis Sewing Clips Assorted Colors
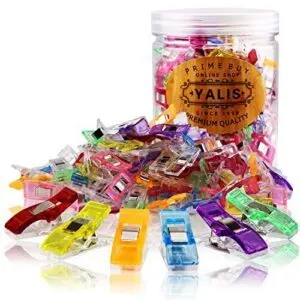
Transform your curve sewing with Yalis’s 100-pack assorted colored clips that grip fabric layers securely without leaving pin holes.
Each clip features marking lines at 5mm, 7mm, and 10mm for precise seam allowances, while their flat base feeds smoothly under your presser foot.
The bright colors help you organize complex projects and stay visible if dropped, making these clips perfect for thick fabrics, delicate materials, and curved seams where traditional pins fail, thanks to their child-safe design.
Best For: Crafters, quilters, and sewists who want precise, child-safe, and easy-to-use fabric clips for managing layers and curved seams.
- Flat base with measurement lines ensures accurate seam allowances and smooth fabric feeding.
- Bright colors help organize materials and keep dropped clips visible.
- Child-safe, blunt design eliminates pin pricks and fabric holes, making them suitable for all ages.
- Color assortment is random, so specific color preferences can’t be guaranteed.
- Clips may not hold as tightly as pins on very thin or slippery fabrics.
- Bulk packaging could be excessive for those who only sew occasionally or need just a few clips.
6. Fiskars SoftGrip Pinking Shears Fabric Shears
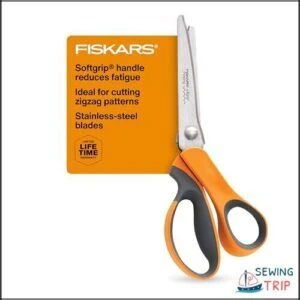
Pinking shears aren’t just for preventing fraying—they’re curve-sewing game changers.
These Fiskars shears create precise zigzag cuts that reduce bulk in curved seam allowances, making your curves lay flatter and smoother.
The ergonomic SoftGrip handle prevents hand fatigue during those marathon sewing sessions, while the bent design keeps fabric flat for accurate cutting.
The extended lower blade lifts fabric slightly, giving you better visibility and control when trimming curved seams to perfection, with the overall design making them precise tools for the task.
Best For: Crafters, quilters, and sewists who need comfortable, precise zigzag cuts to prevent fabric fraying and handle curves with control.
- SoftGrip handle minimizes hand fatigue, even during long projects
- Precision-ground stainless-steel blades stay sharp and cut all the way to the tip
- Bent handle and extended lower blade help keep fabric flat for accurate, clean cuts
- Not ideal for straight cuts or trimming challenging materials outside fabric and craft projects
- May feel bulky for small hands or very detailed work
- Higher price point compared to basic scissors
7. SINGER Pinking Shears Fabric Zig Zag
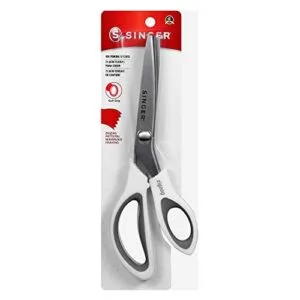
SINGER’s pinking shears deliver professional-grade zigzag cuts that stop fabric fraying in its tracks.
These 9-inch stainless steel blades create crisp sawtooth edges, perfect for finishing curved seams without additional stitching.
The soft white grip handles reduce hand fatigue during long cutting sessions, while the heavy-duty construction maintains sharpness through countless projects.
You’ll love how they transform raw edges into clean, decorative finishes on cotton, flannel, and other tightly woven fabrics, making them ideal for achieving a clean look.
Best For: Sewers and crafters who want crisp, decorative edges and minimal fabric fraying on woven materials.
- Less effective at preventing fraying on knits or loosely woven fabrics.
- Performance may drop on heavy or non-fabric materials.
- Requires regular maintenance and occasional professional sharpening to sustain optimal results.
- Durable stainless steel blades maintain long-lasting sharpness for consistently clean zigzag cuts.
- Soft, ergonomic grip ensures comfortable, pain-free cutting even during extended use.
- Ambidextrous and lightweight design offers smooth, controlled cutting on curved seams.
8. Prym Blue Tailors Ham for Pressing
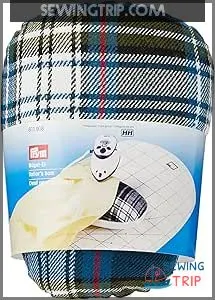
After sewing your curved seams, you’ll need the Prym Blue Tailors Ham to press them properly.
This firm, cushioned tool measures approximately 20x14x10cm and features dual surfaces—cotton for high-heat pressing and wool for delicate fabrics.
Its curved shape perfectly matches garment contours like necklines, darts, and princess seams.
Simply place your sewn curve over the ham’s corresponding contour and press with steam.
This prevents flattening while setting the three-dimensional shape permanently, giving your garments that professional, bespoke finish with steam.
Best For: Professional sewists, tailoring enthusiasts, and home makers who frequently work with curved garment seams and want precise pressing results.
- Supports accurate pressing on curves like necklines, cuffs, and darts for a professional finish
- Double-sided surface for both high-heat and delicate fabric pressing
- Durable filling and construction ensure long-lasting use
- Requires careful handling and spot cleaning to maintain function
- Not machine washable, limiting cleaning options
- Takes up extra space compared to a standard ironing board
9. Dritz Disappearing Ink Marking Pen

Every precise curve marking starts with the right pen, and this purple-ink wonder disappears within 24-72 hours automatically.
You’ll love how the extra-fine tip creates sharp, detailed lines perfect for tracing pattern pieces and marking seam allowances on curves.
The air-soluble ink vanishes on its own, but you can speed removal with a damp cloth.
Test on fabric scraps first—some materials make marks fade faster than expected, so work quickly on humid days.
Best For: Sewers, quilters, and crafters who need precise, temporary fabric markings that disappear on their own.
- Extra-fine tip delivers sharp, accurate lines for detailed work.
- Air-soluble ink vanishes within 24–72 hours or can be removed with water.
- Ideal for delicate fabrics where chalk, pencils, or other markers won’t work.
- Marks can fade too quickly in humid conditions or if project is delayed.
- Not suitable for dark fabrics due to purple ink color visibility.
- Ink may set as a permanent stain if ironed or laundered before removal.
Sewing Convex Curves
Convex curves bulge outward like the rounded edge of a collar or pocket flap, and they’re actually easier to sew than their concave cousins.
You’ll need to clip the seam allowance after stitching to help the fabric lay flat without bunching up.
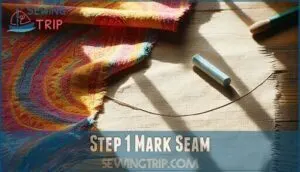
Step 1: Mark Seam
Marking your seam line with precision transforms challenging curves into manageable sewing tasks.
Use a removable fabric marker to trace the exact seam allowance, ensuring your stitching stays true to the pattern’s intended shape.
- Choose removable fabric markers – Water-soluble or air-disappearing ink prevents permanent marks
- Mark seam allowance consistently – Trace ¼ inch from raw edge for accurate curve tracing
- Focus on pattern matching points – Mark notches and center points for proper alignment
- Test marking tools first – Verify your fabric marker disappears completely on scraps
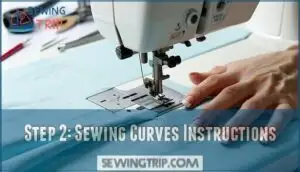
Step 2: Sewing Curves Instructions
After marking your seam, position fabric under your presser foot with needle down at the curve’s starting point.
Adjust your sewing machine to 2.0mm stitch length for better control on tight curves.
| Pinning Techniques | Fabric Manipulation | Needle Position |
|---|---|---|
| Pin every ¼ inch vertically | Guide gently with fingertips | Keep needle down when pivoting |
| Remove pins before stitching | Don’t stretch or pull fabric | Stop with needle in fabric |
| Use clips on thick seams | Let fabric feed naturally | Pivot frequently on tight curves |
Sew slowly, maintaining consistent seam accuracy while following your marked line.
Use the needle down feature for precise pivoting around curved sections, ensuring your stitch direction flows smoothly.
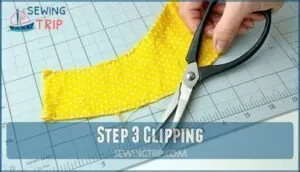
Step 3: Clipping
Small, strategic cuts make all the difference when clipping curves.
Make perpendicular snips into your seam allowance, stopping just short of the stitching line.
For sharp curves, increase your clipping frequency—space cuts every quarter-inch. Gentle curves need fewer clips.
Always angle your cuts straight, not diagonal, to prevent fraying.
Use sharp fabric scissors for clean cuts that won’t create bulk when turning. This prevents bunching or pulling on the finished project, ensuring a professional look with clean cuts.
Step 4: Turn & Press
After clipping your curves, you’ll turn and press to achieve that professional finish.
Patience during pressing transforms your careful clipping work into crisp, professional curves.
This step transforms your raw seamed edges into smooth, defined curves.
Here’s your turning and pressing roadmap:
- Turn carefully – Gently push out curves using a point turner or blunt tool, avoiding sharp objects that might poke through
- Press with steam – Use a pressing cloth and steam iron to set the seam allowance flat without distorting the fabric
- Understitch when possible – Stitch the seam allowance to the facing to prevent rolling and maintain crisp edges
- Use shaping tools – A tailor’s ham supports curved areas during pressing, preventing flattening of dimensional shapes
- Press seams flat first – Always press the seam flat before turning to eliminate bulk and guarantee smooth curves
The key is patience – rushing this stage can undo all your careful clipping work.
Sewing Curved Seams
When you’re sewing two curved pieces together, you’ll need to match their shapes perfectly while maintaining smooth, professional-looking seams.
This technique combines the precision of convex curve sewing with the challenge of aligning two different curve directions, but the five-step process makes it manageable.
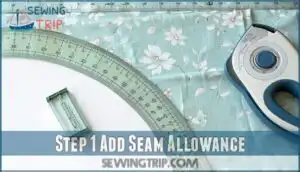
Step 1: Add Seam Allowance
Adding seam allowance requires precision for smooth curved seams.
Standard 5/8-inch allowances work well, but you’ll need consistent marking throughout.
Use accurate marking techniques to maintain seam width uniformity.
Curve grading becomes essential later, so plan for trimming excess fabric during finishing steps.
| Curve Type | Recommended Allowance | Special Notes |
|---|---|---|
| Gentle curves | 5/8 inch standard | Easy to handle, forgiving |
| Sharp curves | 1/2 inch reduced | Prevents bulk, easier clipping |
| Opposing curves | 5/8 inch matched | Guarantees proper alignment |
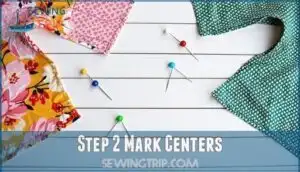
Step 2: Mark Centers
Before you even think about stitching, you’ll want to grab your chalk pencils or fabric markers for accurate marking. Find the center points of both curved pieces and mark them clearly—these center notches become your alignment points throughout the process.
This simple step prevents wonky curves and makes certain your pieces match perfectly. Remember to review fabric marking tools for accurate pattern transfer.
Trust me, marking centers saves countless headaches when sewing curves later.
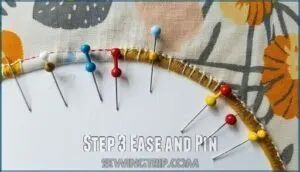
Step 3: Ease and Pin
Perfect fabric easing starts with matching those marked centers you created earlier.
Now you’ll coax the curves into harmony through strategic pin placement and gentle fabric manipulation.
Here’s your easing and pinning game plan:
- Start with center pins – Align your center marks and secure with pins placed perpendicular to the seam line
- Work outward gradually – Add pins every quarter-inch, gently easing the outer curve to match the inner piece
- Use vertical pin placement – Position pin heads toward the curve’s outside for easy removal during sewing
The secret to preventing puckering lies in patience during this step.
Don’t force the fabric – let it naturally settle into position.
For tricky curves, glue basting offers an alternative to traditional pinning, keeping everything perfectly aligned without bulk.
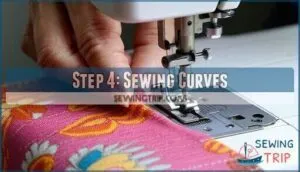
Step 4: Sewing Curves
With your fabric positioned and pinned, it’s time to transform that curved edge into stitching perfection.
Set your stitch length to 2.0mm for ideal control, then engage the needle down feature—this becomes your anchor when pivoting around tight curves.
Guide fabric gently through the machine while maintaining consistent seam allowance, letting the needle do the work rather than forcing fabric manipulation, and practice smooth stitching rhythm for professional curved seams.
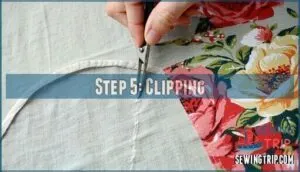
Step 5: Clipping
After sewing your curved seam, you’ll need to clip into the seam allowance to help it lie flat.
For concave curves, make small snips perpendicular to the stitching line, stopping just short of your thread.
For convex curves, try notching—cutting out tiny triangular wedges instead.
This prevents bunching when you turn the fabric right side out.
Mastering Curve Sewing Techniques
Now that you’ve got the basics down, it’s time to level up your curve sewing game with some pro techniques.
These five methods will transform your wobbly curves into smooth, professional-looking seams that’ll make you wonder why you ever struggled with them in the first place, and achieve professional-looking results.
Using Staystitching for Curve Control
Staystitching acts like an invisible safety net for your curves. This simple technique prevents fabric warping and keeps your carefully cut pieces from stretching out of shape during handling.
- Staystitch immediately after cutting – Don’t let bias-cut curves sit around and stretch while you work on other pieces
- Follow proper staystitch direction – Sew from shoulder to center on necklines, maintaining fabric’s natural grain
- Keep stitching within seam allowances – Position your line 1/8 inch inside the seam line for hidden reinforcement
- Use shorter stitch length – Set your machine to 1.5-2.0mm for maximum curve control and stability
- Focus on stabilizing necklines first – These high-stress areas benefit most from preventing distortion through proper fabric manipulation
For added stability, consider using fusible stay tape.
Applying Interfacing for Stability
Adding interfacing creates a backbone for your curves, preventing stretching and distortion.
Choose fusible interfacing for quick application or sew-in interfacing for delicate fabrics.
Match interfacing weight to your fabric—lightweight for cottons, knit interfacing for stretchy materials.
Consider exploring options for purchasing interfacing materials to guarantee you have the right supplies.
Apply to the wrong side before construction for maximum fabric stabilization and seam integrity.
Sewing Slowly for Precision
Every expert knows that patience makes perfect—rushing through curves creates wobbly seams and frustrated sewists.
Controlled stitching at half your normal speed gives you precision and smooth guidance around challenging bends.
This slow stitching technique prevents fabric distortion while maintaining a consistent seam allowance.
To further stabilize your fabric, consider using staystitching methods.
Your sewing curves will transform from amateur attempts into professional-looking results when you master these essential sewing tips and tricks for avoiding distortion, and with consistent practice, you will achieve perfection.
Pivoting for Smooth Curves
Perfect pivot points make all the difference when sewing curves.
Use your machine’s needle down feature to stop mid-curve, lift the presser foot slightly, and rotate fabric incrementally. This fabric rotation technique prevents bunching while maintaining smooth curves.
Take small bites around tight corners, pivoting every few stitches, to achieve flawless results with your sewing tips. Your sewing tips arsenal isn’t complete without mastering these incremental sewing tricks.
Maintaining Consistent Seam Allowance
A steady seam allowance guide transforms wobbly curves into professional masterpieces.
Use your machine’s seam guide or mark consistent measurements with accurate marking tools before sewing curved seams.
Choose a presser foot that maintains consistent stitch width while following your marked lines.
When clipping curves right, you’ll preserve that perfect seam allowance for smooth results.
Frequently Asked Questions (FAQs)
How to sew curves better?
Like threading a needle through a storm, sewing curves demands patience and precision. Use 0mm stitch length, pin every quarter-inch, sew slowly, and staystitch edges first to prevent stretching.
How to sew a curve without puckering?
Use shorter stitch length (0-5mm), sew slowly, and reduce presser foot pressure. Pin vertically every quarter-inch, don’t stretch fabric while guiding, and staystitch curved edges beforehand.
How do you sew curves without puckering?
Mastering curves demands surgical precision—shorten your stitch length to 2mm, staystitch edges beforehand, pin every quarter-inch, and sew slowly while gently guiding fabric without stretching it.
What causes wavy curved seams after washing?
Wavy curved seams happen when you skip staystitching bias-cut edges, use too much tension, or don’t match fabric grain properly before sewing, causing distortion during washing.
How do you match curved pieces perfectly?
Roughly 80% of sewing mishaps happen during curve matching.
Mark centers with chalk, pin vertically every quarter-inch, and ease the outer curve piece gently while maintaining consistent seam allowances for perfect alignment.
Why do my curved seams look uneven?
Your curves look uneven because you’re rushing the process, using incorrect stitch length, or not properly pinning.
Slow down, shorten your stitch to 0mm, and pin vertically every quarter-inch for smooth results.
How do you sew curves on stretchy fabrics?
Stretchy fabrics won’t cooperate like you’d expect.
Use knit interfacing for stability, shorten stitch length to 0mm, and apply stay tape to curved edges.
Starch the fabric beforehand, pin vertically every quarter-inch, and sew slowly while gently guiding—never pulling—the material.
Conclusion
Surprisingly, the biggest mistake sewers make isn’t choosing wrong tools—it’s rushing through curves.
You’ve learned these sewing curves tips and tricks, from selecting cotton fabrics to using open-toe feet for visibility.
Remember, slow stitching beats speed every time.
Your seam allowances need consistent attention, whether you’re clipping convex curves or notching concave ones.
Staystitching prevents stretching, while your tailor’s ham maintains shape during pressing.
Practice these techniques, and you’ll transform challenging curves into your sewing superpower by mastering the art of consistent attention.

