This site is supported by our readers. We may earn a commission, at no cost to you, if you purchase through links.
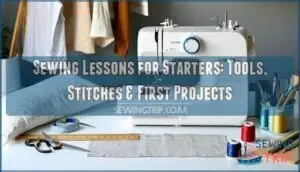 Most people think learning to sew means investing hundreds of dollars in equipment and spending months in formal classes. Wrong. You can start stitching real projects within hours using just five basic tools and your kitchen table.
The secret isn’t expensive gear or perfect technique—it’s understanding which skills actually matter when you’re starting out. Many beginners waste weeks practicing fancy stitches they’ll never use instead of mastering the three foundational techniques that open the door to 90% of beginner projects.
Once you know how to thread a machine, sew a straight line, and secure a seam, you’re ready to create pillowcases, tote bags, and hemmed napkins that look store-bought.
Table Of Contents
Key Takeaways
- You can start sewing real projects within hours using just five basic tools—fabric scissors, measuring tape, pins, needles, and a seam ripper—without spending hundreds on equipment or formal classes.
- Mastering three foundational techniques (threading a machine, sewing straight lines, and securing seams) unlocks 90% of beginner projects like pillowcases, tote bags, and hemmed napkins.
- The straight stitch and backstitch form the core of nearly every sewing project, with the backstitch acting as your seam-locking technique that prevents unraveling through washes.
- Free online sewing courses and communities provide structured learning paths with 6-12 modules covering machine basics, hand-stitching, and downloadable patterns—plus peer support that helps 52% of beginners troubleshoot problems immediately.
Essential Sewing Tools Every Beginner Needs
You can’t sew without the right gear, and getting started doesn’t mean buying everything at once.
I’ve sorted everything into three straightforward groups — enough to get you started on your first projects without spending a fortune.
Here’s what you actually need to grab before you thread that first needle.
Cutting and Measuring Tools
You can’t build a house without measuring twice and cutting once—and the same rule applies to sewing, where your fabric scissors and measuring tape become your most trusted allies.
Invest in sharp fabric scissors dedicated only to cutting fabric—never paper—to maintain precision. Your measuring tape tracks body measurements and fabric yardage for accurate sewing patterns.
Get these basics locked down before you dive into sewing lessons or start picking out fabric.
Pins, Needles, and Thread Basics
Once your cutting tools are ready to roll, pins and needles step in to hold everything together while you sew—and picking the right thread makes all the difference between a project that lasts and one that falls apart.
The essentials break down like this:
- Thread types vary by project—cotton thread suits most beginner sewing classes and everyday fabric preparation
- Needle sizes match fabric weight—thin needles for delicate materials, thicker ones for denim
- Straight pins secure fabric layers before stitching begins
- Hand-sewing needles tackle quick repairs and sewing techniques machines can’t reach
Quality sewing tools don’t break the bank, but they’ll save you headaches down the road in your sewing lessons.
The Seam Ripper’s Role
Mistakes happen—even seasoned sewers pull out stitches they wish they hadn’t made—and that’s exactly why your seam ripper will become one of your most-used tools. This small, pointed tool excels at error correction and thread removal without damaging fabric.
You’ll use it for seam removal, fabric repair, and mistake fixing throughout your sewing lessons. Beginners often fear the seam ripper, but it’s actually your safety net—grab one with a comfortable grip and watch your confidence grow with every corrected stitch.
How to Thread and Operate Your Sewing Machine
Your sewing machine might look intimidating at first, but learning to thread and operate it isn’t as tricky as it seems. Once you understand the basics, you’ll be stitching confidently in no time.
Let’s walk through the essential steps to get your machine up and running smoothly.
Threading The Machine and Bobbin
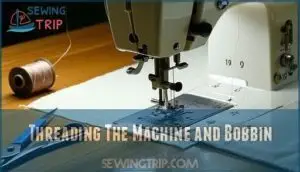
Threading your machine might feel like solving a puzzle the first time, but once you’ve got the hang of it, you’ll be ready to roll in under a minute. Most machines have a numbered path right on the body—just follow those guides from the spool pin down through the tension discs and to the needle.
For bobbin winding, place your thread on the spindle, wrap it around the bobbin a few times, and let the machine do the work.
Adjusting Tension for Perfect Stitches
Stitches looking funky—loops on top, bunching below? Nine times out of ten, it’s your tension dial acting up. Time to dial it in:
- Test your tension settings on scrap fabric before starting any project
- Adjust thread types to match your fabric thickness for balanced stitches
- Check that stitch length complements your machine calibration
- Practice sewing techniques using sewing stitch practice sheets
- Remember that heavier fabrics need different machine tension than lightweight ones
Most sewing machines default to setting 4 or 5—start there and tweak as needed during your sewing lessons.
Basic Machine Maintenance Tips
Your sewing machine will last years longer if you commit to just three simple habits: cleaning out lint after every project, changing needles regularly, and oiling the moving parts once a month. Grab your machine manual—it’ll show you exactly where to drop that oil.
Use a soft brush to clean out your bobbin case, and give those tension settings a quick dust while you’re at it.
Keep up with this maintenance and you’ll deal with way fewer thread jams—plus your stitches will look smoother on every project.
Master These Fundamental Sewing Stitches First
You’ve got your machine threaded and ready—now it’s time to learn the stitches that’ll become your go-to moves for nearly every project.
These handful of basic stitches are the foundation you’ll use whether you’re sewing by hand or machine.
Here’s what to focus on first and why each stitch matters.
Straight Stitch and Backstitch
Think of the straight stitch as the workhorse of your sewing toolkit—it’s the reliable foundation that holds nearly every project together, while the backstitch acts like its trusty sidekick, locking everything in place so your seams never come undone.
Start with a straight stitch on your sewing machine, adjusting stitch length to match your fabric tension and thread types. When you reach seam edges, switch to a backstitch by reversing your sewing speed for three to four stitches—this simple move transforms weak stitch patterns into professional-strength seams that’ll survive countless washes.
Running Stitch and Slip Stitch
When you need speed without sacrificing control, the running stitch is your go-to for quick basting work, while the slip stitch becomes your secret weapon for creating hems so invisible they look like magic.
Master these hand sewing techniques to tackle fabric gathering and sewing edges with confidence:
- Running stitch works perfectly for basic embroidery and temporary seams
- Slip stitch creates an invisible hem that hides your stitches completely
- Both hand stitching methods appear in nearly every beginner sewing tutorial
Whip Stitch and Button Attachment
Buttons are like the unsung heroes of your wardrobe—they hold everything together until one pops off at the worst possible moment, which is exactly why learning to attach them securely (and mastering the whip stitch for quick fabric joins) saves the day more often than you’d think.
Once you’ve got button placement down, edge finishing becomes second nature—especially when you’re using a whip stitch to join fabric pieces or repair a well-loved shirt.
Master these two basics early on, and you’ll find yourself reaching for needle and thread far more often than you’d expect.
Your First Sewing Projects Step-by-Step
Now that you’ve got the basic stitches down, it’s time to put them to work on real projects.
Pick one of these three projects to get your hands dirty. They’re forgiving enough for beginners but satisfying enough that you’ll end up with something worth keeping. Plus, you’ll nail down those techniques without drowning in steps.
Simple Pillowcase Tutorial
A pillowcase might just be the perfect starter project—it’s basically two rectangles stitched together, no zippers or tricky curves to wrestle with. Pick cotton fabric that catches your eye—home decor stores have tons of pillowcase patterns to inspire your fabric selection.
- Cut two matching rectangles using your measuring tape and fabric scissors
- Pin the pieces together with right sides facing each other
- Sew three edges with your sewing machine using a straight stitch
- Practice edge finishing techniques and sewing corners for a polished look
You’ll master essential sewing techniques while creating something actually useful.
Making a Basic Tote Bag
Once you’ve nailed that pillowcase, step up to a tote bag—it teaches you grips, reinforced seams, and how to construct something that’ll carry your groceries (or your next fabric haul).
Start with simple tote bag patterns that skip lining techniques for now. Focus on fabric selection (sturdy cotton works great), strap making, and basic bag construction.
Your sewing machine will grip most of the work, but these sewing techniques build real confidence.
Hemming Practice Projects
Hems are where you’ll actually see your progress—because nothing says "I made this" like a clean, even edge that doesn’t unravel the first time it hits the wash. Practice folded hems on dish towels or napkins—small projects where edge stitching and seam finishing techniques shine.
Your sewing machine manages straight hemming techniques beautifully, though hand sewing works too. These beginner sewing techniques transform raw fabric edging into polished results worth showing off.
Where to Find Quality Sewing Lessons Online
You don’t have to learn sewing alone anymore. The internet’s packed with courses, videos, and communities ready to teach you everything from threading your first needle to tackling tricky techniques.
Here’s where to find the best resources to level up your sewing.
Free Courses and Self-Paced Programs
You’ll find over 19 free online sewing courses worldwide—platforms like Cursa, Alison, and YouTube host beginner-friendly sewing lessons online with zero cost barriers.
Most free online sewing course options include 6 to 12 modules covering machine basics and hand-stitching, plus downloadable patterns.
Online sewing classes and resources offer flexible pacing, so you can learn at your own speed without pressure or deadlines. Many of these courses provide access to free sewing courses that can improve your skills.
Structured Learning Paths for Beginners
If you want skill progression that actually builds on itself, structured online sewing classes with clear learning objectives give you a roadmap instead of random videos. Programs like Sewing 101 usually include 4 sessions (8-12 hours) covering machine threading, bobbin basics, and your first stitches—each lesson building on the last.
A solid course structure gives sewing beginners real direction:
- One new beginner sewing technique per project (like topstitching or elastic waistbands)
- Skills checklists so you know exactly what you’ve mastered
- 3-5 completed projects before you tackle patterns
- Certificates proving you’ve nailed the fundamentals
These beginner resources keep you from spinning your wheels, guiding you from threading your machine to reading actual patterns with confidence. For a thorough education, consider enrolling in a sewing course program to improve your skills.
Joining Sewing Communities for Support
Beyond sewing lessons online, joining online forums and sewing groups transforms your learning—62% of members join specifically for support and advice. Peer feedback in communities like r/sewing (353,000+ members) helps 52% of beginners troubleshoot immediately, while social support boosts mental health for 78% of millennials.
These community benefits offer sewing tutorials, bulk buying discounts (10-30% off), and the encouragement that keeps you stitching when frustration hits.
Frequently Asked Questions (FAQs)
What fabrics work best for learning to sew?
If you’re just starting out, cotton’s your go-to fabric. It doesn’t hold grudges when you mess up, handles easily, and you can find it in weights that won’t fight back.
Woven textures hold their shape better than knit materials, so skip stretchy stuff initially.
Fabric scraps work great for practicing thread selection and basic textile arts techniques.
How much should I budget for starting supplies?
Starting fresh? Budget around $50–$100 for basic sewing tools, fabric scissors, beginner patterns, and starter kits.
Fabric prices vary—cotton runs $5–$15 per yard—while notion expenses (pins, thread) add $10–$20.
A quality sewing machine costs more, but hand-sewing keeps supply costs low initially.
Should I learn hand sewing before using machines?
You don’t need hand sewing basics before jumping on a machine. Learning both together actually helps beginners understand sewing fundamentals faster.
Start with simple machine stitches, then add hand-sewing techniques as your projects demand them.
How do I choose the right pattern size?
Picture yourself holding a pattern envelope, squinting at those mysterious sizing charts—it’s simpler than you think. Take accurate body measurements using a measuring tape, then compare them to the pattern’s size charts rather than your clothing size.
Beginner patterns include sizing guides that account for body proportions and fabric choice, helping you select the right fit before you cut.
Whats the difference between woven and knit fabrics?
Woven fabrics are made by interlacing threads at right angles, creating stable, structured material perfect for fitted projects.
Knit fabrics loop threads together, giving them natural stretch—ideal when you’re working with jersey or sweaters.
Conclusion
Rome wasn’t built in a day, and neither is sewing mastery—but your first finished project? That happens fast. Armed with basic tools, three core stitches, and solid sewing lessons for starters, you’re ready to transform fabric into something real.
Don’t wait for perfect conditions or fancy equipment. Thread your machine, grab that cotton scrap, and start stitching. Every pillowcase you complete builds confidence. Every mistake teaches precision. Your hands already know more than you think.
Start stitching now with what you have—every project builds confidence, and mistakes teach precision faster than perfection ever could
- https://thebeaconnews.org/stories/2022/11/14/kansas-city-sewing-apprenticeships/
- https://www.arts.gov/sites/default/files/NationalReportforADPAccess-8-18-2023.pdf
- https://manhattan.thefashionclass.com/blogs/news/what-to-expect-in-sewing-classes-for-beginners
- https://www.globusedujournal.in/wp-content/uploads/2020/05/Raynor-Ereje-GJEJJ20-PP-49-58.pdf
- https://www.reddit.com/r/sewhelp/comments/1j7dbd9/fee_for_sewing_lessons/

