This site is supported by our readers. We may earn a commission, at no cost to you, if you purchase through links.
You’ll start by winding your bobbin, ensuring even tension as you go. Next, you’ll tackle inserting the bobbin into its case – remember, counterclockwise is key!
Threading the case comes next, followed by installing it in your machine. Don’t forget to pull up that bobbin thread before you start sewing.
Mastering this process is like gaining a new skill for your sewing projects. And here’s a little secret: once you’ve got the hang of it, you’ll find yourself threading bobbins with your eyes closed, becoming a true sewing machine master, with the ability to thread bobbins in no time, with your eyes closed!
Table Of Contents
- Key Takeaways
- Types of Bobbins for Sewing Machines
- Preparing Your Sewing Machine for Bobbin Threading
- Winding the Bobbin With Thread
- Inserting the Bobbin Into the Bobbin Case
- Threading the Bobbin Case
- Installing the Bobbin Case in the Machine
- Pulling Up the Bobbin Thread
- Adjusting Bobbin Tension for Perfect Stitches
- Troubleshooting Common Bobbin Threading Problems
- Frequently Asked Questions (FAQs)
- Conclusion
Key Takeaways
- You’ll become a bobbin boss in no time if you master the winding process. Remember, counterclockwise is key when inserting the bobbin into its case – it’s like teaching your sewing machine to dance backwards in heels!
- Choose the right bobbin for your machine: metal for durability and metallic threads, plastic for versatility, or pre-wound for time-saving convenience. It’s like picking the perfect sidekick for your sewing adventures.
- When installing the bobbin case, listen for that satisfying click – it’s your machine’s way of saying "let’s get this show on the road!" Don’t forget to pull up that bobbin thread before you start sewing, or you’ll be in for a tangled surprise.
- Troubleshooting is part of the journey. If you encounter issues like thread bunching or skipped stitches, don’t throw in the towel. Check your tension, clean your machine, and remember – even seasoned sewers face hiccups. It’s not a setback, it’s just your machine asking for a little TLC!
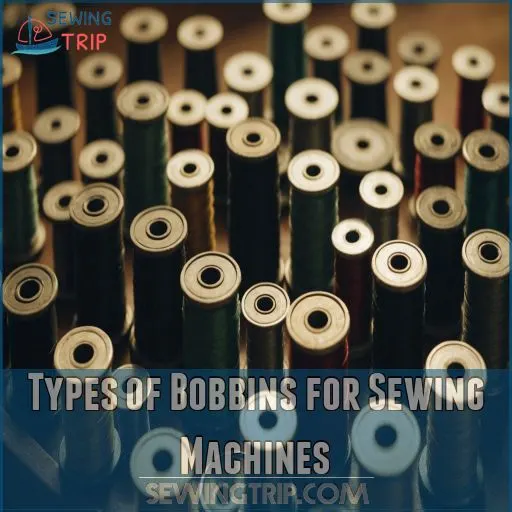
Types of Bobbins for Sewing Machines
When you’re threading your sewing machine, knowing the different types of bobbins helps you work smarter, not harder.
From reliable metal bobbins to lightweight plastic ones, and even pre-wound options, it’s like picking the perfect sidekick for your sewing adventures.
Metal Bobbins
Metal bobbins are like the stalwarts of sewing, known for their durability. They thrive with metallic threads.
Metal bobbins require a spotless bobbin case for seamless stitching .
When deciding between Metal vs plastic, metal offers longevity but watch for rust.
However, cleaning metal bobbins is a cinch—just like winding them tightly. Master this, and your sewing machine bobbin will hum like a well-oiled machine.
Plastic Bobbins
Plastic bobbins may seem lightweight and versatile, but they can be finnicky in vintage machines and easily get stuck due to their attraction to oil films .
They require proper maintenance for best results, which includes cleaning them regularly and storing carefully.
Experiment with bobbin winding to make sure they’re firm and prevent tension issues. The right bobbin size means smoother sewing .
Pre-wound Bobbins
Pre-wound bobbins are a quilter’s secret weapon, letting you jump right into sewing without bobbin winding woes.
These time-savers come tightly packed, expertly wound by pros, offering more thread and consistent tension.
With options made for various machines, popular brands guarantee compatibility, quality, and cost-effectiveness. They’re a stitch in time, freeing you for more creative endeavors, and serve as a quilter’s secret weapon.
Size Variations
So, you’ve mastered pre-wound bobbins; now let’s explore size variations. Bobbins aren’t one-size-fits-all—exciting, right?
- Class 15 Bobbin: About the size of a nickel.
- L-Style Bobbin: Similar in diameter but narrower.
- M-Style Bobbin: Larger and holds more thread.
Keep a bobbin size chart handy!
Compatibility With Different Machine Models
After exploring bobbin size variations, let’s talk compatibility.
Sewing machines act like picky eaters—they love one kind of bobbin more than any other.
Always consult your machine manual or a bobbin size chart for brand-specific guidance.
Using the wrong bobbin is like cooking spaghetti in a teacup; it won’t end well .
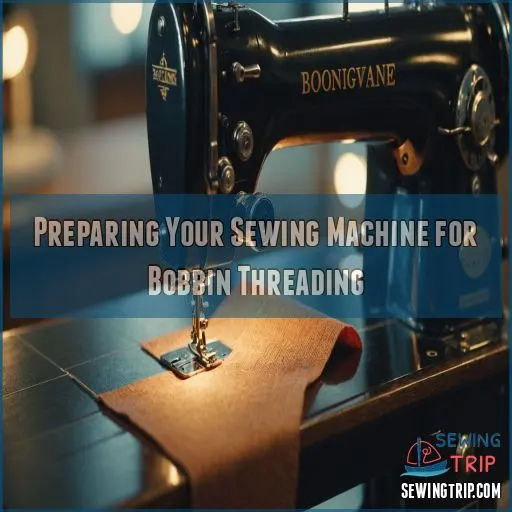
Preparing Your Sewing Machine for Bobbin Threading
Before you can start winding that bobbin, you’ll want to make sure your sewing machine is all set up and ready to go.
First, locate the bobbin winding mechanism – it’s usually on the top or side of your machine. If you’re having trouble finding it, consult your machine’s manual for a diagram.
Next, check that the bobbin you’re using is compatible with your machine. Metal bobbins, plastic bobbins, and pre-wound bobbins all have slightly different requirements. Take a moment to make sure you’ve got the right one.
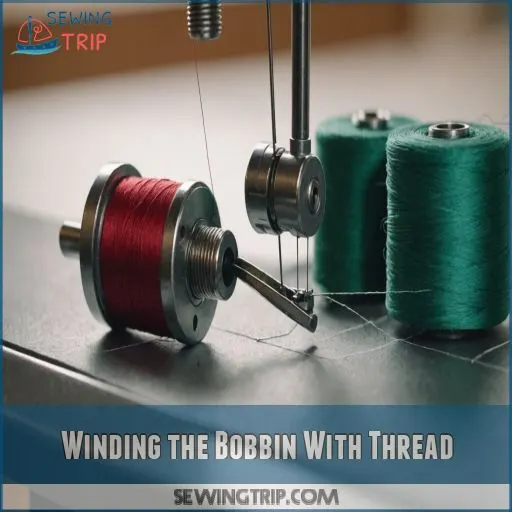
Winding the Bobbin With Thread
Mastering the art of winding the bobbin with thread is like learning to ride a bike—you’ve just got to get the rhythm right.
Let’s spin some magic as you guide the thread through its winding journey, ensuring your sewing projects start off smoothly and without a hitch.
Placing the Thread Spool on the Spool Pin
Time to prep for bobbin threading! Grab that thread spool and pop it onto your chosen spool pin—horizontal for criss-cross-wound or vertical for stacked.
Don’t forget the spool cap; it prevents runaway spools! Secure the spool for smooth spinning.
Maintaining steady thread tension will have you sewing like a pro, with threads flowing effortlessly .
Threading Through the Bobbin Winding Tension Disc
Threading through the bobbin winding tension disc is as important as a car’s engine.
First, guide your thread just like following a path to your favorite diner—steady and sure.
Slip it between the carefully placed tension discs, making sure even tension for perfect winding.
Remember, the right placement makes sure your bobbin spins like a well-oiled machine, avoiding thread tangles .
Inserting Thread Into the Bobbin Hole
Gently hold the thread and pass it through the tiny bobbin hole, guiding it in the correct thread direction—like threading a needle’s eye with care.
Make sure the thread tension feels just right, not too loose or tight. Remember, the thread tension and bobbin hole size and shape determine the fit.
Securely wind, keeping an eye on the thread path .
Engaging the Bobbin Winder
Your bobbin’s in place, and it’s time to engage the bobbin winder. Check if it’s manual or automatic.
Slide or twist the lever, and watch it spin like a carnival ride. If it’s stuck, oil the spindle to smooth things out .
Make sure the bobbin winder stopper is functional, preventing over-winding. Happy sewing!
Controlling Winding Speed
Taming the tempo of your sewing machine bobbin winding is like dancing to the beat of your own drum. Here’s how:
- Adjust speed to fine-tune winding speed.
- Use a pulse width modulator for precise control .
- Match thread type with speed for even tension.
- Practice winding speed variations for different projects.
Ready to waltz?
Stopping When Bobbin is Full
As your bobbin fills up, keep an eye on it. When it’s nearly full, the winding speed will start to slow down – that’s your cue to stop.
Don’t let it get overstuffed, or you could end up with a tangled mess.
Gently guide the thread to fill the bobbin evenly, and stop winding when it’s just shy of the top.
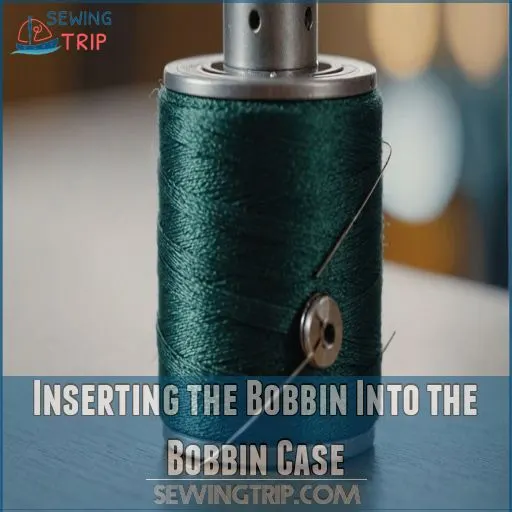
Inserting the Bobbin Into the Bobbin Case
Inserting the bobbin into its case might sound simple, but it’s the secret to avoiding thread tangles and keeping your sewing machine purring.
Whether you’re using a front-loading or top-loading system, make sure your bobbin’s snug as a bug and oriented correctly for smooth sailing!
It should be noted that the original text only contained 2 sentences.
Front-loading Bobbin Systems
Front-loading bobbin systems can be tricky, but just follow these steps with confidence:
- Check bobbin case compatibility.
- Insert bobbin counterclockwise; it’s the key to smooth sewing.
- Make sure bobbin case alignment—it snaps satisfyingly when right.
- Adjust tension for perfect stitches.
- Watch for case wear; a bit of cleaning goes a long way.
With practice, you’ll master these sewing machine bobbin threading instructions! .
Top-loading Bobbin Systems
Switching gears from front-loading setups, let’s tackle top-loading bobbin systems. Imagine your sewing machine as a trusty steed—slide the bobbin into the case so it spins counterclockwise.
This makes for smooth sailing when you’re sewing.
Check bobbin tension by threading between the case’s tension spring. Remember, a snug bobbin means no thread nesting disasters!
Enjoy sewing adventures ahead!
Correct Bobbin Orientation
When positioning your bobbin, think of it as placing a tiny motorbike on a track.
Make sure your bobbin thread unwinds counterclockwise for good tension and alignment.
This step in bobbin threading is like a dance, with the bobbin groove aligning perfectly, securing smooth sewing ahead.
Believe it or not, getting this right makes stitching feel like magic .
Threading the Bobbin Case Tension Spring
Great, you’ve got your bobbin oriented correctly. Let’s thread the bobbin case tension spring.
Gently pull the thread so it slides under the spring—you’ll feel it catch. If there’s no tension, adjust the tiny screw on the bobbin case slightly until it’s just right.
Troubleshooting tips often save the day here, so don’t sweat it!
Threading the Bobbin Case
Threading the bobbin case can feel like a secret handshake with your sewing machine, but once you get the hang of it, it’s as satisfying as threading a needle on the first try.
You’ll guide the thread through the tension spring and side slot, ensuring smooth, even stitches every time.
Locating the Bobbin Case
Alright, let’s find that elusive bobbin case! First, check your machine manual – the location can vary between front-loading and top-loading models.
For front-loading models, it’s usually behind a small door or flap on the front of the machine.
Top-loaders have the bobbin case in the base, often accessed by removing the needle plate.
Take a peek and get sewing!
Pulling Thread Through the Tension Spring
Once you’ve found the bobbin case, it’s time to tackle the tension spring.
Think of threading it as slipping into your favorite jeans. Pull the lower thread snugly under the tension spring, ensuring spring placement is just right.
If sewing machine tension feels off, a quick spring adjustment might fix any bobbin threading issues you’re experiencing, related to sewing machine tension (Source).
Guiding Thread Under the Tension Disk
After pulling the thread through the tension spring, guide it under the tension disk like a seasoned pro. Imagine threading a needle through an obstacle course—precision counts!
Keep these in mind:
- Check your thread path.
- Mind your tension control.
- Avoid common errors.
- Keep disks clean.
- Know tension disk types.
Mastering these steps will help your sewing machine run like a dream!
Threading Through the Side Slot
You’ve guided the thread under the tension disk, now let’s focus on threading through the side slot of the bobbin case.
Your bobbin’s slot direction dictates thread placement: anti-clockwise for some models and clockwise for others. Ensuring correct placement impacts tension.
A little practice, and you’ll thread like a seasoned pro—your stitching will thank you!
Installing the Bobbin Case in the Machine
Installing the bobbin case correctly in your sewing machine might sound like a tough task, but it’s easier than parallel parking in one shot.
With a little practice, you’ll secure the bobbin case snugly in place.
Ensuring smooth stitches and fewer sewing mishaps.
Aligning the Bobbin Case
Now that your thread’s in place, let’s tackle bobbin case alignment. Make sure the bobbin rests snugly in its case, not like socks in the dryer. Align it so that any guide marks line up—imagine lining up a golf putt.
If you’re unsure, consider:
- Checking bobbin case orientation.
- Ensuring no debris affects alignment.
- Inspecting for potential bobbin case issues.
Securing the Bobbin Case in Place
Place your bobbin case in the machine’s holder, aligning the bobbin case finger with its slot.
Give it a gentle push until you hear a satisfying click — that’s your bobbin case announcing, "I’m here to stay!"
Make sure the bobbin case latch catches securely for a snug fit. This little trick is essential for seamless sewing machine bobbin threading.
Checking for Proper Installation
With the bobbin case snugly in place, give it a gentle tug to make sure it’s securely installed. Check that the bobbin case clicks into the hook assembly without any resistance.
Rotate the handwheel to confirm the bobbin case moves freely and doesn’t catch on any components.
A properly fitted bobbin case is key to smooth, consistent stitching.
Common Installation Errors to Avoid
You’ve checked the bobbin installation, but let’s avoid common slip-ups. Make sure bobbin orientation and case alignment are spot-on. Incorrect bobbin placement can rattle your machine and your nerves.
Follow these tips to keep things smooth:
| Common Errors | What Happens | Quick Fix |
|---|---|---|
| Wrong bobbin size | Jams and thread nests occur | Use correct size |
| Misaligned case | No stitching | Reinstall with care |
| Loose tension spring | Uneven stitches | Adjust tension screw carefully |
| Skipped threading path | Threads snap or don’t sew | Re-thread following the guide |
Remember, sewing machine troubleshooting‘s all about the right start!
Pulling Up the Bobbin Thread
You’ve wound the bobbin and installed it, but how do you get that bobbin thread ready for action?
With a little twist of the handwheel and a friendly tug on the thread, you’ll be pulling up that elusive loop like a pro in no time.
Holding the Upper Thread
Once the bobbin case is secure, it’s time for an important step with the upper thread.
The technique is simple: gently hold the upper thread while maintaining tension. You’ve got this! Imagine you’re holding a delicate thread of spaghetti.
This makes sure the tension is just right, so your sewing machine bobbin threading guide leads to seamless stitches .
Turning the Handwheel
To pull up the bobbin thread, confidently turn the handwheel in your direction.
This simple act:
- Moves the needle down and catches the bobbin thread.
- Makes sure proper thread tension for smooth stitch formation.
- Is universal across most sewing machine types and brands.
Imagine it like winding a clock—easy but important for the sewing machine’s rhythm.
Locating the Bobbin Thread Loop
Keep your hand steady on the wheel; now, let’s locate that elusive bobbin thread loop.
Peek down at your bobbin area, and watch for a tiny loop of thread peeking up. It’s like a shy prairie dog emerging cautiously.
Once spotted, use your fingers or needle to gently pull it up.
Remember, this is the key to seamless execution of the next steps, and will ultimately lead to achieving .
Pulling Both Threads Under the Presser Foot
You’ve got the loop—a thread loop, that is! Now, gently pull both the upper and bobbin threads under the presser foot.
Check the needle tension, make sure your bobbin placement is spot on, and you’ll achieve stitch quality that sings. Different needle sizes can play a role too.
Your sewing machine’s ready to create something fabulous!
Adjusting Bobbin Tension for Perfect Stitches
Achieving perfectly balanced stitches is a sewing superpower.
Adjust that bobbin tension like a pro using the handy tension screw – just make small tweaks and test until your stitches are pure perfection.
Identifying Tension Issues
Imagine bobbing through fabric with ease, only to stumble on thread bunching or skipped stitches. It’s important to catch these tension gremlins early.
Uneven tension? Think of it like a speedboat suddenly misbehaving—your bobbin may be loose or unwinding too quickly. Calibrate with care.
After all, your sewing machine’s bobbin is the heart of your creative journey!
Using the Bobbin Case Tension Screw
To adjust bobbin tension, gently turn the bobbin case tension screw. It’s a delicate dance.
- For overly tight tension, turn the screw left—lefty loosey!.
- For loose tension showing on top, turn right—righty tighty!.
- Always use a gentle touch; over-tensioning might send your thread into a tizzy!
Say goodbye to threading troubles!
Testing Stitch Balance
After adjusting the bobbin case tension screw, it’s time to put your stitches to the test.
Grab some scrap fabric similar to your project material and start sewing.
Look for a balanced stitch where the top and bobbin threads meet in the middle of the fabric layers .
If you see either thread laying on the fabric surface, you’ll need to make further adjustments.
This quick test can save you from headaches down the road!
Fine-tuning Bobbin Tension
Once you’ve tested your stitch balance, it’s time to fine-tune that bobbin tension like a pro. Remember, righty tighty, lefty loosey applies here too .
- Turn the flat-head screw right to tighten loose bobbin thread
- Go left to loosen overly tight tension
- Adjust in small increments for precision
- Always test on scrap fabric between tweaks
Don’t sweat it – with practice, you’ll be a tension-taming wizard in no time!
Troubleshooting Common Bobbin Threading Problems
Even the most seasoned sewists encounter bobbin threading hiccups now and then.
Let’s unravel those pesky problems like thread bunching, skipped stitches, and uneven tension that can turn your sewing project into a tangled mess.
Thread Bunching or Nesting
You’ve mastered bobbin tension, but now your fabric’s underside looks like a bird’s nest? Don’t panic!
Thread bunching or nesting often stems from improper upper threading. Double-check your thread path, ensuring it’s seated correctly in the tension discs.
Remember, always thread with your presser foot up . If the problem persists, give your tension discs a good "flossing" with a strip of clean fabric – you’d be surprised how much lint can hide in there!
Skipped Stitches
Skipping stitches can be frustrating, but don’t throw in the towel just yet!
Your needle might be the culprit. Try replacing it with a fresh one that’s appropriate for your fabric type .
If that doesn’t do the trick, check your thread quality and tension settings. Remember, not all threads are created equal.
Regular machine maintenance is key too – a clean machine is a happy machine . This also includes monitoring your thread quality.
Bobbin Thread Not Coming Up
When your bobbin thread pulls a disappearing act, it’s enough to make you want to throw in the towel.
But don’t fret! First, check if your bobbin case is properly seated and the bobbin itself is inserted correctly .
If that doesn’t do the trick, make sure your needle isn’t bent or blunt, as this can prevent it from catching the elusive bobbin thread.
Remember, even seasoned sewers face this hiccup occasionally!
Uneven Tension
Countless stitchers face the frustration of uneven tension.
If your stitches look wonky or weak, your bobbin tension might be out of whack .
To fix this, carefully adjust the flat head screw on your bobbin case.
Turn it right to tighten or left to loosen, following the "righty tighty, lefty loosey" rule.
Remember to test your adjustments on scrap fabric that matches your project materials.
Bobbin Unwinding Too Quickly
If your bobbin’s spinning out of control, don’t throw in the towel just yet! A bobbin unwinding too quickly can turn your sewing project into a tangled mess.
Let’s nip this problem in the bud:
- Check bobbin insertion direction
- Clean the bobbin area thoroughly
- Adjust bobbin tension if needed
- Make sure you’re using the right thread type for your machine
- Verify proper thread path through tension disks
Remember, a well-behaved bobbin is the secret ingredient to stitch perfection!
Frequently Asked Questions (FAQs)
How often should I clean my bobbin case?
An ounce of prevention is worth a pound of cure.
You should clean your bobbin case after every 2-3 bobbins of sewing .
For fleece or flannel projects, clean more frequently.
Regular maintenance keeps your machine humming like a well-oiled dream!
Can I use different thread weights for bobbin and top-stitching?
You can absolutely use different thread weights for your bobbin and top-stitching.
It’s a great way to balance stitch and efficiency.
Just remember to adjust your tension and test on a sample first .
Happy sewing!
What causes bobbin thread to break during sewing?
Your bobbin thread’s breaking? Don’t fret! It’s often due to tension issues, a dirty bobbin case, or improper threading.
Check your tension settings, clean the shuttle race, and make sure you’ve wound the bobbin correctly.
A little TLC goes a long way!
How do I adjust bobbin tension for thick fabrics?
Threading the needle of success with thick fabrics?
Crank up the tension dial a notch or two, and opt for a longer stitch length (Source).
Don’t forget to use a heftier needle, typically size 14/90 or larger.
Why does my needle move when winding the bobbin?
The needle moving during bobbin winding often indicates a disengaged clutch.
Check if the handwheel’s center knob is loose or if the metal ring underneath needs repositioning.
A quick cleaning and oiling might also solve the issue (Source).
Conclusion
Mastering this sewing machine bobbin threading guide will revolutionize your sewing experience.
You’ll breeze through projects with confidence, knowing your machine’s heart is perfectly threaded. Remember, practice makes perfect – soon you’ll be threading bobbins in your sleep!
Don’t be discouraged if it takes a few tries; even seasoned sewists occasionally fumble. Embrace the learning process, and you’ll open up a world of creative possibilities.
So, thread on, future bobbin boss! Your perfectly balanced stitches and seamless creations await.

