This site is supported by our readers. We may earn a commission, at no cost to you, if you purchase through links.
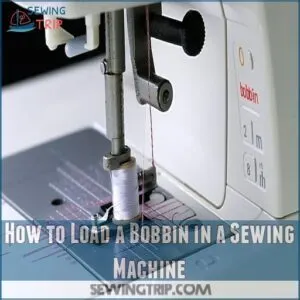 To load a bobbin in a sewing machine, first turn off the machine—safety first!
Open the bobbin area and pop the bobbin into its case, ensuring it spins counterclockwise like a ballerina doing a twirl.
Thread it through the notches, and slide the case back into place with a satisfying click.
Next, raise the presser foot and needle, then place your thread on the spool pin.
Follow the thread guides like a treasure map up to the needle.
Voilà! You’ve mastered it.
Curious about the difference between top-loading and front-loading bobbins?
We’ll unravel that thread in just a bit!
Table Of Contents
- Key Takeaways
- Importance of Proper Bobbin Loading
- How to Load a Bobbin in a Sewing Machine
- Types of Bobbin Systems
- Preparing Your Sewing Machine
- Loading a Top-Loading Bobbin
- Loading a Front-Loading Bobbin
- Threading The Upper Thread System
- Pulling Up The Bobbin Thread
- Securing The Thread and Testing The Bobbin
- Troubleshooting Common Bobbin Issues
- Frequently Asked Questions (FAQs)
- Conclusion
Key Takeaways
- Make sure to turn off the sewing machine before loading the bobbin to ensure safety and avoid accidents.
- Insert the bobbin with the thread unwinding counterclockwise, and guide the thread through tension slots to prevent tangles.
- Know the difference between top-loading and front-loading bobbin systems, as loading methods vary with each type.
- Regularly clean the bobbin case and maintain proper tension for smooth operation and neat stitching.
Importance of Proper Bobbin Loading
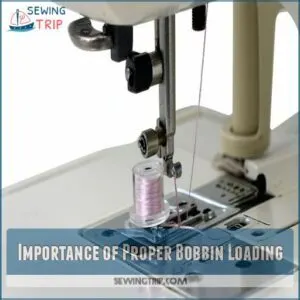
You’ll save yourself hours of frustration and messy stitches when you take time to load your bobbin correctly, since this tiny spool works with your top thread to create balanced, professional-looking stitches.
Loading your bobbin correctly will ensure that your stitches look perfect on top and underneath.
If you’ve ever wondered why your stitches look perfect on top but messy underneath, it’s probably because your bobbin isn’t loaded properly in its case.
Role of Bobbins in Sewing
Think of your bobbin as the unsung hero of your sewing machine – it’s that small but mighty spool that holds the bottom thread.
Working in perfect harmony with your top thread, it creates those clean, balanced stitches you’re aiming for.
Whether you’re using plastic or metal bobbins, they’re sized specifically for your machine model and can be either top-loading or front-loading depending on your machine’s design.
Consequences of Incorrect Bobbin Loading
Loading your bobbin incorrectly is like putting your shoes on the wrong feet – everything just feels off.
When your bobbin’s not seated right, you’ll face thread tangles, machine jams, and broken needles that’ll have you pulling your hair out.
Poor fabric tension and uneven stitches can turn your dream project into a nightmare.
Getting it right from the start saves you time, money, and a whole lot of frustration.
How to Load a Bobbin in a Sewing Machine
Getting your bobbin up and running doesn’t have to feel like solving a puzzle. Here’s what you need to know to master this essential sewing skill – whether you’re a complete beginner or just need a quick refresher.
- Check your machine’s manual to identify the correct bobbin size and type
- Wind fresh thread onto your bobbin using the machine’s bobbin winder guide, then remove the old bobbin and clean out any lint from the bobbin case
- Insert the new bobbin so the thread unwinds counterclockwise
- Guide the thread through the tension slots and pull it up gently
Remember to hold the thread tail while you start winding to prevent tangling. You’ll know you’ve done it right when the thread flows smoothly and creates even stitches. Think of it like threading a needle – it might take a few tries at first, but soon it’ll become second nature.
Types of Bobbin Systems
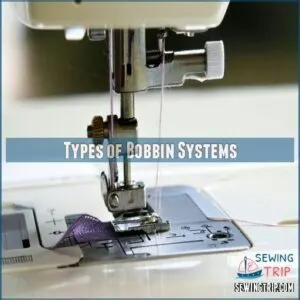
You’ll find that your sewing machine uses one of two main bobbin systems: the drop-in style that loads from the top, or the traditional front-loading type that fits into a removable case.
Just like choosing between automatic and manual transmission in a car, each bobbin system has its own special way of loading, and you’ll need to know which type you’re working with to get your machine running smoothly.
Top-Loading Bobbin Systems
On modern sewing machines, top-loading bobbins are like dropping a quarter in a slot – quick and hassle-free.
You’ll find these systems in popular brands like Brother, Singer, and Janome.
The bobbin sits right under a clear plastic cover plate, making it easy to monitor your thread supply.
Just drop the bobbin in, guide the thread through the tension slot, and you’re ready to sew.
Front-Loading Bobbin Systems
Front-loading bobbin systems, those trusty workhorses of vintage and high-end machines, hide their bobbins behind a hinged door near the needle plate.
You’ll need to remove the bobbin case first, unlike top-loaders.
Insert your wound bobbin into the case so the thread unwinds counterclockwise, then slide the thread through the tension slot.
Key Differences Between Systems
Now that you’re familiar with front-loading systems, let’s compare both types. Top-loading bobbins drop straight down from above, making them easier to see and access.
Front-loading systems, while trickier to reach, often provide better thread tension control. Think of it like choosing between a top-loading or front-loading washer – each has its perks, and your choice depends on your specific needs.
Preparing Your Sewing Machine
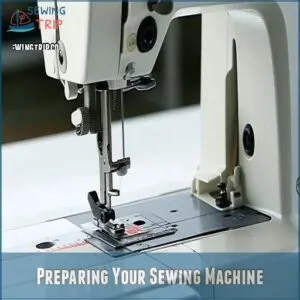
Before you start wrestling with your bobbin, you’ll need to properly set up your sewing machine by turning it off, raising the needle, and lifting that presser foot.
Just like checking your car’s mirrors before driving, you’ll want to locate your bobbin case area and make sure you’ve got clear access to it.
Turning Off The Machine for Safety
Working with sewing machines requires proper safety precautions to prevent accidents.
Before you start loading your bobbin, always turn off your machine’s power switch and unplug it from the electrical outlet.
Here’s your essential safety checklist:
- Remove any loose jewelry or scarves that could get caught
- Roll up long sleeves to prevent fabric snags
- Clear your workspace of unnecessary items
- Check for frayed power cords
- Make sure your hands are dry and clean
Raising The Needle to Its Highest Position
After powering down your machine, let’s get that needle in the right spot.
You’ll want to locate the handwheel on your machine’s right side – it’s like a steering wheel for your needle! Turn it toward you until the needle reaches its highest point.
| Position | What You’ll See | What It Means | Common Mistakes |
|---|---|---|---|
| Lowest | Needle down | Keep turning | Stopping too soon |
| Middle | Needle rising | Almost there | Turning backward |
| Highest | Take-up lever up | Perfect spot | Going too far |
| Past highest | Starts descending | Back it up | Overshooting |
Lifting The Presser Foot
With your needle at its highest point, locate the presser foot lever – it’s that handy little lifter usually found behind the needle.
Give it a gentle push upward until you hear a satisfying click.
This creates the perfect space to work with your bobbin thread.
Think of it like opening your car door before getting in – it’s just what you do first!
Locating The Bobbin Case Area
Your sewing machine’s bobbin case area is like its secret compartment, tucked neatly beneath the needle plate.
For front-loading machines, you’ll spot a small door or compartment near the base.
For top-loading models, look for a removable plastic cover right under your needle.
Once you’ve found it, you’re ready to start threading – it’s easier than finding your car keys!
Loading a Top-Loading Bobbin
You’ll love how easy it’s to load a top-loading bobbin once you know the right steps, and it’s just like dropping a cookie into a jar.
Just remember to check that your thread’s coming off the bobbin counterclockwise, or you’ll end up with a tangled mess that’ll have you scratching your head.
Removing The Bobbin Cover Plate
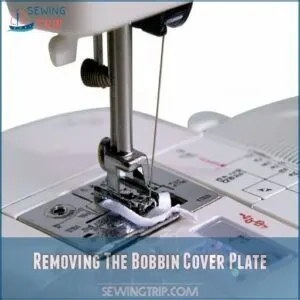
Before you begin loading your bobbin, locate the cover plate underneath your sewing machine’s needle.
It’s typically a small, rectangular piece that slides or snaps off.
You may need to remove the needle plate cover by unscrewing it first, depending on your machine’s design.
Give it a gentle push to the right – you’ll hear a satisfying click when it releases.
Some machines have a button to press, while others need a slight nudge with your fingernail to pop open.
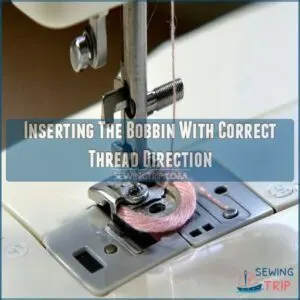
Inserting The Bobbin With Correct Thread Direction
Dropping a bobbin into your sewing machine might seem like a game of chance, but getting the thread direction right is important for smooth stitching.
Most top-loading machines need the thread unwinding counterclockwise when looking down at it.
- Hold the bobbin like you’re looking at a clock face
- Check your machine’s manual for direction arrows
- Place the bobbin with thread tail at 9 o’clock
- Make sure it spins freely in its housing
- Give it a gentle tug to confirm proper placement
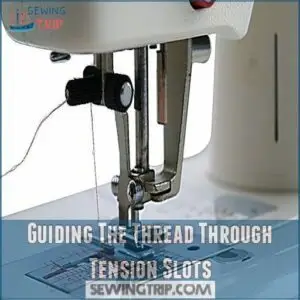
Guiding The Thread Through Tension Slots
With the bobbin in place, pull the thread gently through the tension slot – that little metal groove that looks like a sideways "S."
Follow the thread path marked on your machine, sliding the thread firmly into each slot until you feel it catch.
You’ll know you’ve done it right when the thread moves smoothly but with slight resistance.
Think of it like threading a maze with purpose.
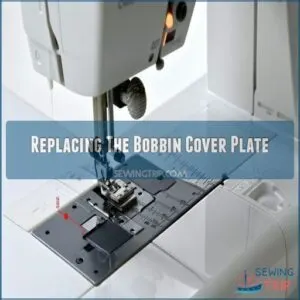
Replacing The Bobbin Cover Plate
Now that your thread’s in place, let’s tackle the bobbin cover plate – it’s like putting the lid back on your favorite cookie jar! Take your plate and align it with the grooves. You’ll hear that satisfying click when it’s properly seated.
- Make sure no threads are caught under the edges
- Double-check the alignment marks
- Press down gently until you feel the snap
- Give it a quick pat (for good luck!)
Remember, a secure cover plate prevents thread tangles and keeps your machine running smoothly. Just like a puzzle piece, it should fit perfectly without any gaps or wobbling.
Loading a Front-Loading Bobbin
You’ll find front-loading bobbins in many classic sewing machines, and while they might look tricky at first, they’re actually pretty straightforward to load.
Just like fitting a key into a lock, you’ll need to position your bobbin case correctly with the metal latch at 12 o’clock before clicking it into place.
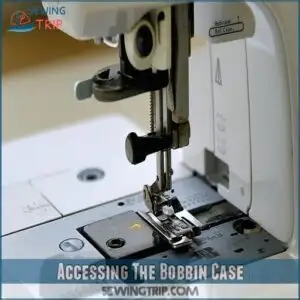
Accessing The Bobbin Case
You’ll find the bobbin case hiding behind a small door at the front of your machine’s base.
Take a deep breath – this is easier than it looks!
Locate the release latch or button near the front panel, usually marked with an arrow or bobbin symbol.
Gently press or slide it to pop open the access door.
Keep the area well-lit so you can see what you’re doing.
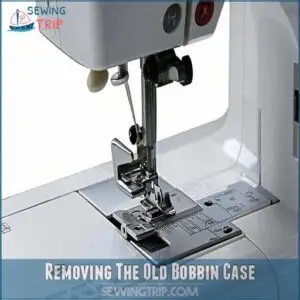
Removing The Old Bobbin Case
Got a front-loading bobbin system?
Let’s take a closer look at removing the old bobbin case.
First, open the chamber and carefully slide out the bobbin case, keeping an eye on how it’s positioned.
It’s a bit like finding your favorite movie in the DVD stack—just don’t let things tumble.
Before inserting a new bobbin, check the case for dust bunnies or mismatched parts.
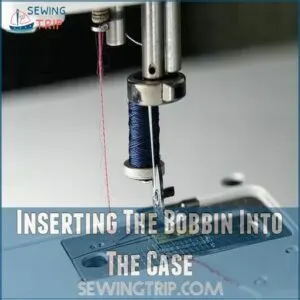
Inserting The Bobbin Into The Case
You’re about to insert the bobbin into the case, a tiny but essential step.
For the correct front-loading bobbin compatible with your machine, visit a trusted online store such as Front Load Bobbin Products.
Follow these easy steps:
- Pick the correct bobbin for your machine’s front-loading system.
- Check the thread direction—ensure it unwinds counterclockwise.
- Clean the case to avoid tangles.
- Place the bobbin snugly, feeling that satisfying click.
It’s all about precision and a little finesse!
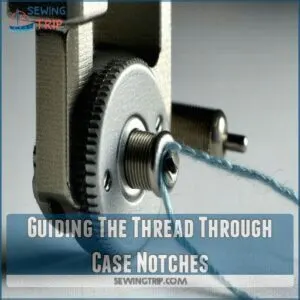
Guiding The Thread Through Case Notches
Thread direction is key! Guide that bobbin thread through the notches on the case with focus and a gentle touch.
Think of these notches as traffic lanes ensuring tension control.
Watch for common mistakes: missing a notch can unravel your plans.
Nailing this step in bobbin loading makes sure your sewing machine runs smoothly, without any hiccups.
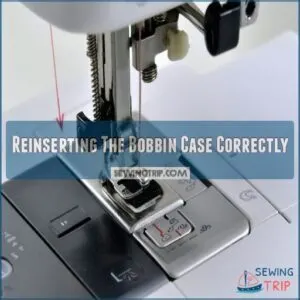
Reinserting The Bobbin Case Correctly
You’ve guided the thread through the case notches, but here’s where the magic happens.
Align the bobbin case with the metal extension facing up and slide it into the machine.
Listen for that satisfying click—it’s music to a sewist’s ears!
This guarantees perfect bobbin case placement and tension, vital for smooth sewing machine bobbin operation.
Happy stitching!
Threading The Upper Thread System
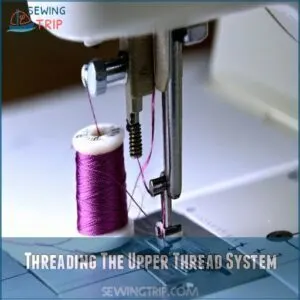
Threading the upper thread system might sound tricky at first, but it’s really just a series of simple steps.
You’ll place the thread on the spool pin, follow the thread guides, and before you know it, you’ll be threading the needle like a pro, with maybe just a tiny bit of squinting to get it through the eye!
Placing Thread on The Spool Pin
Once your new bobbin’s ready, it’s time to tackle the spool pin.
There are many spool pin types, but yours is likely top or side-mounted.
Pop the thread spool on the spindle, making sure it’s snug.
Choose the right spool size to prevent wobbling—think of it like ensuring your bike’s wheels are aligned before a ride.
Following Thread Guides on The Machine
Next, carefully follow your machine’s thread guides.
These little helpers—often metal or plastic loops—direct your bobbin thread.
Notice how they’re strategically placed? That’s no accident!
Each guide makes sure the thread’s smooth journey, setting the right tension.
Think of them as tiny traffic cops, guiding your thread to its destination.
Ignoring them is like trying to drive without street signs—chaotic!
Follow the sequence precisely; your machine’s manual shows you the way.
Proper guide placement is key to preventing tangles and making sure even stitching.
Threading The Take-up Lever
Hope you’re still with me.
To make sure the correct sewing machine tension, be sure to seat the thread snugly in the notch on the lever for the correct sewing machine tension by checking the tension disk setup.
So, threading the take-up lever might sound technical, but it’s a piece of cake once you get the hang of it.
With your thread guide placement set, follow the thread direction, looping it into the take-up lever.
This lever movement ensures smooth tension for your sewing machine bobbin setup.
Ready? Let’s keep stitching!
Guiding Thread Through The Needle
Let’s thread that needle—you’ve got this! Follow these easy steps:
- Hold the thread from the take-up lever, letting the path guide you down.
- Slip the thread through the needle’s eye from front to back.
- Adjust for thread tension, keeping it snug but not too tight.
- Double-check that the needle size matches your fabric.
Pulling Up The Bobbin Thread
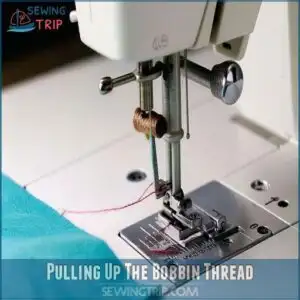
Pulling up the bobbin thread might sound tricky, but it’s as simple as turning a crank.
Just remember to hold that upper thread tight like your favorite movie snack, turn the handwheel, and watch the bobbin thread make its grand entrance under the presser foot.
Holding The Upper Thread
Before you start a grand sewing adventure, grab the upper thread firmly to lead the way.
Think of it as giving a gentle tug on the reins to keep everything tight on your sewing machine.
As you hold the thread, make sure it’s seated correctly along the thread guide and needle threading path, and for the best results, consider using a bobbin thread pull up tool for smooth threading.
This keeps the bobbin and thread tension harmonious.
Turning The Handwheel to Lower and Raise Needle
Grab the handwheel, that trusty sidekick on your sewing machine.
When you turn it toward you, slowly lowering and raising the needle, you’re creating a loop with threads to bring up the bobbin thread.
This shifts the needle, which is essential for bobbin tension and stitch quality.
If the needle movement feels off, check for threading issues.
Master this simple move, and your sewing sessions will be smooth sailing.
Gently Pulling Up The Bobbin Thread Loop
You’ve turned the handwheel, and now it’s time to pull up that bobbin thread loop.
Hold the upper thread gently, as if coaxing a shy cat from under the couch.
The bobbin thread will loop up effortlessly.
Watch the loop size while guiding it, making sure it aligns perfectly.
Congrats, you’ve got bobbin control!
Positioning Both Threads Under The Presser Foot
Now that you’ve gently coaxed up that bobbin thread, it’s time to get those threads working together.
Position both the upper and bobbin threads under the presser foot.
This makes sure proper thread alignment and prevents tangles.
A little bit of careful placement goes a long way!
Make sure the threads aren’t twisted; keep them nice and neat.
Now you’re ready to sew!
Securing The Thread and Testing The Bobbin
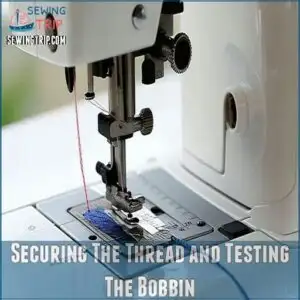
You’re almost ready to sew, but first, let’s make sure those threads are all set to go.
By grabbing the top thread and pulling the bobbin thread through the channel, you’ll avoid tangles—think of it as convincing your sewing machine to play nice!
Holding The Top Thread
Make sure the upper thread is securely in your hand, like holding a kite string ready to catch the wind.
This little move helps prevent thread breakage and keeps your sewing journey smooth.
When you need to replace your bobbin or are looking for a new one to improve your sewing experience, consider purchasing a reliable bobbin winder from a trusted source like Bobbin winding products.
Following the correct thread path with the right tension, your bobbin works harmoniously with the needle, mastering the balance between bobbin and thread for flawless stitches.
Grabbing The Bobbin Thread
With your sewing machine ready, it’s time to grab that elusive bobbin thread.
Picture yourself on a treasure hunt as you:
- Gently tug the bobbin thread loop
- Make sure the thread is going in the right direction
- Avoid thread tangles
- Check bobbin thread tension
- Use a seam ripper if necessary
Don’t yank too hard; gentle persistence is your key to bobbin success.
Pulling Both Threads Through The Channel
After threading your sewing machine, it’s time to get those threads through the channel.
Gently pull both the top and bobbin threads together until they glide smoothly into the machine’s path.
This step is like setting the stage for great stitch quality.
Don’t rush—any tangles here can mess with thread tension and bobbin winding.
Keep it easy; your stitches will thank you!
Cutting Excess Thread
You’ve threaded your sewing machine, but don’t forget to trim the excess thread for a tidy start.
Snip it with precision using thread trimming tools like scissors or a seam ripper.
Keep the ends neat—just like cutting hair, a small mistake could cause unnecessary tangles.
With the right cut, your bobbin thread will flow smoothly during sewing!
Troubleshooting Common Bobbin Issues
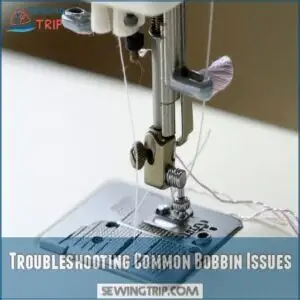
When your sewing machine’s bobbin is acting up, it can feel like trying to untangle a plate of spaghetti—frustrating and messy!
Don’t worry, we’ll walk you through the most common bobbin problems, like broken threads and sloppy stitches, so you’re back to smooth sewing in no time.
Broken Bottom Thread
Okay, so your bobbin thread snapped? Don’t panic!
First, check your bobbin winding – was it too loose?
Next, examine the thread itself; sometimes, a weak spot causes breakage.
Is your bobbin case clean? A clogged case creates friction, leading to thread breaks.
Finally, inspect your needle for bends or burrs; a damaged needle can snag the thread.
Regular machine maintenance prevents many issues. Happy sewing!
Uneven or Sloppy Stitches
If your stitches look rough, it might be more than just a broken bottom thread.
Check the tension adjustment on your sewing machine.
Incorrect tension or poor bobbin winding can cause uneven stitches.
Use high-quality thread and make sure your bobbin thread tension adjustment matches the fabric.
Remember, a balanced bobbin means a balanced stitch!
Needle Skipping Stitches
Needle skipping stitches is often a pesky problem in sewing.
Make sure you’re using the right needle type and size for your fabric.
Double-check the needle position and make sure it isn’t bent.
Also, adjust fabric tension and bobbin tension to harmonize.
Proper threading is key—sometimes, the bobbin needs a closer look.
It might just need a little TLC!
Tangled or Knotted Thread
So, your needle’s skipping stitches and suddenly your thread resembles a cat’s cradle? It might be tangled or knotted thread at work. Here’s what to check: Also, make sure the bobbin thread isn’t bunching up improperly, as this can also cause issues.
- Thread Tension: Too tight or loose? Adjust accordingly.
- Bobbin Winding: Make sure it’s wound evenly.
- Thread Type: Use smooth, high-quality threads to avoid snarls.
No worries, your sewing machine’s got this!
Frequently Asked Questions (FAQs)
How do you put a bobbin in a sewing machine?
Ever notice how fiddly sewing can be?
To load a bobbin, raise the needle, remove the cover, make sure the thread spins counterclockwise, place it in, hook the thread beneath the tab, and replace the cover.
Easy peasy!
How do you use a bobbin winder on a sewing machine?
First, place your thread spool onto the designated pin.
Then, follow your machine’s manual.
It’ll guide you through threading the bobbin winder and getting it spinning.
It’s easier than it sounds!
How to load a bobbin?
To load a bobbin, turn the handwheel to raise the needle.
Open the bobbin compartment.
Insert the bobbin counterclockwise, and thread it through the guide.
Replace the cover, ensuring threads are tidy and untangled.
How do you use a thread bobbin?
Using a bobbin involves placing it correctly in the machine, ensuring thread unwinds counterclockwise, and pulling both threads up through the presser foot.
Don’t forget to secure threads properly, or you’ll face tangles!
What happens if you lose a bobbin on a sewing machine?
Lost the bobbin? Panic not!
It’s like misplacing your left shoe—your machine won’t run well without it.
Find a replacement: either a spare or buy new, ensuring compatibility with your sewing machine model.
How do you use a sewing machine bobbin?
Master the sewing machine by loading and threading your bobbin correctly.
Begin with winding thread onto the bobbin, inserting it in the case, and threading through the machine until it’s ready for action.
Keep everything tangle-free!
How to load a bobbin into a sewing machine?
Feel like you’re wrangling spaghetti?
First, pop off the bobbin cover.
Slip the bobbin in the case, ensuring the thread unwinds counterclockwise.
Hook it behind the tab, replace the cover, and your machine’s ready to stitch.
How do you arrange a bobbin on a sewing machine?
Place the bobbin in the case, ensuring the thread pulls counterclockwise.
Slide it into the machine until it clicks.
Take the thread from the side, raise the needle, and pull the upper thread to catch the bobbin thread.
How do you fill a bobbin when sewing?
Grab your thread and spool. Thread the bobbin, slipping it onto the winder. Press the pedal; it’ll whir and fill itself with thread. Easy peasy!
Does it matter which way you put the bobbin in?
Yes, it matters!
If the bobbin isn’t inserted correctly, the thread can tangle or break.
Always make sure the thread unwinds counterclockwise for smooth sewing.
Picture it like a mini racecar on track—direction matters!
How do I choose the right bobbin size?
Choosing the right bobbin size? It’s like finding the perfect puzzle piece!
Check your sewing machine manual to match the bobbin type and size.
Mismatched bobbins can tangle threads and cause chaos.
Can I use metal bobbins in my machine?
You can use metal bobbins if your sewing machine manual specifies they’re compatible.
Mixing metal and plastic could lead to tension issues or damage.
Always match your bobbin style to your machine for smooth sewing adventures.
What is the difference between bobbin threads?
Different types of bobbin threads vary by thickness, material, and color.
Some are lightweight for delicate fabrics, while others are heavier for durable stitching.
Using the right bobbin thread results in smooth sewing and balanced stitches.
How often should I clean the bobbin case?
Clean your bobbin case every 8-10 hours of sewing.
This prevents lint buildup and helps the machine run smoothly.
Imagine it like flossing for your machine—keeps everything running smoothly for that perfect stitch each time.
Why does my bobbin thread bunch up?
Picture a tangled jungle of thread beneath your fabric.
A misaligned bobbin, incorrect tension settings, or fluff in the bobbin case often cause those annoying thread bunches.
Check your bobbin and machine settings to fix it.
Conclusion
So, you’ve successfully loaded your bobbin!
Remember, mastering how to load a bobbin in a sewing machine takes practice.
Don’t get discouraged by initial snags; it’s a skill honed over time.
Consistent bobbin loading guarantees beautiful, even stitches.
Now, sew some sensational creations!
Practice makes perfect, and soon you’ll be a bobbin-loading pro.
Celebrate your success—you deserve it!
Happy sewing!

