This site is supported by our readers. We may earn a commission, at no cost to you, if you purchase through links.
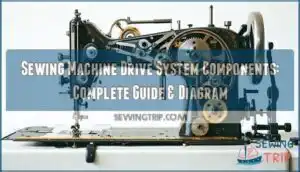
The motor generates rotational force, which transfers through belts or gears to create the synchronized movements needed for stitching. Key components are the clutch or servo motor, timing belt, cam mechanisms, and drive shaft assembly.
Each part works together to convert electrical energy into precise mechanical motion. When one component wears out, it affects the entire system’s performance.
Understanding these connections helps you troubleshoot issues and maintain smooth operation. There’s more to discover about optimizing each component’s performance.
Table Of Contents
Key Takeaways
- Your motor type determines your machine’s performance – Clutch motors run continuously for heavy-duty work, while servo motors offer precise speed control and energy savings for detailed projects.
- Drive belts are your system’s weak link – Check monthly for cracks, fraying, or glazing, and maintain proper tension (½ inch deflection) to prevent costly breakdowns and timing issues.
- Regular maintenance prevents expensive repairs – Oil moving parts every 8-10 hours of use, clean lint from feed dogs and tension discs, and inspect your thread path to keep everything running smoothly.
- Timing issues cascade through your entire system – When needle timing slips, it disrupts the synchronized movement between components, causing skipped stitches and straining your motor and drive mechanisms.
Drive System Basics
Your sewing machine’s drive system powers every stitch through a coordinated network of motors, belts, and mechanical components that transform electrical energy into precise fabric manipulation.
Your machine’s heart transforms electrical energy into perfect stitches through coordinated mechanical precision.
Understanding these core components—from clutch and servo motors to drive belts and speed controls—helps you maintain peak performance and troubleshoot issues before they become costly repairs, which is crucial for precise fabric manipulation.
Motor Types Overview
Your sewing machine’s motor acts as the heart of your entire drive system, converting electrical energy into the mechanical power that creates every stitch.
Understanding motor types helps you choose the right machine for your projects and troubleshoot performance issues effectively.
- Clutch motor – Runs continuously at full speed, using a clutch mechanism to engage stitching
- Servo motor – Starts and stops precisely, offering variable speed control and energy efficiency
- Universal motor – Operates on both AC and DC power, commonly found in domestic machines
- WorkerB motor – Delivers 2.5 times more power than universal motors for heavy-duty applications
- European power motor – Designed for 220-240VAC systems used outside North America
Power Transmission Mechanism
Your sewing machine’s power transmission mechanism acts like a mechanical relay race, transferring energy from the motor to essential components.
The drive belt connects your sewing machine motor to the main drive shaft, while sewing machine pulley systems create proper gear ratios for speed reduction.
Motor coupling guarantees smooth power transmission throughout the mechanism.
| Component | Function | Material/Type |
|---|---|---|
| Drive Belt | Transfers motor power to main shaft | Rubber or polyurethane belt material |
| Pulley Systems | Creates speed reduction through gear ratios | Metal or composite pulleys |
| Motor Coupling | Connects motor to drive mechanism | Steel or aluminum coupling |
| Drive Shaft | Distributes power to machine components | Hardened steel shaft |
The drive belt and pulley systems work together to ensure efficient operation of the sewing machine, with the drive shaft playing a crucial role in distributing power.
Drive Belt Inspection
Since drive belts connect your motor to essential components, regular inspection prevents costly breakdowns. Check for cracks, fraying, or glazed surfaces that signal belt wear. Proper belt tension guarantees smooth operation—too loose causes slippage, too tight strains bearings.
A broken belt may require immediate timing belt attention.
- Belt Wear Signs: Look for cracks, fraying edges, or shiny glazed surfaces indicating replacement needs
- Tension Adjustment Tips: Press belt midway between pulleys—should deflect ½ inch with moderate finger pressure
- Pulley Alignment Checks: Misaligned pulleys cause premature belt failure and uneven wear patterns
Motor Speed Controls
Your motor’s speed control system acts as the command center for stitch precision.
Variable speed settings let you adjust from slow, detailed work to rapid straight seams. The foot pedal provides intuitive pressure-sensitive control, while digital adjustment options on servo motors offer precise stitch rate settings.
Motor efficiency improves when you match speed to fabric type, giving you better electrical foot pedal response and smoother motor controller operation, which is crucial for achieving precise stitch rate settings.
Motor Components
Your sewing machine’s motor is the powerhouse that drives every stitch, and understanding its components helps you choose the right machine for your projects.
Different motor types offer distinct advantages, from the heavy-duty reliability of clutch motors to the precision control of modern servo systems.
Clutch Motor Function
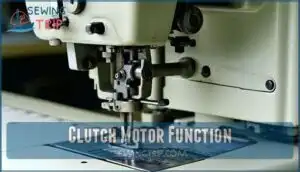
Your clutch motor runs constantly when you flip the power switch, acting like a car engine idling at a traffic light.
Unlike servo motors that start and stop on demand, this workhorse maintains speed consistency through its brake mechanism rather than motor controller adjustments.
You’ll find clutch engagement happens instantly when you press the pedal, making it perfect for industrial applications despite higher noise levels.
Here’s how clutch motors handle your sewing machine drive:
- Constant Operation – The drive shaft spins continuously, ready for immediate clutch engagement when you need it
- Brake System Control – Speed changes through brake mechanism pressure rather than electronic motor controllers
- Industrial Durability – Built for heavy-duty use where consistent power delivery matters more than quiet operation
Servo Motor Operation
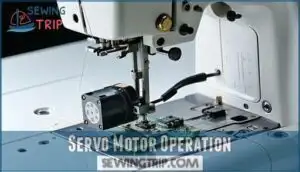
Advanced servo-motor technology revolutionizes your sewing machine drive system through precision electronic controls. Unlike traditional clutch systems, servo efficiency delivers variable speed control while maintaining consistent torque.
You’ll experience significant noise reduction and extended motor lifespan through intelligent power management. Servo motors also offer significant energy savings compared to clutch motors.
| Feature | Servo Motor | Traditional Motor |
|---|---|---|
| Speed Control | Variable 0-45,000 RPM | Fixed speed only |
| Power Draw | 550W when active | Continuous consumption |
| Noise Level | Silent when idle | Constant operation |
| Digital Interface | Electronic controls | Mechanical systems |
Your foot pedal connects directly to the digital interface, providing instant response to speed adjustments. The sewing machine drive system benefits from servo motors that draw power only during active stitching, eliminating energy waste from mechanical slip systems, and providing variable speed control while maintaining consistent torque.
Universal Motor Features
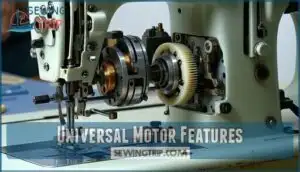
You’ll discover universal motors power many sewing machines with their flexible AC/DC operation capability.
These robust motors handle speed variation through built-in brushes and commutators, making them perfect workhorses for your drive system.
- AC/DC Operation – Runs on both alternating and direct current power sources
- Brush Maintenance – Requires regular cleaning to prevent commutator wear and sparking
- Torque Output – Delivers consistent power across various sewing machine motor types
WorkerB Motor Capabilities
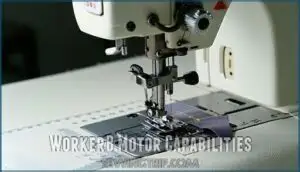
You’ll find the WorkerB motor stands as the heavyweight champion among portable sewing machine motors, packing 2.5 times more power than standard units.
This powerhouse delivers approximately 1 horsepower, making it perfect for heavy-duty projects like upholstery and canvas work that would bog down weaker motors.
The innovative design offers unrivaled power and control for demanding sewing tasks.
| Feature | WorkerB Motor | Standard Motor |
|---|---|---|
| Torque Output | 2.5x stronger | Standard power |
| Speed Range | Variable with dial control | Limited adjustment |
| Material Compatibility | Heavy canvas, leather | Light to medium fabrics |
The WorkerB motor’s superior power consumption efficiency means you get professional results without the industrial machine footprint.
Its durability testing proves it handles extended use while maintaining consistent performance across all speed settings, making it the go-to choice for serious sewers with a need for professional results.
Drive System Mechanisms
Your sewing machine’s drive system orchestrates a complex dance of mechanical components that transform electrical power into precise stitching motions.
Understanding how feed dogs, presser feet, take-up levers, and tension controls work together helps you troubleshoot problems and maintain peak performance.
Feed Dog Movement
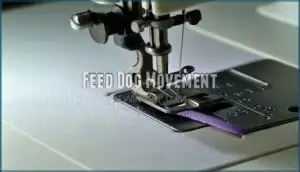
Feed dogs work like tiny mechanical conveyor belts beneath your needle plate.
These metal teeth rise through slots, grab your fabric with their gripping strength, then push it forward in precise increments.
The feed dog timing synchronizes perfectly with your needle’s up-down motion, creating consistent stitch lengths.
Different fabric feeding speeds between front and rear feed dogs enable differential feed effects for specialty techniques, utilizing the feed dog mechanism.
Presser Foot Adjustment
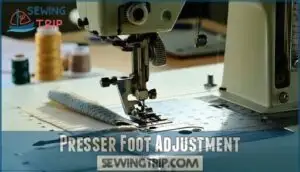
Your presser foot’s pressure directly affects how fabric moves through the machine.
You’ll find the adjustment screw near the presser foot mechanism – turn it to increase or decrease foot pressure settings based on fabric thickness.
Heavy materials need more pressure, while delicate fabrics require a lighter touch to prevent puckering or uneven feed.
Incorrect settings can lead to fabric stretching and wrinkles, so experimentation is key to achieve the right balance and prevent issues like puckering.
Take-Up Lever Function
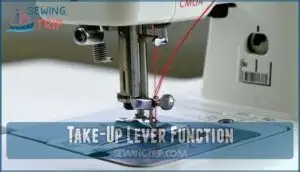
Your take-up lever acts as the thread’s choreographer, managing thread slack between each stitch.
This takeup arm pulls thread through the tension assembly during lever timing, creating proper stitch formation.
When the needle rises, the lever draws excess thread upward, maintaining tension balance throughout the thread flow cycle.
Without this sewing machine mechanism coordination, you’d face loose stitches and material impact issues.
Thread Tension Control
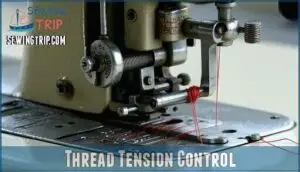
Your machine’s tension control acts like a traffic cop, managing thread flow to create perfectly balanced stitches.
Proper tension disc alignment and thread pathway maintenance prevent frustrating sewing problems.
Here’s your tension control checklist:
- Tension Dial Calibration – Start with manufacturer’s recommended settings, then test-stitch on fabric scraps to find your sweet spot
- Digital Tension Sensors – Modern machines automatically adjust tension based on fabric thickness and thread type for consistent results
- Balanced Stitch Formation – Check both sides of your fabric; threads should interlock evenly without puckering or loose loops
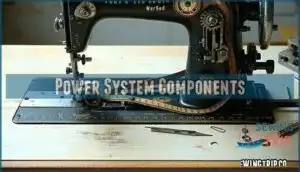
Power System Components
Your sewing machine’s power system converts electrical energy into the mechanical force that drives every component.
Understanding these core power elements—from the motor that provides the initial drive to the belt that transfers motion throughout the machine—helps you maintain peak performance and troubleshoot issues before they become costly repairs.
Electric Motor Basics
Electric motors power your sewing machine’s drive system, converting electrical energy into mechanical movement.
You’ll find different motor types affecting Motor Efficiency and Power Consumption. Understanding Motor Overload protection helps prevent damage during heavy use.
Servo motors excel in Speed Regulation, while clutch motors provide high Starting Torque.
| Motor Type | Starting Torque | Power Consumption | Speed Control |
|---|---|---|---|
| Clutch Motor | High | Continuous | Fixed Speed |
| Servo Motor | Variable | On-Demand | Variable Speed |
| Universal Motor | Medium | Moderate | Basic Control |
| WorkerB Motor | Very High | High | Limited Control |
| AC Motor | Consistent | Steady | Single Speed |
Power Cord and Switch
How does your sewing machine’s power switch really work behind that simple flip? Understanding these electrical components keeps you sewing safely and efficiently.
Your power system’s critical safety features include:
- Cord Safety – Inspect for frays that could spark dangerous electrical fires
- Switch Types – Toggle or rocker switches control your motor circuit reliably
- Voltage Compatibility – Wrong voltage destroys expensive motors instantly
- Power Surges – Unprotected electrical wiring fries delicate internal components
The power cable delivers electricity through the power switch to your motor circuit. Check voltage requirements match your outlet before plugging in.
Drive Belt Replacement
Worn drive belts spell trouble for your sewing machine’s performance. You’ll notice slipping, reduced power, or erratic stitching when replacement time arrives. Inspect belts regularly for cracks, fraying, or stretching that indicates wear.
| Belt Material Types | Tension Adjustment Tips | Pulley Alignment Issues |
|---|---|---|
| Rubber belts for durability | Adjust gradually in small increments | Check for wobbling or misalignment |
| Polyurethane for flexibility | Test tension with gentle finger pressure | Verify that pulleys sit parallel |
| Leather belts for vintage machines | Maintain moderate tightness | Look for belt tracking off-center |
| Synthetic blends for longevity | Avoid over-tightening damage | Verify proper spacing between components |
When selecting replacement belts, measure the old belt’s length and width precisely. Considering drive belt options can substantially improve your machine’s lifespan. Belt size selection matters – too loose causes slipping, too tight strains components. Your replacement tool guide should include screwdrivers, measuring tape, and belt removal tools for proper sewing machine maintenance.
Internal Drive Mechanisms
Your sewing machine’s internal drive mechanisms transform motor power into precise stitching through interconnected systems.
The drive shaft transfers rotational energy from your motor to the sewing mechanism via gear ratios and timing belts.
Linkage systems create eccentric motion, converting rotation into the needle’s up-and-down movement.
Meanwhile, camshaft design coordinates feed dog timing with needle position.
These sewing machine gears work together, ensuring your sewing machine belt maintains proper synchronization throughout operation.
Especially, the motor consumes most power, especially with thicker fabrics, as seen in the link: motor consumes most power.
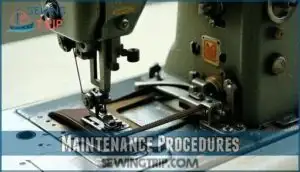
Maintenance Procedures
Proper maintenance keeps your sewing machine’s drive system running smoothly and prevents costly breakdowns that’ll leave you stuck mid-project.
You’ll need to follow a regular inspection schedule and learn the right cleaning techniques to keep everything from your motor to your drive belt in peak condition.
Regular Inspection Schedule
Consistency is your sewing machine’s best friend—establishing a regular inspection frequency keeps your equipment running smoothly.
Check your drive shaft, motor, and sewing machine belt monthly to catch wear indicators before they become costly problems.
Performance monitoring through log maintenance helps track your machine’s health over time.
- Monthly motor inspection – Listen for unusual sounds or vibrations during operation
- Belt tension check – Look for cracks, fraying, or stretching in the sewing machine belt
- Drive shaft alignment – Verify smooth rotation without wobbling or resistance
- Performance tracking – Record any changes in stitching quality or machine behavior
Oil and Cleaning Procedures
Lubrication keeps your machine’s heart beating smoothly—neglect it, and you’ll face costly repairs.
Apply light machine oil to moving parts every 8-10 hours of use, following your manual’s oiling frequency guidelines.
Clean lint removal from feed dogs and tension discs prevents residue buildup.
For peak performance, consider the specific type of oil for your machine.
Use appropriate cleaning solvents for component lubrication, ensuring thorough motor cleaning and belt cleaning for superior drive system maintenance.
Thread Path Maintenance
Check your threading guides regularly for wear and damage that restricts thread flow.
Remove lint buildup from tension discs using a soft brush to prevent tension adjustment problems.
Clear path obstructions immediately to avoid thread breakage during operation.
Inspect the entire thread path monthly, ensuring smooth operation by replacing worn guides and maintaining proper thread tension throughout the system.
Drive Belt Replacement Guidelines
Replace drive belts when you spot these Common Failure Signs: cracks, fraying, or unusual wear patterns.
Always disconnect power first for sewing machine repair safety. Different Belt Material Types require specific Replacement Tool Guidelines – never force installation.
Create proper slack by loosening motor mounts, then check Pulley Alignment Checks before applying correct belt tensioning through systematic Tension Adjustment Methods.
You can find resources for drive belt products online.
Frequently Asked Questions (FAQs)
Can drive belts cause skipped stitches?
Your machine’s performance hiccups aren’t always needle or thread issues.
Yes, worn or loose drive belts can absolutely cause skipped stitches by disrupting the precise timing between your needle and feed mechanisms, creating inconsistent fabric movement.
How often should motor brushes be replaced?
Typically, you’ll replace motor brushes every 5-10 years with moderate use.
Heavy users might need replacement every 2-3 years.
Listen for unusual sparking, reduced power, or erratic speed—these signal it’s time for fresh brushes to keep your machine humming smoothly.
What causes excessive motor vibration during operation?
Motor vibration often stems from worn drive belts, loose mounting bolts, or damaged motor brushes.
You’ll also see this when the motor’s out of balance or when debris clogs internal components, causing uneven operation.
Do timing issues affect drive system performance?
Yes, timing issues directly impact drive system performance.
When your needle timing slips, it disrupts the synchronized dance between upper and lower threads, creating skipped stitches and thread breaks.
These skipped stitches and thread breaks strain your motor and drive components.
Can worn gears impact stitch formation quality?
Worn gears definitely impact your stitch quality by disrupting the precise timing between needle, bobbin, and feed mechanisms.
You’ll notice skipped stitches, uneven tension, and poor thread loops when gear teeth wear down.
Conclusion
Like a well-orchestrated symphony, your sewing machine’s drive system components must work in perfect harmony to create flawless stitches.
You’ve learned how motors, belts, pulleys, and mechanisms transform electrical energy into precise mechanical motion.
Regular maintenance of these sewing machine drive system components guarantees reliable performance and extends your machine’s lifespan.
You’ll prevent costly repairs by inspecting belts, cleaning mechanisms, and following proper lubrication schedules. Your investment in understanding these systems pays dividends in smooth, professional-quality sewing projects.
- https://lovesewing.com/the-secret-life-of-machines/
- https://sewguru.com/parts-of-sewing-machine-and-their-functions/
- https://schempal.com/serger-parts-diagram
- https://electraschematics.com/parts-of-a-sewing-machine-diagram.html
- https://textileengineering.net/basic-parts-of-sewing-machine-and-their-functions/

