This site is supported by our readers. We may earn a commission, at no cost to you, if you purchase through links.
First, check your needle – a dull or wrong-sized needle punches holes without catching thread properly. Second, examine your thread tension settings, as loose tension prevents stitches from forming while still piercing fabric.
Third, inspect your bobbin threading and make certain it’s inserted correctly. Your needle and thread combination matters too – heavy thread through a small needle creates problems.
Don’t overlook basic maintenance like cleaning lint from feed dogs or replacing worn needles. These simple fixes solve most hole-making issues, but deeper mechanical problems require different approaches.
Table Of Contents
Key Takeaways
- Check your needle first – you’ll solve most problems by replacing dull, bent, or wrong-sized needles that can’t properly catch thread while still punching holes in fabric.
- Adjust your thread tension settings carefully – loose tension prevents stitches from forming even when the needle pierces fabric, so test on scraps and make small adjustments until threads lock properly.
- Verify your bobbin’s threaded and inserted correctly – improper bobbin placement stops stitch formation and causes thread to miss connections with the upper thread.
- Clean your machine regularly and use quality thread – lint buildup around feed dogs and cheap thread that breaks easily create most hole-without-stitching problems you’ll encounter.
Thread Issues
Thread problems can cause skipped stitches or prevent your machine from sewing altogether. Check your tension settings and make certain you’re using high-quality thread that’s correctly threaded through the machine.
Thread troubles? Your machine’s begging for quality spools and proper tension—don’t let cheap thread sabotage your masterpiece.
Tension
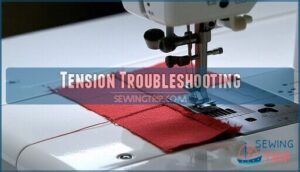
Tension problems create a domino effect that ruins your entire sewing project. When your machine’s tension balance is off, you’ll see fabric puckering, thread breakage, and uneven stitches that make your work look amateur.
Here’s your step-by-step tension troubleshooting guide:
- Test stitch evenness on scrap fabric using contrasting thread colors
- Adjust tension settings in small increments, never jumping from 2 to 8
- Check if bobbin thread appears on top (tension too tight) or loops underneath (too loose)
- Make tension adjustments one dial click at a time
- Reset to manufacturer’s recommended starting point if completely lost
Most sewing machine problems stem from incorrect thread tension. Start with your upper tension dial at the middle setting, then fine-tune based on your fabric weight. Remember, delicate fabrics need lighter tension while heavy materials require more. To guarantee smooth thread delivery, verify spool position. Don’t rush this process—proper tension adjustments take patience and practice.
Thread Quality
Your thread quality directly affects whether your machine creates perfect stitches or frustrating holes.
Old thread loses thread strength and snaps easily, especially when exposed to sunlight. Thread material matters too – polyester outperforms cotton for durability.
Black thread often breaks more than other colors across different brands. Check your thread storage conditions and stick to manufacturers with solid brand reputation.
Quality thread reduces thread breakage, prevents thread knots, and improves overall thread performance. When your thread consistently fails, it’s time to upgrade your spool selection.
You can find products related to assessing thread quality online.
Needle Problems
Your needle creates the holes that should receive thread, but damaged or wrong-sized needles prevent proper stitch formation.
You’ll need to check your needle’s condition, size, and type to match your fabric and thread combination.
Size and Type
Wrong needle selection creates more problems than you’d expect. Your fabric choice dictates everything about needle selection and thread compatibility.
- Needle size must match your fabric type – fine needles for delicate materials
- Needle type varies by project needs – ballpoint for knits, sharp for wovens
- Needle point determines fabric penetration – universal works for most projects
- Thread compatibility requires proper needle eye sizing for smooth flow
Selecting the right needle size is essential for your project.
Damage or Wear
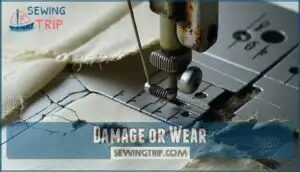
Needle damage creates bigger problems than you’d think.
Bent needles hit the needle plate and cause scratches that snag future threads.
Dull tips pierce fabric roughly, leaving visible holes instead of clean punctures.
Burr formation is another issue, as burrs form when needles scrape against thick materials, creating rough edges that shred thread.
A damaged needle affects needle alignment and creates poor stitches.
Check your needle condition before each project, looking for bent shafts, damaged tips, or surface scratches.
Replace any questionable needles immediately to prevent fabric damage and maintain proper needle issues resolution, ensuring proper stitches.
Replacing Regularly
Fresh needles prevent costly thread breaks and skipped stitches that plague most sewers.
Replace your needle every 8-10 hours of sewing for peak performance. This preventative maintenance costs pennies but saves hours of frustration with tension problems and bobbin problems.
Mark your calendar or set reminders to maintain regular intervals. Your needle lifespan directly affects stitch quality, making consistent replacement your best defense against needle problems.
Fabric Not Feeding
When your sewing machine creates holes but won’t move fabric through, you’re likely dealing with feed dog or presser foot problems.
Check that your presser foot is lowered and applying proper pressure, then inspect the feed dogs for lint buildup or mechanical issues that prevent smooth fabric movement.
Check Presser Foot
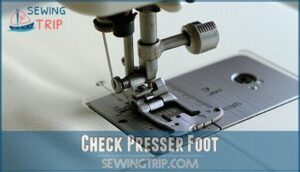
Your presser foot might be the culprit behind fabric feeding problems and skipped stitches. This small but mighty component controls how fabric moves through your machine, and when it’s not working properly, you’ll see tension problems and needle problems crop up quickly.
Here’s your diagnostic checklist:
- Verify foot alignment – confirm the presser foot sits flush against the needle plate
- Check foot pressure – adjust the pressure dial for your fabric weight
- Inspect for foot damage – look for scratches, bent parts, or worn edges
- Confirm correct foot type – match your presser foot to your fabric and stitch
- Test fabric feeding – run a sample to verify smooth, even movement
Feed Dogs and Belts
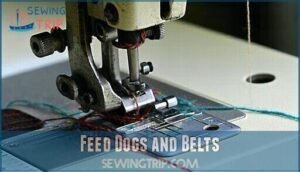
Debris-clogged feed dogs can’t grip fabric properly, causing feeding problems and skipped stitches.
Check feed dog height and inspect for lint buildup that blocks movement.
Belt slippage causes irregular fabric feeding when tension loosens over time, and damaged feed dogs with worn teeth won’t advance material smoothly.
Clean feed dogs thoroughly with a brush, then adjust belt tension adjustment screws for consistent sewing machine repair results.
Oil and Clean Machine
Regular sewing machine maintenance prevents feeding problems that cause stitching failures. Your machine needs consistent care to perform reliably.
A key step is to check stitch length to guarantee proper fabric movement.
Essential Maintenance Tasks:
- Remove lint from feed dogs and bobbin area weekly
- Oil moving parts according to your manual’s schedule
- Clean tension disks with compressed air monthly
- Wipe down surfaces after each project
- Check belt tension during routine inspections
Follow your maintenance schedule religiously for peak performance.
Skipping Stitches
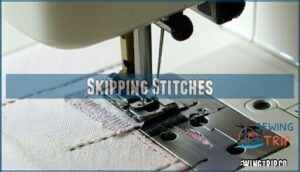
When your fabric feeds smoothly but you’re still getting skipped stitches, your sewing machine troubleshooting needs to focus on timing and setup. Thread tension issues often cause this problem, creating gaps where stitches should lock together.
Check your needle first – dull or bent needles can’t pierce fabric properly, causing timing problems. Replace it if there’s any doubt.
Next, examine your stitch length settings. Too long creates gaps, while too short bunches fabric.
| Problem | Quick Fix |
|---|---|
| Thread catching | Check spool position and thread path |
| Needle plate damage | Inspect for scratches around needle hole |
| Wrong fabric type setup | Match needle size to material weight |
| Timing adjustment needed | Professional service required |
Your needle plate might’ve scratches disrupting thread flow.
Feed issues can also stem from incorrect presser foot pressure for your fabric type. Test on scraps first – this saves time and frustration while you dial in the perfect settings.
Holes in Fabric
When your sewing machine creates unwanted holes in fabric, the problem usually stems from three main causes: mismatched needle and thread combinations, incorrect bobbin insertion, or damage to the needle plate.
Check these components first, as a dull needle paired with thick thread or a scratched needle plate can punch holes instead of creating clean stitches.
Needle/Thread Combo
Wrong needle and thread combinations create unwanted holes in your fabric.
Mismatched needles and threads punch holes instead of perfect stitches—get the combo right or ruin your fabric.
Thread Weight must match Needle Size for proper compatibility.
Thick thread through a small needle causes friction and fabric damage.
Your Fabric Type determines the right Combo Problems to avoid.
Check your machine’s Compatibility Chart for recommended pairings.
Heavy fabrics need sturdy needles with appropriate thread thickness.
Delicate materials require fine needles and lightweight thread.
Mismatched combinations stress both needle and fabric, creating visible holes and compromising stitch quality.
Selecting the correct needle involves considering needle size and fabric.
This is crucial for achieving proper compatibility and avoiding fabric damage with the right thread weight.
Inserting Bobbin
Your sewing machine bobbin needs proper bobbin placement to prevent holes.
Check your bobbin threading follows the correct path through tension springs. Different bobbin materials and bobbin type require specific bobbin insertion techniques.
Wind thread evenly on the bobbin, then place it flat in the rotary hook. Test bobbin tension by pulling the thread – it should unwind smoothly without excessive resistance during threading.
Plate Damage
A damaged needle plate creates havoc with your sewing machine.
Scratches and nicks around the needle hole catch thread, causing breaks and skipped stitches.
These rough spots also damage fabric as it feeds through.
Here’s how to identify and fix plate damage:
- Inspect for Needle Plate Scratches – Run your finger around the hole’s edge to feel for burrs or rough spots
- Check Hole Size Impact – Enlarged holes from needle strikes prevent proper stitch formation
- Assess Feed Dog Damage – Scratched feed dogs won’t grip fabric properly during feeding
- Consider Plate Material Matters – Metal plates last longer than plastic but show damage differently
- Explore Replacement Plate Options – New plates restore smooth fabric feeding and eliminate thread breaks
Tension Troubleshooting
When your sewing machine creates holes but won’t form stitches, incorrect thread tension is often the culprit.
You’ll need to check that your upper and lower threads work together properly, then test your tension settings on scrap fabric before starting your project.
Balance Threads
Balanced threads create perfect stitches that lock together properly inside your fabric layers.
When your sewing machine produces uneven results, the culprit often lies in mismatched thread tensions between upper and bobbin threads.
Check these key areas to achieve proper balance:
- Thread weight and thread type must match between upper spool and bobbin
- Tension disks should grip your thread firmly but allow smooth flow
- Thread path must follow your manual’s threading diagram exactly
- Bobbin spring needs correct tension to match your upper thread setting
To address this, it’s important to understand common tension issues.
Test Tension
Testing your sewing machine tension reveals whether threads interlock properly within fabric layers.
Start with fabric scrap testing using contrasting thread colors to see stitch formation clearly.
Turn your hand wheel toward you and feel the resistance as upper thread unwinds.
Examine both sides of your test seam carefully.
Balanced thread placement creates even stitches with no visible loops or knots on either surface.
When troubleshooting tension, adjust your tension dial settings gradually.
If you see loops underneath, tighten upper tension.
Knots on top mean loosening is needed.
Proper stitch appearance indicates your needle and thread work harmoniously together, creating a balanced and even stitch.
Common Repairs
Most sewing machine problems stem from three basic repairs you can handle yourself: incorrect bobbin placement, loose thread tension, or damaged buttonhole settings.
These common issues account for nearly 80% of stitching failures, and you’ll fix them faster than scheduling a repair appointment.
Bobbins
Your bobbin might be the culprit behind stubborn holes and thread breaks. Check bobbin installation first – it needs to sit flat in the rotary hook.
Wind your bobbin evenly to prevent tension issues. Remove any lint or debris from the bobbin area that’s restricting smooth thread flow.
Various bobbin types are available for different machines. Wrong bobbin materials or poor bobbin compatibility with your sewing machine creates uneven stitches and fabric damage. Your bobbin might cause issues due to poor bobbin compatibility or wrong bobbin materials.
Loose Tension
Thread loops hanging loose on your fabric’s surface signal your sewing machine tension needs adjustment.
When upper thread tension sits too low, you’ll see uneven stitches and fabric puckering.
Start by checking your tension disks for lint buildup. Gradually increase the tension dial setting while testing on scrap fabric.
Thread looping often disappears when you find that sweet spot where upper and lower threads lock properly between fabric layers, creating perfect tension balance, and achieving proper tension adjustment.
Buttonholes
Buttonhole feet getting stuck mid-stitch? Your machine’s crying for help. Insert your button into the foot’s slot and lock it down tight.
Set zigzag width to maximum for stronger buttonhole types, then test on scraps first.
- Watch your buttonhole placement turn from disaster to perfection
- Feel the satisfaction when fabric stabilizer prevents puckering
- Experience smooth buttonhole size control with proper sewing machine adjustment
When to Call for Help
You should contact a professional repair technician when you’ve tried the basic fixes and your machine still creates holes without forming stitches.
Call for help if you notice internal mechanical sounds, persistent tension problems after multiple adjustments, or if electrical components aren’t working properly, such as experiencing persistent issues.
Complex Issues
Some sewing machine malfunctions require professional expertise beyond basic troubleshooting.
Motor malfunction, timing adjustments, and electrical problems demand specialized knowledge and tools.
When your machine creates holes in fabric despite correct threading, internal damage may affect the shuttle hook mechanism.
Gear slippage and mechanical issues often stem from worn components that need replacement.
Machine timing problems require precise calibration that untrained hands can worsen.
If basic fixes fail and your sewing machine malfunction persists, contact a certified technician who can properly diagnose and repair complex internal systems, using their professional expertise.
Persistent Problems
Certain sewing machine issues demand professional assistance when basic troubleshooting fails repeatedly. If you’ve exhausted standard fixes yet still face recurring issues, the root cause likely requires advanced troubleshooting beyond home remedies.
Consider professional help when experiencing:
- Persistent holes despite needle and thread changes
- Skipped stitches after tension adjustments
- Timing problems affecting stitch formation
- Internal mechanical failures
- Electrical issues with motor or controls
Document your machine history and attempted fixes before scheduling service to ensure a smooth and efficient repair process, which may involve advanced troubleshooting.
Maintaining Your Machine
Regular machine maintenance prevents most sewing problems before they start.
Clean lint from feed dogs and bobbin areas after each project, oil moving parts according to your manual’s schedule, and replace worn needles and bobbins to keep your machine running smoothly.
Cleaning
Regular sewing machine cleaning prevents stitch problems and fabric holes. Clean your machine every 8-10 hours of use or weekly for peak performance.
Focus on lint removal around the bobbin area and feed dog care using a small brush or vacuum attachment. Wipe down the needle plate and threading guides with a lint-free cloth.
| Area | Tool | Frequency |
|---|---|---|
| Bobbin case | Small brush | After each project |
| Feed dogs | Vacuum brush | Weekly |
| Needle plate | Lint-free cloth | Every use |
| Thread guides | Cotton swab | Monthly |
| Tension discs | Compressed air | Bi-weekly |
Oiling
Think of machine lubrication as giving your sewing machine a rejuvenating drink. Proper oiling frequency prevents 90% of mechanical problems that create fabric holes and skipped stitches.
Use only sewing machine oil—never household oils that attract dust and cause rust.
Focus on these key application points:
- Bobbin case and hook assembly
- Needle bar mechanism
- Feed dog pivot points
- Tension disc springs.
Apply one drop per location every 8-10 hours of use. Wipe away excess oil immediately to prevent fabric staining during your next sewing machine maintenance session.
Replacing Parts
Your sewing machine parts work like teammates – when one fails, the whole operation suffers.
Replace worn components before they damage your fabric or create bigger problems.
- Needle plates: Check for scratches around needle holes that snag thread
- Presser feet: Look for nicks or flattened surfaces affecting fabric feeding
- Feed dogs: Replace when worn teeth can’t grip material properly
- Bobbin cases: Swap damaged cases preventing smooth thread flow
Part compatibility matters most for successful replacement and peak sewing machine performance.
Frequently Asked Questions (FAQs)
Why is my sewing machine not stitching?
Like troubleshooting a telegraph that’s gone silent, you’ll need to check several culprits. Your needle might be dull, threading could be incorrect, tension settings off, or the bobbin improperly installed.
How do you troubleshoot a sewing machine?
Start by checking your needle—replace if bent or dull.
Rethread both top and bobbin threads correctly. Adjust tension settings.
Clean lint from feed dogs. Verify you’re using the right needle-thread combination for your fabric.
Can a sewing machine problem be fixed?
Most sewing machine problems can be fixed with basic troubleshooting.
You’ll solve threading issues, needle problems, tension adjustments, and bobbin complications using your manual.
Complex mechanical failures need professional repair, but common issues are DIY-friendly.
Why is my sewing machine not releasing fabric?
Ever felt like your fabric’s stuck in quicksand?
Check if your presser foot’s lowered and applying proper pressure.
Inspect feed dogs for lint buildup or damage, and verify that your machine’s tension settings aren’t too tight, preventing smooth fabric movement, to ensure smooth fabric movement is not hindered.
How do you fix skipped stitches on a sewing machine?
Check your needle first – replace if bent or dull.
Rethread completely, ensuring proper tension. Verify needle size matches thread and fabric weight.
Clean lint from bobbin area and confirm bobbin’s inserted correctly.
How to diagnose sewing machine problems?
Identify your machine’s specific issue first. Check threading, needle condition, and bobbin placement.
Test tension settings on scrap fabric. Examine feed dogs for lint buildup.
Consult your manual’s troubleshooting chart for systematic diagnosis.
Why is my sewing machine working but not stitching?
Your machine’s likely missing proper thread connections.
Re-thread both top and bobbin completely, check needle condition, verify tension settings, and make certain the presser foot’s lowered—these threading issues cause most non-stitching problems.
The presser foot must be lowered to ensure proper stitching.
Why do sewing machines lock up and won’t sew?
Sewing machines lock up when thread tangles in the bobbin area, tension settings are too tight, or needles break and jam the mechanism.
You’ll need to clear debris, adjust tension, and replace damaged parts.
Why isn’t my thread going in my fabric?
Thread path errors account for 40% of stitching failures.
Your needle’s likely bent, thread’s improperly threaded through tension disks, or you’re using wrong needle size for your fabric weight.
Re-thread completely and check needle condition, to address issues such as a bent needle.
Why is my sewing machine not sewing underneath?
Your bobbin isn’t catching the upper thread properly. Check if your bobbin’s inserted correctly, threading path is right, and tension settings are balanced. Re-thread both top and bobbin threads completely.
Conclusion
Like a detective solving a mystery, you’ve now learned to identify the clues when your sewing machine holes not sewing properly.
Armed with these seven diagnostic techniques, you can tackle needle problems, thread tension issues, and feeding malfunctions systematically.
Regular maintenance prevents most troubles before they start.
Remember to check basics first—needle condition, thread quality, and proper threading—before assuming complex mechanical failure.
With consistent care and these troubleshooting steps, you’ll keep your machine running smoothly for years.


