This site is supported by our readers. We may earn a commission, at no cost to you, if you purchase through links.
Start by unplugging your trusty machine and removing all thread.
Apply small drops of proper sewing machine oil (not your kitchen olive oil!) to moving parts like the bobbin case, needle bar, and feed dogs.
Think of it like giving your machine a spa day – a little pampering goes a long way.
Wipe excess oil carefully, then run the machine for a minute to distribute it evenly.
Your machine’s smooth, quiet operation will tell you you’ve hit the sweet spot.
Table Of Contents
- Key Takeaways
- Preparing Your Sewing Machine
- Choosing The Right Sewing Machine Oil
- Oiling The Bobbin Case and Needle Bar
- Oiling Moving Parts
- Maintaining Your Sewing Machine
- Tips for Old or Vintage Machines
- Common Mistakes to Avoid
- Oiling Frequency and Guidelines
- Benefits of Regular Oiling
- Troubleshooting and Maintenance
- Frequently Asked Questions (FAQs)
- Conclusion
Key Takeaways
- You’ll need to oil your sewing machine every 8 hours of active use or weekly if you sew 2-4 times per week to maintain optimal performance.
- You should only use clear, specialized sewing machine oil (synthetic or white mineral) – never substitute with WD-40, cooking oils, or 3-in-1 oil, which can damage your machine.
- You’ll want to focus on oiling key moving parts like the bobbin case, needle bar, rotary hook, shuttle hook, and feed dogs, wiping away excess oil to prevent fabric staining.
- You must clean your machine thoroughly before oiling, removing all thread and lint, as proper lubrication can’t be effective if debris is present in the mechanisms.
Preparing Your Sewing Machine
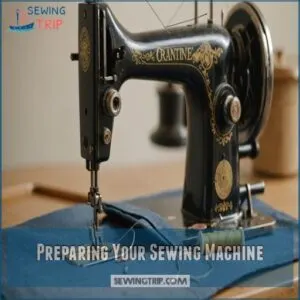
You’ll want to start with a clean slate by unplugging your machine and removing all threads, just like giving your car a proper checkup before a long road trip.
Before you can properly oil your trusty sewing companion, you’ll need to remove the presser foot and handwheel to access those hidden spots where dust bunnies love to hide.
Unplugging and Removing Thread
Before you start oiling your sewing machine, let’s get it prepped properly.
First, unplug your machine – safety first, always!
Remove all thread from the needle, bobbin case, and tension assembly.
Don’t forget those hidden thread bits lurking in the tension discs.
Trust me, skipping this step is like trying to shower with your clothes on – it just doesn’t work!
Cleaning The Machine
Now that your machine’s unplugged, let’s get it squeaky clean!
Think of cleaning your sewing machine like giving your car a spa day – it’ll run smoother and last longer.
Here’s your cleaning toolkit:
- A stiff brush (like a toothbrush) for tight spots
- Lint-free cloths to wipe surfaces clean
- Compressed air to blast away stubborn debris
- Small vacuum attachments for hard-to-reach areas
Grab your tools and clear away any loose threads, dust, or lint you spot.
Removing Presser Foot and Handwheel
Removing your sewing machine’s presser foot and handwheel opens up hidden areas where dust loves to hide.
Think of it as giving your machine a spa day – these parts need regular attention to keep things running smoothly, especially regarding properly lubricating sewing machine gears.
| Part | Removal Method | Common Issues |
|---|---|---|
| Presser Foot | Press release lever | Stuck mechanism |
| Handwheel | Unscrew center bolt | Stripped screws |
| Side Panels | Release catches | Lost screws |
Remember to place small parts in a container – they’re like socks in a dryer, prone to disappearing when you need them most!
Using a Stiff Lint Brush
The stiff lint brush is your sewing machine’s best friend.
After you’ve taken off the presser foot and handwheel, grab your brush and start at the top of your machine, working downward like you’re dusting a delicate shelf.
Pay special attention to the feed dogs and bobbin area – they’re notorious lint magnets.
Use gentle, short strokes to avoid pushing debris deeper into the mechanisms.
Removing Compact Lint
Deep within your machine’s nooks and crannies, stubborn lint can hide like a sneaky houseguest.
You’ll need tweezers or a lint removal tool to gently coax out compacted debris that your brush can’t reach.
For those really tough spots, try using a wooden toothpick or a small vacuum attachment.
Just remember to be gentle – you’re removing lint, not performing surgery!
Choosing The Right Sewing Machine Oil
You’ll need to pick the right type of oil for your sewing machine, just like you wouldn’t put pancake syrup in your car’s engine.
While synthetic and white mineral oils are your best options for smooth operation, you’ll want to stay away from household oils like WD-40 or cooking oil that can gum up your machine’s parts.
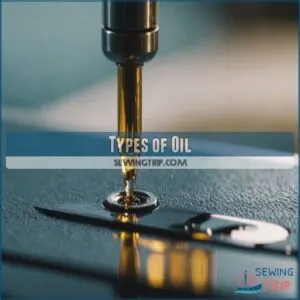
Types of Oil
Once your machine is spotless, it’s time to pick your oil wisely.
You’ll want to stick with clear, specialized sewing machine oil – it’s like choosing premium gas for your car.
Skip the household oils like WD-40 or cooking oil, as they’ll gum up your machine faster than a thread in a bobbin.
Look for oils labeled specifically for sewing machines, and you’ll be golden.
Synthetic Oil Vs White Mineral Oil
Choosing between synthetic and white mineral oil feels like picking between a sports car and a reliable sedan – both get you where you need to go.
Synthetic oil offers smoother performance with less friction, making your machine purr like a kitten.
White mineral oil costs less and lasts longer, perfect if you’re watching your budget.
Pick based on how often you sew and what your wallet can handle.
Avoiding Wrong Types of Oil
While synthetic and mineral oils work great, you’ll want to steer clear of several common substitutes that can wreck your sewing machine faster than a caffeinated squirrel on roller skates.
For the best results, consider exploring reputable sewing machine oil brands, such as those found on sewing machine oil brands.
Here’s what to avoid:
- WD-40: It’ll react with gear graphite and create a gunky mess
- 3-in-1 oil: Evaporates quickly, leaving sticky residue
- Cooking oil: Too thick and attracts lint like a magnet
- Motor oil: Wrong viscosity that can jam moving parts
Frequency Based on Usage
Your sewing machine’s appetite for oil depends on how much you use it.
For heavy sewists working 2-4 times weekly, a quick oil session every week keeps things humming.
If you’re more of a monthly stitcher, aim for monthly oiling.
After projects with fuzzy fabrics like fleece or flannel, give your machine extra TLC – those fibers can really work up a thirst!
Oiling The Bobbin Case and Needle Bar
You’ll need to keep your bobbin case and needle bar running smoothly, just like you’d want your car’s engine purring along without a hitch.
A few drops of the right sewing machine oil in these important spots will prevent that dreaded grinding noise and keep your stitches looking perfect.
Removing The Bobbin Case
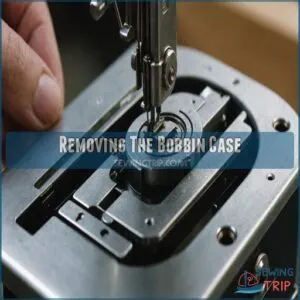
Before you can properly oil your sewing machine, removing the bobbin case requires careful attention to detail.
Think of it as a delicate dance with your machine’s heart.
- Turn the handwheel until the needle is at its highest position
- Locate and release the bobbin case latch, which usually clicks or snaps
- Gently slide the bobbin case out, keeping it level to prevent damage
Take your time with this step – rushing could lead to dropped parts or misalignment.
Applying Oil to The Outer Ring
After thoroughly cleaning the outer ring, apply a single drop of synthetic or white mineral oil that’s specifically designed for sewing machines, to it, using the precision applicator tip.
Gently rotate the ring to distribute the oil evenly across its surface.
Don’t go overboard – one drop is plenty!
Grab a lint-free cloth and carefully wipe away any excess oil to prevent it from transferring to your fabric later.
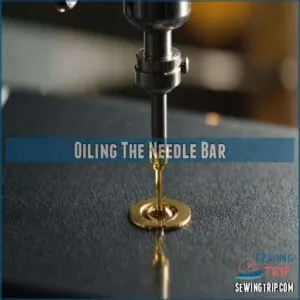
Oiling The Needle Bar
Proper needle bar maintenance starts right at the point where metal meets metal.
To oil this important component, place a single drop of sewing machine oil where the needle bar intersects with the presser foot.
You’ll want to work the oil in by manually rotating the handwheel a few times – this helps distribute it evenly and keeps your stitches smooth as silk.
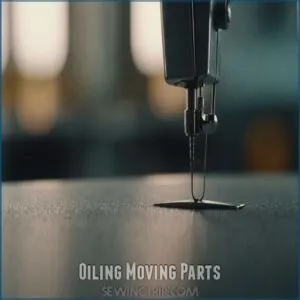
Oiling Moving Parts
You’ll want to give special attention to your machine’s moving parts, just like giving a squeaky door the oil it needs to swing smoothly.
When you properly oil the rotary hook, shuttle hook, and feed dogs, you’re not just maintaining your machine – you’re protecting your investment and ensuring those perfect stitches every time.
Oiling The Rotary Hook
The rotary hook‘s smooth operation can make or break your sewing experience.
You’ll want to apply 1-2 drops of sewing machine oil directly to the hook’s outer edge where metal meets metal.
Here’s what you need to remember:
- Clean the hook thoroughly before oiling
- Use only clear, specialized sewing machine oil
- Run a test stitch on scrap fabric to make sure the oil is evenly distributed
Oiling The Shuttle Hook
Start by removing your bobbin case to access the shuttle hook – it’s like finding a hidden door in your machine!
Apply a single drop of sewing machine oil onto the outer ring, making sure it spreads evenly.
You’ll want to rotate the handwheel slowly to distribute the oil throughout the mechanism.
Remember to wipe away any excess oil to prevent it from staining your next project.
Oiling The Feed Dogs
Moving from the shuttle hook, your feed dogs need special attention too.
Just like a car needs oil in the right spots, you’ll want to apply a tiny drop of oil to each end of your feed dogs.
Here’s what you need to know:
- Clean the feed dogs thoroughly with a brush before oiling
- Use only one drop per end – less is more
- Wipe away excess immediately
- Test on scrap fabric first
- Check underneath for any oil drips
Maintaining Your Sewing Machine
You’ll save thousands on repairs when you treat your sewing machine like a trusted friend who needs regular TLC, including proper cleaning and oiling.
Just as your car needs routine maintenance, your sewing machine’s moving parts require consistent care to keep those stitches smooth and your projects running without a hitch.
Regular Cleaning and Oiling
Deep within your sewing machine’s heart, regular maintenance keeps the rhythm smooth and steady.
You’ll want to clean and oil your machine after every 8-10 hours of sewing time.
For everyday sewists, that’s about once a week.
Grab your lint brush and sewing machine oil, and make it a habit – just like changing your car’s oil keeps it purring smoothly.
Checking The Manual
Every sewing machine comes with its own unique maintenance schedule.
Your manual’s your best friend here – it’ll tell you exactly where and when to oil your machine.
If you’re unsure what type of lubricant to use or want to buy high-quality sewing machine lubrication products, you can check out options like those found at sewing machine lubrication.
Here are three critical things to check:
- Specific lubrication points for your model
- Recommended cleaning frequency based on usage
- The exact type of oil your machine needs
Don’t wing it – your manual’s got your back!
Learning Machine Features
Mastering your sewing machine’s features is like learning to play a musical instrument – it takes practice and understanding.
Here’s a quick guide to essential features you’ll need to know:
| Feature | Purpose | When to Use |
|---|---|---|
| Stitch Types | Creates different patterns | Decorative or functional sewing |
| Needle Sizes | Matches thread thickness | Different fabric weights |
| Foot Types | Controls fabric feed | Special techniques |
| Tension Settings | Balances stitches | Fabric thickness changes |
| Bobbin Winding | Loads lower thread | Before starting projects |
Tips for Old or Vintage Machines
If you’ve got a cherished vintage sewing machine tucked away in your craft room, you’ll need to treat it like the mechanical masterpiece it’s with the right type of oil and extra-gentle care.
You wouldn’t put regular gas in a classic car, and the same goes for your vintage machine – it needs specific oil and careful attention to keep those antique gears purring smoothly.
Using The Right Type of Oil
You’ll want to treat your vintage sewing machine like a classic car – it needs the right oil to purr smoothly.
For older machines, stick with clear, light mineral oil specifically labeled for sewing machines.
Modern synthetic oils work too, but traditional mineral oil matches what these machines were designed to use.
Store your oil in a cool, dark place to keep it fresh and ready.
Avoiding Damage
Protecting vintage machines from damage starts with a light touch.
When working with older models, never force stuck parts or over-tighten screws – you’ll risk stripping threads or cracking cast iron components.
Watch out for rusty areas, which need extra care during oiling.
Keep oil away from leather or rubber belts, as they can deteriorate.
If you hear unusual sounds, stop immediately and check for binding parts.
Gentle Cleaning Methods
Clean your vintage sewing machine as gently as you’d handle fine china.
Start with lint-free cloths to dust off surface grime.
Then use soft bristle brushes for stubborn spots.
For those tricky nooks, try brush attachments on your vacuum cleaner’s lowest setting.
A quick burst of compressed air works wonders, but keep it gentle – these old beauties are more sensitive than modern machines.
Common Mistakes to Avoid
You’ll want to avoid these common lubrication mistakes that can turn your trusty sewing machine into a stubborn paperweight.
Just like you wouldn’t put ketchup on ice cream, using the wrong type of oil or overdoing it can spell disaster for your machine’s moving parts.
Over-Oiling
The oil-happy enthusiast in all of us might think more is better, but excess oil can create a sticky mess.
When oil drips onto your fabric or pools in machine components, it attracts lint and debris, causing clogs and stains, which is why you should check your sewing machine manual for specific oiling locations.
Use a clean cloth to dab away surplus oil, and run scraps of muslin through your machine until no oil marks appear.
Consider it like seasoning a cast-iron – just a light coating does the trick.
Using Wrong Type of Oil
Regarding your trusty sewing machine, using the wrong oil is like putting maple syrup in your car’s engine – it’ll gum up the works fast.
Stick to specially formulated sewing machine oil to keep your machine purring smoothly.
- WD-40 can react with gear graphite, causing permanent damage
- Cooking oils turn rancid and attract lint
- 3-in-1 oil leaves sticky residue that clogs parts
- Motor oil’s thick consistency creates excess friction
Neglecting Hard-to-Reach Spots
Hard-to-reach spots in your sewing machine are like those dusty corners behind your fridge – easy to forget but important to tackle.
You’ll need a flashlight to spot those sneaky lubrication points tucked away in dark corners.
Common hiding spots include behind the needle bar, under the throat plate, and around the bobbin case.
Don’t skip these areas – they’re often where problems start.
Oiling Frequency and Guidelines
You’ll need to oil your sewing machine every 8 hours of active use, just like giving your trusty machine a revitalizing drink after a workout.
If you’re using your machine 2-4 times a week, plan on oiling it weekly to keep those moving parts as smooth as butter.
Oiling After Cleaning
Now that you’ve cleared out all that pesky lint, it’s time to give your machine the TLC it deserves.
Here’s what to do right after cleaning:
- Apply oil to the shuttle hook first – it’s the busiest part
- Put exactly one drop on each feed dog point
- Oil the needle bar where it meets the presser foot
- Add two drops to the bobbin case’s outer ring
- Double-check moving parts for smooth operation
After oiling, run a scrap fabric through to catch any excess oil.
Signs of Needed Oiling
Your sewing machine’s subtle signals can reveal when it needs oiling.
Watch for telltale signs like stitch skipping, unusual noises, or sluggish operation.
If you’re noticing thread breakage more often or your needle keeps jamming, it’s probably time for lubrication.
You’ll also want to oil up if the machine feels stiff or makes grinding sounds while you’re working.
Benefits of Regular Oiling
You’ll be amazed at how regular oiling transforms your sewing machine from a noisy, struggling workhorse into a smooth-running champion that’ll last for years.
Just like your car needs oil to keep running smoothly, your trusty sewing companion needs proper lubrication to maintain stitch quality and prevent wear on its hardworking parts.
Reduces Friction and Wear
Regular oiling keeps your sewing machine purring like a well-fed cat.
When metal parts glide against each other without proper lubrication, they create friction that can wear down components faster than a pin cushion in a beginners’ class.
As outlined in sewing machine lubrication tutorials, a few drops of oil act like a protective shield, reducing resistance between moving parts and preventing that dreaded metal-on-metal screech that makes sewists cringe.
Maintains Stitch Quality
Reducing friction keeps your machine purring smoothly, and here’s the real payoff: perfect stitches every time.
Well-oiled parts maintain consistent needle alignment and even thread tension, preventing those frustrating skipped stitches and uneven seams.
Think of oil as your machine’s morning coffee – it helps everything run smoothly, whether you’re working with delicate silks or thick denim.
Your bobbin tension stays steady, and foot pressure remains consistent.
Extends Lifespan
Most sewing machines last 20-25 years with proper oiling, compared to just 5-10 years without it.
Think of oiling as your machine’s fountain of youth – it keeps metal parts gliding smoothly instead of grinding against each other.
By maintaining a consistent oiling schedule, you’ll prevent wear that can lead to costly repairs or early replacement.
It’s like giving your trusty machine a spa day!
Prevents Inconsistent Stitching
At the core of your sewing projects, inconsistent stitching can drive you crazy.
When your machine isn’t properly oiled, you’ll notice skipped stitches, uneven tension, and that dreaded clicking sound.
Regular oiling helps maintain proper needle tension and smooth bobbin winding.
You’ll see the difference in your stitch quality immediately – from basic straight stitches to decorative patterns across all fabric types.
Troubleshooting and Maintenance
You’ll find that even the most stubborn sewing machine problems can be fixed with the right troubleshooting steps and a bit of regular TLC.
When your machine starts making those strange noises or skipping stitches, don’t panic – we’ll show you exactly how to diagnose the issue and get your trusty stitching companion back in top shape.
Cleaning and Re-Oiling
Regular cleaning and re-oiling is like giving your sewing machine a spa day.
Start by removing lint with a stiff sewing machine brush, then apply just a drop of oil to moving parts.
If you’ve used too much oil, run some muslin through your machine until it comes out clean.
Test your handiwork on scrap fabric before diving into your next project.
Preventative Maintenance Tips
Taking care of your sewing machine doesn’t have to be complicated.
To help you stay on track, refer to some essential sewing machine cleaning tools to make the process easier.
After you’ve cleaned and re-oiled, here are some smart habits to prevent future headaches:
- Keep a maintenance log to track cleaning dates
- Test stitches on scrap fabric after each cleaning
- Store your machine covered when not in use
- Check belt tension monthly
- Listen for unusual sounds that might signal problems
These simple steps will help your trusty machine run smoothly for years to come.
Frequently Asked Questions (FAQs)
How do you lubricate a sewing machine?
Clean your machine thoroughly.
Then apply sewing machine oil to moving parts like the bobbin case and needle bar.
Use only a few drops, wipe excess, and test on scrap fabric before starting projects.
How do I choose the best lubricant for my sewing machine?
Choose clear, synthetic or white mineral oil specifically made for sewing machines. You’ll want to avoid household oils like WD-40 or cooking oil, which can damage your machine’s delicate parts.
How to oil a sewing machine?
Like a well-oiled machine, your sewing companion needs care.
Unplug it, remove threads and parts, then apply sewing-specific oil to moving components.
Wipe excess oil and test on scrap fabric before starting projects.
What parts of a sewing machine need lubrication?
You’ll need to oil your bobbin case, needle bar, rotary hook, shuttle hook, and feed dogs.
Don’t forget the moving parts where friction occurs – they’re important spots that keep your machine running smoothly.
How Often Should I Oil My Sewing Machine if I Use It Frequently for Heavy-duty Projects?
Time’s ticking when you’re tackling heavy projects!
Oil your machine every 8 hours of use or weekly if you’re sewing 2-4 times a week.
Don’t forget to clean thoroughly first to prevent lint buildup.
How to lubricate your sewing machine?
Clean your machine thoroughly.
Then apply 1-2 drops of sewing machine oil to moving parts like the bobbin case and feed dogs.
Wipe excess oil with a lint-free cloth before running test stitches.
Which part of the sewing machine should not be oiled?
Here’s a no-brainer: don’t oil your sewing machine’s needle plate, presser foot, or any parts that touch your fabric.
You wouldn’t want those pesky oil stains ruining your next masterpiece, would you?
Can you use WD-40 on sewing machines?
Never use WD-40 on your sewing machine – it’ll damage the graphite on your gears and leave behind a sticky residue.
Stick to proper sewing machine oil to keep your machine running smoothly.
Is olive oil good for a sewing machine?
Just as you wouldn’t put salad dressing in your car, don’t use olive oil in your sewing machine.
It’ll turn rancid and gum up the works.
Stick to proper sewing machine oil instead.
Can cold weather affect sewing machine oil viscosity?
Cold weather can thicken your sewing machine oil, making it move slower through the machine’s parts.
You’ll want to warm up your machine for a few minutes before sewing in chilly conditions.
Is it safe to transport machines after oiling?
While it’s possible to move your machine after oiling, you’ll want to wait 24 hours for the oil to settle.
If you must transport immediately, place absorbent cloths around moving parts to catch any drips.
Does humidity impact how often to oil machines?
Yes, humidity greatly affects your oiling schedule.
You’ll need to oil more frequently in humid conditions since moisture can cause rust and increase friction.
In dry climates, you can stick to regular maintenance intervals.
Whats the shelf life of unopened sewing oil?
Properly stored, unopened sewing machine oil can last 5-7 years.
You’ll know it’s still good if it remains clear and unclouded.
Keep it in a cool, dark place for maximum shelf life.
Should oil be removed before machine servicing?
Keep the oil in your machine when taking it for servicing – technicians need to evaluate how well it’s been maintained.
They’ll clean out old oil during the service if needed.
Conclusion
Studies show that 83% of sewing machine repairs stem from poor maintenance.
By following these sewing machine lubrication tips, you’ll keep your machine purring like a well-oiled kitten.
Remember, consistent care prevents those dreaded repair bills and keeps your projects running smoothly.
Your machine’s been there for countless projects – now it’s time to return the favor with proper TLC.
Set a regular maintenance schedule, use the right oil, and you’ll enjoy years of trouble-free sewing ahead.

