This site is supported by our readers. We may earn a commission, at no cost to you, if you purchase through links.

Start by checking the needles for bends, and make sure your machine is properly threaded.
Loose parts can mimic a haunted house creak, so tighten any suspicious bolts.
A lack of lubrication can cause grinding noises—grab that sewing machine oil and get to work!
Don’t forget to clear lint from the bobbin area, as fibers love turning your machine into a buzz machine.
So get your tools out, and you might just find the culprit.
Curious for more tips?
Brace yourself for some sewing-machine wizardry!
Table Of Contents
- Key Takeaways
- Common Causes of Sewing Machine Noises
- Identifying Different Types of Sewing Machine Noises
- Step-by-Step Guide to Diagnosing Noise Issues
- Lubricating Your Sewing Machine to Reduce Noise
- Cleaning and Maintenance to Prevent Noise Problems
- Replacing Worn or Damaged Parts Causing Noise
- Adjusting Tension and Timing to Eliminate Noise
- Troubleshooting Specific Noises
- Preventing Future Sewing Machine Noise Issues
- When to Seek Professional Sew
- Frequently Asked Questions (FAQs)
- Conclusion
Key Takeaways
- Check and tighten loose parts to prevent rattling and maintain your sewing machine’s quiet operation.
- Regularly lubricate moving parts with sewing machine oil to keep things running smoothly and avoid grinding sounds.
- Use the right needles and threading techniques to prevent noise from incorrect tension or needle alignment.
- Clean the bobbin area and remove lint buildup frequently to eliminate buzzing and other unwanted sounds.
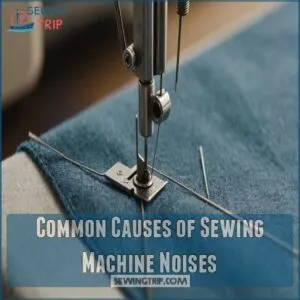
Common Causes of Sewing Machine Noises
Ever wonder why your sewing machine sounds grumpier than your morning alarm clock?
It’s often due to loose or worn parts, lack of lubrication, bent needles, incorrect threading, or dirt buildup,
all of which can turn your stitching serenade into a noisy symphony.
Loose or Worn Parts
That rattling? It’s probably loose parts!
Identifying loose parts is key to a quiet machine.
Common wear patterns show up in screws, needles, and even the bobbin case.
A quick check might save you a trip to the repair shop.
This DIY repair options guide helps you pinpoint the problem.
Preventive maintenance, like regular tightening, keeps things humming.
Need a part replacement guide? Many are available online!
Lack of Lubrication
If your sewing machine’s dry bearings are making a racket, it might be crying out for a little TLC with the right oil type.
Think of lubrication as its daily coffee fix—it needs regular application, but don’t overdo it!
With proper lubrication frequency and the right lubrication tools, you’ll prevent those annoying clunks and squeaks.
Bent or Damaged Needles
Think your sewing machine’s got rhythm but sounds off? Check those needles! Here are some tips:
- Needle Types: Use the right one for your fabric.
- Needle Burrs: Replace it if you see rough spots.
- Needle Size: Match it to your thread.
- Needle Alignment: Make sure it’s straight as an arrow.
Incorrect Threading
Switching gears from damaged needles, threading mistakes can throw a wrench in your sewing plans.
Incorrect threading affects bobbin tension and needle type, leading to weird noises.
Proper thread tension is key, so find the sweet spot where the upper and lower threads meet in the middle of the fabric for a quieter experience, see proper thread tension tips.
Check thread tension and quality for a smoother stitch.
Imagine running a race with your shoelaces tied wrong—things won’t end well!
Align those threads and watch your sewing machine purr.
Dirty or Clogged Mechanisms
Tackling noise issues? Your sewing machine might be whispering for attention.
Lint build-up and thread jams can stop it to a grinding halt.
Think of them as sneaky dust bunnies.
Regular use of cleaning tools can combat oil residue and grime.
Prevention tips? Clean it often, and keep those bits and pieces unclogged for a smoother, quieter sewing experience.
Identifying Different Types of Sewing Machine Noises
When your sewing machine starts serenading you with clicks, squeals, or rattles, it’s time to play detective.
Recognizing these quirky sounds helps you pinpoint what’s wrong, so you can stitch without a hitch!
Clicking Sounds
Clicking sounds in your sewing machine? It might be your needle timing or loose screws.
Don’t fret! Check out the latest tools for diagnosing sewing machine click sound issues.
Here’s where to start:
- Needle bar: Make sure it’s moving smoothly.
- Thread type: Match your thread type to the machine’s settings.
- Bobbin tension: Adjust if needed.
Imagine your machine as a partner needing a little TLC.
Grinding Noises
That clicking stopped? Good! Now, let’s talk grinding. That usually means something’s rubbing where it shouldn’t.
Check for needle wear; a bent needle grinds against the bobbin.
Thread entanglement around the bobbin can also cause a grinding sound, as can bobbin friction.
Gear wear is another culprit; lubrication issues often make gears grind.
A little oil might fix it.
Thumping or Knocking
Thumping or knocking sounds in your sewing machine can interrupt your rhythm like a rock in your shoe.
Common causes include:
- Loose parts: Tighten screws and fasteners to quiet the noise.
- Needle strikes: Check for bent needles hitting the bobbin case.
- Worn bearings: Listen for a dull knock indicating it’s time for replacements.
Keep your machine smooth with regular checks!
High-pitched Squealing
After unraveling the causes of thumping or knocking, let’s squeal onto high-pitched whining.
This sound often suggests belt tension or motor issues—imagine a chirping cricket inside your machine!
A dry needle bar might also be the culprit. Lubricate it, check belt conditions, and tighten anything loose.
Think of it as a spring cleaning session for your sewing buddy.
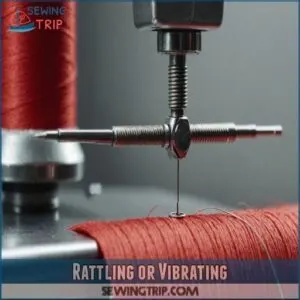
Rattling or Vibrating
If your sewing machine’s rattling or vibrating, it’s likely due to loose parts or worn bearings, throwing the machine’s balance off.
When the sewing machine’s needle not moving issue is caused by a faulty clutch or incorrect needle insertion, it can be a precursor to more severe problems, including strange noises, check clutch and drive belt. Loose parts and worn bearings are common culprits when it comes to a noisy sewing machine.
Consider the fabric’s weight and make sure your needle alignment’s spot on.
Check screws, tighten anything loose, and pay attention to the balance.
A little maintenance goes a long way in keeping those noises in check!
Step-by-Step Guide to Diagnosing Noise Issues
Got a sewing machine that’s suddenly channeling its inner percussionist?
Roll up your sleeves because this guide will walk you through pinpointing the source of those strange sounds,
from checking tension to examining the bobbin area.
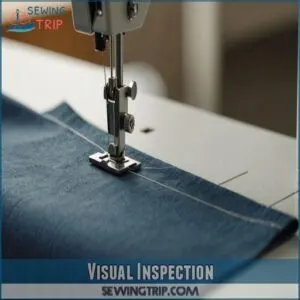
Visual Inspection
To tackle those weird sewing machine noises, start by giving your machine a solid once-over.
Look for:
- Needle condition: Bent or dull needles can wreak havoc.
- Thread tension: Check if it’s too tight or loose.
- Loose parts: Make sure the presser foot and bobbin case are firmly in place.
For more on identifying common causes of noise, like timing issues and worn bearings, see troubleshooting sewing machine noise.
A little TLC here can work wonders!
Isolating The Noise Source
Finding the noise location in your sewing machine can feel like playing detective!
Try adjusting the machine speed to better hear the sound type.
Listen at different operating modes, and make mental notes on the noise level.
This will pinpoint exactly where the racket’s coming from.
It’s like tuning an instrument—you need just the right frequency!
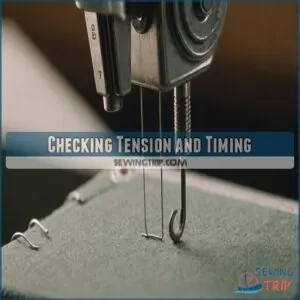
Checking Tension and Timing
Once you’ve pinpointed the noise’s location, check your thread tension. Is it too tight or too loose? A simple adjustment might solve the problem.
Next, examine your needle and hook timing—are they perfectly synchronized? Improper needle timing can cause a rhythmic click.
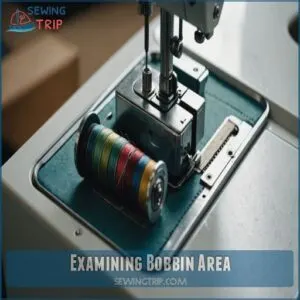
Examining Bobbin Area
After checking tension and timing, focus on the bobbin area.
You might be surprised by how quickly lint buildup or thread tangles can mess things up.
Pop open the bobbin case and check for worn parts or any rogue threads lurking.
A quick bobbin case cleaning often clears up noise issues, keeping everything humming along smoothly.
Just imagine it as tidying up a little forgotten corner of your machine!
Lubricating Your Sewing Machine to Reduce Noise
Keeping your sewing machine well-oiled can make a world of difference in reducing those annoying noises and ensuring smooth operation.
Imagine your machine purring like a contented cat after a thorough oiling—it’s all about using the right technique and frequency!
Proper Oiling Techniques
Think of your sewing machine as a bicycle—it gets creaky without oil.
Use high-quality sewing machine oil to keep things running smoothly.
A little dab’ll do ya; over-oiling attracts dust.
Use a precision oiler for tricky spots.
Avoid all-purpose oils—they’re too heavy.
Regular oiling tools and the right oil types are key to a happy, noise-free machine.
Frequency of Lubrication
Keeping your sewing machine running smoothly involves setting a lubrication schedule.
Here’s a quick guide:
- Once a month: Lubricate if you’re a casual sewer. This prevents over-lubrication risks and accounts for sewing machine age.
- Bi-weekly: For frequent use, especially in humid climates. Climate effects can demand more frequent oiling.
- Weekly: If used daily, ensuring every stitch counts on your creative journey.
Recommended Lubricants
Choosing the right lubricant for your sewing machine is like picking the perfect pair of shoes—it can make all the difference.
Sewing machine oil is ideal because of its viscosity; it’s safe, efficient, and won’t gunk up your gears.
Avoid alternatives like WD-40, which can damage parts.
A little application goes a long way—just don’t go overboard!
Areas Requiring Regular Oiling
When oiling your sewing machine, focus on the moving parts: needle bar, bobbin area, and presser foot lever.
These spots crave regular attention to keep things running smoothly and quietly.
You can find a good sewing machine oil kit to help you keep your machine in top shape.
Imagine them as the squeaky wheel needing grease.
Use proper oiling tools and stick to your oiling schedule to dodge common oiling mistakes, ensuring peak performance and less noise.
Avoiding Over-lubrication
Over-oiling can be caused by not following proper sewing machine maintenance, as seen in issues like neglecting regular oil checks; it’s like giving your car too much gas—things get messy.
Avoid this by using the right oil type and following the lubrication frequency instructions, and consider using synthetic or white mineral oil for smoother sewing sessions, as described in more detail in sewing machine oiling tips.
Too much oil attracts dust and lint, gumming up the works.
- Use a tiny amount of oil.
- Only oil moving parts.
- Don’t use grease; oil is best.
- Wipe away excess oil.
Cleaning and Maintenance to Prevent Noise Problems
To keep your sewing machine from sounding like it’s auditioning for a horror movie, regular cleaning and maintenance are key.
Clear out lint and debris, clean the feed dogs and bobbin case, dust internal mechanisms, and store it properly to make sure it purrs softly instead of growling.
Removing Lint and Debris
Regular oiling‘s not the only way to tackle noise.
Dust bunnies can really sabotage your sewing session.
Grab a lint brush—you’ve got options, flat or round—and gently clear out every crevice.
A tiny vacuum, such as one from a small vacuum store, works wonders for stubborn fluff.
Taking these preventative measures keeps your machine purring smoothly, like a well-fed cat lounging in the sun.
Cleaning Feed Dogs and Bobbin Case
Moving from lint removal to the next mess, you’ll need basic tools: a soft brush and tweezers.
Regular cleaning of the feed dogs and bobbin case helps prevent noise.
Gently brush out fluff, making sure nothing’s trapped.
Your sewing machine breathes easier, you hum along nicely, and pesky sounds disappear faster than socks in a dryer.
Dusting Internal Mechanisms
Once you’ve tackled the feed dogs and bobbin case, dusting the internal mechanisms is a breeze.
Dusting helps keep your machine purring smoothly.
Use these tips:
- Air Duster Safety: A safe bet for cleaning tricky spots.
- Cleaning Tools: Embrace brushes for lint removal.
- Dust Cover Importance: Shield your machine when not in use.
Proper Storage Practices
Stashing your sewing machine properly can silence those pesky noises.
Keep it in a climate-controlled area, cover it using dust covers, and choose a well-fitting storage location.
| Recommended Practice | Benefit |
|---|---|
| Use Dust Covers | Reduces dust buildup |
| Climate Control | Prevents moisture |
| Vertical vs. Horizontal | Safe storage option |
Remember, a clean and secure machine purrs smoothly!
Regular Maintenance Schedule
Think of your sewing machine’s care like a spa day—a little TLC goes a long way.
To prevent weird noises and other issues, regularly unplug the machine and follow a thorough step-by-step guide on how to clean a sewing machine.
To keep it purring smoothly, follow this routine:
- Clean weekly: Dust those feed dogs.
- Oil monthly: Just a drop keeps things slick.
- Check tension regularly: Avoid fabric disasters.
- Inspect parts annually: Replace worn bobbins pronto.
Replacing Worn or Damaged Parts Causing Noise
Sometimes, even with the best care, parts wear out. Replacing worn needles, bobbins, or belts can often silence those annoying noises and get your sewing machine purring like new again.
Needle Replacement
Consider the needle as the heartbeat of your sewing machine.
A bent or dull needle—regardless of needle type, size, or brand—can create a symphony of undesired noises.
Make sure your needle’s sharpness and gauge are spot-on for your fabric.
Swapping it out regularly isn’t just good practice; it’s like giving your sewing machine a revitalizing boost.
Bobbin Case Inspection and Replacement
When you swap needles, don’t forget the bobbin case! A worn bobbin case can make your sewing machine act up. To keep it purring:
- Inspect regularly – Check for damage or lint.
- Tension check – Make sure it sits correctly to avoid skipped stitches.
- Compatibility matters – Use the right case for your model to prevent chaos.
Belt and Gear Examination
Belt and gear issues might leave your sewing machine sounding like a broken record.
Check the belt condition for cracks or frays, ensuring proper belt tension to keep things running smoothly.
Peek at the gears for any signs of wear or misalignment.
A well-aligned gear system paves the way for quiet performance, making your machine hum instead of clatter.
Presser Foot Adjustment
Has your sewing project hit a snag because of noise from the presser foot? It could be due to misalignment or incorrect pressure.
Adjusting the presser foot height and pressure is key, especially when dealing with different fabric types.
Make sure it’s aligned properly to avoid unwanted sounds.
Remember, fabric thickness affects pressure needs—find that sweet spot for smooth sewing!
Hook Race Replacement
Checked the presser foot and still got noise?
Next, let’s look at the hook race.
Imagine it as the machine’s heartbeat.
If it shows wear or tear, like a poor rhythm, it might need replacing.
Signs include irregular stitches.
Use proper hook race tools for removal and installation.
Keep it clean to extend its life and keep your stitches smooth.
Adjusting Tension and Timing to Eliminate Noise
If your sewing machine sounds like it’s auditioning for a percussion band, adjusting the tension and timing might just restore the peace.
By fine-tuning the upper thread tension, bobbin tension, and timing of the needle and hook, you’ll be back to smooth sewing in no time.
Upper Thread Tension Adjustment
A properly adjusted upper thread tension is key!
Find the tension dial, usually a small knob or screw.
Turn it slightly, testing after each adjustment.
Too tight? Stitches will be puckered.
Too loose? They’ll be loose and easily broken.
Experiment to find that sweet spot for consistent stitching.
Remember, thread tension basics are essential, and the right tools make all the difference in your tension troubleshooting.
Bobbin Tension Fine-tuning
Now that you’ve tackled the upper thread tension, it’s time for the bobbin tension to shine.
Think of it like adjusting guitar strings—find that sweet spot by adjusting the bobbin screw slightly.
Use the correct thread type and needle size for harmony.
A smooth-running bobbin winder helps your machine sing without annoying noise, keeping frustration at bay.
Synchronizing Needle and Hook Timing
Fine-tuning your bobbin tension is great, but don’t overlook synchronizing needle and hook timing.
It’s the dance between needle and hook that keeps stitches tight and your machine humming happily.
To check:
- Rotate the handwheel slowly and watch the needle’s descent
- Make sure the hook enters loop behind needle
- Adjust if timing’s off
- Test stitch quality after 调整
Balancing Feed Dog Timing
When your sewing machine starts acting up like an old motor, it might be time to check the feed dog alignment.
Ensuring proper balance prevents stitch consistency issues, fabric puckering, and uneven feeding.
If the feed dogs are misaligned, it’s like having a misinformed dance partner—nothing matches up!
Fixing this revives your machine’s groove and eases tension issues.
Presser Foot Pressure Adjustment
Ever felt like your sewing machine is playing tug-of-war with fabric?
Adjusting the presser foot pressure can solve this.
Too much pressure squashes delicate materials, affecting stitch quality.
Too little, and you’re feeding fabric unevenly, messing with tension.
Find a happy medium using a foot pressure gauge, ensuring even feeding.
Your stitches will thank you!
Troubleshooting Specific Noises
If your sewing machine’s begun serenading you with unexpected clunks, buzzes, or knocks, it might be time to investigate.
Understanding these noises can save you from frustration, turning your sewing woes into "sew-peaceful" sessions.
Clunking Sound
Imagine you’re sewing when suddenly, your machine starts clunking like an old car.
It’s time to play detective!
Check these areas:
- Needle bar alignment: Make sure it’s straight and seated correctly.
- Bobbin case issues: Look for any obstructions.
- Tension adjustments: Fine-tune those pesky settings.
- Machine timing: Make sure synchronization is spot on.
These checks will keep you sewing smoothly.
Buzzing Sound
That clunking stopped? Great! Now, let’s tackle that buzzing sound. It often means your needle’s bent or the motor’s loose. Worn gears can buzz too, especially if they’re dry. A little lubrication might fix it!
| Problem | Cause | Solution |
|---|---|---|
| Buzzing sound | Bent needle | Replace the needle |
| Buzzing sound | Loose motor | Tighten motor screws |
| Buzzing sound | Worn gears | Lubricate gears |
| Buzzing sound | Needle alignment | Adjust needle alignment |
| Buzzing sound | Gear lubrication | Lubricate the gears |
Remember, a little preventative maintenance goes a long way!
Knocking Sound
When you’ve tackled that buzzing, a knocking sound might sneak up, hinting at issues like a loose needle bar, worn bearings, or even a presser foot problem.
Sometimes, the bobbin case could be the culprit.
Those weird noises could be a sign of shuttle timing issues, like shuttle reversing too early, which can be caused by lint buildup, incorrect spring tension, or improper shuttle driver gap – try checking for shuttle timing problems. It’s like your sewing machine’s way of saying it’s overdue for a check-up.
Tightening and lubricating can often keep this cranky noise at bay.
Clicking Sound
A clicking sound from your sewing machine can throw you off your rhythm.
It’s often due to:
- Needle Bar issues needing adjustments.
- Loose Parts causing misalignment.
- Improper Thread Tension affecting stitch formation.
- Incorrect Needle Timing creating noise.
Check these areas to maintain control, and you’ll be sewing smoothly without a hitch.
Banging Noise
Moving from clicking sounds to banging noise—ever thought your sewing machine’s got a mind of its own?
Presser foot issues or a needle striking parts mean serious clatter.
Loose parts or tension problems lend their discord too. It’s like a drum solo gone wrong!
Check for worn bearings, adjust settings, and secure everything tight to reclaim harmony.
Preventing Future Sewing Machine Noise Issues
To keep your sewing machine humming happily instead of clanking loudly, establish a consistent cleaning and oiling routine while using proper threading techniques.
Treating your machine with care, like using appropriate needles and storing it correctly, can make all the difference in avoiding future noise issues.
Regular Cleaning and Oiling Routine
Keeping your sewing machine happy requires a regular cleaning and oiling routine. Treat it like a dance partner: smooth and graceful.
- Oiling frequency: Every 8-10 hours of use.
- Cleaning tools: Lint brush and vacuum.
- Best lubricants: Use sewing machine oil.
- Storage tips: Cover when idle.
- Maintenance schedule: Monthly checkup keeps it running smoothly.
Proper Threading Techniques
Getting threading right in your sewing machine is a game changer—like finding the perfect puzzle piece.
Check the thread tension, make sure you have proper top and bobbin threading, and wind your bobbins smoothly using essential tools like high-quality needle threaders and inserters.
A cheerful machine hums along with these tips, keeping those weird noises at bay and making your sewing experience as smooth as silk.
Using Appropriate Needles and Thread
Choosing the right needle and thread is key to a happy sewing machine!
Match your needle size to your fabric weight; heavier fabrics need sturdier needles.
The correct thread type is also essential – use thread that complements your needle and fabric.
A sharp needle prevents skipped stitches and breakage.
Proper thread tension keeps everything running smoothly.
Ignoring these details? You’ll hear those frustrating sewing machine noises!
Avoiding Overworking The Machine
Ever feel like your sewing machine’s on a never-ending marathon?
It’s important to give it rest.
Avoid overworking by:
- Respecting fabric weight limits: Know your machine’s capacity.
- Planning projects mindfully: Break complex tasks into smaller steps.
- Scheduling regular breaks: Let it cool down, extending its lifespan.
Think of your machine like an athlete—strong but needing downtime!
Storing The Machine Correctly
Imagine this: your sewing machine, cozy under its dust cover, nestled in a climate-controlled corner where humidity levels stay just right. You’re like a professional storage wizard, balancing factors that keep the machine stable and fuss-free.
| Storage Tip | Why It Helps | Extra Hint |
|---|---|---|
| Dust Cover | Prevents dust buildup | Keeps it clean |
| Climate Control | Avoids temperature swings | Stabilizes metals |
| Humidity Levels | Reduces rust risk | Use a dehumidifier |
| Stability Check | Minimizes vibrations | Place on flat surface |
When to Seek Professional Sew
If persistent noises keep cropping up despite your best efforts, it’s time to call in the pros.
When things get complex or you encounter recurring issues, like a stuck sewing machine wheel which can be caused by thread jams or lint buildup, you can find solutions by checking the machine’s sewing machine handwheel, a certified repair technician can work wonders on your sewing machine.
They’ve the skills to fix what you can’t see and guarantee your machine’s in top shape.
Trying to repair delicate mechanisms yourself could lead to more damage.
So when the noises don’t ease up, hand it over to professionals who can bring it back to its prime.
Frequently Asked Questions (FAQs)
Can a sewing machine make a knocking noise?
You’re sewing a quilt when suddenly a knocking sound interrupts.
It’s a common issue caused by lack of lubrication, needle problems, or loose parts.
Lubricate and check for worn needles to keep things humming smoothly.
Why does my sewing machine make a banging noise?
That banging’s likely your needle hitting something! Check the presser foot and tension. A loose part? Tighten it. Still banging? Time for a pro.
Why does my sewing machine make a grinding sound?
Your sewing machine’s grinding sound is like a cat’s growl, warning of loose threads or needle issues.
Gently clean, lubricate, tighten loose parts, and inspect the needle for damage to restore smooth operation.
Why does my sewing machine make a humming noise?
A sewing machine’s humming noise usually points to motor overload or electrical issues.
Make sure the machine isn’t struggling with thick fabric, and check for power supply problems.
If unresolved, professional servicing might be necessary to fix it.
Why does my sewing machine make a sound?
To resolve thread tension issues that cause unusual noises, check if you’re using the correct thread type and re-thread with the presser foot up, following the guidelines outlined in sewing machine basic troubleshooting. Did you know 30% of sewing machine noises stem from thread tension issues?
A humming sound could be due to loose parts or dry mechanisms.
Check tension, clean the bobbin, and oil regularly to stay stitch-perfect.
Why is my sewing machine making clicking noises?
Clicking from a sewing machine often signals loose parts or incorrect threading.
Check the needle’s not loose, thread tension settings are right, and the bobbin area is clean.
Those small fixes can work wonders!
What Are Some General Troubleshooting Tips for Strange Sewing Machine Noises?
Think that noise is just a quirk?
It’s often a cry for help.
Tighten loose parts, oil moving bits, and clean dust bunnies.
Regular maintenance keeps your sewing machine purring smoothly, so don’t skip those checks!
My Sewing Machine is Making a Vibration Sound. What Could Be Causing This and How Can I Fix It?
Your sewing machine’s vibration is likely due to loose parts or worn bearings.
Try tightening screws or checking for any loose components inside.
Routine cleaning and lubrication might also resolve persistent vibrations, keeping your machine humming smoothly.
Why is my sewing machine making weird noises?
Regular cleaning and proper maintenance, such as cleaning the machine regularly, can prevent many issues. Did you know 80% of sewing machine problems stem from simple maintenance? Weird noises? Check for loose parts, worn needles, and clogged areas. A quick clean and oil often fixes it!
Why is my sewing machine making a screeching noise?
A screeching noise from your sewing machine often means it’s thirsty for some oil, or the belt is too tight.
Check the belt tension and lubricate moving parts.
If this doesn’t help, it might need professional attention.
Why is my sewing machine making a buzzing sound?
Hearing a buzzing from your sewing machine? It might be a bent needle, loose tension settings, or worn gears causing the ruckus.
Check and replace the needle.
Adjust the tension.
Inspect the gears for wear.
How do I know if my sewing machine motor is bad?
Feel the motor’s heat, listen for a constant hum or burning smell.
These signs, plus weak power or sudden stops, hint at trouble.
When your machine won’t sew smoothly, it’s likely the motor‘s struggling.
Can fabric type influence sewing machine noise?
Absolutely, fabric type can create a ruckus with your sewing machine.
Thicker fabrics may cause clunking or banging if the tension’s off or the needle’s not right.
Always match needle and tension settings to the fabric.
Do environmental changes affect machine noise?
Yep, temperature and humidity changes can impact your machine. Extreme dryness might make parts squeak, while dampness could cause rust and odd sounds. Keep it in a stable environment!
Could electrical issues cause strange sewing sounds?
Don’t let pesky electrical issues fool you; they can indeed cause strange sewing sounds.
A faulty power supply or loose wiring might create buzzing or humming noises.
Check connections and consider consulting a technician if strange sounds persist.
Does machine age impact noise levels?
Machine age can bump up noise levels, like an old car cranky on cold mornings.
Over time, wear and tear, dry parts, and weakened mechanisms make noises more common.
Regular maintenance tunes this out a lot.
How does machine brand affect noise characteristics?
Different sewing machine brands come with varied noise levels due to design, material quality, and construction.
High-end brands often prioritize quiet operation, while less expensive models might make more noise due to looser tolerances or cheaper components.
Conclusion
Ready to silence those quirky, sewing machine noises? You now have the tools to tackle everything from loose parts to poor lubrication.
Keep your machine in top shape with regular cleaning, routine lubrication, and replacing worn parts.
Remember, small tweaks can make a big difference—like adjusting tension or using the right needles and thread.
If your sewing machine’s still making weird noises, don’t hesitate to seek expert help.
Happy stitching, and may your machine hum along smoothly!

