This site is supported by our readers. We may earn a commission, at no cost to you, if you purchase through links.
Start by checking the threading. The top thread should flow smoothly through the tension discs and follow the correct threading path—no shortcuts here!
Misaligned tension is another culprit, so adjust it until the stitch is balanced, with neither top nor bobbin thread pulling unevenly.
Use the right needle and thread combo—a heavy thread in a fine needle often spells trouble. If thread keeps breaking, look for snags or burrs on the needle or throat plate.
Regular maintenance helps, and there’s plenty more to explore!
Table Of Contents
Key Takeaways
- Always thread your machine with the presser foot up to ensure the tension discs engage properly and prevent tangling.
- Use the right needle and thread combo to avoid skipped stitches, thread breakage, or puckered fabric.
- Clean lint buildup regularly around the bobbin case, needle plate, and feed dogs to keep your machine running smoothly.
- Adjust thread tension and presser foot pressure based on your fabric type to balance stitches and avoid thread nests.
Threading Issues Explained
You’ll find that most thread issues stem from incorrect threading paths or mismatched thread and tension settings.
Most thread trouble starts with improper threading paths or mismatched tension—master these basics to ensure frustration-free sewing.
Check that your thread passes through all guides and tension discs properly, with the presser foot raised during threading to confirm proper engagement.
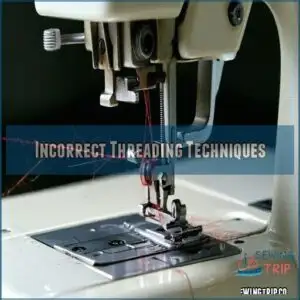
Incorrect Threading Techniques
When you mess up the threading path, you’ll end up with a tangled mess under your fabric.
Always follow your machine’s threading diagram exactly, keeping the presser foot up while threading to properly engage tension disks.
Different thread types in top and bobbin cause tension problems, while improper threading leads to skipped stitches.
The take-up lever must be threaded correctly to prevent random loops in your seams.
Addressing needle thread breakage can often be resolved by ensuring the overhead guide is properly aligned.
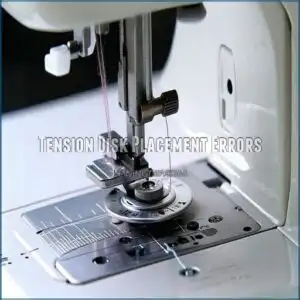
Tension Disk Placement Errors
After threading your upper needle, tension disk placement errors can ruin your perfect stitch. When the presser foot is down during threading, your thread won’t seat properly in the tension disks.
Here’s how tension disk errors affect your sewing:
- Random loops appear on your fabric
- Thread bunches underneath your work
- Stitches break unexpectedly
- Your machine makes unusual clicking sounds
Always raise your presser foot while threading to guarantee proper thread path alignment and tension spring engagement, preventing errors that can cause your stitches to break unexpectedly.
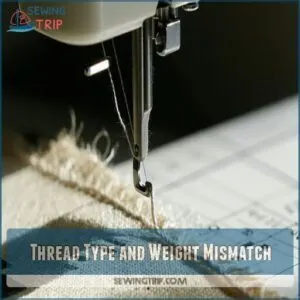
Thread Type and Weight Mismatch
Beyond tension disk issues, your thread-to-needle relationship matters substantially.
The wrong thread weight for your needle size creates chaos in your stitching. Remember: thread weights (30-100) work inversely—higher numbers mean thinner thread—while needle sizes (60/8-100/16) increase with the number.
Never use thread lighter than 20 weight; it’ll damage your machine. Mismatched combinations lead to bent needles, skipped stitches, and puckered fabric.
Selecting the right thread for the project is vital for achieving the best results.
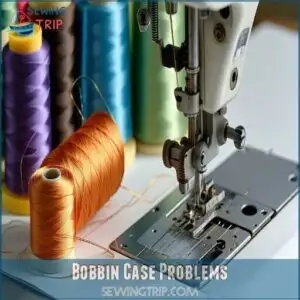
Bobbin Case Problems
Your sewing machine’s bobbin case is ground zero for many threading headaches.
Bobbin problems arise from dirt buildup, incorrect insertion, or damage.
Check your tension spring alignment – it should move freely without sticking.
Uneven bobbin winding creates inconsistent thread delivery.
Clean your hook area regularly and inspect for wear.
If persistent issues occur despite proper bobbins tension adjustments, consider bobbins case replacement to restore smooth operation.
Always make certain you’re using the correct bobbin size for your machine.
Needle Thread Tension Adjustment
You’ll need to master tension adjustment if you want to stop those frustrating thread nests and puckered seams from ruining your projects.
The right balance between upper and lower thread tension creates perfect stitches that look identical on both sides of your fabric.
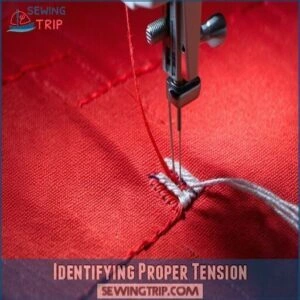
Identifying Proper Tension
Now that you’ve mastered proper threading, let’s examine what balanced thread tension actually looks like.
Proper tension is evident when your stitches appear identical on both fabric sides.
Here’s how to identify correct tension:
- Look for thread loops midway between fabric layers
- Check for smooth, flat seams without puckering
- Verify that no bobbin thread shows on the top
- Verify that top thread doesn’t appear on the bottom
- Test tension interplay on your specific fabric type to ensure proper tension and achieve smooth seams.
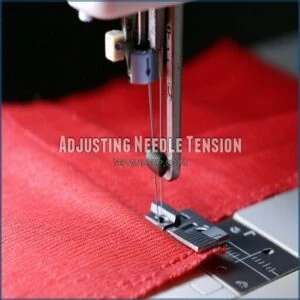
Adjusting Needle Tension
For perfect stitches, adjust your needle tension in small increments.
Turn the tension dial clockwise to tighten if you see loops on the underside. Turn counterclockwise to loosen if your fabric puckers or thread breaks.
Test each adjustment on scrap fabric, watching for balanced stitches where threads interlock in the middle.
Remember, sewing machine tension troubleshooting is easier with patience and methodical changes.
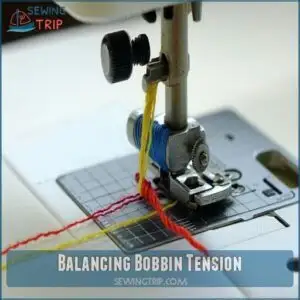
Balancing Bobbin Tension
The correct balance between the top and bobbin tension is vital for perfect stitches. Your bobbin tension needs adjustment when threads aren’t interlocking properly in the fabric’s middle.
Mastering the balance between top and bobbin tension unlocks flawless stitches, ensuring threads interlock perfectly within your fabric’s layers.
A tension log can help track the ideal settings for different fabrics.
To test and adjust bobbin tension:
- Drop the bobbin case while holding the thread – it should descend slowly
- Turn the small screw clockwise to tighten, counterclockwise to loosen
- Check thread draw rates match between needle and bobbin threads
- Confirm even bobbin winding to prevent tension issues
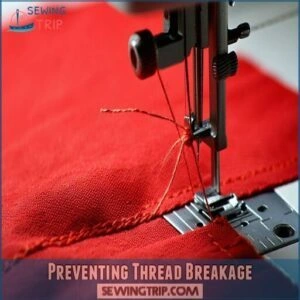
Preventing Thread Breakage
Now that your bobbin tension is balanced, let’s tackle thread breakage.
To prevent needle thread breaks, check needle quality and replace bent or dull ones. Verify thread compatibility between your fabric and needle size.
Clean lint buildup around bobbin case regularly. Adjust thread tension gradually—too tight causes breaks.
Use quality thread and maintain smooth feeding by supporting fabric as you sew. Schedule machine servicing annually for peak performance.
Common Stitching Problems
You’ll notice several common stitching problems that can frustrate your sewing projects, including skipped stitches, fabric stretching, seam puckering, and thread bunching.
These issues often result from incorrect needle selection, improper threading, or tension imbalances that you can quickly fix with the right techniques.
Skipping Stitches Causes
Skipping stitches can frustrate even the most patient sewers.
When your machine misses stitches, check these common causes:
- Needle issues: Using the wrong needle size or type, incorrect insertion, or dull needles
- Threading problems: Improper machine threading or tension settings
- Machine factors: Timing problems, lint buildup, or worn parts
Replace your needle regularly and make certain it matches your fabric type to prevent needle thread breaks and maintain proper thread tension, which helps to avoid frustrating issues.
Fabric Stretching and Distortion
While incorrect needle positioning can cause skipped stitches, fabric stretching creates equally frustrating problems.
When you pull fabric through your machine, bias distortion occurs, especially with knits and lightweight materials.
| Problem | Solution |
|---|---|
| Knit stretching | Use gentle guiding motion |
| Bias distortion | Support fabric completely |
| Feed issues | Loosen foot pressure |
| Seam distortion | Avoid pulling fabric |
| Puckered seams | Match thread tension to fabric type |
Let the feed dogs do their job—pushing or pulling creates uneven seams, and to achieve the best results, it is crucial to avoid puckered seams and ensure seam distortion is minimized.
Seam Puckering Solutions
To combat seam puckering, adjust your thread tension first.
Loosen it slightly when working with lightweight fabrics.
Increase stitch length to reduce fabric gathering and guarantee proper fabric support while sewing.
For persistent puckers, switch to a lighter thread weight that matches your fabric type.
Check presser foot pressure—too much compression can cause unwanted ripples.
Remember, proper tension adjustment varies based on fabric type and needle size.
Thread Bunching and Breakage
Thread bunching and thread breaking can ruin sewing projects.
Check these essentials to fix common sewing machine thread issues:
- Lint Buildup: Clean around the bobbin case and needle plate to prevent tangles.
- Thread Tension: Adjust needle and bobbin tension for your fabric type.
- Needle and Bobbin Winding: Replace dull needles and make sure of smooth bobbin winding with quality thread.
To prevent this, verify correct bobbin threading.
Machine Maintenance Tips
Keep your sewing machine running smoothly by prioritizing regular maintenance. Cleaning, oiling, and checking key components like the needle and feed dogs prevent thread issues and guarantee consistent stitching.
Regular Cleaning and Oiling
Sewing machine maintenance starts with regular sewing machine cleaning. Tackle lint buildup issues by removing debris around bobbin cases, feed dogs, and tension discs.
Use your manual to locate oiling points and prevent wear with sewing machine oiling. Proper maintenance requires specialized machine lubricants for peak performance.
Component cleaning prevents damage and guarantees smooth performance. Preventative maintenance avoids costly repairs, so don’t skip these easy steps to keep your machine running perfectly.
Bobbin Winding Mode Settings
Bobbin winding mode settings can make or break your stitching. Mismanaged winding leads to thread overlap, tension inconsistency, and needle thread issues.
Here’s how to get it right:
- Match bobbin size to your machine.
- Use uniform winding speed.
- Prevent winding problems by ensuring proper alignment.
- Avoid overfilling the bobbin.
- Check for smooth bobbin insertion to maintain even tension.
Needle Installation and Replacement
Always check that the needle direction matches your machine’s guide—it matters!
Needle installation requires placing the flat side properly.
Pick the correct size and type for fabric and thread.
Inspect for needle eye burrs or damage.
Wrong needle types can break threads, so prioritize compatibility.
Proper technique helps with sewing needle installation.
Installation tools aren’t necessary, but steady hands help guarantee proper positioning for smooth sewing.
Feed Dog Maintenance
When feed dogs get clogged or worn, fabric feeding issues arise.
Keep them clean and adjusted to guarantee smooth sewing.
- Brush lint off feed dogs after each project.
- Replace worn feed dogs to prevent uneven fabric feed.
- Check for feed dog problems during skipped stitches or jamming.
- Verify feed dog adjustment matches fabric type for steady fabric feed.
Troubleshooting Mechanical Issues
Mechanical issues with your sewing machine can lead to skipped stitches, uneven tension, or thread snapping.
By checking the hook timing, tension discs, bobbin case, and presser foot pressure, you can quickly restore smooth and consistent stitching.
Hook Timing and Adjustment
If skipped stitches or thread breaks sound familiar, hook timing issues might be the culprit.
Machine timing guarantees the hook catches the thread perfectly. To adjust, position the hook 1-2mm from the needle eye when the needle rises.
Tighten screws firmly after adjustments. Regular checks of your hook assembly prevent bigger headaches later—sometimes sewing machine repair is unavoidable.
Tension Disc Verification
Start by checking if the thread is properly seated in the tension discs.
Misaligned tension discs can cause inconsistent stitches.
Clean the discs to remove lint or buildup affecting tension consistency.
Verify the spring’s integrity for smooth adjustments.
Proper disc cleaning and alignment improve thread tension and prevent loops, guaranteeing your thread flows evenly for flawless sewing.
Bobbin Case Inspection
Your sewing machine’s bobbin case can impact stitch quality.
Inspect it for lint or damage using a clean cloth.
Verify the bobbin fits snugly and the thread path is smooth.
Check the tension spring for wear; it controls bobbin tension.
If threads tangle or break, cleaning the case and verifying bobbin tension often resolves the issue.
Presser Foot Pressure Adjustment
Adjusting presser foot pressure guarantees smooth fabric feed and prevents issues like puckering or distortion.
Too much pressure can cause stretching in knits or threading challenges with heavyweight materials, while too little struggles with slippery fabrics.
Proper pressure adjustment is essential for different fabric types, and referring to your sewing machine’s tension adjustment guide can be very helpful.
Testing settings on scraps and proper fabric handling and support keep stitches consistent, balancing thread tension effectively.
Frequently Asked Questions (FAQs)
Why isn’t my sewing machine threading properly?
It’s like threading a needle in a hurricane—check threading paths, lift the presser foot, and verify that tension discs are open.
Re-thread properly, remove lint, and verify the needle is installed correctly for smooth results.
Why is my machine needle not picking thread?
Your needle mightn’t pick thread if it’s inserted backward, the timing is off, or the bobbin’s threaded incorrectly.
Verify proper threading, check the needle’s direction, and inspect the hook timing alignment.
Why does my sewing machine knot underneath fabric?
Loose tension, incorrect threading, or a misaligned bobbin can create thread nests underneath fabric.
Check your tension settings, rethread the machine with the presser foot up, and verify proper bobbin insertion to fix the issue.
How can I resolve inconsistent needle thread tension?
Start by re-threading the machine with the presser foot raised, ensuring the thread clicks into tension discs.
Check tension settings, testing on scrap fabric to keep stitches balanced, and avoid mismatched threads.
Avoid skipped guides to ensure stitches remain balanced.
What causes thread to snap during sewing?
Thread snapping happens when tension’s too tight, the needle’s dull or incompatible with the thread, or the machine’s threaded wrong.
Also, inspect for lint buildup, sharp burrs, or mismatched thread and bobbins types.
How do I prevent tangled thread at the start?
Imagine threading a needle as taming a lively thread.
Raise the presser foot, thread carefully, and hold thread tails snugly when starting.
Avoid yanking, or loops may form.
Practice patience—it’s a stitcher’s secret weapon!
Why won’t my needle thread move through fabric?
Check if the presser foot is down, the fabric is fully under the needle, and the threading is correct.
Incorrect tension or a dull needle may also block the thread from moving smoothly.
Conclusion
Mastering sewing machine needle thread issues is like untangling a puzzle—the right steps make all the difference.
Always start with proper threading and check your tension settings. Pair the correct needle and thread to avoid breakage, and don’t overlook regular maintenance to keep your machine running smoothly.
Troubleshoot common problems like skipped stitches or thread bunching with simple adjustments. With these fixes, you’ll achieve perfect stitches and keep your projects frustration-free. Happy sewing!
- https://www.schmetzneedles.com/pages/sewing-machine-needle-troubleshooting-guide?srsltid=AfmBOopMfAwP92Q5fh4YH3t88iwfm2UfCUCvbsvhZxVCJzjlnd6zWbz0
- https://wunderlabel.com/en-gb/blog/p/17-common-sewing-machine-problems-solve/
- https://www.wonderfil.ca/blog/6-issues-that-cause-skipped-stitches/9/3/2020
- https://blog.treasurie.com/sewing-machine-thread-keeps-breaking
- https://www.thesewingdirectory.co.uk/thread-tension/

