This site is supported by our readers. We may earn a commission, at no cost to you, if you purchase through links.
 If your sewing machine’s bottom thread is bunching, don’t fret!
It could be due to incorrect bobbin threading, bobbin tension not being engaged, or loose bobbin case tension.
Double-check that the bobbin thread is passing through the tension spring and dropping freely.
Gently pull on the bobbin thread to check for slight resistance but free movement.
If the problem continues, it might be time to adjust that bobbin case tension screw.
Stay tuned to find out more about tackling thread bunching and keeping your sewing machine happy!
Table Of Contents
Key Takeaways
- Sewing machine woes? First, check your bobbin. It might be incorrectly threaded, or the tension could be off, leading to thread bunching.
- Keep it clean! A dusty, lint-filled machine can cause all sorts of chaos, from tension issues to thread clumps. Regular cleaning keeps your sewing groove smooth.
- Thread quality matters. Cheap threads are prone to tangles and breakage, so invest in reputable brands for seamless stitching.
- It’s all about balance. Both top and bottom thread tensions need to be in harmony for smooth stitching. Adjust gradually and test often.
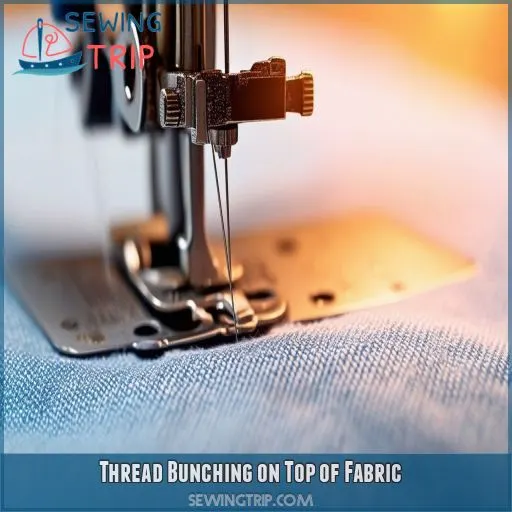
Thread Bunching on Top of Fabric
If your thread is bunching on top of the fabric, the culprit is often an issue with the bobbin. This could be due to incorrect bobbin threading, tension not being set up properly, or a loose bobbin case tension.
Incorrect Bobbin Threading
If your bobbin thread is bunching on top of the fabric, the first thing to check is whether you’ve threaded the bobbin correctly.
It’s an easy mistake to make, and it can lead to a world of frustration.
Double-check that you’ve followed the instructions for your machine, making sure the bobbin thread passes through the bobbin case without any twists or tangles.
A small mistake in threading can throw off your entire project, so take your time and get it right!
Bobbin Tension Not Engaged
If your thread is bunching on the top of your fabric, it could be because your bobbin tension isn’t engaged. Here are some quick fixes to try:
- Make sure the bobbin thread is passing through the bobbin tension spring.
- Check if the bobbin is correctly inserted into the bobbin case.
- Test the tension by holding the bobbin thread and seeing if it drops freely to the floor.
Loose Bobbin Case Tension
If you’ve recently loosened the bobbin case screw for thicker threads, double-check that it’s tightened back up correctly. This screw is really important for maintaining the right tension, so it’s important to make sure it’s not too loose or too tight. Adjusting the bobbin case tension gradually and carefully is key to achieving smooth stitches.
Tug Gently on Bobbin Thread
After you’ve checked the bobbin case tension, it’s time to test it.
Gently tug on the bobbin thread. You’re looking for a bit of resistance, but it should still move freely.
This simple test, known as the "Bobbin Tension Trick," can save you a lot of headaches.
It’s a quick way to make sure your stitches will be smooth and even.
Adjust Bobbin Case Tension Gradually
If you’ve made adjustments to the bobbin case tension screw for thicker threads, you may need to readjust it for regular thread. Make these adjustments gradually, in small increments, to avoid dislodging the screw entirely.
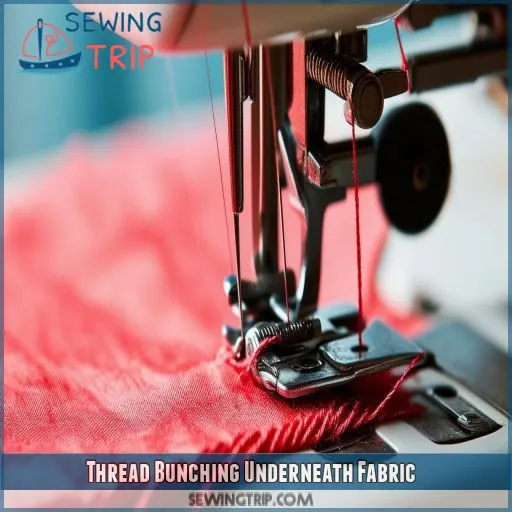
Thread Bunching Underneath Fabric
If thread bunching is happening underneath your fabric, it’s likely due to incorrect needle threading, tension disc engagement, or a presser foot that’s not in the down position. Let’s get to the bottom of this issue and smooth out your sewing experience.
Incorrect Needle Threading
If you’re seeing thread bunching underneath your fabric, one of the first things to check is your needle threading. Here are some quick fixes to make sure your needle is threaded correctly and prevent that annoying bunching:
- Cut the thread a few inches from the spool and re-thread the needle, making sure the upper thread is fully engaged in the tension discs.
- Make sure the presser foot is down while sewing. This helps the tension discs work properly and keeps the tension consistent.
- Regularly clean your sewing machine to prevent dust and lint buildup, which can contribute to thread bunching and other stitching problems.
Tension Disc Engagement
If your thread is bunching underneath the fabric, it might be due to the tension discs not properly grasping the thread. To fix this, hold the thread on either side of the tension disc and slide it back and forth with a flossing motion. This helps the tension discs engage the thread correctly and prevents thread bunching.
Presser Foot Not Down
Keep the presser foot down while you sew. This helps the tension discs work properly, keeping your stitches nice and even. If the presser foot isn’t down, the tension discs won’t be able to do their job, and you’ll end up with loose stitches and thread bunching up under your fabric.
Machine Needs Cleaning
If thread bunching persists, it might be time for a deep clean. Lint buildup and dust can wreak havoc on your machine’s inner workings, causing stitch glitches and thread clumps. A clean machine is a happy machine, so grab your manual and get to work. It’s a small effort for smooth sewing and a machine that’ll last for years.
Regular Machine Maintenance
To prevent thread bunching underneath the fabric, regular maintenance is key. Here’s a simple 3-step routine:
- Dust underneath the throat plate and along the thread path frequently
- Clean and oil your machine periodically
- Keep your machine in tip-top shape with a consistent cleaning schedule
Preventing Stitch Glitches
Preventing stitch glitches is simple when you use the right tools and keep your machine in good condition. Using correct bobbins, high-quality thread, and sharp sewing machine needles are all key.
Use Correct Bobbins
It’s super important to remember the old saying, "like attracts like." Using the correct bobbins specifically designed for your sewing machine model is key to preventing stitch glitches and making sure your sewing goes smoothly. Here’s why:
| Sewing Machine Part | Compatibility | Stitch Quality |
|---|---|---|
| Bobbin | Make & Model-Specific | Balanced Stitches |
Using the wrong bobbin size or a generic brand can lead to tension issues and uneven stitches. So, it’s worth investing in quality bobbins made for your machine. This simple step can save you from stitch woes and keep your sewing projects on track.
High-Quality Thread
Using high-quality thread is a simple yet effective way to prevent stitch glitches and achieve smoother sewing.
It’s like using premium fuel for your car—it just runs better.
Go for well-known brands like Gutermann, Mettler, Aurifil, or Robison Anton.
These threads are designed to reduce lint buildup and deliver consistent stitch quality.
It’s one of those cases where spending a little extra is worth it.
Sharp Sewing Machine Needle
A sharp sewing machine needle is essential for preventing stitch glitches and making sure your sewing goes smoothly. Here’s why:
The size and sharpness of your needle really matter when it comes to how good your stitches look. Pick the right needle size for your fabric and thread. A sharp needle goes through the fabric cleanly, which stops stitches from messing up.
Pay attention to the needle gauge. The right gauge makes sure the needle fits your machine. Go for brands known for their quality needles. A good needle with a fresh, sharp point makes a big difference.
Don’t wait for stitch problems to pop up. Change your needle often, especially when you start new projects. A fresh needle keeps stitches looking perfect and helps keep your stitch length, width, and tension even.
Regular Cleaning and Maintenance
Keeping your machine clean and well-maintained is key to preventing stitch glitches and making sure your sewing goes smoothly. Here are some tips:
- Dust and lint buildup can cause stitch issues, so regularly clean your machine using a soft brush and compressed air.
- Lubricate moving parts like the bobbin case raceway, needle bar, and feed dog mechanism with sewing machine oil.
- Periodically check and adjust tension settings to make sure they’re right for your fabric and thread.
- Replace the needle regularly, even if it looks sharp. A dull needle can cause skipped stitches and thread bunching.
Follow Machine Instructions
Your sewing machine manual is your best friend for keeping your machine running smoothly and avoiding stitch problems.
It’s like a secret weapon that helps you do everything the right way.
Always refer to the manual for specific instructions on the following:
- threading
- tension adjustments
- stitch length
- stitch width
- stitch density
- stitch patterns
- maintenance
This way, you’ll be a stitch wizard, sewing with precision and grace.
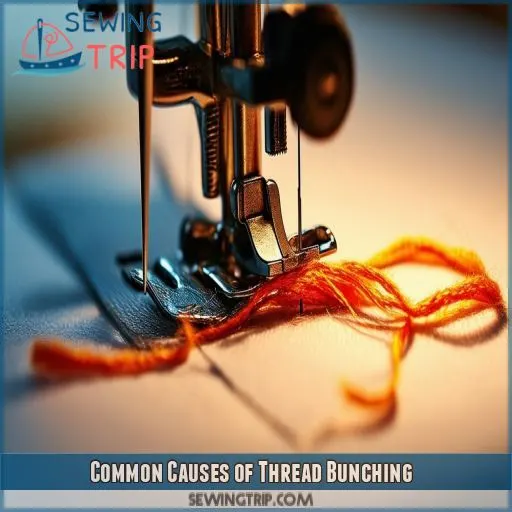
Common Causes of Thread Bunching
When thread bunching strikes, it’s often due to a few key culprits. The tension of your threads, both bobbin and needle, plays a huge role, as does the condition of your machine and the type of thread and needle you’re using.
Incorrect Thread Tension
Tension is a key culprit behind thread bunching. Here’s the lowdown:
- Both top and bottom thread tensions need to be balanced for smooth stitching.
- If tensions are uneven, it can cause puckered seams and unstable stitches.
- The right tension varies with thread type and fabric weight, so adjust accordingly.
- Visual clue: uneven tension shows as different-looking stitches on the front and back of the fabric.
Machine Malfunctions
Sometimes, the issue goes deeper than tension or threading.
Sewing machine malfunctions can also cause thread bunching. While this might seem like a big deal, it’s often an indication of a simple fix.
A malfunctioning machine can be the result of something as straightforward as a dirty or worn-out part.
So, before you panic, take a breath and grab your toolbox.
A quick clean or a simple part replacement might be all you need to get your machine humming along smoothly again.
Improper Threading
Improper threading is a sneaky culprit that can lead to thread bunching, especially when you’re working with the needle. Here’s a checklist to make sure your threading is on point:
- Double-check that the needle is threaded correctly, with the upper thread fully engaged in the tension discs.
- Make sure the thread passes through every thread guide on its journey to the needle.
- Try a "flossing" motion: hold the thread on either side of the tension disc and slide it back and forth to check for a snug fit.
Dirty or Worn Machine Parts
Dirty or worn machine parts can cause thread bunching, leading to uneven stitches and fabric Puckering. It’s like trying to run a race with a pebble in your shoe—you won’t get very far!
| Problem | Solution |
|---|---|
| Dirty Parts | Regular cleaning keeps dust and lint at bay, preventing stitch glitches. |
| Worn Parts | Replace damaged parts, like needles or tension discs, to keep your machine in tip-top shape. |
| Machine Care | Consult your machine’s manual for specific cleaning and maintenance instructions. |
Using the Wrong Needle or Thread
Choosing the right needle and thread for your fabric is like pairing the perfect shoes with your outfit.
You wouldn’t wear sneakers with a ball gown, right?
The same goes for your sewing projects.
Using the wrong needle size or thread weight can lead to thread bunching.
Troubleshooting and Maintenance
Troubleshooting thread bunching issues can be a headache, but with the right know-how, you can save yourself time and frustration. In this section, we’ll guide you through simple steps to identify and fix common problems, keeping your sewing machine humming along smoothly.
Check for Obstacles
Before you panic, take a breath and do a quick once-over of the thread path. Sometimes, the simplest solutions are the most effective. A quick check can save you from unnecessary headaches.
Make sure there are no obstructions or tangles along the thread path. This can cause all sorts of chaos, from tension issues to thread bunching. Keep an eye out for any loose threads or knots that might be causing the problem.
Test Tension
Now it’s time to play detective and experiment with tension settings. Remember, tension is a delicate balance, so you’re looking for that sweet spot where your stitches are uniform and smooth. Here’s a quick checklist:
- Adjust the tension settings on both the bobbin and needle to find the right harmony.
- Test different thread types and needle sizes to see how they affect tension and stitch quality.
- Pay attention to stitch evenness, width, and density as you make adjustments.
Replace Worn Parts
If issues persist, it might be time to replace some worn or damaged parts.
These parts can wear out over time, leading to stitch length, width, density, and evenness issues.
This could include the needle, bobbins, or tension discs.
It’s like trying to drive a car with worn-out tires—you’re not going to get a smooth ride.
Consult a Sewing Machine Technician
If all else fails, it’s time to call in the experts. Consult a sewing machine technician for troubleshooting tips and advice. They can help identify any issues with your machine and provide guidance on repair costs, technician advice, and machine parts. It’s better to seek professional help than to risk causing further damage to your machine.
Practice and Experiment
Once you’ve mastered the basics of troubleshooting, it’s time to get creative and try out different techniques to see what works best for you. Practice makes perfect, so grab some scrap fabric and go wild with different thread types, needle sizes, and tension settings. You’ll be a thread-bunching-busting pro in no time!
Regular Cleaning
Keep your machine in tip-top shape with regular cleaning. A stitch in time saves nine, right? Here’s how:
- Dust and debris: Use a soft brush and compressed air to banish dust bunnies and lint buildup from under the throat plate and along the thread path.
- Frequency: Clean and oil your machine periodically. How often? Well, that depends on how often you sew. Once a month is a good rule of thumb if you’re a regular sewist.
- Routine: Make cleaning a part of your sewing routine. It’s like doing the dishes after cooking a meal—not the most exciting task, but it keeps things humming along smoothly.
Lubrication
Lubrication is key to keeping your machine’s moving parts happy. Sewing machine oil is the lube of choice. It’s like a spa treatment for your machine, keeping everything running smoothly. You don’t want to overdo it, though – a little goes a long way.
Now, oil viscosity is like the thickness of the oil. Think of it like honey versus water. You want to use an oil that’s not too thick and goopy, but also not too thin and runny. The right viscosity makes sure your machine gets just the right amount of lubrication without making a mess.
As for how often you should lube up, that depends on how often you sew. If you’re a sewing machine (pun intended), you might need to oil it more frequently. A good rule of thumb is to oil it every few months or when you notice things starting to feel a bit stiff.
Needle Replacement
A dull needle can cause skipped stitches, thread breakage, and fabric snags. Here’s the lowdown on needle replacement:
- Size matters: Different projects call for different needle sizes. For instance, a heavier fabric like denim requires a larger needle size.
- Usage: Regularly replace your needle, even if it looks sharp. A fresh needle helps prevent stitch glitches and keeps your sewing smooth.
- Types and brands: Various needle types are available, each designed for specific fabrics and threads. Popular brands include Schmetz, Organ, and Groz-Beckert.
Storage
Storing your sewing machine properly is essential for keeping it in good condition. Here are some tips:
- Keep your machine in a clean, dry place to prevent rust and damage.
- Consider investing in a hard case or cover to protect it from dust and debris.
- Store extra needles, bobbins, and thread in a separate container to keep them organised and within reach.
- Avoid stacking items on top of your machine to prevent accidental damage.
Frequently Asked Questions (FAQs)
Why is my thread bunching up underneath?
You’re not alone in this frustration. Thread bunching is common, especially for beginners. It’s likely a problem with your needle tension. Check your threading and tension discs.
Why does my sewing machine keep jamming underneath?
Sewing machine jamming is frustrating. Usually, it’s due to a lack of tension in the upper thread. Other causes include a deformed or broken needle, clogged machine, or low-quality thread. Check the bobbin and upper thread for tangles.
Why is my sewing machine getting tangled underneath?
Your sewing machine might be getting tangled underneath due to several reasons, including improper threading, tension issues, or a damaged needle. Let’s troubleshoot and get your machine running smoothly again!
Why is my sewing machine puckering underneath?
Puckering can be caused by incorrect tension settings or using a needle that’s too large or small. Check your tension and adjust if necessary. Try switching to a different-sized needle.
How do I know if my machine is malfunctioning?
Signs of malfunction include: thread bunching, damaged parts, timing issues, electrical problems, and more. If basic troubleshooting doesn’t work, consult a professional.
Whats the difference between good and bad thread?
Good thread is strong, smooth, and resists friction. It won’t break or cause seams to pucker. It’s worth investing in high-quality thread from reputable brands like Coats & Clark, Mettler, or Gutermann. Poor-quality thread is prone to breakage and can cause tangles.
How do I use the bobbin tension trick?
If your machine is acting up, try this: test the bobbin tension by gently tugging the thread. If it’s balanced, you’ll feel some resistance, but the thread should still move freely. Adjust the tension screw if needed.
How often should I clean my machine?
It depends on how much you sew and the type of sewing you’re doing. Aim to clean your machine after each project or every few weeks.
Whats the best way to oil my machine?
My machine doesn’t need oiling!" you might think. But, if your manual says it does, use a sewing machine oil like Singer, not WD-40 or household oils. Put 1-2 drops in the bobbin area, on the hook race, and the needle bar.
Conclusion
Whether you’re a sewing enthusiast or a novice, that pesky bottom thread bunching can ruin your rhythm and leave you in a tangle.
We’ve unraveled the common causes and quick fixes to get your sewing groove back on track.
From double-checking your bobbin to giving your machine some TLC, you’ll be stitching smoothly in no time.

