This site is supported by our readers. We may earn a commission, at no cost to you, if you purchase through links.
That crooked seam you just stitched probably has nothing to do with your skills. More often than not, it’s the little metal foot pressing down on your fabric that’s causing the trouble.
Most sewers stick with the standard presser foot that came with their machine, unaware that switching to the right foot can transform frustrating projects into smooth sailing. Each presser foot is engineered for specific tasks—zippers, buttonholes, hems, or quilting layers—and using the wrong one is like trying to hammer a nail with a screwdriver.
Once you understand how these feet work and which ones match your projects, you’ll wonder how you ever managed without them.
Table Of Contents
Key Takeaways
- Using the correct presser foot for each sewing task prevents common problems like crooked seams, fabric puckering, and uneven stitches that most sewers mistakenly blame on their own skills.
- Essential feet include the all-purpose foot for basic stitching, zipper foot for tight spaces, buttonhole foot for consistent sizing, blind hem foot for invisible hems, and overcasting foot to prevent fabric fraying.
- Specialty feet like walking feet, darning feet, and non-stick feet handle advanced techniques such as quilting thick layers, free-motion embroidery, and sewing sticky materials like vinyl or leather.
- Before buying any presser foot, measure your machine’s shank height and verify stitch width compatibility to ensure safe attachment and prevent needle strikes or equipment damage.
What is a Sewing Machine Presser Foot Guide?
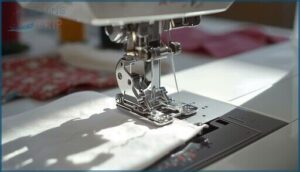
A presser foot is a small but mighty attachment on your sewing machine that holds fabric flat against the needle plate while you stitch. Think of it as a gentle hand keeping everything in place so your stitches come out even and your fabric moves through smoothly.
The right presser foot for the job can make the difference between a frustrating mess and work that feels almost easy.
The right presser foot transforms frustrating sewing challenges into effortless, professional results
Definition and Purpose
A presser foot is a small attachment that clips onto your sewing machine’s presser bar. It holds fabric flat while you stitch, giving you fabric control and stitch consistency. Different types of presser feet expand project versatility—from straight seams to decorative work.
Understanding sewing machine feet means better sewing efficiency. The right sewing machine presser feet turn tricky tasks into straightforward ones, boosting foot functionality across every project. Using the correct foot, like a quilting presser foot, ensures accurate seams.
How Presser Foot Guides Work
Now that you know what a presser foot is, let’s look at the mechanics. Your presser foot works through pressure application—it compresses fabric against feed dogs that move in an elliptical motion. This sandwich principle keeps fabric stabilized while the needle stitches. Seam guides on sewing machine feet help you sew straight.
Specialty feet allow creative options.
Meanwhile, tension engagement happens when you lower the foot, activating the machine’s threading system for proper stitch formation through feed coordination.
Benefits for Sewing Projects
The right presser foot transforms your sewing projects from frustrating to satisfying. Here’s what you gain:
- Seam accuracy improves when guides maintain consistent allowances—your quilt blocks fit together without gaps
- Fabric control prevents puckering and layer shifting on tricky materials
- Sewing efficiency increases because you won’t spend time marking lines or redoing crooked seams
- Project appearance looks sharper with uniform topstitching and clean edges
Versatility optimization means your machine accommodates everything from delicate chiffon to thick vinyl.
Essential Types of Presser Feet
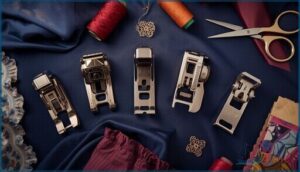
Every sewing machine comes with a few basic presser feet that handle most everyday tasks. These essential feet are your go-to tools for common techniques like straight stitching, adding zippers, and creating clean hems.
Let’s look at the five presser feet you’ll reach for again and again in your sewing projects.
All-Purpose Foot
Your machine probably came with an all-purpose foot—it’s your workhorse default accessory. This essential presser foot accommodates most utility and decorative zigzag stitching up to 9 mm on larger models. Keep stitch lengths above 1.0 mm to avoid fabric tunneling. Clear foot versions offer better visibility without sacrificing function.
| Feature | Benefit |
|---|---|
| Stitch widths up to 9 mm | Furnishes most decorative patterns |
| Moderate stitch lengths | Prevents fabric tunneling |
| Clear acrylic versions | Improved marking visibility |
Zipper Foot
When sewing zippers, your standard presser foot won’t cut it—you need a zipper foot. This narrow attachment lets the needle stitch tight against teeth or coils, whether you’re installing regular or invisible zippers. The offset toe guides fabric right where you need it.
If you’re tackling piping or bulky seams, this foot navigates those tight spaces effortlessly.
Buttonhole Foot
Perfect buttonholes start with the right foot. A buttonhole foot includes a sliding gauge you set to your button’s length, ensuring consistent sizing. Most machines then create all four parts—columns and bar tacks—automatically using dense satin stitches.
Here’s what makes buttonhole creation reliable:
- Button size determines hole length through the adjustable gauge
- Stitch density increases with settings near 0.5 mm for professional edges
- Fabric stabilization matters—add lightweight interfacing to prevent distortion
This button sewing foot accommodates various buttonhole types on compatible machines.
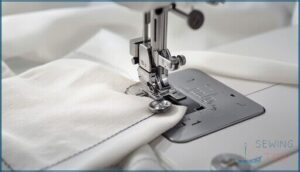
Blind Hem Foot
Invisible hems rely on precise folding and careful stitch placement. A Blind Hem Foot features a center guide that holds your fold steady—expose about 6 mm of hem allowance so only tiny zigzag bites catch the garment. Adjustable Blind Hem Foot models let you fine-tune guide position for different fabric types and control hem visibility.
This blind stitch foot works with dedicated blind hem stitches—several straight stitches plus one zigzag bite—for professional weaving results.
| Feature | Purpose | Adjustment Range |
|---|---|---|
| Center Guide | Maintains fold position during hemming | Lateral shift for bite depth |
| Stitch Settings | Controls flexibility and visibility | 2–3 mm length recommended |
| Guide Adjustments | Fine-tunes fabric catch amount | Varies by sewing machine feet |
| Hem Visibility | Minimizes showing on right side | Depends on zigzag swing width |
| Curved Hems | Requires careful fabric manipulation | Slower feed with gentle curves |
Overcasting Foot
Raw fabric edges fray and unravel if left untreated, but an Overcasting Foot gives you a serger alternative on your home machine. This overcast stitch foot wraps thread around the fabric edge for professional seam finishes that prevent fraying.
- Central bridge adds thread slack for secure stitch formation
- Front guide aligns fabric edges with the needle path
- Works with zigzag and multi-step overcast stitch types
- Produces clean, professional finish without extra equipment
Specialty Presser Feet and Their Uses
Once you’ve mastered the basics, specialty presser feet open up a whole new world of sewing techniques. These attachments handle tasks that would be nearly impossible with a standard foot—from quilting thick layers to creating delicate rolled hems.
Let’s look at five specialty feet that can transform how you approach your more ambitious projects.
Walking Foot for Quilting
When you’re layering bulky fabrics for quilting projects, a walking foot—also called an even feed or evenfeed walking foot—becomes your best friend. This specialty presser foot feeds the top and bottom fabric layers at the same rate, preventing shifting and puckering.
You’ll see stitch quality improve dramatically, especially on thick quilts. Many models include a quilting guide attachment for perfectly spaced rows every time.
Darning and Free-Motion Feet
If you want to stitch freeform designs without following your machine’s feed dogs, a darning foot is your ticket. This specialized foot lets you move fabric in any direction for free-motion quilting and creative embroidery options.
The open-toe design gives you clear visibility while you work. Check foot compatibility with your machine before buying—most snap-on models fit standard low-shank domestic machines perfectly.
Gathering and Ruffler Feet
A gathering foot creates soft, consistent ruffles by feeding fabric through special grooves at controlled density. Ruffler mechanisms offer more precise pleating by adjusting gather ratios—popular for wedding dress embellishments with over 5,000 wholesale sales recorded.
You’ll find these sewing machine feet invaluable for curtain panels, skirt waistbands, and decorative garment edges. Adjusting gathers works best on medium-weight cottons, though you can tackle most fabric types with practice.
Rolled Hem and Edge Feet
A rolled hem foot curls lightweight fabric edges into narrow, uniform hems, perfect for scarves and napkin borders. Edge joining feet guide two fabric edges together for precise seams.
These hemming techniques offer serger alternatives, with industrial applications showing over 3,000 wholesale sales monthly.
You’ll achieve professional fabric edge finishing and decorative edges on silks, chiffons, and medium cottons using controlled feeding and careful stitch width adjustments.
Non-Stick and Roller Feet
When you’re working with vinyl, leather, or laminated fabrics, a NonStick Foot (often Teflon-coated) or Roller Foot becomes your best friend. These specialty feet reduce fabric friction and improve stitch quality on sticky materials.
The Teflon foot’s low-friction surface—with a coefficient as low as 0.05 against steel—permits smooth feeding and delicate fabric sewing across different material types without puckering or skipped stitches.
Choosing and Attaching The Right Presser Foot
Picking the right presser foot isn’t complicated once you know a few basics about your machine. The key is understanding what type of attachment system your sewing machine uses and how to connect feet safely.
Let’s walk through the simple steps that’ll have you swapping feet like a pro.
Identifying Machine Shank Height
Before you buy any presser foot, you need to know your machine’s shank height. Low Shank machines measure 0.5 inches from the presser foot holder screw to the needle plate. High Shank measures 1 inch. There’s also Slant Shank at 1.125 inches on vintage Singers.
Lower your presser foot lever completely, then measure from the screw’s center straight down. This matters because High Shank machines need adapter usage to accept Low Shank feet—Shank Compatibility isn’t optional.
Snap-on Vs. Screw-on Feet
Most machines since around 1980 use snapon feet—you’ll press a lever and the foot clicks into place in seconds. Screw-on feet require tightening a screw each time, which slows Changeover Speed but offers better Force Resistance for heavy tasks like walking feet.
A Low Shank Snapon Foot Adaptor lets you convert screw-on machines to SnapOn systems, boosting Attachment Security and Cost Comparison value.
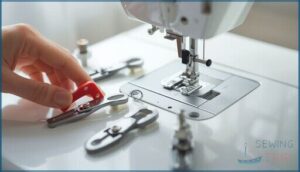
Step-by-Step Attachment Guide
Before changing a presser foot, switch off your sewing machine—it’s a simple habit that prevents accidental needle movement.
Here’s your step-by-step process:
- Foot removal: Raise the needle with the handwheel, lift the presser foot lever, then press the release button for snap-on feet or loosen the screw for screw-on types.
- Foot positioning: Align the new foot’s bar directly under the holder.
- Securing attachment: Lower the lever until you hear a click, then test with a gentle tug. For screw-on feet, tighten firmly.
Handwheel checks before testing alignment confirm the needle clears all openings—turning it manually through several cycles catches problems before you start sewing.
Ensuring Compatibility and Safety
Even a perfect attachment won’t help if your foot doesn’t match your machine. Before you buy presser feet, measure your shank height—low-shank machines sit about 0.5 inches from screw to plate, while high-shank models measure 1.25 inches. Check your stitch width too; a 5 mm foot can break on a 7 mm machine when the needle swings wide.
| Check This | Why It Matters | What to Look For |
|---|---|---|
| Shank Height | Wrong size won’t attach securely | Low (0.5″), high (1.25″), or medium (1″) |
| Stitch Width | Needle can strike incompatible feet | Match foot opening to your machine’s maximum width |
| Brand Adapters | Some brands need special connectors | Pfaff, Bernina, Husqvarna often require proprietary adapters |
| Foot Condition | Damage causes needle breakage | Replace bent bars, burrs, or worn grooves immediately |
Generic snap-on feet work across many Brother, Janome, and Juki models when shank height and stitch width are compatible. Brands like Pfaff require specific adapters—high-shank machines can use low-shank feet with a converter, but you’ll still need to verify needle clearance.
Safe operation starts before you sew. Never stitch with the presser foot raised—fabric lifts and needles snap. Don’t force material forward or backward either; that bends needles against the foot. Keep your fingers clear of the needle zone, especially during detail work.
Foot maintenance prevents accidents. Inspect for burrs or bends before each project—damaged feet deflect needles and send shards flying. Clean lint from the underside regularly; buildup changes feeding pressure and jams fabric near the needle. Check your screw-on attachment for looseness too, since vibration works fasteners free over time.
Replace heavily used sewing machine feet when you spot wear marks or groove deformation. Uneven surfaces scratch fabric and distribute pressure poorly, turning simple seams into frustrating fights with puckered material.
Troubleshooting and Caring for Presser Feet
Even the best presser feet need a little attention now and then to keep working smoothly. You’ll run into occasional hiccups like skipped stitches or fabric bunching, but most problems have quick fixes.
Let’s walk through how to troubleshoot common issues, keep your feet clean, and know when it’s time for a replacement.
Common Sewing Problems and Solutions
When skipped stitches or seam puckering show up, don’t panic—most problems trace back to simple fixes. Thread breakage often means your tension’s too tight or your needle’s dull. Fabric slippage? Check your presser foot pressure. Uneven feeding happens when pressure’s off or your foot’s dirty.
Around 80% of troubleshooting sewing problems come down to threading, needle choice, and pressure adjustments you control.
Cleaning and Maintenance Tips
Your presser feet need regular attention to keep stitching smooth. Clean lint removal around the foot and feed dogs every 8–10 hours of sewing prevents buildup that ruins stitch quality.
Wipe feet with a soft cloth after sticky fabrics. For rust prevention, store them dry.
Walking feet benefit from a tiny drop of oil at pivot points—just test on scrap fabric first to avoid staining your project.
When to Replace or Upgrade Presser Feet
Visible grooves or needle strikes signal it’s time for new feet—after 50–100 hours on heavy fabrics, worn soles drag and degrade stitch quality by over 20%.
You’ll also want specialty feet as your projects grow more complex. Tackling leather, quilting layers, or precision topstitching? Upgrading from standard to non-stick, walking, or edge-stitch feet solves material limitations that basic accessories can’t handle.
Frequently Asked Questions (FAQs)
What Tips Are There for Attaching and Detaching Presser Feet?
Always turn off your machine before swapping feet.
Raise the presser foot lever, use the foot release lever for snap-on types, and confirm secure attachment.
Check orientation to avoid needle strikes.
How Can I Tell if My Presser Foot Needs to Be Replaced or Repaired?
Check for visible damage like cracks or bends. Watch for poor stitch quality, foot instability, or unusual noises during sewing.
Your maintenance history and troubleshooting efforts will guide caring for presser feet and solving common sewing problems.
How do I maintain and clean presser feet?
After about 100 hours of sewing—roughly a month of regular use—wipe your presser feet with a soft brush to remove lint.
For rust prevention, store them in a dry container and thoroughly dry after any water-based cleaning methods.
Can presser feet be used interchangeably between brands?
Most presser feet aren’t directly interchangeable between brands due to different shank heights and proprietary systems. Low-shank machines share better compatibility, but snap-on adapters and safety concerns make verification essential before use.
What are telltale signs of a damaged presser foot?
Look for bent foot bars, uneven feeding that drags fabric, skipped stitches that persist, or needle strikes hitting metal.
Surface damage like deep scratches can snag thread and cause frustrating sewing problems.
How do different materials affect presser foot performance?
Fabric friction and material thickness directly impact stitch length and seam quality. Sticky surfaces like leather need a Teflon foot or Ultra Glide Teflon Foot, while layered materials benefit from a Walking Foot to prevent shifting and material damage.
Are there presser feet specifically for elastic fabrics?
Yes, elastic foot types include knit feet with rolling soles, walking feet for even feeding, and serger elastic feet with tension guides. Teflon and roller alternatives help stretch fabrics glide smoothly without distortion.
How much do individual presser feet typically cost?
Individual presser feet generally range from $5 to $30 depending on brand and complexity. Basic utility feet like zipper or buttonhole attachments cost around $5 to $8, while specialty walking or quilting feet reach $20 to $
What fabrics require specialty presser foot adjustments?
Slippery fabrics like silk and chiffon need straight-stitch or specialty presser feet to prevent shifting.
Sticky surfaces such as vinyl require non-stick Teflon or roller feet, while bulky fabrics and stretch knits work best with walking feet.
Are there presser feet for decorative stitching?
Decorative stitching demands what plain seams don’t: visibility and clearance.
Open-toe embroidery feet, satin stitch attachments, and free-motion feet handle wide zigzags, pintuck applications, and couching techniques—but machine limitations like stitch width affect twin needlework compatibility.
Conclusion
The right presser foot turns struggle into precision. The wrong one turns simple seams into frustration. Now that you’ve explored this sewing machine presser foot guide, you know which foot solves which problem—and that knowledge changes everything.
Start with the basics: swap your standard foot for a zipper foot next time you install a zipper. Feel the difference. Then keep expanding your collection as your projects demand it. Your machine already has the power. You just unlocked it.

