This site is supported by our readers. We may earn a commission, at no cost to you, if you purchase through links.
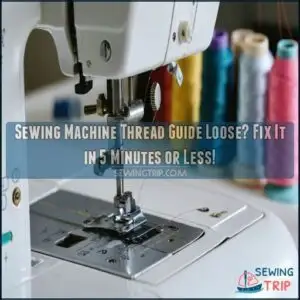
First, turn off your machine and locate the loose guide—usually a small metal piece along the threading path.
Tighten any visible screws with a small screwdriver, or if it’s bent, gently reshape it with pliers.
When guides aren’t properly secured, your thread jumps ship mid-stitch, causing tension nightmares.
Check that all guides align properly after tightening.
A properly functioning thread guide keeps your stitches even and prevents that familiar nest of thread underneath your fabric.
The difference between perfect seams and sewing disasters often hangs by a thread—literally.
Table Of Contents
Key Takeaways
- You’ll know your thread guide is loose when your stitches look uneven and your thread keeps breaking during sewing projects – this disrupts proper thread tension and creates a nest of thread underneath your fabric.
- You can fix a loose thread guide by turning off your machine, locating the small metal guide piece, tightening any visible screws with a small screwdriver, or gently reshaping it with pliers if it’s bent.
- Always rethread your machine with the presser foot raised to ensure proper tension – this opens the tension discs and guarantees tension balance throughout the thread path, fixing most loose thread guide issues instantly.
- Regular maintenance prevents problems – clean your thread guides weekly with a soft brush to remove lint buildup, check for secure attachment each time you thread your machine, and follow your manual’s threading path exactly.
Thread Guide Issues
You’ll know your thread guide is loose when your stitches look uneven and your thread keeps breaking during sewing projects.
A wobbly or misaligned thread guide disrupts proper thread tension, causing frustrating sewing problems that can quickly ruin your project, due to uneven stitches.
A loose thread guide throws off tension, turning your sewing dreams into a frustrating tangle of uneven stitches.
Causes of Loose Thread Guides
Struggling with loose thread guides? Your sewing machine’s guides can become unstable due to Guide Wear from extended use or Impact Damage from drops or bumps.
Improper Threading puts stress on components, while constant Vibration Effects loosen screws over time.
Material Fatigue naturally occurs as plastic or metal parts age. Thread guide problems often stem from regular use, but understanding these causes is the first step toward effective sewing machine repair.
Signs of Thread Guide Problems
The tell-tale signs of thread guide problems can sabotage your sewing project before you even realize what’s happening.
Watch for these warning signals:
- Skipped stitches that create gaps in your seams
- Uneven tension causing puckered fabric
- Thread breaks occurring frequently during sewing
- Looping stitches appearing on the underside of fabric
- Tangled thread that bunches up near the needle
To resolve these issues, understanding thread tension basics is critical to improve your sewing experience and avoid skipped stitches and tangled thread.
Effects on Stitch Quality
Loose thread guides create a domino effect on your stitch quality.
When guides aren’t secure, your thread tension becomes inconsistent, resulting in uneven stitches.
You’ll notice skipped stitches, thread breaks, and poor seam strength.
The fabric may pucker or develop holes where stitches are too tight.
Stitch consistency suffers as thread jumps from its path, making your sewing machine unreliable for precision work, and potentially causing thread breaks.
Tension Adjustment Basics
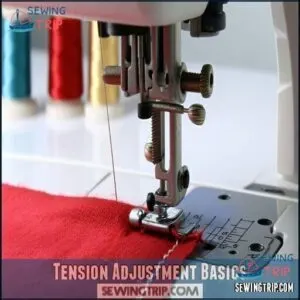
To fix a thread guide issue, understanding tension adjustments is key. Balanced stitches depend on proper thread tension, which controls the thread flow for smooth stitching. Start with the tension dial, usually set between 3 and 5 as a baseline. One common cause is incorrect threading.
Here’s what you need to focus on:
- Adjust the Tension Dial: For loose top stitches, increase the number. For tight stitches, lower it gradually. Each step affects the stitch appearance.
- Keep Factory Settings in Mind: Bobbin tension is typically pre-set. Adjust it only if you notice irregularities on the fabric underside.
- Test for Balanced Stitches: Use scrap fabric to fine-tune tension adjustments. Make certain the top and bottom thread meet evenly in the fabric center.
This method simplifies sewing machine troubleshooting!
Troubleshooting Loose Guides
You’ll need to check your thread guides for looseness if your stitches look uneven or your thread keeps breaking during sewing.
Tighten any loose screws on the thread guide with a small screwdriver and make sure the guide is properly aligned with the thread path to restore proper tension.
Checking Thread Path and Guides
Now that you understand tension basics, let’s examine your thread path for problems.
First, check each guide along the path for alignment issues. Run your finger along the entire threading route to feel for burrs or sharp spots causing thread snagging.
Look for bent guides that might disrupt tension consistency. Verify your sewing machine threading follows the correct path through each guide—even one missed point can create loose thread problems.
Proper threading prevents thread tension issues and is crucial for maintaining a smooth sewing experience with proper threading and avoiding loose thread problems.
Adjusting Tension Discs and Springs
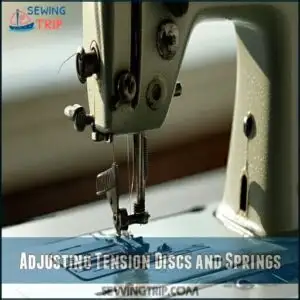
When tension discs aren’t gripping properly, your thread guide may feel loose.
Check your tension discs for alignment and clean any lint buildup with a small brush. Adjust the pressure by turning the tension dial slightly clockwise for more grip.
If your tension spring appears weak or damaged, consider spring replacement.
Proper sewing depends on precise disc alignment, for more information visit precise disc alignment.
For persistent issues, calibrate your thread tension by making small adjustments until the thread flows smoothly, ensuring proper sewing depends on these adjustments.
Re-threading The Machine Correctly
Proper rethreading is the #1 solution for a loose thread guide problem.
Start with your presser foot raised, which opens the tension discs. Follow your sewing machine threading diagram exactly, maintaining the correct threading order through all thread guides.
Don’t forget to load your bobbin properly. This guarantees tension balance throughout the thread path, fixing most thread guide loose issues instantly, which is the key to achieving a proper rethreading.
Maintaining Thread Guides
You’ll need to regularly clean your thread guides with a soft brush to prevent lint buildup that can cause tension problems.
Check all thread guides for secure attachment each time you thread your machine, tightening any loose screws with a small screwdriver to ensure secure attachment.
Regular Cleaning and Inspection
Now that you know how to identify loose guides, let’s keep them in top shape.
Dust and lint build-up can cause thread guides to loosen over time. Clean your machine weekly using a small brush to remove lint from thread paths and tension discs.
Using the correct sewing machine brushes will help to keep your machine in good working order. Check needle condition and bobbin for damage.
Oil mechanisms according to your manual, and inspect feed dogs for debris. Regular sewing machine maintenance prevents most threading problems.
Proper Threading Techniques
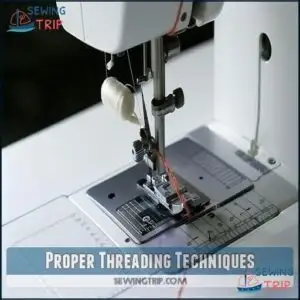
Now that your guides are clean, let’s make sure you’re threading correctly. Always follow the proper threading order from top to bottom.
Raise your presser foot when threading to guarantee thread slips between tension discs. Guide your thread through each path marker without skipping any points.
Match your thread type to your project needs. Remember: correct bobbin winding direction matters too—it should rotate counterclockwise when pulled, which is a critical aspect of the threading process.
Avoiding Common Mistakes
Before adjusting anything, avoid these common mistakes that cause loose thread tension and thread keeps breaking:
- Incorrect Threading – Always follow your manual’s threading path exactly
- Uneven Bobbins – Wind bobbins slowly and evenly to prevent thread tension problems
- Needle Mismatch – Use the right needle size for your thread weight
Don’t rush through sewing machine troubleshooting tips by ignoring your manual or skipping tests on scrap fabric.
Repairing Thread Guide Problems
You’ll need to tighten your sewing machine’s thread guide with a small screwdriver, ensuring it’s properly aligned with the thread path.
Once secured, test the guide by threading your machine and sewing a straight line on scrap fabric to confirm the repair was successful.
Replacing Damaged or Worn Parts
When your sewing machine’s worn thread guides start sabotaging your projects, it’s time for replacement. Cracked guides cause breakage, while loose tension springs can’t maintain proper pressure.
Metal bobbins often solve the issues caused by worn plastic ones. A common problem is inconsistent thread tension, which can often be resolved by re-threading the machine.
Check your machine manual before replacing any parts to confirm compatibility. Don’t ignore misaligned needle arms—they directly impact stitch quality and require immediate attention for preventative maintenance.
Adjusting Bobbin Tension and Thread Flow
Fine-tune your bobbin tension when thread flow problems persist. Turn the bobbin case screw clockwise for tighter tension or counterclockwise for looser tension.
A balanced thread flow guarantees consistent stitch formation on both fabric sides.
- Check bobbin winding quality—unevenly wound bobbins create erratic bottom thread tension
- Test adjustments on scrap fabric before sewing your project
- Clean the tension spring adjustment mechanism regularly to prevent thread buildup
Consulting Machine Manuals and Experts
When troubleshooting fails, your sewing machine manual becomes your best friend.
Consult it for model-specific instructions on thread guide repair.
Most manuals include detailed troubleshooting guides with diagrams showing proper positioning.
If you’re still stuck, don’t hesitate to seek expert assistance from professionals who understand the intricacies of your machine’s design.
Many repair resources are available online, but nothing beats personalized sewing machine help.
Owners often need a replacement sewing manual for older machines.
Frequently Asked Questions (FAQs)
How to strengthen fragile plastic thread guides?
You can reinforce fragile plastic thread guides with clear nail polish or epoxy.
Apply thin layers and let dry completely between coats.
For severely damaged guides, try replacement parts or create temporary guides with paperclips.
Can vintage machine thread guides be upgraded?
Yes, you can upgrade vintage machine thread guides with modern metal replacements.
Check specialty shops for exact fits or adapt universal guides.
You’ll need to match the mounting holes for proper installation.
Should thread guides be oiled regularly?
No need to oil thread guides regularly.
They’re typically made of metal or plastic and don’t require lubrication.
Excess oil can attract lint and dirt, potentially transferring to your fabric during sewing, which is a key issue to avoid.
Are aftermarket thread guides better quality?
Nearly 70% of aftermarket thread guides are made from similar materials as OEM parts.
You’ll find most aftermarket guides work adequately, but they aren’t necessarily better quality.
Stick with brand-compatible options for the best fit and performance.
Do thread guide materials affect stitch quality?
Thread guide materials directly impact your stitch quality.
Metal guides offer durability and smooth thread flow, while plastic ones may create friction.
You’ll notice better tension control with higher-quality materials that won’t scratch or wear down, which can be considered as better tension control with higher-quality materials.
Conclusion
Remember, a sewing machine thread guide loose today means endless frustration tomorrow.
By taking just five minutes to inspect, tighten, and align your thread guides, you’ll save hours of troubleshooting later. You’ve got this!
Regular maintenance prevents those pesky thread nests and keeps tension perfect for professional-looking projects.
Next time your stitches start misbehaving, check those guides first—they’re often the unsung heroes of smooth sewing. Your future self (and fabric) will thank you for taking care of the thread guides.


