This site is supported by our readers. We may earn a commission, at no cost to you, if you purchase through links.
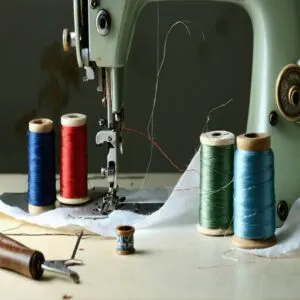
Start by checking your needle – it should be sharp and matched to your fabric type. Replace it after 8 hours of use, just like changing your running shoes when they’re worn out.
Next, inspect your thread tension and bobbin alignment. A properly wound bobbin should drop slowly when held vertically, like honey dripping from a spoon.
Clean lint from the bobbins area and make certain you’re using quality thread. These fixes target the most common culprits, but there’s more to explore about perfect stitch formation.
Table Of Contents
Key Takeaways
- Your needle is often the culprit – replace it after 8 hours of use, ensure it’s sharp, and match the size to your fabric type to prevent skips.
- You’ll need to maintain proper thread tension – if you’re seeing loops underneath, your upper tension is too loose; if you spot top knots, it’s too tight.
- Your bobbin setup matters – keep the area clean, ensure proper alignment, and test tension by holding the bobbin vertically (it should drop slowly like honey).
- You’ll get the best results by matching materials – pair light fabrics with fine needles and thread, use medium-weight combinations for standard projects, and opt for heavy-duty tools when working with denim.
Sewing Machine Issues
When your sewing machine skips stitches, it’s often a sign that something needs adjusting or replacing.
From needles to thread tension, understanding common machine issues can save you time and frustration.
Needle Problems and Solutions
Got skipped stitches? It’s often a needle problem.
Bent needles, dull tips, or incorrect needle size can mess with your stitching.
The fix? Easy:
- Swap dull needles for sharp ones immediately.
- Replace after 8 hours of sewing—it’s like giving your machine fresh legs.
- Match needle size to fabric type.
- Insert properly to avoid headaches.
Using the right sewing needles is essential for a smooth sewing experience.
Thread and Bobbin Issues
Behind every skipped stitch lurks a potential thread or bobbins culprit.
Let’s tackle these pesky problems head-on with proven solutions that’ll get you back to smooth sewing: Regular maintenance of the sewing machine, including checking for bobbin thread issues, can help prevent common problems.
The following are common issues and their solutions:
| Issue | Solution | Common Cause | Time Impact |
|---|---|---|---|
| Thread Breakage | Use quality thread | Poor fiber selection | Frequent stops |
| Bobbin Jamming | Clean and realign | Wrong bobbin size | Project delays |
| Uneven Winding | Rewind carefully | Improper technique | Minor setback |
| Case Damage | Replace case | Normal wear | Major pause |
These solutions can help you address problems efficiently, ensuring you spend more time on sewing and less on troubleshooting, by applying the right technique and using quality materials, such as the right thread.
Tension and Threading Problems
Now that you’ve sorted your bobbin situation, let’s tackle tension troubles.
Uneven stitches often point to incorrect Thread Tension – when your top thread’s too tight or loose.
Threading Errors are another culprit; missing a guide can mess up your Stitch Formation completely.
Quick fix? Re-thread your machine from scratch, and double-check your Tension Adjustment dial.
Start at the middle setting and test on scrap fabric.
Common Skipped Stitch Causes
You’ll find that skipped stitches often stem from three main culprits: incorrect needle setup, improper thread tension, or misaligned bobbin components.
Understanding these common causes will help you quickly diagnose and fix the problem, getting you back to your sewing project without the frustration of uneven stitches, which can be attributed to improper thread tension.
Incorrect Needle Type and Size
Most skipped stitch problems start with using the wrong needle for your fabric.
Match needle types to your material: ballpoint for knits, sharp for wovens.
Check needle sharpness regularly – a dull needle can’t form stitches properly.
For more detailed troubleshooting, consult this skipped stitches resource.
When thread compatibility isn’t right, or fabric density doesn’t match your needle size, you’ll see skips.
Replace needles every 8 hours of sewing or between projects, which helps prevent skipped stitches.
Improper Thread Tension and Quality
Struggling with thread tension issues?
Your machine’s skipped stitches might trace back to unbalanced tension or poor thread quality.
Thread weight matters more than you’d think – using the wrong type can throw off your whole project.
Check the upper thread tension first, then inspect your thread for weak spots or brittleness.
A quick tension adjustment and high-quality thread choice often provide that perfect stitch fix you’re after.
Bobbin Winding and Alignment Issues
When your bobbin winding isn’t perfect, skipped stitches are bound to follow.
Your bobbin thread breakage might stem from uneven tension or improper alignment during winding.
A thorough guide to bobbin winder problems offers various troubleshooting tips.
- Check that your bobbin’s wound evenly – no gaps or bulges that could mess with tension
- Keep the bobbin area free from lint buildup that affects alignment
- Test bobbin tension by holding it vertically – it should drop slowly
Machine Maintenance Tips
You’ll find that maintaining your sewing machine is like giving your car a regular oil change – it prevents problems before they start and keeps everything running smoothly.
Your machine needs consistent cleaning and proper lubrication to prevent those frustrating skipped stitches, especially since lint and thread bits can build up faster than you might expect.
Regular Cleaning and Lubrication
When your sewing machine starts acting up, a consistent cleaning and lubrication routine is your best defense.
Keep your machine running smoothly with these essential maintenance steps:
| Task | Frequency |
|---|---|
| Machine Oil Checks | Every 8 hours |
| Dust Removal | Before each use |
| Deep Clean | Monthly |
| Lubrication Types | As per manual |
| Maintenance Schedule | After each project |
Only use manufacturer-recommended sewing machine oil, and remember to run your machine after oiling to distribute it evenly throughout the parts.
For easy access, explore a range of sewing machine oil products online.
Removing Lint and Thread Residue
After regular maintenance, it’s time to tackle those fuzzy bits hiding in your machine.
Use a soft-bristle brush or mini vacuum to remove lint accumulation around the bobjin case and feed dogs.
Thread residue and machine obstructions need special attention – grab your cleaning tools and gently clear debris with a loop cleaning brush or tweezers.
Never blow into your machine; this pushes lint deeper into essential parts, requiring more thorough cleaning with a loop cleaning brush.
Checking and Adjusting Tension Settings
Clean machine? Perfect! Time to master tension adjustment.
Start by setting your dial to 4 – it’s the sweet spot for most projects.
Watch for thread balance by testing on scrap fabric; loops underneath mean loose upper tension, while top knots signal it’s too tight.
For a detailed guide, explore these sewing machine tension adjustment tips.
Turn the tension dial in tiny quarter-turn increments until your stitches look even on both sides, achieving perfect tension and even stitches.
Fabric and Technique Considerations
You’ll need to match your fabric type with the right needle and thread combination to prevent those pesky skipped stitches from ruining your sewing project.
Your sewing technique, including proper fabric handling and correct stitch settings, plays a key role in achieving consistent, professional-looking results.
Choosing The Right Needle and Thread
Think of your needle and thread as dance partners – they need perfect harmony to prevent skipped stitches.
For silks, pair 60/8-70/10 needles with fine silk thread.
Cotton fabrics work best with 80/12 needles and 40-50 weight thread, while denim needs 100/16 with 30-40 weight.
Remember: knits love polyester thread, while wovens are more flexible with fiber choice.
For a wider selection, explore these sewing machine needle products.
Adjusting Stitch Length and Width
Let’s fine-tune your tension balance with perfect stitch optimization.
While needle calibration sets the foundation, proper stitch length and width prevent those frustrating skipped stitches.
Your machine’s sweet spot depends on fabric density and thread viscosity working together in harmony.
For high-quality stitch quality, understanding the stitch length mechanism components is essential.
- For medium fabrics, dial in a 2.5mm stitch length – this standard setting works like a charm for most projects
- Adjust stitch width between 1-5mm based on your fabric weight, testing on scraps first
- Match heavier fabrics with longer stitches (3-5mm) to avoid sewing machine troubleshooting headaches
Preventing Fabric Pulling and Bunching
Now that you’re comfortable with stitch settings, let’s focus on fabric control to avoid those pesky skipped stitches.
You’ll want to guide your fabric without pulling or pushing – just let the feed dogs do their job while maintaining light control.
Here’s a quick guide to help you master fabric handling:
| Action | Common Issue | Quick Fix |
|---|---|---|
| Speed Control | Fabric snagging | Maintain steady pace |
| Feed Dog Help | Uneven feeding | Let them guide naturally |
| Tension Check | Material bunching | Adjust upper tension |
Troubleshooting Skipped Stitches
You’ll find your sewing machine skips stitches due to common issues like needle problems, thread tension, or bobbin misalignment that can turn your perfect seam into a loose, gappy mess.
Whether you’re working with delicate silks or sturdy denim, this troubleshooting guide will help you identify and fix these frustrating problems.
So you can get back to creating beautiful, professional-looking stitches with the help of this guide that will aid in resolving issues like thread tension.
Identifying and Resolving Thread Issues
Now that you’ve mastered fabric handling, let’s tackle thread troubles head-on.
Check your thread quality by unspooling a few inches – poor yarn quality often leads to skipped stitches and thread breakage.
Analyze the fiber for any inconsistencies or fraying, and when dealing with weave patterns, match your thread weight to prevent threading problems.
High-quality thread might cost more upfront but saves hours of frustration fixing needle problems later, as it is crucial for preventing thread breakage.
Checking and Adjusting Bobbin Tension
Now that you’ve nailed down your thread quality, let’s zero in on bobbin thread control.
A balanced bobbin tension keeps your stitches looking pro-level on both sides.
Here’s what to watch for:
- Check if your bobbin case has dust or debris affecting thread flow
- Test bobbin balance by holding the case and letting it drop – it should descend slowly
- Listen for clicking sounds that might signal bobbin issues
Remember to clean and adjust your bobbin tension regularly to prevent those pesky skipped stitches.
Evaluating and Adjusting Machine Settings
Precise machine calibration starts with your stitch regulation and tension control.
Adjust your sewing machine settings gradually, starting with the tension dial at 4-5 for balanced stitches.
Monitor thread tension while adjusting speed – faster isn’t always better.
Fine-tune stitch length and check your tension adjustment after each change, testing on scrap fabric until you’ve achieved perfectly formed stitches.
Considering Fabric Type and Thickness
After fine-tuning your machine settings, your fabric choices play a huge role in stitch quality.
Different materials need specific approaches:
- Match thread thickness to fabric weight – thin threads for delicate silks, sturdy ones for denim
- Adjust your sewing speed based on material selection – slower for tricky textures
- Pick needles that complement fabric type – smaller sizes for chiffon, larger for canvas
For a thorough guide on troubleshooting, consult this helpful resource on sewing machine skipping stitches.
Keep fabric compatibility in mind as you work with thick fabrics to prevent skipped stitches.
Your fabric settings should reflect the texture impact of each unique material.
Frequently Asked Questions (FAQs)
What causes a sewing machine to skip stitches?
Ever feel like your stitches are playing hide and seek?
Bent needles, wrong thread tension, or dirty feed dogs can cause skips.
You’ll also see this when your needle’s too dull or doesn’t match your fabric.
What are the most common sewing machine problems?
Your machine might’ve tension issues, worn needles, thread tangles, or timing problems. You’ll also face bobbin jams, broken threads, and needle breaks. Regular maintenance helps prevent these common headaches.
How do you prevent skipped stitches on a sewing machine?
Just as a skilled conductor leads an orchestra, you’ll prevent skipped stitches by using the right needle size, maintaining proper tension, replacing worn needles, and keeping your machine clean.
Don’t pull fabric while sewing.
Why is my sewing machine skipping zigzag stitches?
Your zigzag skips usually mean it’s time for a new needle – they’re often bent or dull.
Check that you’re using the right size and type for your fabric, and verify proper threading.
How do I know if my sewing machine has skipped stitches?
You’ll notice uneven gaps or missing V-shaped patterns in your stitching line.
Check both sides of your fabric – if you spot broken or irregular patterns where there should be consistent stitches, that’s a clear sign.
What happens if you miss a stitch on a sewing machine?
Like a broken link in a chain, missing stitches create weak spots in your seam.
You’ll notice uneven spacing and loose threads that can unravel.
Your fabric won’t hold together properly without fixing it.
How Do I Know if the Timing of My Sewing Machine is Off?
When your stitches look uneven or you hear unusual noises, check if the needle’s hitting the hook timing is off.
You’ll notice thread bunching, broken needles, or inconsistent stitch patterns during sewing.
What Should I Do if I Notice Skipped Stitches When Using Twin Needles?
First, check needle alignment and size match your fabric.
Then, verify proper threading and tension settings.
You’ll want to slow down your sewing speed and consider using stabilizer for delicate fabrics.
Can humidity affect my sewing machines performance?
High humidity can affect your machine’s performance, causing tension problems and skipped stitches.
You’ll want to keep your workspace dry using a dehumidifier and store your machine away from moisture to prevent issues.
How do stabilizers prevent skipped stitches?
Holy moly, you’ll love how stabilizers work.
They’re your fabric’s backbone, preventing stretching and shifting while you sew.
That steady support lets your needle punch through consistently, keeping those stitches locked in place, with steady support being key to the process.
Conclusion
Mastering your sewing machine is like conquering Mount Everest – it seems intimidating until you break it down step by step.
This sewing machine troubleshooting guide for skipped stitches gives you the tools to diagnose and fix common issues.
Remember to check your needle regularly, maintain proper tension, and keep your machine clean.
With these tips in hand, you’ll be back to creating flawless stitches in no time.
Don’t let skipped stitches derail your creative journey.
- https://www.thesprucecrafts.com/solutions-to-fix-skipped-stitching-2978070
- https://siemachtsewingblog.com/2022/11/why-is-my-sewing-machine-skipping-stitches/
- https://www.threadwerk.com/post/why-is-your-sewing-machine-skipping-stitches
- https://www.ageberry.com/sewing-machine-skipping-stitches-causes-how-to-fix/
- https://www.wonderfil.ca/blog/6-issues-that-cause-skipped-stitches/9/3/2020

