This site is supported by our readers. We may earn a commission, at no cost to you, if you purchase through links.
 When your sewing machine acts up, you’re not alone.
Most sewing machine problems fixing starts with the basics: check your threading path, verify proper bobbin installation, and verify needle condition.
You’ll find that 90% of issues stem from improper threading, incorrect tension settings, or lint buildup.
Clean your machine regularly, using the brush that came with it to remove dust from the bobbin area.
Don’t forget to oil the moving parts as your manual suggests—think of it as giving your faithful mechanical companion a well-deserved spa day.
Those strange noises and missed stitches often have simple solutions hiding in plain sight.
Table Of Contents
Key Takeaways
- You’ll solve 90% of sewing machine issues by checking your threading path first—always thread with your presser foot raised to ensure threads seat properly in tension disks.
- You need to clean your machine regularly by removing lint from the bobbin area after each project and oil moving parts monthly according to your manual’s instructions.
- You should replace your needle after 8-10 hours of sewing as dull or bent needles cause most skipped stitches and fabric damage issues.
- You can fix most fabric feeding problems by checking that your feed dogs are raised and clean, then adjusting your presser foot pressure based on fabric type—lighter for delicate fabrics, heavier for thick materials.
Here are the key takeaways from the article about fixing sewing machine problems:
- You’ll solve 90% of sewing machine issues by checking your threading path first—always thread with your presser foot raised to ensure threads seat properly in tension disks.
- You need to clean your machine regularly by removing lint from the bobbin area after each project and oil moving parts monthly according to your manual’s instructions.
- You should replace your needle after 8-10 hours of sewing as dull or bent needles cause most skipped stitches and fabric damage issues.
- You can fix most fabric feeding problems by checking that your feed dogs are raised and clean, then adjusting your presser foot pressure based on fabric type—lighter for delicate fabrics, heavier for thick materials.
Common Sewing Issues
You’ll encounter common sewing machine problems no matter your experience level, from tangled threads to skipped stitches.
With the right knowledge, you can quickly fix these issues and get back to your project without the frustration of machine malfunctions.
Thread Bunching Causes
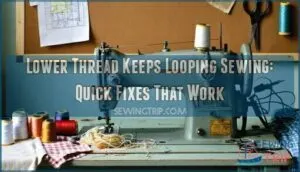
The dreaded "bird’s nest" of thread bunching under your fabric is the number one headache for sewists everywhere.
Thread bunching beneath your fabric—the dreaded "bird’s nest"—is every sewist’s number one nightmare.
This issue typically stems from tension imbalance between your upper and bobbin threads.
Common culprits include:
- Incorrect threading with presser foot down
- Poor thread quality causing breakage or lint buildup
- Bobbin issues including wrong insertion or tension
- Thread tangling due to dust in feed dogs
Don’t panic—rethreading properly solves 90% of these problems, which is a key solution to the issue.
Bobbin Thread Problems
While thread bunching can halt your project, bobbins problems are often the hidden culprits behind your sewing machine issues.
Check your bobbins tension first—too tight causes thread breaks, too loose pulls thread to the fabric top.
Verify proper bobbins winding with no crossed threads, and always leave a 2-3 inch tail when inserting the bobbin case.
For persistent bobbin problems, clean the tension spring and verify your bobbin size matches your machine specifications.
Needle Breakage Solutions
While bobbin thread problems can frustrate you, needle breakage can stop your project completely.
Replace broken needles immediately with the correct needle type for your fabric. Confirm proper needle installation by fully inserting it into the holder.
Turn the handwheel only toward you to prevent timing issues. Match thread compatibility with needle size, and check for bent needles before starting any project.
Refer to a proper needle guide to guarantee the best stitch quality. Regular needle replacement prevents most sewing machine needle issues.
Fabric Feeding Issues
Needle problems solved? Now let’s tackle fabric feeding issues.
When your fabric refuses to move under the needle, check if your feed dogs are raised and clean.
Jammed feed dogs? Raise them, clean them, and watch your fabric glide through like butter!
Adjust presser foot settings based on fabric type impact—lighter pressure for delicate fabrics, heavier for thick materials.
Slippery fabric feed improves with a walking foot, while knit fabric feeding requires gentle handling.
Inconsistent fabric feed often signals it’s time for machine maintenance or checking sewing machine fabric compatibility.
Threading Machine Properly
You’ll solve most machine problems by threading your sewing machine correctly, with the presser foot raised to guarantee threads seat properly in tension disks.
Consult your machine’s manual for the specific threading path, making sure the take-up lever is at its highest position and both top and bobbin threads are properly tensioned.
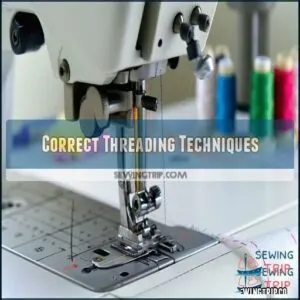
Correct Threading Techniques
For proper sewing results, always start with correct threading techniques.
Raise your presser foot before threading to guarantee thread seats properly in tension disks.
Guide thread through all thread guides in sequence, paying special attention to the take-up lever.
Never skip steps or thread with the machine on.
Remember, improper threading causes 90% of sewing machine problems, including bird’s nest tangles underneath your fabric.
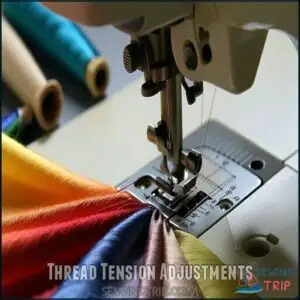
Thread Tension Adjustments
Now that your machine is threaded correctly, let’s tackle tension adjustments – the true balancing act of sewing.
Think of tension as a dance between your top and bobbin threads.
The standard tension dial setting is 4.5, but you’ll need to adjust based on:
- Fabric weight (lightweight needs higher settings around 5)
- Thread thickness (thicker threads need looser tension)
- Stitch type (decorative stitches require different tension)
- Material density (tightly woven fabrics expose top thread more)
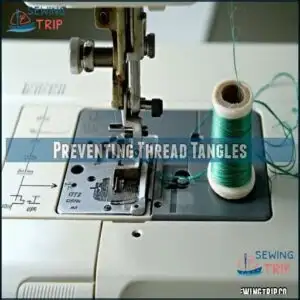
Preventing Thread Tangles
Now that you’ve adjusted your tension settings, let’s tackle those frustrating thread tangles.
Thread quality plays a bigger role than most sewists realize—those bargain bin spools might cost you more time than money saved!
| Tangle Cause | Quick Fix | Prevention |
|---|---|---|
| Poor thread quality | Replace with quality thread | Store thread properly |
| Incorrect threading | Rethread with presser foot up | Check threading path |
| Dusty machine | Remove lint from bobbin area | Clean regularly |
To improve your sewing experience, consider the thread quality and how it affects your work, and remember to clean regularly to prevent issues like a dusty machine.
Bobbin Problems Solving
You’ll find that most bobbin-related issues stem from incorrect insertion or tension problems that can quickly derail your sewing projects.
By understanding how to properly install, wind, and adjust your bobbin, you can eliminate those frustrating thread nests and uneven stitches that waste valuable sewing time, which is a key aspect of mastering sewing projects.
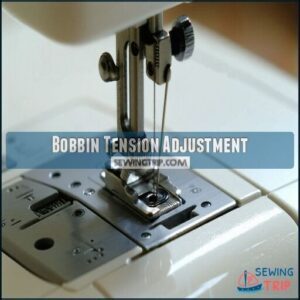
Bobbin Tension Adjustment
Now that you’ve got your machine threaded properly, let’s tackle the mysterious bobbin tension.
Your bobbin case spring controls how freely the thread releases. For perfect stitches, make small tension screw tweaks using a tiny screwdriver.
Turn clockwise to tighten or counterclockwise to loosen.
Remember, consistent bobbin winding and matching bobbin thread weight to your top thread are key.
Always test bobbins tension on scrap fabric before tackling your project.
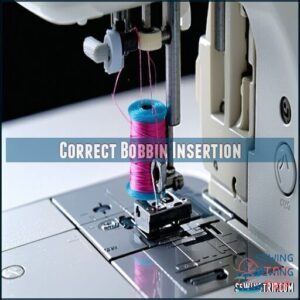
Correct Bobbin Insertion
Frustration with your sewing machine often comes down to incorrect bobbin insertion.
Always check your bobbin type and size match your machine’s specifications.
Insert the bobbin with thread unwinding in the proper direction—usually counterclockwise, but verify in your manual.
You’ll hear a satisfying "click" when it’s seated correctly. Understanding bobbin direction is essential for smooth sewing.
Improper insertion causes tension issues that can ruin your entire project, highlighting the importance of proper bobbin insertion.
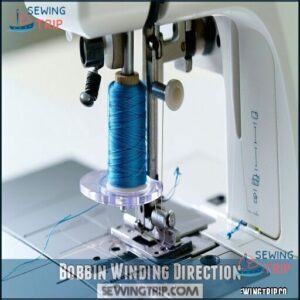
Bobbin Winding Direction
Now that your bobbin is properly inserted, winding it correctly is equally important. The direction matters more than you might think! Most modern machines wind clockwise, but check your manual to be certain.
For smooth bobbin winding, consider the following tips:
- Maintain consistent winding speed to prevent thread bunching
- Don’t overfill beyond the bobbin rim (most machines have auto-stop mechanisms)
- Match your winding thread type to your top thread for best compatibility
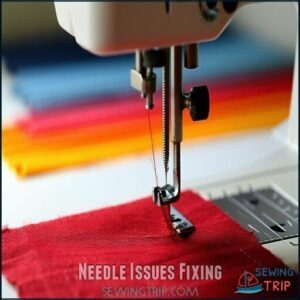
Needle Issues Fixing
You’ll save hours of frustration by addressing needle problems quickly, as they cause most common sewing machine issues.
Changing your needle regularly and selecting the correct type for your fabric will prevent skipped stitches and fabric damage.
Skipped Stitches Causes
When your machine skips stitches, you’re dealing with one of the most common sewing frustrations.
Old or worn needles typically cause this problem, as they become dull over time. Incorrect needle types for your fabric, improper threading, or sewing too fast can also disrupt your stitching.
Check that your needle is properly inserted, your thread quality is good, and your sewing machine tension is balanced.
Regularly replacing needles, especially with titanium coated options, can substantially reduce skipped stitches.
Dull Needle Solutions
While skipped stitches frustrate many sewists, they often point to a more fundamental issue: dull needles. You’ll notice immediate improvements in stitch quality with fresh, sharp needles.
Here’s how to solve dull needle problems:
- Replace needles after 8-10 hours of sewing or one major project
- Store needles in protective cases to prevent dulling
- Check for burrs by running your fingertip gently along the needle
- Choose the right needle material for your fabric (titanium lasts longer)
- Remember that needles can’t be effectively sharpened – always replace them
Bent Needle Prevention
Nearly all bent needle problems come from improper technique. Always turn your handwheel toward you, never forcing fabric through your machine.
Store needles properly in a case, not loose in drawers. Match needle size to fabric thickness—thicker fabrics need stronger needles.
Verify correct needle insertion by pushing it fully into the clamp. Following these sewing machine maintenance basics prevents costly repairs and frustrating project delays.
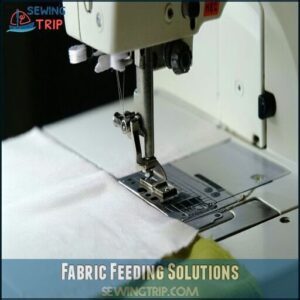
Fabric Feeding Solutions
You’ll save hours of frustration when you fix fabric feeding problems that cause uneven stitches and puckered seams.
Check your feed dogs for lint buildup and adjust your presser foot pressure to match your fabric type for smooth, professional results, which will help you achieve professional outcomes.
Fabric Not Feeding Properly
When your needle is working perfectly but your fabric isn’t moving, it’s time to check your feed dogs. These tiny teeth beneath your presser foot are responsible for guiding fabric through your machine.
Common fabric feeding issues have simple fixes:
- Check if feed dogs are lowered or covered by a darning plate
- Clean lint buildup from feed dog teeth
- Verify feed dog height is properly adjusted
- Make certain you’re not pulling or pushing fabric while sewing
To maintain peak performance, lubricate moving parts as recommended.
Adjusting Presser Foot Pressure
When you’re dealing with fabric feeding issues, adjusting the presser foot pressure can make all the difference.
Different fabrics require different pressure settings to feed properly through your machine.
| Fabric Type | Pressure Setting | Common Issues |
|---|---|---|
| Lightweight | Higher (3-4) | Puckered seams |
| Medium | Standard (2) | Uneven stitches |
| Heavy | Lower (1) | Feed dog damage |
Test pressure settings on scrap fabric before sewing your project to avoid tension problems with your actual garment, and ensure you have the right settings for your specific fabric type.
Using Walking Foot
When your presser foot pressure isn’t enough for tricky fabrics, a walking foot attachment becomes your best friend.
This special foot has built-in feed dogs on top that work with your machine’s feed dogs underneath.
A walking foot helps you:
- Prevent fabric slippage when sewing slippery materials
- Keep multiple layers even when quilting
- Navigate thick materials like denim without distortion
- Create perfect quilt binding with aligned layers
No walking foot? Try tissue paper between feed dogs and fabric.
Stitch Quality Improvement
You’ll notice immediate improvements in your project’s appearance when you fix stitch quality issues by adjusting tension and using proper thread.
Your machine will perform better with regular maintenance and correct needle selection, preventing skipped stitches that can weaken your seams, which is crucial for the overall quality of your work.
Adjusting Tension Settings
Why do your stitches look off? Your tension settings could be the culprit.
Start with the standard tension dial guide (4.5) and adjust based on fabric type impact. Tighter settings (5) work for lightweight fabrics, while medium settings (4-5) suit cotton.
Remember, thread weight matters substantially when balancing tension. Check bobbins case tension if top stitches look good but bottom ones pucker.
Troubleshooting imbalance gets easier with practice.
Using Right Thread Type
Choosing the right thread type can make or break your sewing project’s success.
Using improper thread leads to tension issues and stitch quality problems.
For the best results, remember to examine thread fiber content.
- Match thread weight to fabric weight (lightweight thread for delicate fabrics)
- Store thread away from direct sunlight to prevent deterioration
- Use polyester thread for stretchy fabrics, cotton for quilting
- Check thread compatibility with your machine’s needle size
- Invest in quality thread brands that produce less lint
Preventing Skipped Stitches
Skipped stitches can quickly turn your sewing project into a frustrating mess.
Always match your needle type to your fabric—use ballpoint for knits and sharp needles for wovens.
Check that your needle size complements your thread quality and isn’t bent or dull.
Maintain proper thread tension and consider using a fabric stabilizer for delicate materials.
If problems persist, your machine timing might need professional adjustment.
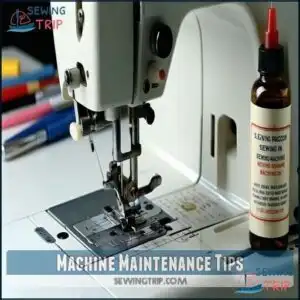
Machine Maintenance Tips
You’ll extend your sewing machine’s life and prevent frustrating breakdowns by implementing regular maintenance routines.
Clean lint from the bobbin area after each project and oil moving parts monthly according to your manual’s instructions.
Regular Cleaning Importance
Dust bunnies and thread bits are silent machine killers that compromise your sewing quality.
Regular lint removal from your bobbin area after every project prevents performance issues.
Vacuum or brush away accumulated debris weekly, especially under the throat plate where dust collects.
Professional servicing annually guarantees proper alignment of all parts.
Regular cleaning helps prevent future wear and tear.
Your sewing machine maintenance routine directly impacts stitch quality and machine longevity.
Oil Machine Regularly
Now that your machine is clean, don’t forget to oil it.
Regular lubrication keeps your sewing machine running smoothly.
Apply a drop of sewing machine oil to moving parts every 8-10 hours of sewing time.
Focus on oiling points mentioned in your manual—typically where metal touches metal.
Proper maintenance requires using the correct sewing lubricant.
Never use household oils; they’ll gum up the works.
Wipe away excess oil to prevent fabric stains and keep your stitches perfect.
Proper maintenance is crucial for the longevity of your sewing machine, and using the right sewing lubricant is key.
Annual Servicing Benefits
The annual checkup for your sewing machine is like a spa day that pays dividends year-round.
Professional servicing prevents costly repairs by catching worn parts early, maintains warranty requirements, and extends machine life through specialized cleaning.
You’ll notice improved stitch quality after technicians make professional adjustments to tension and timing that DIY maintenance can’t achieve.
Think of it as preventative care for your faithful stitching companion, which ultimately leads to a longer and more efficient machine life, making the annual checkup a valuable investment.
Troubleshooting Machine
You’ll save hours of frustration when you know how to quickly diagnose and fix common sewing machine problems.
Understanding your machine’s troubleshooting process helps you identify whether the issue stems from threading, tension, or mechanical problems.
Identifying Common Issues
Detecting the culprit behind your sewing machine problems is half the battle won. Before panicking about thread bunching or needle breakage, learn to recognize these telltale signs:
- Thread forming loops or nests underneath fabric often indicates incorrect tension settings
- Unusual clunking or grinding noises typically point to lint buildup or mechanical issues
- Fabric puckering or uneven stitches suggest improper presser foot pressure or feed dog problems
The ability to identify these issues is crucial for troubleshooting and maintaining your sewing machine. By recognizing the signs of potential problems, you can take preventive measures to avoid more serious issues.
Fixing Jammed Machine
Now that you’ve spotted the problem, let’s tackle that jammed machine.
When your sewing machine jammed, first turn off the power and remove all thread. Check for tangled thread or foreign objects caught in the shuttle hook.
Clear lint accumulation around moving parts with a brush. One common cause is incorrect thread tension, so be sure to check this.
If timing issues persist, examine gear alignment. Sometimes a simple needle change fixes stubborn jams. Never force parts when clearing a thread jam, as this can cause further damage, and always check for incorrect thread tension to ensure smooth operation, and remember to handle the machine with care to avoid any timing issues.
Resolving Tension Problems
In the face of tension troubles, start by rechecking your threading with the presser foot up.
Adjust your tension dial gradually, testing on scrap fabric between changes. Poor thread quality often causes inconsistent tension settings.
Clean your bobbin case regularly, as lint buildup affects thread flow.
Different fabric types require different sewing machine tension adjustments—typically between 4-5 for cotton and slightly higher for lightweight materials, which may need careful tension adjustments.
Advanced Sewing Solutions
You’ll need more advanced techniques when basic troubleshooting doesn’t fix your persistent sewing machine issues.
These proven solutions tackle complex problems like fabric bunching, lint buildup in hard-to-reach areas, and mysterious machine noises that disrupt your sewing projects, including issues with persistent sewing machine troubles.
Overcoming Fabric Bunching
Now that you’ve diagnosed common machine issues, let’s tackle fabric bunching – the nemesis of smooth seams.
When your fabric puckers, adjust your tension balance and check feed dog height. Choose the right presser foot for your material and stabilize slippery fabrics with tissue paper underneath.
Lengthen your stitch when working with thicker materials. Syncing your thread tension settings with fabric type prevents most bunching issues while ensuring proper fabric feeding and a smooth seam, which is the key to avoiding bunching issues.
Preventing Lint Buildup
Throughout your sewing journey, lint buildup can silently sabotage your machine’s performance.
To prevent this, establish a regular cleaning schedule for your bobbins case after each project.
Use proper lint prevention tools like small brushes rather than compressed air, as high-quality threads generate less debris.
While maintaining a clean workspace keeps stray fibers at bay, remember, consistent sewing machine maintenance prevents most lint-related problems before they start.
Machine Noise Troubleshooting
While keeping lint at bay prevents clogs, tackling strange noises requires different strategies.
If your sewing machine sounds like an angry robot, first replace the needle—even if it looks fine, invisible bends cause gear grinding and case resonance.
Tighten loose bolts, check for pins in the bobbin area, and verify proper threading.
For persistent internal rattling, apply oil to moving parts and try vibration dampening by placing your machine on a stable surface.
Frequently Asked Questions (FAQs)
What are the 7 common sewing machine troubles?
You’ll encounter these seven common sewing machine troubles: tangled threads, broken needles, skipped stitches, fabric not feeding properly, tension problems, strange noises, and thread bunching or "nesting" underneath your fabric.
What is the most common problem when a machine doesn’t sew correctly?
Nearly 80% of sewing machine issues stem from improper threading.
When your machine isn’t sewing correctly, you’ll typically need to rethread both top and bobbin threads with the presser foot raised for proper tension.
Is it worth repairing a sewing machine?
Yes, it’s often worth repairing your sewing machine.
Quality machines can serve for decades when properly maintained.
Consider the machine’s value, repair costs, and availability of parts before making your decision, focusing on the machine’s value.
What is the most common problem of the sewing machine?
Millions of sewers worldwide tear their hair out over thread bunching or "bird nesting."
You’ll find this frustrating tangle under your fabric when tension’s off or you’ve threaded incorrectly.
Fix it by properly rethreading with your presser foot up.
Why do sewing machines lock up and won’t sew?
Your sewing machine locks up when there’s thread tangled in the bobbin case, incorrect threading, lint buildup, or a dull/bent needle.
Regular cleaning and proper threading will solve most lockup issues.
What is the most common sewing machine problem?
The most common sewing machine problem you’ll encounter is improper threading, which causes tension issues and thread bunching.
Re-threading both top and bobbin threads with the presser foot up usually resolves this frustrating issue.
Why is the thread not going through fabric?
Did you know that 80% of thread problems are due to incorrect threading?
Check your needle (it might be dull or bent), raise your presser foot while threading, and make certain you’re using the right thread for your fabric.
What is the number one problem when a machine doesn’t sew properly?
The number one problem affecting your machine’s performance is incorrect threading. You’ll find that rethreading both top and bobbin threads with the presser foot raised solves most sewing issues immediately.
Can I fix common sewing machine problems myself?
Many sewing machine issues can be fixed at home. You can resolve most problems by re-threading with the presser foot up, changing needles, cleaning lint buildup, and adjusting tension settings.
What are the most common sewing machine problems?
You’ll encounter thread tangling, tension issues, skipped stitches, needle breakage, and fabric feeding problems most often.
These typically stem from improper threading, dull needles, or lack of regular maintenance in your machine, which can lead to a variety of issues, including needle breakage.
Conclusion
Remember, effective sewing machine problems fixing doesn’t require expert skills—just patience and attention to detail.
With these 15 solutions in your toolkit, you’ll tackle most issues before they become major headaches.
Regular maintenance saves you time and money in the long run.
When all else fails, consult your manual or seek professional help. Your trusty sewing companion will reward your care with years of reliable service.
Now go create something beautiful!

