This site is supported by our readers. We may earn a commission, at no cost to you, if you purchase through links.
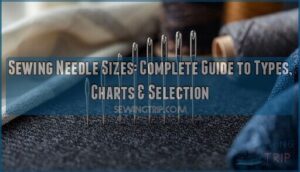
That tiny piece of metal in your sewing machine does more heavy lifting than most people realize. Pick the wrong needle size, and you’ll fight puckered seams, skipped stitches, and mysterious thread breaks that make you question your sanity. Pick the right one, and your fabric glides under the presser foot like it’s supposed to.
The difference between frustration and flow often comes down to understanding how needle sizes work with different fabrics and threads. Once you crack the code—matching thickness to weight, point style to fiber type—sewing transforms from a battle into something that actually feels satisfying.
Table Of Contents
Key Takeaways
- Needle size directly impacts stitch quality—too small risks breakage and skipped stitches, too large leaves visible holes, so matching needle diameter to fabric weight (fine 60/8-70/10 for silk, medium 80/12-90/14 for cotton, heavy 100/16-120/19 for denim) prevents most common sewing problems.
- The dual numbering system shows metric size (shaft diameter in hundredths of a millimeter) paired with American imperial size, so an 80/12 needle measures exactly 0.80mm and works best with medium-weight fabrics and standard threads.
- Thread compatibility matters as much as fabric type—fine threads need smaller needle eyes to prevent shredding, heavy topstitching threads require larger eyes, and specialty needles (ballpoint for knits, sharp for wovens, metallic for delicate threads) handle specific material challenges.
- Needle lifespan averages 8-10 hours of active sewing before the point dulls, causing thread breaks and skipped stitches, while proper maintenance (wiping after projects, storing in dry containers with silica gel, replacing at first sign of roughness) extends performance and prevents fabric damage.
Sewing Needle Basics
Before you can master any sewing project, you need to understand the tools in your hands. Needles aren’t one-size-fits-all—they come in different types and sizes, each designed for specific fabrics and tasks.
Needles aren’t one-size-fits-all—each type and size is designed for specific fabrics and tasks
Let’s break down the essentials so you can match the right needle to your project every time.
Types of Sewing Needles
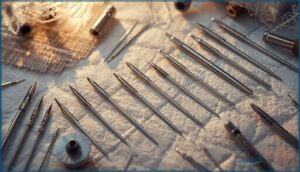
You’ll find three main categories when sorting through sewing needle types: hand needle types, machine needle types, and specialty needles. Hand needles include sharps for general sewing, betweens for quilting, and crewel needles for embroidery—each with distinct eye shapes that accommodate different thread weights.
Machine needle types feature universal needles with slightly rounded tips for everyday fabrics, ballpoint needles that slip between knit fibers, and sharp needles that pierce tightly woven materials.
Specialty needles tackle specific challenges: twin needles create parallel decorative stitches, leather needles use wedge-shaped points to slice through tough materials, and metallic needles have elongated eyes for delicate threads. Needle materials generally consist of nickel-plated steel or chrome-plated steel for durability.
Understanding these sewing needles and their needle types and uses prevents frustrating problems like skipped stitches and fabric damage. Your needle size guide starts with matching needle types to fabric weight and thread thickness. For example, ball point needles are best suited for rib knits and fleece.
Needle Sizes and Uses
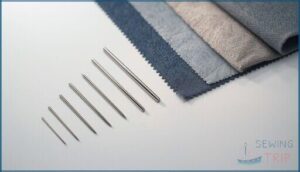
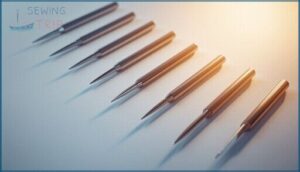
Once you’ve selected your needle type, understanding sewing needle sizes becomes your next step. Each needle displays two numbers—like 80/12—where the first is metric (shaft diameter in hundredths of a millimeter) and the second is American imperial. This dual size system helps you choose the right tool for fabric weight and thread pairing.
Your needle size guide works like this: sizes 60/8 through 70/10 suit silk and chiffon, 80/12 and 90/14 handle everyday cottons, while 100/16 up to 120/19 power through denim and canvas. It’s important to understand that thicker needles exist for use with heavier fabrics. Mismatched sewing needle sizes and uses directly impact stitch quality—too small risks needle damage and breakage, too large leaves visible holes in delicate materials.
Fabric Compatibility
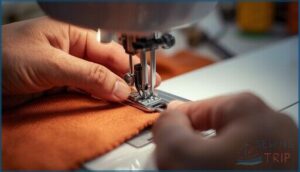
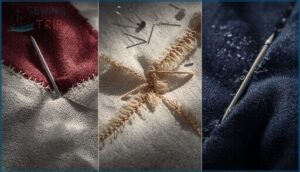
Your needle point and fabric weight form a team that directly affects stitch quality. Chiffon and silk need fine 60/8 to 70/10 needles—anything larger punches visible holes in these delicate materials. Heavy denim demands 100/16 or larger sizes to penetrate dense weaves without breaking.
Cotton and poplin work smoothly with 75/11 through 90/14 universal needles for everyday sewing with different fabrics.
Thread matching matters too: proper needle and fabric combinations prevent skipped stitches and damage. Stretch fabrics require ballpoint needles that slide between knit loops, while tightly woven textiles need sharp points for clean fabric compatibility and damage prevention.
Choosing Right Needle
Picking the right needle isn’t just about grabbing whatever’s in your sewing kit. The needle you choose affects everything from how your stitches look to whether your fabric gets damaged along the way. Let’s walk through what you need to think about before threading that needle.
Factors to Consider
Think of needle selection as solving a puzzle where five pieces must fit perfectly. Fabric weight comes first—lightweight silks demand fine 60/8 to 75/11 needles, while heavy denim requires sturdy 100/16 to 120/18 sizes.
Thread type matters just as much; fine threads need small needles to prevent shredding, but topstitching threads require large eyes to avoid breakage.
Your stitch type influences the needle point you’ll need—ballpoint for knits, sharp for wovens. Don’t overlook sewing speed either; at high speeds, needles heat up quickly and wear faster.
When you match all these factors using reliable needle size charts, you’ll prevent skipped stitches and achieve professional results.
Thread and Fabric Type
When you pair thread weight with fabric weave and fiber content, you achieve professional-quality seams. Cotton threads in 40–50 weight work beautifully with 75/11 or 80/12 needles on quilting cottons, while polyester thread at the same weight works with medium knits with 80/12 ballpoint needles. For fabric compatibility, consider these proven matches:
- Fine 60–100 weight threads need 60/8–70/10 needles for sheers and silks
- Heavy bonded threads require 110/18–120/19 needles for denim and canvas
- Densely woven batiks demand one size larger to prevent needle deflection
- Stretch fabrics pair with 75/11–90/14 stretch needles to avoid skipped stitches
- Needle coating reduces friction on synthetic fabric types
Your stitch appearance depends entirely on this needle selection strategy.
Stitch Type and Length
How does stitch length increase or undermine your needle selection strategy? Your chosen stitch type creates specific demands on needle size, thread types, and seam strength that directly affect fabric behavior.
Standard seams on medium-weight fabrics perform best at 2.5–3.0 mm with 80/12 universal needles, while topstitching length extends to 3.5–4.0 mm for visibility on denim and outerwear. Temporary stitches like basting run longer at 4.0–5.0 mm for easy removal. Stitch density matters too—shorter lengths below 2.5 mm increase seam strength by distributing load across more thread loops, though excessive density risks fabric damage.
| Stitch Purpose | Recommended Length |
|---|---|
| Construction seams | 2.5–3.0 mm |
| Topstitching | 3.5–4.0 mm |
| Basting/gathering | 4.0–5.0 mm |
| Stretch fabrics | 2.5–3.0 mm (zigzag) |
Match your needle size to fabric types and intended stitch function for professional results.
Machine Needle Sizes
Machine needle sizes can feel like a puzzle at first, but once you understand the two main numbering systems, everything clicks into place. The imperial and metric measurements work side by side on most needle packages, so you’ll see both numbers listed together.
Let’s break down how these sizing systems work and which sizes you’ll reach for most often in your sewing projects.
Imperial and Metric Measurements
When you flip over a sewing needle package, you’re looking at two size standards that work together perfectly. The metric system—also called the European size—measures needle diameter in hundredths of a millimeter, so an 80 becomes 0.80 mm. The imperial or American size uses traditional numbering where 12 sits alongside that 80 in dual markings like 80/12.
Historical context matters: size standardization arrived in 1942 to replace roughly 40 confusing designations. Today’s conversion charts make needle dimension chart reading simple:
- Diameter increments usually jump by 10 metric units (70, 80, 90)
- Both systems increase as needles thicken
- Needle size charts align perfectly across regions
- Mid-range spans most garment work
American and European Standards
You’ll spot two sets of numbers on every needle package—American and European sizes working side by side. American needles use numbers 8 through 19, where higher values mean thicker shafts for heavier fabrics. European needles run from 60 to 120, directly representing shaft diameter in hundredths of a millimeter. That 80/12 marking you see? The 80 is European size (0.80 mm), while 12 is its American size equivalent.
Historical context reveals why this dual system exists: regional preferences developed separately before industry adoption standardized packaging worldwide. European needles gained traction internationally thanks to their metric equivalents offering precise measurements. American size conventions still dominate North America, though needle size charts now routinely include both standards.
Size discrepancies between systems disappear when you understand their logic—both climb as needles thicken, just using different scales. This makes selecting the right needle straightforward once you recognize either numbering system.
Common Needle Sizes
Think of your needle collection as a specialized toolkit—five core sizes handle nearly everything you’ll sew. Size 60/8 slips through silk and chiffon without leaving marks, though you’ll reach for it rarely.
Your workhorses live in the middle: 70/10 handles cotton lawn and light knits, 80/12 powers through quilting cotton and medium fabrics, while 90/14 masters denim and layered projects. When heavy fabrics demand muscle, 100/16 punches through canvas and upholstery.
Size prevalence matters here—retailers stock 70/10, 80/12, and 90/14 most heavily because needle size and fabric weight relationships guide 80% of home sewing. Master these five sewing machine needle sizes, and you’ve covered fine fabrics through heavyweight construction without gaps.
Needle Size Guide
Finding the right needle size doesn’t have to feel like guesswork. A quick reference chart can help you match needle sizes to fabrics in seconds, taking the confusion out of your next project.
Let’s break down how sizing works, what thickness means for your fabric choices, and when you’ll need something more specialized.
Size Charts and Conversion
Mastering needle size charts transforms confusion into confidence. You’ll decode dual systems where European metric measurements (60, 70, 80) appear alongside American imperial sizes (8, 10, 12). A needle marked 80/12 tells you its shaft measures 0.80 mm—that simple metric conversion unlocks perfect needle selection every time.
Quick reference essentials:
- Size 60/8 accommodates delicate silks and sheers under 0.65 mm thick
- Mid-range 80/12 suits everyday cotton and lightweight denim
- Heavy-duty 100/16 powers through thick canvas and upholstery
- Understanding needle sizing systems prevents thread breakage and skipped stitches
Your needle chart becomes your roadmap to ideal stitching.
Needle Size and Fabric Thickness
Your fabric thickness directly controls needle selection. Lightweight silks under 0.2 millimeters need sizes 60/8 to 70/10, preventing visible punctures. Medium-weight cottons around 0.5 millimeters match with 80/12 or 90/14 needles—your everyday workhorses. Heavy denim exceeding 1.2 millimeters demands 100/16 to 110/18 sizes to penetrate layers without bending.
Thread size correlation matters too: thicker threads require larger needle eyes. Stitch quality factors collapse when you mismatch needle size and dimensions with fabric weight.
Specialized Needle Sizes
Beyond standard options, specialty needles access challenging materials with surgical precision. Twin needles arrive in spacing from 1.6 mm to 8.0 mm paired with sizes like 75/11 or 100/16, delivering parallel topstitching on knits and hems. Industrial needle sizes extend from 55/7 to 200/25 for manufacturing-grade leather and technical textiles.
Your needle chart should include:
- Metallic thread sizes (80/12, 90/14) with elongated eyes preventing breakage
- Hemstitch needle sizes (100/16, 120/19) creating decorative openwork
- Overlock needle range (65/9 to 125/20) for serger applications
Sewing Machine Needles
Machine needles are precision tools engineered for specific fabrics and tasks. Each needle features distinct materials, coatings, and design elements that affect how it performs over time.
Understanding these characteristics helps you choose the right needle and keep it working at its best.
Characteristics and Features
Every sewing machine needle carries distinct design elements that shape your stitching results. Needle anatomy includes shank design—the flat-backed upper section that locks into your machine—and a blade diameter that defines needle size (a 75/11 needle measures 0.75mm). Point geometry varies from sharp tips for wovens to ball points for knits.
The groove function protects thread during penetration, while the scarf permits reliable loop formation.
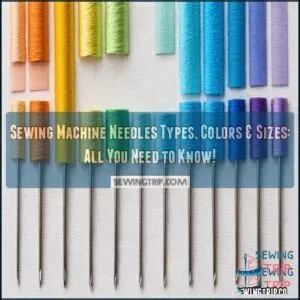
Color coding on Schmetz needles lets you identify needle types instantly—look for upper bands marking specialty features.
Needle Materials and Coatings
The needle’s base material determines its fundamental strength. Most modern machine needles use high-carbon steel, which resists bending under heavy stitching loads.
Coating Hardness matters greatly. Nickel plating offers basic rust protection at the lowest cost, while chrome coatings deliver more than twice the surface hardness for better Material Corrosion resistance. Titanium Needles, recognizable by their golden tint, provide outstanding wear resistance—lasting up to six times longer than standard nickel-plated options in abrasive applications. Friction Reduction coatings like PTFE prevent sticky residue buildup on synthetics.
Visual Identification is simple: nickel appears yellowish, chrome looks bright silver, and titanium shows that distinctive gold. Understanding these coating differences helps you match needle types to fabric compatibility requirements and improve overall needle selection for consistent thread compatibility.
Needle Lifespan and Maintenance
After about eight hours of active stitching, your standard needle starts losing its edge—literally. Replacement Intervals fall between 8–10 hours for household machines, though titanium-coated needles can stretch that to 16 hours. Wear Indicators include frequent thread breakage at the eye, repeated skipped stitches, or louder striking sounds during penetration—all signaling it’s time for a swap.
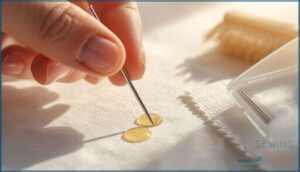
For Cleaning Practices, wipe needles with a lint-free cloth to remove adhesive residue and fiber buildup. Use alcohol on stubborn sticky materials, but keep moisture away from the machine body. Proper Handling Methods are essential—avoid touching points with oily fingers, and inspect new needles under bright light before installation. Storage Solutions are simple: keep spare needles in sealed containers with silica gel packets to prevent rust formation.
Inserting Sewing Needles
Changing your sewing machine needle isn’t complicated, but doing it correctly makes all the difference in your stitch quality. The process involves three straightforward steps that you’ll want to follow in order.
Let’s walk through how to safely remove the old needle, check your new one for defects, and install it properly.
Removing Old Needles
When your machine starts skipping stitches or punching holes instead of clean seams, you’ve hit a classic replacement indicator.
Safety preparation comes first—turn off and unplug your machine, then raise the needle to its highest position using the handwheel. Lift the presser foot to give yourself clear access. Now you’re ready for the detachment steps: hold the needle firmly while you loosen the clamp screw counterclockwise with a small screwdriver or your fingers. Pull the needle straight down once it’s free.
- Keep one hand supporting the needle while your other hand operates the clamp screw
- Use tweezers as handling tools if you can’t comfortably grip the short shank
- Replace needles every 6–8 hours of sewing time to maintain stitch quality
- Check for bent tips or burrs during needle maintenance—they reveal why your stitches failed
- Practice proper disposal practices by dropping used needles into a rigid plastic bottle with a lid
Never yank or twist a stuck needle; gentle wiggling prevents damage to your needle bar.
Examining New Needles
Before you slip that new needle into your machine, take a moment for a careful visual inspection. Hold it under good light and look for bent tips, burrs around the eye, or any surface imperfections. Tactile checks matter too—run your fingernail gently along the point to catch roughness you can’t see.
Size verification is simple: match the marking on your needle package to your fabric needs. An alignment check on a flat surface reveals any warping.
Quality control at this stage prevents fabric damage and extends needle lifespan, saving you from needle replacement indicators like skipped stitches down the line.
Installing New Needles
Power off your machine before you start—safety always comes first.
Loosen the clamp screw and slide your new needle upward until it hits the internal stop; correct needle insertion depth prevents seating issues. The flat side of the shank should face the back on most machines.
Tighten the clamp screw firmly to prevent slippage, completing your needle installation.
Needle Care and Maintenance
Taking care of your needles isn’t complicated, but it makes a real difference in how they perform. A few simple habits can prevent frustrating problems like skipped stitches, fabric snags, and premature needle failure.
Let’s look at practical ways to keep your needles in top shape so they last longer and sew better.
Cleaning and Storage
Dust and lint aren’t your needles’ only enemies—moisture is. Wipe needles with a soft cloth after each project, then use rubbing alcohol (70–90% pure) on a cotton swab for deeper cleaning.
Store needles in airtight containers with silica gel packets to prevent rust; desiccants can absorb up to 40% of their weight in moisture. Wool felt needle books work better than synthetic versions because wool resists holding moisture against metal surfaces.
Proper storage containers and cleaning agents extend needle lifespan considerably.
Preventing Damage and Breakage
A bent needle is like a ticking time bomb—it’s not a matter of if it will break, but when. Needle breakage occurs most often when machine alignment drifts, thread weight exceeds needle capacity, or sewing speed pushes past safe limits. Material obstacles such as pins cause instant fractures, while needle deflection from forcing fabric increases stress on the shaft.
Check needle condition before every project by running your fingernail across the point—any roughness means replacement time. Proper needle-thread compatibility reduces friction damage, and keeping machine speed moderate prevents the heat buildup that weakens metal over extended runs.
Extending Needle Lifespan
Keeping your needles working longer comes down to a few smart habits. Cleaning practices matter—lint buildup around the needle bar increases friction and speeds wear. Speed control protects both thread and metal; research shows high speeds can push needle temperatures past 180 °C, weakening the shaft. Needle quality from trusted brands outlasts bargain alternatives, especially under heavy use.
Regular inspection and fabric choice work hand in hand:
- Match needle type to material density to reduce deflection stress
- Replace needles every 6–8 hours of active sewing time
- Store needles dry to prevent rust between projects
- Use appropriate thread weight to minimize eye friction
Needle maintenance isn’t complicated, but it pays off. When you combine proper sewing machine maintenance with thoughtful needle replacement frequency, you’ll catch wear before it becomes needle troubleshooting.
Common Sewing Errors
Even the best sewers hit snags when they overlook basic needle principles. Most problems trace back to three simple mistakes that throw off your entire project.
Let’s look at the most common errors and how to fix them before they ruin your work.
Incorrect Needle Size
When your needle size doesn’t match your fabric, you’re inviting trouble. Too large a needle creates permanent fabric hole size issues in delicate materials—those pinholes won’t disappear.
Too small a needle increases thread breakage and skipped stitch risk as the eye can’t accommodate your thread properly. You’ll see seam puckering on lightweight fabrics and potential machine timing damage when forcing undersized needles through denim or canvas.
Improper Thread Tension
Beyond needle selection, thread tension often causes the most frustration. When your top tension climbs too high, you’ll see the bobbin thread pulled to the surface, creating those telltale “railroad tracks” instead of a balanced stitch. Set it too loose, and needle thread loops appear underneath. Both extremes trigger fabric puckering, thread breaks, and skipped stitches.
Tension troubleshooting starts with the basics: rethread your machine with the presser foot up so thread seats properly between the tension discs. Clean out any lint hiding in those discs or around your bobbin case. Most machines ship with upper tension near 4–5, which works for standard thread. Adjust only your upper tension first, testing on scrap fabric until you achieve thread balance. Proper tension maintenance prevents needle and thread compatibility issues before they start.
Machine Malfunction and Repair
When tension settings check out, look closer at needle-related malfunctions before calling for repair. Size-related issues—like using a fine needle on denim—cause most skipped stitches and thread breaks you’ll encounter. Breakage consequences go beyond the snap itself: broken needles strike the hook and throat plate, creating burrs that trigger ongoing jamming.
Smart diagnostic steps save you time and money. Check your needle first: replace it if bent, dull, or wrong for your fabric. This simple sewing machine maintenance prevents most troubleshooting sewing problems and reduces downtime considerably.
Frequently Asked Questions (FAQs)
What is a sewing needle size guide?
A sewing needle size guide helps you match needle thickness to fabric weight, showing size importance and how metric conversion works.
Reading charts makes needle selection easy, ensuring clean stitches, preventing damage, and supporting confident sewing machine needle size choices.
What are the different sizes of sewing machine needles?
Sizes for sewing machine needles span 60/8 (fine) to 120/20 (heavy). Using Metric Conversion, needle diameter increases with number. Size Applications vary: 80/12 suits general use, while 60/8 fits delicate, and 100/16 handles heavy fabrics.
How to choose a sewing needle?
Think about fabric weight, thread type, and project needs. Use smaller needles for delicate fabrics, medium for general sewing, and larger for heavy materials.
The right needle point and size help maintain stitch quality—needle charts simplify sewing needle selection.
How to choose the right needle for your sewing machine?
To choose the right sewing machine needle, match needle size to fabric properties—smaller for lightweight, larger for heavy. Consider thread compatibility, needle point type, and machine type. Specialty needles boost stitch quality on knits, wovens, or tricky materials.
How do you know what size sewing needle to use?
Funny how the right needle size can make or break your project. Match needle size to fabric weight—smaller for light, larger for heavy.
Always test stitch and watch seam appearance; thread matching and needle indicators guide perfect needle selection for fabrics.
Which needle size is finer, a 9 or a 14?
A size 9 needle is finer than a 14—it’s thinner, making it ideal for delicate fabrics and precise stitch quality.
Using a thicker 14 can cause fabric damage or needle breakage, especially if thread compatibility isn’t considered.
What is the difference between sewing needle 80 12 and 90 14?
The 80/12 needle has a shaft diameter of 80 mm, ideal for light to medium fabrics. The 90/14 measures 90 mm, handling heavier materials with better stitch quality and thread compatibility.
How big is a size 7 sewing needle?
Think of a size 7 hand needle as the Goldilocks zone—it measures roughly 63–69mm in diameter and about 36–38mm long, making it ideal for medium-weight cottons, linens, and everyday embroidery without stress.
What is an 80/12 needle used for?
You’ll reach for an 80/12 needle when sewing medium-weight cottons, linens, and knits.
This adaptable size is suitable for quilting projects, garment seams, and multiple fabric layers while maintaining excellent stitch quality with standard threads.
How do vintage needles compare to modern ones?
Manufacturing has transformed dramatically—vintage needles suffered from inconsistent sizing systems and brittle fracture risks.
Today’s alloy composition and standardized needle types deliver sharper points, extended needle lifespan, and reliable application range across diverse fabrics.
Conclusion
Like picking the right tool from a well-organized toolbox, matching sewing needle sizes to your fabric and thread transforms chaos into precision. You now understand the numbering systems, the relationship between thickness and weight, and which needle solves which problem.
That knowledge turns every project into something predictable—where stitches form cleanly, fabric feeds smoothly, and your machine cooperates. The difference between struggle and success really does come down to one small, decisive choice.

![Different Sewing Machine Needles for Fabrics: The Complete Guide [2025] 3 different sewing machine needles for fabrics](https://sewingtrip.com/wp-content/uploads/2025/03/different-sewing-machine-needles-for-fabrics-300x300.jpeg.webp)
