This site is supported by our readers. We may earn a commission, at no cost to you, if you purchase through links.
Compare them to the pattern chart to spot potential tweaks.
To adjust lengths, mark and pin hemlines or inseams where needed, and always account for fabric drape.
Alter widths by taking in seams or letting out seams or adding darts for shaping.
Don’t skip creating a muslin mock-up—it’s your blueprint for catching fit quirks like draglines or gaping necklines.
Remember, patience is key; with practice and the right tools, you’ll master that perfect custom fit!
Table Of Contents
Key Takeaways
- Take accurate measurements of your body, including hip, waist, and body length, and compare them to the pattern chart to identify necessary adjustments.
- Always create a muslin mock-up to test your pattern for fit issues like draglines or gaping necklines before cutting into your final fabric.
- Adjust lengths and widths strategically by marking hemlines, altering seams, or adding darts to achieve a perfect fit for your unique shape.
- Preserve your original patterns by tracing them onto new paper, and make adjustments like shoulder modifications directly on the copy.
Choosing Correct Pattern Size
Ever wondered why your homemade clothes never quite fit right?
Choosing the correct pattern size is your secret weapon to transforming those store-bought patterns into perfectly fitted garments that look like they were made just for you, with perfectly fitted clothes being the ultimate goal.
Measuring Body Length
Because your body is your unique blueprint, mastering body length measurements is key to sewing success.
Grab a flexible measuring tape and stand tall with good posture. Measure from your shoulder to desired garment endpoint, tracking torso size and arm span carefully.
Understanding accurate measurements is essential for a perfect fit. Pro tip: always measure twice and record precisely to nail that perfect fit.
Measuring Hip and Waist
Every seamstress knows hip and waist measurements are the secret sauce of sewing pattern success. Grab a flexible measuring tape and elastic to pinpoint your body’s curves precisely.
Stand relaxed, with a friend’s help if possible, ensuring the tape stays parallel to the floor. To achieve a smooth curve, understanding pattern adjustment is essential for a well-fitting garment.
Measure at your natural waistline and fullest hip point for pattern-perfect fitting magic.
Comparing Measurements to Pattern Chart
After nailing your hip and waist measurements, grab that pattern sizing chart and play detective.
Compare your body proportions to the chart, watching for measurement errors that could throw off your sewing game.
Pro tip: Pay attention to fit analysis points like bust, waist, and hip, pattern matching isn’t an exact science, but it’s your roadmap to a killer custom fit.
Mastering Pattern Alteration Basics
So you’ve nailed your measurements—now what? Pattern alteration is where the magic happens, turning a generic paper pattern into your personal fit masterpiece.
Think of it like sculpting your own clothing blueprint.
You’ll want sharp sewing tools and a keen eye for detail. The game is all about understanding pattern markings, grainlines, and how fabric behaves.
Start by tracing your pattern onto fresh paper—this preserves the original and gives you room to experiment.
Learn to read pattern notation like a pro: those mysterious lines and symbols are your roadmap to fit perfection.
Pro tip: always mark your adjustments in pencil first, giving yourself wiggle room to tweak and refine.
With practice, you’ll transform basic patterns into custom-crafted garments that feel like they were made just for you.
Altering Pattern Lengths
Ever struggled with pattern lengths that never seem quite right for your body?
Don’t worry—with a few simple simple techniques, you’ll learn how to adjust sleeve lengths, hemlines, and pant legs to create garments that fit you perfectly.
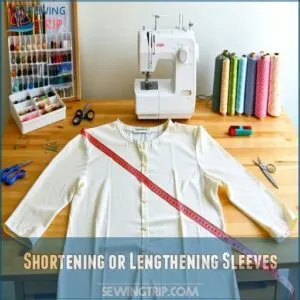
Shortening or Lengthening Sleeves
Got too short sleeves? No sweat! Conquering sleeve adjustments is easier than you think.
Measure from shoulder to wrist, then compare with your pattern’s length. Whether you need to shorten dramatically or add a touch more fabric, strategic seam alterations can transform ill-fitting sleeves.
Utilizing a sleeve lengthener can also be a game-changer for altering sleeve lengths. Pro tip: Always adjust before cutting to prevent fabric waste and guarantee a killer fit.
Adjusting Hemlines for Perfect Fit
When hemlines feel off, your perfect fit is just a few strategic adjustments away. Hemline measurement isn’t rocket science – it’s your ticket to garment liberation.
- Pin and mark your desired length with precision
- Choose the right seam allowance for clean edges
- Consider fabric drape and weight before cutting
- Test the new hemline before making permanent changes
Sewing pattern alterations transform baggy bottoms into custom treasures.
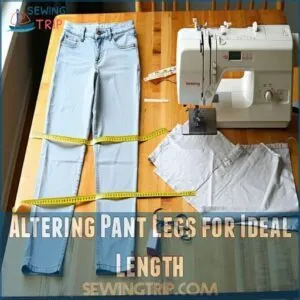
Altering Pant Legs for Ideal Length
At the crossroads of fashion and fit, pant leg alterations can transform your wardrobe from awkward to awesome.
Measure your inseam carefully, then mark the desired length with tailor’s chalk.
Fold and pin excess fabric, ensuring an even hemline.
Pro tip: Always adjust both the inseam and outseam for balanced leg length modifications that’ll make your pants look custom-tailored.
Adjusting Pattern Widths
If your sewing pattern feels like it’s wearing you instead of the other way around, you’re not alone in the fit frustration club.
Learning to adjust pattern widths is your secret weapon for transforming baggy or tight garments into perfectly fitted pieces that make you look and feel amazing.
Letting Out or Taking in Seams
Ever struggled with clothes that just don’t fit right? Seam adjustments are your secret weapon for transforming ill-fitting garments into perfectly fitted pieces.
Mastering fabric easing and thread tension can make all the difference in your sewing pattern alteration journey. Understanding pattern adjustments is essential for achieving a flawless fit.
- Learn to rip seams carefully without damaging fabric
- Use precise measurements for accurate width adjustments
- Practice stretching fabric strategically for ideal fit
Adding or Removing Darts
After fine-tuning seam adjustments, you’ll want to master dart magic for smoother garment fitting.
Darts are your secret weapon for shaping fabric around curves, creating killer silhouettes without bunching.
Whether you’re adding definition to a blouse or removing excess fabric from a dress, strategically placed darts transform shapeless patterns into custom-fit masterpieces that hug your body just right.
To achieve professional results, utilizing the right dart tools is essential for making precise adjustments and creating a flawless fit.
Modifying Armholes for Comfort
Someone struggling with tight or baggy armholes knows the comfort struggle is real.
Mastering armhole modifications can transform your sewing game and boost your confidence.
Here’s how to nail that perfect fit:
- Measure your armhole depth carefully to identify where adjustments are needed
- Consider your shoulder slope when mapping out seam adjustments
- Test different fabric choices to understand how they impact armhole comfort
Fitting for Body Shape
Your body’s unique shape is the secret sauce to a killer wardrobe, and nailing the perfect fit starts with understanding how to tweak patterns just for you.
Whether you’ve got narrow shoulders, curves for days, or need extra room for a Dowager’s hump, you’ll learn how to transform any pattern into your personal style blueprint.
Altering for Narrow or Broad Shoulders
Ever wrestled with a pattern that doesn’t match your shoulder width? Narrow or broad shoulders can throw off your entire garment fit.
Shoulder adjustments are your secret weapon. By tweaking the shoulder slope and armhole depth, you’ll transform ill-fitting designs into custom masterpieces.
Shoulder pads or strategic bodice alterations can balance out asymmetrical shoulders, giving you that perfect, custom-fitted look.
Adjusting for Curvy or Straight Figures
After tackling shoulder adjustments, let’s zero in on body shape mapping. Whether you’re rocking curves or sporting a straighter silhouette, pattern making isn’t one-size-fits-all.
Your figure’s unique blueprint demands smart dress alteration strategies, including mastering bust darts to achieve a flawless fit.
Identify your body proportions, then use strategic curve modifications to transform patterns. Silhouette adjustment isn’t about hiding – it’s about celebrating your shape with precision fit techniques.
Accommodating for Dowager’s Hump
Need to smooth out that upper back bulge? Back adjustments for a Dowager’s hump are easier than you think!
Add extra room in your pattern’s back by creating a slight curve or wedge at the upper back seam.
Shoulder fixes and neck modifications can help distribute fabric smoothly, ensuring your garment drapes perfectly while accommodating your unique spinal alignment and upper back seam adjustments.
Muslin Fitting Essentials
Creating a muslin mock-up is your secret weapon for nailing the perfect fit before cutting into your expensive fabric.
Think of it as a dress rehearsal for your garment, where you’ll pinpoint and fix fitting issues without risking your final project.
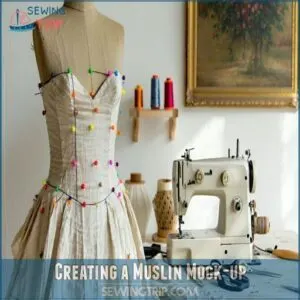
Creating a Muslin Mock-up
Ready to master your sewing skills? A muslin mock-up is your secret weapon for perfect-fitting garments.
Grab some inexpensive muslin fabric and trace your sewing pattern, creating a test version of your future masterpiece.
This prototype lets you spot potential fit issues before cutting into your precious fabric, saving time and preventing costly mistakes, with a test version.
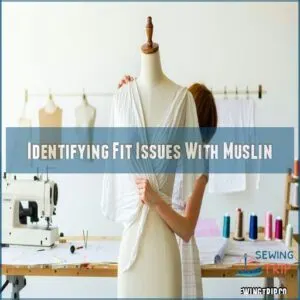
Identifying Fit Issues With Muslin
After crafting your muslin prototype, it’s detective time! Look closely at draglines, wrinkles, and tight spots that scream "needs adjustment."
Check shoulder seams, armholes, and bust area for telltale fabric tension. Pinch excess fabric where it bunches, noting where seams pull or gape.
Your muslin’s imperfections are treasure maps guiding your fit adjustment journey, revealing exactly where your sewing patterns need some love.
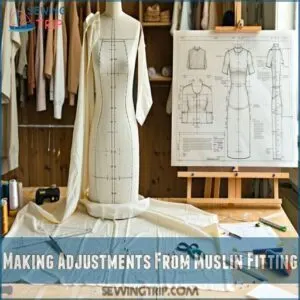
Making Adjustments From Muslin Fitting
How will you transform those pesky muslin prototype fit issues into sewing magic? Turning your garment testing challenges into precise pattern adjustments is an art form that’ll elevate your sewing game.
- Mark every dragline and wrinkle with tailor’s chalk
- Transfer seam adjustments directly onto your original pattern
- Use fitting issues as a roadmap for strategic alterations
Your muslin is speaking – are you listening?
Common Fit Challenges Solved
Ever struggled with sewing patterns that just don’t seem to fit right?
Don’t worry—with a few smart tricks and techniques, you’ll learn how to solve those pesky fit challenges and transform your homemade garments from frustrating to fabulous.
Resolving Draglines and Wrinkles
Wrinkle warfare begins with keen fabric smoothing techniques that transform draggy, lumpy garments into sleek masterpieces.
Seam adjustments are your secret weapon against stubborn texture misalignments. Trace those pesky draglines carefully, then strategically alter the pattern’s fit lines.
By understanding how fabric falls and moves, you’ll conquer wrinkles like a pro sewing ninja, creating garments that hug your curves perfectly.
Fixing Gaping Necklines or Armholes
Those pesky gaping necklines and armholes can make your perfectly chosen pattern look like a sad, baggy mess.
But don’t sweat it! With some strategic shoulder tweaks and armhole fixes, you’ll transform that loose fabric into a custom-fit dream.
To achieve a perfect fit, understanding the fix gaping neckline sewing trick is essential.
Pinch and pin those neckline adjustments, scoop out the armscye, and watch your garment’s fit go from blah to brilliant.
Solving Pant Fitting Issues
Because ill-fitting pants can make you feel like you’re wearing a strait jacket, mastering pant alterations is key to wardrobe confidence.
Tackle waistband fitting by adjusting the rise and taking in side seams. Smooth out thigh shaping, address crotch depth issues, and nail knee alterations to transform baggy or tight jeans into your perfect-fitting dream pants.
Freedom starts here!
Advanced Alteration Techniques
When it’s time to tackle zippers, buttons, or tricky collars, knowing advanced alteration techniques can save the day.
These pro tips will help you handle complex adjustments like adding linings or reshaping sleeves with confidence and precision.
Replacing Zippers or Buttons
Replacing zippers or buttons can feel intimidating, but with a few tips, you’re golden! Start by carefully unpicking the old fastener—don’t rush it, or you’ll regret the tears (yours and the fabric’s).
For a professional finish, consider consulting zipper tips to guarantee your sewing project turns out perfectly.
- Use a zipper foot for precise stitching.
- Stabilize lightweight fabrics with interfacing.
- Match thread and zipper color for a polished look.
- Test alignment before stitching permanently.
Adding Linings or Pockets
Adding linings or pockets transforms your garment from basic to polished.
Use lightweight fabrics to avoid bulk, and try fusible interfacing for structure.
Placement is key—test pocket positions before stitching.
Finish seams cleanly to prevent fraying, especially with silky linings.
Mastering these sewing techniques enhances fit and adds functional flair as well.
Trust these sewing pattern alteration tips for pro results!
Altering Collars or Sleeves
Tweaking collars or sleeves can transform a garment’s look.
Sleeves too tight? Try easing seam modifications or adding width with gussets.
Collar fixes? Adjust neckline depth or reshape edges for comfort.
Don’t skip armhole fitting—it’s key for movement.
Use cuff alterations to perfect length.
These sewing pattern alteration tips are gold for creating polished, professional looks without breaking a sweat!
Achieving Perfect Fit Tips
Getting a perfect fit isn’t magic—it’s all about using the right tools and tricks.
From darts to measuring your favorite clothes, a few simple steps can make your sewing projects look like they were made just for you.
Using Darts for Shaping
Darts are your secret weapon for shape and fit. They sculpt garments to follow curves and sit smoothly.
Here’s how to ace it: Utilizing the right dart sewing tools can greatly enhance your sewing experience.
- Pin darts for accurate fabric draping.
- Match dart placement with fit analysis.
- Stitch seamlessly for clean seam shaping.
- Incorporate pattern drafting techniques for precision.
- Practice with mock garments—alteration tips made easy!
Measuring Existing Clothes for Fit
Got a favorite piece that fits like a dream? Use it as a template!
Lay it flat, grab your measuring tools, and note key dimensions like length, waist, and armhole width.
Reverse engineer the fit by comparing these Existing Clothes Measurements to size charts. It’s like duplication without the guesswork—spot-on Garment Measuring Techniques for perfect alteration tips!
Utilizing Sewing Tools for Alterations
After sizing up clothes, grab your sewing tools. Fabric scissors keep cuts clean, while measuring tools guarantee accuracy. Don’t underestimate seam rippers—they’re lifesavers in fixing hiccups.
Nail it with smart thread selection for durability and style. Master the sewing machine tips—it’s your MVP for garment alteration.
Understanding sewing patterns is vital for a perfect fit. These tools? Your ticket to mastering those tricky sewing patterns!
Frequently Asked Questions (FAQs)
How to adjust patterns to fit you perfectly?
Think of patterns like blueprints for a dream house—you adjust for your unique needs.
Take accurate body measurements, pin-fit muslin prototypes, and tweak seam lines, darts, or armholes until each piece fits perfectly.
What is the order of sewing pattern adjustments?
Start with shoulder adjustments since they set the foundation.
Next, tackle width changes like the bust or waist, then length alterations, including hems.
How to upscale a sewing pattern?
Choose a pattern in the closest size, then extend seam lines evenly using a ruler and pattern paper.
Keep proportions intact by altering length and width separately—don’t forget to test with muslin before cutting!
How do you correctly pick out your size for a pattern?
Ignore your usual clothing size—focus on your measurements instead.
Grab tape, measure bust, waist, and hips, then check the pattern’s size chart.
Go larger if unsure; it’s easier to slim down than expand later.
How do I balance seam allowances in patterns?
Even seams, clean lines, no stress—balance seam allowances by marking them evenly on your pattern.
Use a ruler, measure carefully, and double-check.
It’s like giving your garment boundaries that make sewing smooth and frustration-free.
What tools simplify tracing complex pattern pieces?
Pattern weights keep everything steady, tracing wheels help transfer curves, and chalk or disappearing ink pens make marking lines simple.
For tricky bits, try a projector or carbon paper—it’ll save you tons of frustration.
How can I alter patterns for asymmetrical features?
Think of asymmetrical features like quirky puzzle pieces.
Adjust patterns by marking differences directly onto the fabric, using transfer tools or mock-ups.
Focus on fit for each side separately—what works for one won’t always work for both!
What fabrics work best for practicing alterations?
Start with cotton fabrics—lightweight, forgiving, and easy to work with.
Muslin’s a favorite choice, being cheap and fuss-free.
Avoid stretchy or slippery fabrics for starters; they’ll drive you nuts when you’re still figuring things out.
How do I preserve original patterns during modifications?
Did you know 90% of sewing pros trace patterns onto tracing paper?
It saves the original, lets you tweak endlessly, and avoids disaster.
Bonus: mistakes on your copy won’t wreck your precious master pattern!
Conclusion
Transforming a pattern to fit your body isn’t rocket science, but it can feel like it at first—don’t worry, you’ve got this!
Master the basics like measurements, tackling lengths and widths, and experimenting with muslins. The key is patience and practice; every adjustment teaches you something new.
With these sewing pattern alteration tips, you’re on your way to creating clothes that fit like a dream. So, grab that fabric and start sewing your perfect wardrobe!
- http://aces.nmsu.edu/pubs/_c/C205/welcome.html
- https://www.moodfabrics.com/blog/the-ultimate-guide-to-garment-alterations/
- https://sewguide.com/alterations/
- https://www.thesprucecrafts.com/sewing-pattern-alteration-and-fitting-articles-2977364
- https://katrinakaycreations.com/how-to-adjust-your-waist-to-hip-measurement-hip-depth-on-your-pattern/

