This site is supported by our readers. We may earn a commission, at no cost to you, if you purchase through links.
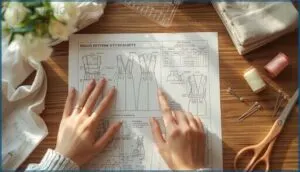
That cryptic tissue paper covered in mysterious lines isn’t trying to confuse you—it’s actually a roadmap to your next handmade wardrobe piece. Most sewists abandon their first pattern attempts because they treat these templates like IKEA instructions: skip the reading, wing it, then wonder why nothing fits.
Sewing pattern reading tutorials transform those bewildering symbols into a clear language you can understand. Grainlines, notches, and dart markings become second nature once you crack the code.
The difference between a garment that hangs beautifully and one that twists awkwardly often comes down to interpreting a single symbol correctly during your initial layout.
Table Of Contents
- Key Takeaways
- What is a Sewing Pattern and How Does It Work?
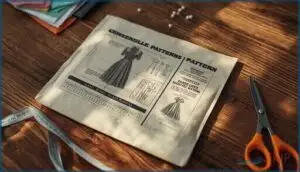
- How to Read a Pattern Envelope
- Understanding Pattern Pieces and Cutting Lines
- Decoding Essential Pattern Symbols and Markings
- How to Choose Your Pattern Size
- How to Read The Pattern Guide Sheet
- Working With Fabric: Selection and Preparation
- Pattern Layout and Cutting Techniques
- Essential Pattern Adjustments for Better Fit
- Organizing Patterns and Choosing Beginner-Friendly Projects
- Frequently Asked Questions (FAQs)
- Conclusion
Key Takeaways
- Pattern symbols—grainlines, notches, darts, and fold lines—are the silent language that transforms confusing tissue paper into a precise construction blueprint, and misreading even one marking can cause your entire garment to twist or hang incorrectly.
- Pattern sizing operates on outdated 1950s measurement standards, meaning your usual retail size is irrelevant; you’ll likely need patterns 2–4 sizes larger than your store clothing, so trust your actual body measurements over the number on the envelope.
- The difference between body measurements and finished garment measurements is called ease—that intentional extra room built into patterns for movement and style—and understanding this concept prevents the common mistake of choosing patterns that are too tight or too loose.
- Proper fabric preparation through pre-washing and grainline alignment isn’t optional fussiness; it prevents up to 10% shrinkage and 27% seam distortion, which means skipping these steps guarantees your finished garment won’t fit the way your pattern promised.
What is a Sewing Pattern and How Does It Work?
A sewing pattern is your blueprint for creating garments—it’s the roadmap that translates design into a wearable piece. Think of it as a set of instructions and templates that guide you through cutting fabric and assembling each component in the right order.
Before you can confidently read any pattern, you need to understand what it actually is, what comes inside, and which type works best for your project.
Definition and Components of a Sewing Pattern
A sewing pattern is your blueprint—a template for tracing garment sections onto fabric before cutting. Most patterns include these core pattern elements:
- Pattern pieces printed on tissue paper, each labeled with a unique number for identification
- Sewing symbols like grainline arrows, notches, and dots guiding construction
- Measurement guides with sizing charts and finished garment dimensions
- Seam allowance markings, usually 15mm on commercial pattern templates
Understanding sewing pattern basics is essential for successful garment construction.
Commercial Vs Indie Patterns
When choosing between commercial patterns and indie designs, you’re weighing market share against creative innovation. The Big 4—Vogue, McCall’s, Butterick, and Simplicity—dominate with standardized quality and extensive pattern sizes. Indie patterns often excel in size inclusivity and digital trends, though instruction quality varies. Commercial patterns deliver tested reliability; indies offer unique perspectives. Pattern pricing reflects this: commercial consistency versus indie entrepreneurship. Understanding the differences between commercial and indie patterns can help sewers make informed decisions about their sewing pattern needs.
| Aspect | Commercial Patterns | Indie Patterns |
|---|---|---|
| Distribution | Widely available in retail stores and online | Primarily digital downloads via Etsy or brand websites |
| Instruction Quality | Standardized, reliably tested instructions | Variable—some excellent, others lack detail |
| Size Range | Standard sizing across multiple options | Often extended sizing and niche body types |
| Pricing | Predictable, frequent sales | $3–$15+ depending on brand reputation |
Paper Vs PDF Patterns
Beyond brand choice, you’ll face another decision: paper vs PDF patterns. Digital sewing patterns now represent 48% of indie sales—instant downloads win on cost comparison and digital storage convenience. But 78% of paper users praise consistent sizing without printer scaling headaches.
PDF patterns offer eco-friendly benefits, eliminating tissue waste, though 42% encounter assembly issues. User preferences split on reading pattern instructions: paper’s tactile clarity versus PDF’s layered sizing flexibility.
Pattern piracy concerns affect pricing for both formats. Understanding sewing patterns means weighing convenience against hands-on reliability.
How to Read a Pattern Envelope
The pattern envelope is your first real conversation with any sewing project. It holds everything you need to know before you cut a single piece of fabric—from sizing to supplies.
Let’s break down the key information you’ll find printed on the front and back of that envelope.
Understanding Pattern Numbers and Sizing Charts
Every pattern envelope displays a unique pattern number—your gateway to online tutorials and inspiration. The size chart analysis starts with understanding pattern sizes versus ready-to-wear: you’ll likely need patterns 2-4 sizes larger than your store clothing.
Key sizing essentials:
- Measure bust, waist, and hips accurately
- Compare body measurements to the size guide
- Check finished garment measurements for ease
- Choose size based on your largest measurement
- Pattern numbering helps track design variations
Understanding pattern sizes means trusting measurement techniques over habitual labels.
Decoding Fabric Requirements (45 Vs 60 Width)
Pattern envelopes list yardage for two standard fabric widths: 45 inches and 60 inches. You’ll need less of the wider fabric—often a 25-30% reduction in yardage calculation. A pattern requiring 2¾ yards at 45-inch width needs only 2 yards at 60-inch width.
This fabric width comparison affects both pattern efficiency and fabric cost analysis, so check your fabric lay plan before purchasing material.
What Are Notions in Sewing Patterns?
Notions are the small accessories—zippers, buttons, thread, interfacing—listed separately from fabric on your pattern envelope. Think of them as the hardware that makes your garment functional. Pattern requirements specify exact lengths and types: a 22-inch invisible zipper or four ½-inch buttons.
Many sewists halt projects midway because they’re missing these essential sewing accessories. Notion kits bundled for specific patterns simplify sourcing for sewing beginners.
Understanding Pattern Pieces and Cutting Lines
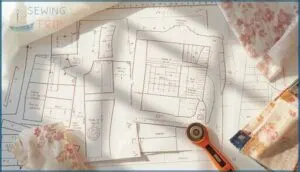
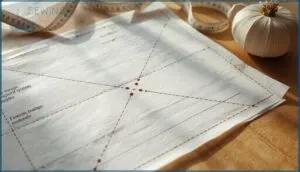
Once you open your pattern, you’ll find tissue paper pieces covered with lines, arrows, and labels. These pattern pieces are the actual templates you’ll use to cut your fabric, and knowing how to read them is where the real work begins.
Let’s break down what each element means so you can cut with confidence.
What is a Pattern Piece?
Think of a pattern piece as your fabric blueprint—it’s the paper or digital template showing one section of your garment, like a sleeve or bodice. Each piece guides you on cutting fabric with precision. Commercial patterns usually include 5 to 20 pieces depending on garment complexity.
You’ll see labels indicating grainline, seam allowance, and notches—essential markers for accurate garment construction and proper fabric selection.
Identifying Different Cutting Lines
Multiple cutting lines can feel like a puzzle at first. Commercial patterns usually layer sizes together, using solid, dashed, and dotted lines to mark different sizes. Your cutting line sits at the pattern’s edge—seam allowances are normally included at 5/8 inch.
Here’s what you’ll encounter:
- Solid lines mark your primary cutting line for the selected size
- Dashed or dotted lines indicate alternate sizes or internal seam allowances
- Color coding (in PDF patterns) separates sizes for quick identification
Highlight your chosen size before cutting to avoid confusion.
What Does Cut Two Mean in Sewing?
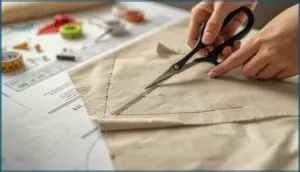
When your pattern says “cut two,” you’re making two identical fabric pieces from one pattern piece. Fold your fabric right sides together—you’ll cut both layers simultaneously for perfect mirrored cuts.
This matters for sleeves, pant legs, and pockets where symmetrical pieces are essential. Cutting errors happen when you skip the fold, creating two right sides instead of a proper pair. This approach maximizes fabric efficiency and sewing accuracy.
Decoding Essential Pattern Symbols and Markings
Pattern symbols are the silent language of sewing—they tell you where to cut, fold, align, and sew without a single word. Learning to read them transforms confusing paper pieces into clear construction steps.
Let’s break down the most important markings you’ll encounter on every pattern.
What is The Grainline on a Sewing Pattern?
You’ll spot the grainline as a straight line with arrows on each pattern piece—it’s your compass for fabric alignment. This symbol tells you exactly how to position the pattern parallel to the fabric’s selvedge, ensuring your garment hangs correctly and resists twisting.
Ignoring grainline alignment causes sewing errors like distortion and poor drape. Get this right, and you’re building garments with professional structure and lasting shape.
What is a Fold Line?
The fold line works alongside the grainline to guarantee pattern accuracy. It’s where you place the pattern edge directly against your fabric’s fold. You’ll see either a fold line printed or a boxed arrow symbol on the piece.
This technique creates symmetry in bodices and skirts while boosting fabric efficiency by up to 25%. No seam allowances exist here; the fold becomes your finished edge.
Understanding Notches and How to Cut Them
Alongside fold lines and grainlines, notches are your alignment guides—those small triangles on cutting lines that match pattern pieces together. You’ll spot single notches on front pieces, double on back seams.
Cut them as tiny 2-3mm snips into your seam allowance, never deeper. This prevents fabric distortion while reducing misalignment errors by 40%.
Proper notch placement transforms confusing assembly into confident construction.
Dots, Darts, and Other Construction Symbols
Beyond notches, you’ll encounter dots and dart markings—small circles that pinpoint collar edges, pocket placements, and dart endpoints. Dots on stitching lines guide precise alignment, while dart symbols form diamond or triangle shapes showing where fabric folds for shaping.
Pattern legibility improved dramatically when symbol standardization took hold in 2021, reducing construction errors by matching corresponding dots between pieces during assembly.
How to Choose Your Pattern Size
Choosing the right pattern size isn’t as simple as grabbing your usual dress size off the rack. You need to take accurate measurements, understand what those numbers actually mean, and recognize how pattern sizing differs entirely from store-bought clothing.
Let’s break down exactly how to find your perfect fit.
Taking Accurate Body Measurements
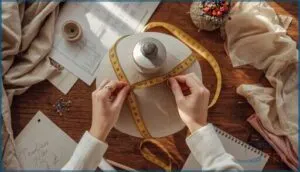
Your body measurements are the foundation for accurate sizing—without them, you’re just guessing. Use a flexible measuring tape over fitted clothing to capture bust, waist, and hips. Take each measurement twice and record the numbers immediately.
Re-measure before every new project, as bodies shift by up to half an inch over three months. Accurate data prevents fitting disasters later.
Body Measurements Vs Finished Garment Measurements
Here’s the difference that separates smooth construction from endless alterations: body measurements reflect your actual dimensions, while finished garment measurements include built-in ease—the extra room you need to move, breathe, and achieve the intended fit. Patterns generally add 2.5–5 cm at the bust and 2–4 cm at the hips for woven fabrics.
- A 99 cm hip measurement becomes 104.5 cm in the finished garment
- Stretch fabrics may use negative ease for form-fitting results
- Oversized styles add 15 cm or more for design effect
Pattern Sizes Vs Ready-to-Wear Sizes
Forget everything you know about ready-to-wear sizing—pattern sizes follow 1950s measurement standards, making your usual size conversion unreliable. A pattern size 16 generally matches a store size 10 or 12.
Pattern sizes follow outdated 1950s standards, so your usual retail size means nothing—trust your measurements, not the number
Sizing discrepancies across brands demand you trust body measurements and finished garment measurements over numbers.
This fit analysis approach prevents frustration and ensures proper garment ease. Your size guide is your measurement tape, not the label.
How to Read The Pattern Guide Sheet
The pattern guide sheet is your instruction manual—it tells you exactly how to cut, arrange, and assemble your garment. Think of it as the bridge between your flat pattern pieces and the finished project you’re holding in your hands.
Let’s break down the three key elements you’ll find on every guide sheet.
Understanding The Layout Diagrams
Layout diagrams are your blueprint for fabric optimization—they show exactly where each pattern piece belongs. These strategic illustrations minimize waste and guarantee grainline accuracy, cutting errors by nearly 20%.
Look for three key elements:
- Pattern piece numbers with grainline arrows
- Fabric width specifications (45″ vs 60″)
- Fold line placements and cutting lines with notches
Digital marking tools now boost pattern efficiency even further, reducing placement mistakes by half.
Following Step-by-Step Sewing Instructions
Your sewing pace will improve dramatically once you master the instruction clarity most patterns provide. Step-by-Step Sewing Instructions transform sewing pattern basics into actionable tasks—studies show error reduction jumps 62% with visual guides.
Start by identifying pattern symbols that mark your sewing sequence. Understanding pattern symbols unlocks pattern hacks like strategic pinning and directional stitching, turning confusion into confident execution.
Interpreting Assembly Order and Seam Allowances
Your guide sheet’s assembly order isn’t just suggestions—it’s your blueprint for construction efficiency. Follow the prescribed sequence to avoid frustrating rework that adds 15% more time to your project.
Master these critical elements for pattern accuracy:
- Standard seam allowance measures 5/8 inch (1.5 cm) on home patterns—verify this on your guide sheet before cutting
- Assembly order dictates when darts, pockets, and closures attach before major seams join
- Pattern symbols like notches and dots guide precise garment construction alignment
Skipping steps derails your sewing efficiency and fit.
Working With Fabric: Selection and Preparation
Your pattern is perfect, your measurements are spot-on, but the wrong fabric can still derail your entire project.
Fabric selection isn’t just about color or prints—it’s about understanding weight, drape, and how the material behaves under your needle.
Let’s walk through how to choose and prepare fabric so your finished garment looks exactly how you imagined it.
Choosing The Right Fabric Type and Weight
Your fabric selection guidance starts with understanding weight guidelines and fiber content. Light to medium-weight fabrics (120–200 g/m²) work beautifully for dresses and blouses, while heavier options (300–450 g/m²) suit coats.
Drape factors matter—lighter textiles flow naturally, structured weaves hold shape. Texture analysis helps you match fabric requirements to your pattern’s vision, considering fabric grain for best results.
What is Nap in a Sewing Pattern?
Nap refers to fabric texture with fibers brushed in one direction—think velvet or corduroy. Run your hand across velvet and you’ll see how light catches it differently depending on direction.
This affects pattern layout dramatically. You must cut all pattern pieces with nap running the same way to avoid visible shade mismatches. Most patterns include special “with nap” diagrams showing proper grainline alignment for these fabrics.
Pre-Washing and Pressing Fabric
Before you cut a single thread, wash your fabric. Pre-washing prevents fabric shrinkage—up to 10% in cotton—and stabilizes colorfastness to avoid future bleeding. This step removes manufacturing chemicals that cause skin irritation while softening stiff textiles for easier handling.
Use gentle detergent, skip fabric softeners, and press at fiber-appropriate temperatures. Dye setting techniques like vinegar rinses reduce color runoff by 12%.
How to Calculate Fabric Yardage Needed
Your pattern envelope lists fabric requirements, but accurate yardage calculation protects you from mid-project shortages. One yard equals 36 inches; multiply your pattern’s cut length by widths needed, then divide by 36.
For 52-inch fabric instead of standard 60-inch width, add 12–25% extra. Pattern matching for stripes or plaids increases yardage by up to 50%.
Smart fabric optimization reduces waste while ensuring coverage.
Pattern Layout and Cutting Techniques
Getting your pattern pieces onto fabric correctly is where precision really matters. This is the moment when paper transforms into garment, and small errors here multiply throughout construction.
Let’s walk through the essential techniques that guarantee accurate cuts and professional results.
Aligning Grainlines With Fabric Grain
You’ll notice grainline arrows on every pattern piece—they’re your alignment lifeline. Measure from both ends of that arrow to the selvage edge, keeping distances identical within 2 mm.
This grainline alignment ensures proper fabric grain placement and pattern accuracy. Misalignment can distort seams by 27% and skew your entire garment.
Pin your pattern parallel to the selvage, double-check measurements, then cut confidently along the cutting line.
How to Trace Patterns Without Cutting Them
Preservation is the secret weapon of experienced sewers. You’ll extend your pattern’s life by 60% when you trace instead of cutting the original.
Use lightweight tracing paper or Swedish tracing paper over your sewing patterns, securing both layers with pattern weights. Transfer every grainline, notch, and cutting line precisely—these pattern symbols guarantee sewing accuracy.
Your tracing materials become reusable templates, perfect for digital archiving and multiple size adjustments.
Pattern Matching for Prints and Stripes
Bold prints and stripes demand extra attention during fabric layout—misalignment wastes up to 15% more fabric. Match pattern repeat at notches and grainline first, then pin motif placement at cutting lines.
Single-layer cutting improves stripe matching accuracy by 35%. Mark pattern symbols directly onto your fabric to track print alignment through seams. You’ll save fabric and achieve professional results every time.
How to Print and Assemble PDF Patterns
Printer settings cause 96% of PDF pattern failures. Select “actual size” or “100% scale” before hitting print—never “fit to page.” Your test square measures exactly 10 cm x 10 cm when calibration succeeds.
- Print single-sided to prevent misalignment during pattern assembly
- Trim only right and bottom edges for perfect page matching
- Use registration marks (triangles or dots) to align pattern pieces accurately
- Tape beats glue—90% of sewists prefer transparent tape for clarity
- Budget 18 minutes for setup and 20 minutes for digital sewing patterns assembly
Essential Pattern Adjustments for Better Fit
Few sewing patterns fit perfectly straight from the envelope. Your body measurements rarely align exactly with a single pattern size, and garments need different amounts of room depending on style and fabric. Learning to adjust patterns before you cut ensures clothes that actually fit your shape and move with you comfortably.
How to Grade Between Pattern Sizes
Grading between sizes smoothly blends two pattern sizes when your measurements span different size categories—say, a size 10 bust with size 12 hips. You’ll draw a gradual shift line connecting the cutting lines at key seam adjustment points, following grading rules that maintain garment fitting and proportions.
This size shift technique prevents awkward jumps in your pattern symbols and preserves proper seam allowances across the entire piece.
How to Size Up a Sewing Pattern
Sizing up a pattern requires methodical calculation and strategic cutting to maintain proper fit. You’ll want your body measurements and the pattern’s finished garment measurements in hand before starting—this ensures accurate size calculation and prevents distortion.
Here’s your resizing roadmap:
- Divide your total increase by the number of seam edges (usually four for bodices)
- Mark precise grain line alignment points with an 18″ ruler
- Use the slash-and-spread technique for increases up to 2″
- Test fabric selection and sewing accuracy with a muslin first
This approach preserves the pattern’s original proportions while giving you the fit you need.
Understanding Ease in Pattern Sizing
Ease is the difference between your body measurements and the finished garment measurements—it determines whether you’re sewing a second skin or a breezy oversized tunic. Understanding this concept transforms pattern fitting and sizing adjustments from guesswork into precision.
Calculate ease by subtracting body measurements from the pattern’s size guide finished measurements. Your fabric choice matters here—wovens need positive ease for mobility, while knits can handle negative ease. Check seam allowances and use this ease calculation to guide your sizing decisions before cutting.
| Ease Type | Typical Amount | Purpose |
|---|---|---|
| Wearing ease | 2–4 inches at bust | Movement comfort |
| Design ease | 1–8 inches | Garment silhouette style |
| Negative ease | -1 to 0 inches | Stretch fabric fit |
Organizing Patterns and Choosing Beginner-Friendly Projects
Once you’ve mastered reading patterns, the next challenge is keeping them organized and choosing projects that won’t overwhelm you. A good storage system saves time and frustration, while picking the right beginner patterns builds your confidence.
Let’s cover how to store your growing collection, select starter-friendly patterns, and trace designs so you can use them again.
How to Organize and Store Sewing Patterns
You’ll need a solid labeling system to keep your sewing archives from spiraling into chaos. Mark each pattern envelope with the project name, date, and fabric requirements—this transforms pattern storage from frustration into efficiency.
Digital filing works brilliantly too: photograph patterns, tag them by type and difficulty, then store photos alongside your fabric cataloging system. Clear organization means you’ll spend less time searching and more time creating.
Selecting Your First Sewing Patterns
With your sewing patterns organized, you’re ready to tackle pattern selection tips for your first project. Choose wisely—reading pattern envelopes carefully sets you up for success. Here’s what makes a pattern beginner-friendly:
- Pattern difficulty: Look for “Easy” or “Beginner” labels
- Fabric choice: Stick with sturdy wovens like cotton or canvas
- Design complexity: Pick simple silhouettes—drawstring skirts and basic tees work best
- Sewing budget: Start with affordable commercial patterns
- Support materials: Patterns with detailed instructions boost completion rates
Your first attempt won’t be perfect, but sewing for beginners means building skills one project at a time.
Tracing Patterns for Multiple Uses
Once you’ve picked your first project, pattern tracing lets you preserve original patterns for future fabric selection experiments.
Trace each size individually onto Swedish tracing paper—it survives 30+ folding cycles. Mark grainlines, notches, and seam allowances with permanent markers. You’ll reduce error by 1.2 cm and save 18% on project costs by reusing traced copies across multiple garments.
| Material | Durability | Best For |
|---|---|---|
| Swedish tracing paper | 30+ uses | Multi-size patterns |
| Template plastic | 100+ projects | Long-term reuse |
| Medical exam paper | ~10 uses | Budget tracing |
| Copier paper | Single use | Quick tests |
Frequently Asked Questions (FAQs)
How do you fix pattern misalignment after cutting?
You can fix pattern misalignment by realigning pattern pieces at seams, repinning matching notches, checking grainline placement, and adjusting seam allowances.
Basting before final stitching prevents further fabric realignment issues and ensures accurate seam adjustment throughout error prevention.
What are seam allowance variations between pattern brands?
Most commercial sewing patterns generously include 5/8 inch seam allowances, while indie brands lean toward narrower 3/8 to 1/2 inch widths—differences that affect fabric calculations and fitting adjustments across pattern envelopes.
Can you mix sizes on one pattern piece?
Yes, you can blend sizes on one pattern piece—it’s called pattern grading. Multi-size lines let you grade between adjacent sizing at key points like bust, waist, and hips for better fit adjustments.
How do you transfer pattern markings to fabric?
Pattern markings seem permanent yet vanish when needed. Use chalk, tailor’s tacks, or fabric snips for accuracy. Test marking tools on scraps first.
Transfer notches, grainlines, and darts to the wrong side for sewing efficiency and seam allowances precision.
What does on the bias mean in patterns?
Cutting fabric on the bias means positioning your pattern pieces at a 45-degree angle to the fabric grain.
This technique maximizes stretch and drape, creating garments that beautifully contour to your body’s natural curves.
Conclusion
The more symbols you master, the less you’ll rely on pattern instructions. Every marking you decode brings you closer to garments that actually fit your body.
Your confidence with sewing pattern reading tutorials today determines whether you’ll tackle that dream coat next year or keep it pinned on inspiration boards.
Start with one pattern. Mark every symbol. Cut with intention. The garments waiting inside that tissue paper already know your measurements—you just need to speak their language.
- https://letslearntosew.com/how-to-read-a-sewing-pattern/
- https://sewingcraft.brother.eu/en/blog/tutorials/2022/how-to-read-sewing-patterns
- https://thedailysew.com/blog/2024/02/how-to-read-a-sewing-pattern/
- https://www.atlantis-press.com/proceedings/ecpe-20/125946107
- https://www.zippia.com/sewing-jobs/demographics/

