This site is supported by our readers. We may earn a commission, at no cost to you, if you purchase through links.

Start by matching your project’s complexity to your skill level – no one wants their dream dress turning into a hot mess.
Set up your space with proper lighting and a sturdy table (your dining room makeshift setup won’t cut it forever).
Choose fabrics that match your pattern’s needs, and don’t forget to calculate extra for those "just in case" moments.
Whether you’re crafting clothing, accessories, or home decor, success lies in the details – from mastering basic stitches to understanding fabric behavior.
Table Of Contents
Key Takeaways
- You’ll maximize your sewing success by carefully matching project complexity to your skill level – start with simple projects like scrunchies before attempting intricate garments
- You’ll need to establish a proper workspace with adequate lighting (5000K-6000K), a sturdy dedicated sewing table, and a designated pressing area before starting any project
- You’ll save time and frustration by gathering all materials upfront – calculate fabric quantities with 15% extra for mistakes, choose appropriate notions, and ensure your thread matches perfectly
- You’ll benefit from maintaining a consistent pace and documenting project details – schedule regular breaks every 45-60 minutes, track modifications in a sewing planner, and keep detailed notes for future reference
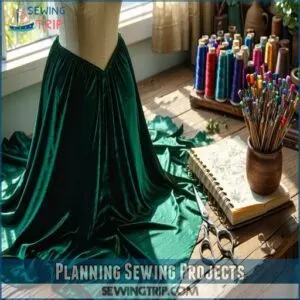
Planning Sewing Projects
Before you even thread your needle, you’ll want to map out your sewing journey.
This planning stage sets you up for sewing success, so let’s make it fun!
Define Project Specifics
Start your sewing project planning with clarity.
Define your project goals—are you making clothing, accessories, or decor?
Know your limits: match complexity to skills.
Nail down measurements, then consider fabric types and sewing tools needed.
For beginners, checking free patterns can be incredibly helpful.
Don’t forget budget planning!
A solid sew project plan saves time and headaches, making sewing project preparation a breeze.
Save creativity for stitches, not panic!
Select Patterns
Once you’ve nailed down your sew project plan, it’s time for pattern selection.
Think about sewing patterns that match your skill level and sewing style. Go for designs with clear instructions or customization options.
Considering the right fabric guide is essential for a successful project. Whether it’s mastering garment fit or experimenting with bold design elements, the right sewing project planning can turn simple pattern drafting into something truly magical.
Assess Sewing Skills
Before you begin any project, be honest about your sewing skills. Are you ready for intricate patterns or feeling more beginner-friendly?
Use this quick checklist:
- Tackle projects matching your Skill Level Assessment.
- Test your Stitch Mastery on scrap fabric.
- Brush up on Thread Control techniques.
- Study Fabric Knowledge—it’s essential.
- Embrace small Sewing Challenges to grow.
Preparing Materials
Gathering your materials is like packing for a road trip—you want everything ready before the adventure starts.
From fabric to zippers, getting it all together now saves you headaches later!
Choose Fabric
Fabric selection isn’t just picking something pretty—it’s nailing the soul of your project.
Think fabric types: soft cotton for ease or silks for drama.
Texture analysis keeps it comfy, while weight consideration guarantees flow.
Drape importance? Paramount!
To make an informed decision, consider consulting a fabric guide for your specific needs.
Bold colors or muted tones, weigh your vibe.
Master fabric finesse to avoid turning your dream dress into a “what happened” moment.
Calculate Quantities
Once you’ve got the perfect fabric picked, it’s time for quantity measurement.
Fabric estimation isn’t scary—it’s just a little textile math.
Use a measurement guide or sewing planner to calculate yardage based on your pattern, and consider utilizing sewing tools to simplify the process.
Don’t overlook extras like seam allowances or gathering.
Careful material calculation keeps surprises away, saving both fabric and frustration in your sewing project planning.
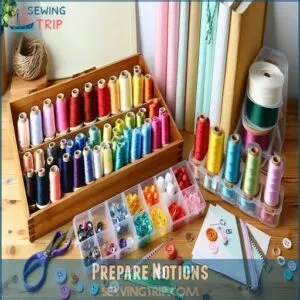
Prepare Notions
Notion selection can feel like picking toppings for a pizza—so many choices.
Stock up on thread storage solutions, fabric markers, zippers, buttons, and interfacing materials.
Match thread choices to your fabric, and don’t skimp on sewing supplies like pins or measuring tape.
Having a variety of sewing notions on hand can greatly simplify the preparation process.
Trust me, organized notions save time, and having the right sewing materials avoids last-minute panic runs to the store.
Setting Up Space
Creating the perfect sewing space doesn’t have to be complicated—it’s all about comfort and functionality.
With good lighting, a sturdy table, and a little creativity, you’ll feel like a sewing pro in no time.
Arrange Lighting
A well-lit sewing space is everything.
Natural light’s great, but good task lighting saves the day (and your eyesight).
Choose lamps with adjustable brightness and the right color temperature (5000K-6000K works wonders).
Smart lamp placement cuts shadows, making precision a breeze, and clip-on LED lights are perfect for extra visibility.
Great lighting equals a happier, more productive sewing studio setup!
Establish Sewing Table
You’ve got the lighting set—now let’s tackle the sewing table.
Pick a sturdy surface that’s big enough to spread out fabric and follow sewing instructions comfortably.
Bonus points if it has built-in storage solutions for project organization.
Prioritize table ergonomics to keep your back happy and workspace optimization easy.
Pair it with a comfy chair, and you’re golden.
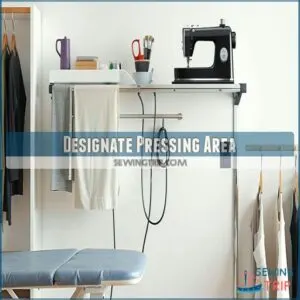
Designate Pressing Area
Now that your sewing table’s set, let’s get your pressing area sorted.
Position your ironing board and steam station near electrical outlets, but keep them away from your fabric storage to prevent moisture damage.
Smart pressing tools and fabric refreshers should be within arm’s reach.
For tight spaces, a wall-mounted ironing board saves precious floor space in your sewing studio organization setup.
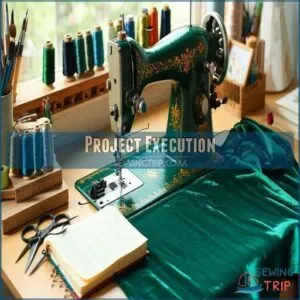
Project Execution
You’re about to turn your sewing dreams into reality, and trust me, this is where the real fun begins.
Just like a chef needs their mise en place before cooking up a storm, you’ll want to set yourself up for success with proper machine storage, a steady pace, and regular breaks to keep your creative juices flowing.
Store Machines Safely
Fresh from organizing your sewing space, it’s time for smart machine storage tips.
Keep your trusty machine in its original case or wrap it with protective sheets to guard against dust.
Before storing, always clean the machine thoroughly and unplug it.
Consider using sewing machine cases for added protection.
Store in a lockable cabinet away from hazardous substances, and remember to keep the presser foot down for extra stability.
Maintain Slow Speed
With your machine safely stored, let’s talk speed control – your secret weapon for error reduction.
Think of precision sewing like learning to drive: you wouldn’t floor it on your first lesson!
Keep your sewing project planning on track by maintaining a steady, controlled pace.
Your sewing planner might say "finish by Friday," but rushing leads to wonky stitches and frustration.
Slow stitching is your friend here.
Take Breaks
When your eyes start to blur from following those seam lines, it’s time to practice some self-care.
Schedule regular breaks every 45-60 minutes during your sewing project planning to prevent fatigue and boost your mental health.
Stand up, stretch those shoulders, or flip through your sewing diary for motivation.
Physical rest isn’t just nice—it’s essential for stress relief and keeping your creative flow going.
Sewing Techniques
You’ll love mastering essential sewing techniques like English paper piecing and applique that’ll transform your projects from homemade to handcrafted.
Whether you’re creating intricate quilted designs or adding decorative touches to clothing, these time-tested methods will help you create pieces that look professionally made, utilizing skills like applique.
English Paper Piecing
Now that you’ve got your workspace set up, let’s explore English paper piecing – your secret weapon for stunning geometric designs.
This classic technique transforms fabric scraps into mesmerizing hexagons and intricate patterns through precise hand-stitching.
You’ll need paper templates, fabric choices that complement each other, and sharp fabric scissors.
The beauty of this sewing project planning method lies in its portability – perfect for crafting anywhere!
Applique Techniques
Moving from paper piecing to applique opens up endless creative possibilities.
Fabric cutting takes center stage as you transform simple shapes into stunning border designs.
You’ll get the best results by mastering these key elements:
- Choose the right needle choices and stitch lengths for your fabric weight
- Match thread colors perfectly to your applique pieces or go bold with contrasts
- Play with patchwork techniques by layering different fabrics and textures
Want to level up your embroidery techniques? Let’s start with applique – it’s like painting with fabric!
Quilting Methods
While applique adds beautiful details to your projects, let’s explore quilting.
Start with basic Block Patterns and work your way up to intricate patchwork designs.
You’ll need proper Quilting Tools for precise Fabric Cutting and consistent Stitch Variations. Master straight-line quilting before tackling curves, and don’t forget those Binding Techniques – they’re what gives your quilt that polished edge everyone loves.
Choosing Patterns
You’ll feel like a kid in a candy store when you’re picking out your first sewing pattern, with endless styles from cozy loungewear to show-stopping dresses at your fingertips.
Whether you’re drawn to vintage-inspired designs or modern classics, you’ll find the perfect pattern that matches both your skill level and personal style.
Versatile Dress Patterns
The latest dress patterns for 2025 showcase sculptural silhouettes and bold pattern mixing.
Your garment making journey starts with versatile dress patterns that incorporate statement sheer elements and flirty flounce details.
For beginner sewing projects, try the Majorelle dress pattern with its raglan sleeves.
Mix seasonal trends with classic dress silhouettes by choosing fabric choices that complement your body type and style preferences, incorporating bold pattern mixing.
Figure-Hugging Styles
Mastering figure-hugging styles starts with careful body type analysis and smart fabric choices.
You’ll want stretchy materials that hug curves without feeling restrictive.
Focus on sewing techniques for smooth seams along bustlines and hips – these details make or break your garment’s fit.
When choosing sewing patterns, look for designs with strategic darts and princess seams that create flattering silhouettes while allowing comfortable movement.
Breezy Beach Numbers
Creating beachy keen dresses lets you embrace coastal style inspiration while staying cool.
Pick lightweight fabrics like cotton voile or linen for your warm weather garments – they’re perfect for those breezy silhouettes.
When sewing project planning, focus on simple patterns with flowing lines and minimal fitted sections.
Add seaside sewing tips to your sewing planner: French seams prevent fraying, and wider seam allowances let you make future adjustments.
Time Management
You’ll find that managing your sewing time isn’t about rushing through projects like a caffeinated squirrel, but rather about breaking them into bite-sized chunks you can actually finish.
Whether you’re stitching up a quick pencil case or tackling that dreamy wedding dress, we’ll show you how to create a realistic schedule that won’t leave you feeling overwhelmed.
Plan Work Sessions
Now that you’ve picked your patterns, let’s talk about making the most of your sewing time.
Smart session scheduling is your best friend here. Break down your sewing project planning into bite-sized time blocks – maybe 30 minutes for cutting fabric one day, an hour for seams the next.
Your sewing planner becomes your roadmap. Try task prioritization to keep your workflow smooth and your workspace organized.
Evaluate Project Completion
After putting in those focused work sessions, you’ll want to check if your project hits the mark.
Start your project review by examining seams, hems, and overall fit.
Run through a completion checklist – how’s the stitching quality? Does everything line up perfectly?
This outcome analysis helps you spot any fixes needed before you call your sewing project planning complete.
Document Details
Why let all those brilliant project tweaks slip through your fingers?
Keep a sewing project planner handy to document every lightbulb moment. Effective sewing supply organization is also essential for streamlining your workflow.
Track your fabric records, measurement charts, and progress tracking in a digital planner – it’ll be your best friend when you’re tackling similar projects later. Plus, jotting down your sewing budget and project notes helps you spot patterns in what works for you.
Fabric Selection
You’ll be amazed at how the right fabric can transform your sewing project from good to absolutely stunning, just like picking the perfect outfit for a special occasion.
Whether you’re crafting a cozy winter sweater or a breezy summer dress, you’ll learn how to match your fabric to your pattern’s needs and create something that fits and feels exactly right, with the perfect outfit.
Choose Appropriate Fabrics
Selecting the right fabric can make or break your sewing project.
Start with Fabric Types that match your skill level – cotton and polyester are perfect for beginners, while silk and linen require more expertise.
When building your fabric stash, focus on Thread Counts and Weave Patterns that suit your project’s function.
Consider Fiber Blends and Texture Options for the perfect drape and durability.
Consider Pattern Recommendations
Your fabric choice sets the stage, but in 2025, pattern recommendations have evolved to match modern trends.
The latest sewing patterns come with detailed fabric guides that factor in drape, texture, and seasonal wearability.
When exploring style options for your sewing project planning, match your fabric’s properties to those suggested on your pattern – it’s like following a recipe for the perfect garment.
Calculate Material Quantities
Now that you’ve picked your pattern recommendations, let’s get your fabric estimation right.
The right material measurement can save you from those dreaded mid-project store runs. Understanding fabric selection is important for choosing the right materials for your project.
Here’s your fail-proof sewing math guide:
- Measure pattern pieces and add 15% for mistakes
- Factor in nap direction for printed fabrics
- Include extra for pattern matching
- Account for shrinkage during pre-washing
- Double-check your sewing project planner’s requirements
Safety Guidelines
You’ll want to keep your fingers intact and your machine running smoothly while you’re creating your masterpiece.
Just like you wouldn’t juggle chainsaws, you shouldn’t take shortcuts with sewing safety – trust me, your future self (and fingers) will thank you for following these guidelines.
Avoid Sewing Over Pins
Just as fabric selection sets the foundation for success, pin safety tips can make or break your sewing process.
Let’s explore smart ways to prevent needle breakage and protect your machine.
The following table outlines key safety aspects and prevention tips:
| Safety Aspect | What Happens | Prevention Tips |
|---|---|---|
| Thread Tension | Pins damage tension discs | Remove pins before reaching presser foot |
| Needle Health | Sudden breaks and bends | Sew around pins, not over them |
| Machine Parts | Internal mechanism damage | Pull pins out as you approach them |
| Sewing Accuracy | Skipped or uneven stitches | Use fewer pins, placed strategically |
By following these prevention tips, you can ensure a smoother sewing experience and protect your machine from potential damage.
Maintain Machine Regularly
While avoiding pins keeps your machine running smoothly, regular sewing machine maintenance is your ticket to lasting performance.
Schedule a thorough machine cleaning and oil check every 10-15 hours of sewing time.
Wipe down your sewing equipment daily, focusing on thread management and bobbin maintenance. For heavy sewers, set up a weekly cleaning routine to keep your sewing tools in top shape.
Use Appropriate Needles
Keeping your machine in top shape is great, but your needle selection is the real MVP of any sewing project.
Matching your sewing needles to your fabric’s weight is like finding the perfect dance partner – it just works.
For delicate silks, grab a size 60/8, while denim needs a sturdy 100/16, and this simple step boosts your sewing efficiency and keeps your machine purring along smoothly.
Frequently Asked Questions (FAQs)
How to plan your sewing projects?
Start by measuring carefully and selecting your pattern.
Gather all materials, choose quality fabric, and organize your workspace.
Take notes on adjustments needed, and don’t forget to schedule enough time for completion.
How to make a project plan in dressmaking?
Take your measurements, select a pattern and fabric, gather all supplies.
Mark key steps in a calendar, and create a checklist covering cutting, fitting, and construction phases.
You’ll stay organized throughout the process.
What should my first sewing project be?
A simple scrunchie or sleep mask lets you build confidence quickly.
You’ll learn basic stitches and machine control without feeling overwhelmed.
These beginner-friendly projects don’t need much fabric or advanced skills.
How to charge for sewing projects?
Ever wondered why some sewists struggle with pricing?
Calculate your hourly rate ($15-30), add material costs plus 20%, and include consultation fees.
Don’t forget to factor in your expertise and project complexity.
How long should I expect my sewing project to take?
Project timing varies based on your skill level and complexity – a simple mask might take 30 minutes, while a custom-made dress could need 20+ hours.
Plan extra time for fitting adjustments and detailed work.
Which sewing projects are profitable for selling online?
Think you’ll strike gold with basic totes?
Actually, trendsetting accessories and customized clothing bring the real profits.
You’ll win big with personalized phone cases, statement jewelry, stylish scrunchies, and upcycled vintage fashion pieces.
How do you adjust patterns for different body shapes?
Take your key measurements first, then compare them to the pattern’s size chart.
You’ll need to grade between sizes, add length or width, and make a muslin test garment for perfect fit.
When should I hire a professional instead of DIY?
Just as a masterpiece isn’t painted in a hurry, consider hiring pros for complex tailoring, intricate designs, or when precision matters most.
You’ll save time and headaches with formal wear, wedding attire, or heirloom pieces.
Conclusion
Ready to turn your sewing dreams into reality?
With these sewing project planning ideas, you’re equipped to tackle any project that catches your eye.
Remember, success isn’t just about perfect stitches – it’s about smart preparation, the right setup, and knowing your limits.
You’ve got all the tools to create something amazing, from choosing the perfect pattern to setting up your ideal workspace.
Now grab those scissors, fire up that machine, and let your creativity soar.
- https://elizabethmadethis.com/how-to-start-sewing-with-a-plan-hint-its-never-too-late/
- https://krystaldouglas.com/how-to-plan-your-sewing-project
- https://sewing.com/basic-sewing-skills/
- https://www.seamwork.com/articles/the-8-most-important-sewing-skills-to-learn
- https://sewcanshe.com/free-sewing-patterns-for-an-absolute-beginner/

