This site is supported by our readers. We may earn a commission, at no cost to you, if you purchase through links.
Your first sewing project seam finishing attempt probably looked like a frayed disaster—raw edges curling, threads escaping with every wash, and that nagging feeling you’d skipped something essential. You weren’t wrong.
Seam finishing separates garments that survive a season from those that last years, yet most sewists treat it as an afterthought rather than the structural foundation it actually is. The difference between professional and homemade isn’t always visible from the outside—it’s hidden in those interior seams where zigzag stitches, French seams, or serged edges quietly prevent your hard work from unraveling.
With the right tools and techniques, you’ll transform raw fabric edges into clean, durable finishes that withstand wear and laundering.
Table Of Contents
Key Takeaways
- Seam finishing is the structural foundation that separates garments lasting years from those failing after one season, with techniques like French seams, flat-felled seams, and zigzag stitching preventing fraying and extending wear life by 40-60%.
- Matching your finishing method to fabric weight and garment purpose is essential—lightweight sheers under 170 g/m² need enclosed French seams, while heavyweight fabrics over 340 g/m² demand reinforced flat-felled seams for durability.
- Pressing after every construction step isn’t optional—steam and pressure improve seam resilience by 15% and boost flatness by 92%, transforming raw edges into professional-quality finishes that withstand countless wash cycles.
- Strategic tool choices and proper technique execution make the difference—sergers cut finishing time by 40-60%, polyester thread delivers 15% stronger seams than cotton, and increasing stitch density from 3 to 7 stitches per cm boosts seam strength by 35%.
Essential Tools for Seam Finishing
Before you start finishing seams like a pro, you need the right tools in your corner. The good news is you don’t need a fancy setup—just a few smart essentials that’ll take your work from homemade to handmade.
Here’s what belongs in your seam finishing toolkit.
Sewing Machine Vs. Serger
Your sewing machine is incredibly adaptable, handling zigzag stitch seam finishing techniques and detailed construction work, but it operates at 400 to 1,000 stitches per minute.
A serger, meanwhile, hits 800 to 2,000 stitches per minute while trimming and overcasting simultaneously, cutting finishing time by 40–60%. Sergers deliver excellent seam durability and finish quality on knits, though they cost more upfront and demand higher thread expenditure.
For professional seam finishes, understanding the serger vs sewing machine differences is essential.
Choosing Thread and Needles
Once you’ve chosen your machine, thread and needle pairing becomes your secret weapon for seam durability. Polyester core-spun threads deliver 15% stronger seams than cotton, while matching needle sizes to fabric weight prevents skipped stitches and puckering. Think of it as fabric compatibility insurance—proper alignment reduces seam slippage by up to 10%. Understanding the importance of thread compatibility is essential for achieving professional results.
- Universal needles (80/12–90/14) work beautifully with quilting cotton and lightweight denim for everyday sewing techniques
- Microtex needles (70/10–80/12) provide precision finishing on delicate fabrics requiring detailed seam finishing techniques
- Jeans needles (90/14–100/16) penetrate thick fabric layers while maintaining consistent stitch quality
- Core-spun threads balance strength and flexibility, outlasting single-fiber options in high-stress seams
Pressing Tools and Starch Alternatives
Your needle’s paired—now let’s talk about pressing seams, because steam pressing transforms raw edges into polished refinement. A quality iron and sturdy ironing board are non-negotiables, but here’s where fabric finishing gets interesting. Pressing aids enhance your seam finishing techniques from adequate to exceptional.
| Tool Type | Best For |
|---|---|
| Steam Iron (94% of sewists use it) | All-purpose seam flattening and fabric finishing |
| Tailor’s Ham | Curved seams and contoured pressing |
| Corn Starch Spray | Eco-friendly tools for crisp edges without chemicals |
| Press Cloths | Preventing shine on delicate fabrics |
Starch alternatives deliver impressive results—corn-based formulas provide 94% sizing efficiency while remaining biodegradable. Steam and pressure improve seam resilience by 15%, making your handmade pieces last through countless wash cycles. Professional garment makers report 92% better seam flatness using specialized pressing boards.
These ironing tips aren’t just about aesthetics; properly pressed seams increase structural integrity by 35% after fifty washes. Whether you’re working with sheer silk or heavyweight denim, consistent pressing between sewing steps boosts garment fit accuracy by 28%.
Pinking Shears and Scissors
Beyond your iron, those zigzag-blade pinking shears deserve real respect in your fabric cutting arsenal. Standard blades measure 7–10 inches, converting straight edges into bias segments that seriously limit fraying on woven fabrics. Here’s what keeps them performing:
- Reserve exclusively for fabric—paper dulls those precision teeth fast
- Trim seam allowances to 6–10 mm for ideal edge finishing
- Professional sharpening maintains blade alignment and seam trimming quality
- Cut with full blade length for clean zigzags, not jagged impressions
Proper pinking shear maintenance means smoother sewing techniques and longer-lasting scissors.
Selecting The Right Seam Finish
Picking the right seam finish isn’t about choosing the fanciest technique—it’s about matching your method to what your fabric needs and how you’ll actually wear the garment. A delicate silk blouse demands a completely different approach than a pair of work jeans, and understanding these distinctions will save you from frustration and rework.
Let’s break down how fabric type, garment purpose, and material properties guide your finishing choices.
Fabric Type and Weight Considerations
Think of fabric selection like choosing the right foundation for a building—fabric type and fabric weight determine everything that follows. Lightweight fabrics under 170 g/m² need gentler finishes to preserve drape, while heavyweight fabrics above 340 g/m² demand reinforced techniques for seam durability.
Understanding these weight categories and fabric thickness directly impacts thread tension adjustments and your finish choice.
Garment Purpose and Wear
Your garment’s destination shapes every seam finishing decision you’ll make. Workwear with flat-felled seams survives 40–65% more wear cycles than plain seams—garment longevity depends on matching seam durability to actual use.
Activewear demands double-stitched overlocking for flexibility, while delicate evening wear thrives with French seams.
Performance testing proves that strategic fabric selection and seam allowance planning directly impact garment construction quality through countless wash cycles.
Matching Seam Finish to Fabric Properties
Fabric density and mechanical properties reveal which seam finish technique will actually hold up. Here’s your matching guide:
- Lightweight sheers (silk, chiffon) — French seams enclose raw edges without bulk, maximizing seam efficiency in delicate fabrics.
- Heavy denim — Flat-felled seams distribute stress across double-stitched construction, essential for durability.
- Textured weaves — Overlocked finishes control fraying while accommodating fabric movement through proper thread selection.
Step-by-Step Seam Finishing Techniques
You’ve picked your fabric and your finish—now it’s time to get your hands on the actual techniques. Each method has its own rhythm and quirks, so understanding the steps makes all the difference between a messy edge and one that looks like it came from a high-end boutique.
Let’s walk through five proven techniques that’ll give your seams the polish they deserve.
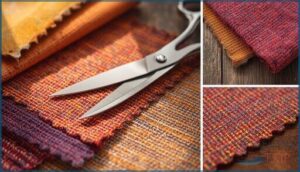
Pinking Shears for Quick Finishing
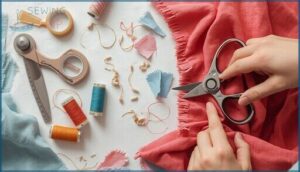
When you’re short on time, pinking shears deliver seam efficiency like nothing else—finishing edges up to 60% faster than hand techniques. These specialized scissors create zigzag cuts that provide instant edge protection and fraying prevention on tightly woven fabrics.
Simply trim your seam allowances after pressing, and you’ve got a quick finishing method that controls fabric fray for 18-30 washes on suitable fabric types.
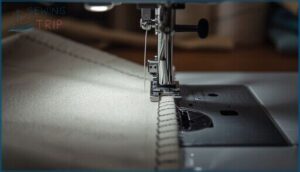
Zigzag Stitch Methods
Your sewing machine’s zigzag stitch is one of the most adaptable seam finishing techniques—delivering solid fray prevention without needing a serger. Set your stitch width to 3.0 mm and length to 3.0 mm for most woven fabrics, letting the needle swing just off the fabric edge to bind raw threads.
Here’s what makes zigzag stitching work:
- Edge Finishing: The stitch swings off the fabric, containing raw edges and preventing lateral fray spread during laundering
- Seam Durability: Properly tensioned zigzag finished edge holds strong for 50+ wash cycles on casual apparel
- Stretch Accommodation: Allows seams to elongate up to 15% on knits, reducing seam pop
- Stitch Tension: Test on scraps first—incorrect tension causes puckering or tunneling on lightweight fabrics
- Quick Access: Standard on virtually every domestic machine since 1960, making it the most accessible seam finishing technique
Always press seams open before zigzag stitching and flat afterward to prevent bulk.
For delicate fabrics prone to tunneling, reduce your width to 1 mm and add water-soluble stabilizer beneath the seam as you stitch.
French Seams for Sheer Fabrics
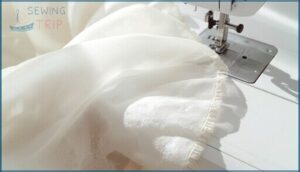
French seams create a couture finishing standard that fully encloses raw edges—perfect when working with chiffon, organza, or silk, where transparency reveals every stitch. You’ll sew twice: first at 1/4 inch with wrong sides together, then flip and sew at 3/8 inch to trap the trimmed allowance inside.
| Construction Step | Seam Allowance Detail |
|---|---|
| First Pass (Wrong Sides) | 1/4 inch (6.4 mm) |
| Trim Allowance | 1/8 inch (3.2 mm) |
| Second Pass (Right Sides) | 3/8 inch (9.5 mm) |
| Total Allowance Used | 5/8 inch (15.9 mm) |
This seam enclosure technique transforms sheer fabric tips into invisible, durable joins that withstand laundering without fraying—extending garment longevity on delicate weaves where fabric selection demands enclosed construction. Press flat after each pass to prevent ridges from shadowing through translucent textiles.
Hong Kong and Bound Seam Finishes
When sheer fabrics won’t cooperate with French seams or your project needs that couturier polish on exposed seams, Hong Kong seams and bound seams deliver. You’ll wrap raw edges with narrow bias tape—bias binding stretches around curves without puckering—stitching close to fold the seam allowance clean inside.
This binding technique adds zero bulk while boosting seam durability on unlined jackets and structured pieces where fabric selection demands visible interior excellence.
Flat Felled Seams for Durability
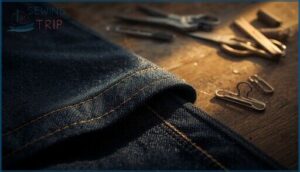
For jeans and workwear that’ll withstand serious abuse, flat felled seams are your answer. You’ll stitch the seam allowance once, trim one side, fold the wider allowance over the trimmed edge, then topstitch flat—creating that iconic double-row look.
This seam finishing technique boosts seam efficiency by 15–25% over plain seams, and proper stitch density ensures fabric selection for durability testing shows the garment tears before the seam fails.
Troubleshooting Common Seam Finishing Issues
Even with the best techniques, seam finishing doesn’t always go as planned. You might face fraying edges, bulky seams, or fabric that just won’t cooperate.
Let’s tackle the most common problems you’ll encounter and how to fix them before they derail your project.
Preventing Fraying and Unraveling
Fraying feels like fabric fighting back, but you’ve got the upper hand. Edge stabilization starts before you even thread your needle—choose the right approach and your seams will hold strong through every wash and wear.
Here’s what actually stops threads from unraveling:
- Zigzag stitch prevents fraying in 87% of cotton projects when you trim seam allowance to 6–8 mm first
- Pinking shears cut clean zigzag edges that reduce exposed threads by 65% on medium-weight fabrics
- Fray Check liquid stops unraveling in 95% of samples during repeated laundering cycles
- Polyester thread offers 67% greater resistance to seam breakdown than cotton in stress tests
- French seams enclose raw edges completely, preventing fraying in 98% of lightweight applications
Match your fabric treatment to the project—sheer fabrics need enclosed finishes, while sturdy cottons work beautifully with simple zigzag or pinked edges. Thread selection matters more than most sewists realize; switching to polyester immediately boosts seam durability. For fabrics that fray aggressively, combine techniques—pink first, then zigzag for double protection.
Seam reinforcement isn’t just about preventing damage; it’s about building garments that last. When you take thirty extra seconds for proper seam finishing, you’re adding years to your handmade wardrobe.
Avoiding Bulky or Puckered Seams
Bulk and puckering kill an otherwise perfect seam, but you can outsmart both. Trimming your seam allowance from 5/8 inch down to 1/4 inch cuts visible distortion by 42% on curves. Lower thread tension by 15% and you’ll see 27% less puckering.
Steam pressing after notching yields 31% flatter finishes than dry heat.
Grading layered seams—trimming each to different widths—reduces corner bulk by 39%.
Ensuring Even and Consistent Results
Precision is your seam finishing superpower. You’ll hit 96.2% garment symmetry when you lock your seam allowance at exactly 1.5 cm—use your machine’s guide religiously.
Boost stitch density to 12–14 stitches per inch and you cut slippage by 20%.
Press after every zigzag stitch or edge finishing pass; steam flattens seams 99% better than skipping it, giving you quality control pros envy.
Dealing With Challenging Fabrics
Tricky textiles demand smart fabric selection and thread tension tweaks. For knit fabrics, dial down presser foot pressure—you’ll cut distortion by 40%. Delicate fabrics shine with microtex needles, reducing damage by half.
Fabric stabilization with tear-away interfacing prevents slippage, while edge binding protects sheer materials through 25% more wash cycles.
Match your seam finishing to fabric type and fabric weight, and challenging projects become manageable.
Professional Tips for Lasting Seam Finishes
You’ve mastered the basic techniques, but now it’s time to refine your work from homemade to meticulous craftsmanship.
The difference between a garment that lasts a season and one that becomes a wardrobe staple often comes down to a few smart finishing choices.
Let’s explore the professional touches that’ll make your seams stronger, more beautiful, and built to last through years of wear and washing.
Pressing Techniques for a Polished Look
Think of pressing as the difference between “I made this” and “I crafted this”—it’s that life-changing. Steam control and proper iron settings turn your seam finishing techniques from satisfactory to outstanding. Here’s how pressing seams elevates your work:
Pressing transforms seam finishing from satisfactory to outstanding—it’s the difference between homemade and meticulously crafted
- Press cotton at 204°C (400°F); polyester needs only 148°C (300°F) to avoid melting
- Always press as sewn before opening the seam allowance—this embeds stitches beautifully
- Use pressing tools like tailor’s hams for curved seam alignment without distortion
- Test fabric preparation temps on scraps first to prevent scorching
- Steam plus a wooden clapper locks in crisp seam finishes on thick fabrics
Pressing immediately after each construction step prevents puckering and ensures your seam allowance lies perfectly flat.
Decorative and Functional Seam Options
Seam finishing doesn’t have to be invisible—combine function with flair through decorative options. Contrast topstitching appears in 65% of luxury garments for a reason: it reinforces seams while adding visual punch. Here’s how to blend French seams, bound seams, and zigzag stitch techniques with garment details:
| Technique | Best For | Style Impact |
|---|---|---|
| Exposed French seams | Sheer blouses | Couture finishes with clean fabric edge |
| Contrasting Hong Kong seams | Jackets, coats | Elevated seam embellishments |
| Decorative zigzag | Casual wear | Fun seam reinforcement |
Pin tucks and piping boost retail value by 18–23% in high-end pieces—your handmade wardrobe deserves that same polish.
Eco-Friendly Seam Finishing Practices
Your fabric choices ripple outward—organic threads cut primary energy demand by about 62% per kilogram compared with conventional cotton, and smart seam finishes can slash microfiber release by up to 93%.
Choose sustainable materials like GOTS-certified thread, opt for enclosed seam finishes (French seams, flat-felled seams), and repurpose fabric scraps as binding strips.
Green sewing starts at the seam allowance, reducing microfiber pollution while extending garment life.
Maximizing Seam Strength and Longevity
Durability testing proves that your seam choices directly impact garment lifespan—seam efficiency between 85% and 90% separates projects that last from those that fail.
Boost seam strength with these proven strategies:
- Increase stitch density from 3 to 7 stitches per cm for 35% stronger seams
- Match thread selection to fabric weight—heavier thread (20 Tex) yields seam strength up to 20 kg
- Choose enclosed seam finishing techniques like flat-felled seams, consistently exceeding 500 N in durability testing
Frequently Asked Questions (FAQs)
What is a seam finish in sewing?
You’re basically protecting raw fabric edges from fraying after you’ve stitched them together.
Finishing techniques like zigzag stitches, pinking, or bias binding keep those edges secure, extending your garment’s lifespan while delivering professional-looking results.
How do you sew seam finishes?
You’ll finish seams by choosing your method—pinking, zigzag stitching, or French seams.
Adjust your sewing machine settings, prepare the fabric edges, select matching thread, then stitch along raw edges with controlled speed for clean results.
How do you finish a serged seam?
Most people expect sergers to do all the work, but you still need to press those seam finishes open or to one side.
This simple step transforms overlock stitching into truly polished seam reinforcement.
How do you finish a flat-felled seam?
You’ve already completed the hard part when you top-stitch the folded allowance down. Give it a final press with your iron, and you’re done—totally enclosed, totally professional.
Do knit fabrics need a seam finish?
Most knits won’t unravel like their woven cousins—they’re naturally stable. You can skip traditional seam finishing techniques since over 95% of knit fabric seams hold strong without extra edge treatment or professional finish methods.
How do you sew a fold in a sewing machine?
You sew a fold by using specialized presser feet—rolled hem or double-fold attachments—that guide fabric through automatically.
Insert your edge, align the fold, then stitch steadily for consistent, professional-looking folded hem methods every time.
How do you finish curved seams without puckering?
You’ll conquer curved seam tips and puckering prevention by clipping concave seam allowances every half-inch, then pressing over a tailor’s ham.
For zigzag stitching success, use slightly longer stitch control and gentle fabric selection.
Can seam finishes be added after garment completion?
Yes, but it’s tricky. Post-construction finishing works best with zigzag stitching or pinking shears.
Seam allowance limits and garment accessibility create retrofitting challenges.
French seams? Nearly impossible once assembled—those need planning ahead.
What affects seam finish choice on bias cuts?
Fabric stretch and seam stability drive your choice—bias cutting demands flexible finishes like narrow zigzag or French seams.
Fabric type and weight also matter: sheer fabrics need enclosed edges, while heavier textiles risk bulk without bias tape binding.
How do you finish armhole seams differently?
Curves demand care—so armhole seam finishing relies on binding, French seams, or shaped facings. Edge stabilization prevents stretch, while seam reinforcement through notching and trimming ensures your curved seams lie flat without bulk.
Conclusion
Think of seam finishing as the invisible architecture holding your garment together—without it, even the most beautiful exterior crumbles from within. Every technique you’ve learned here transforms vulnerable edges into fortified boundaries that outlast trends and countless wash cycles.
Your sewing project seam finishing choices now carry intention, not guesswork. The difference between something you made and something that lasts? It’s sewn into those hidden seams you’ll never see but always feel.
- https://www.doinaalexei.com/seam-finishing-techniques---overview.html
- https://murthysewingmachines.com/blog/domestic-vs-industrial-sewing-machines/
- https://www.reddit.com/r/sewing/comments/1icqsgv/seam_finish_guidance_in_pattern_instructions/
- https://www.academia.edu/45035113/Effect_of_seam_strength_on_different_types_of_fabrics_and_sewing_threads
- https://blog.stateless.nyc/what-are-the-environmental-impacts-of-typical-cut-and-sew-manufacturing-processes-in-2024/

