This site is supported by our readers. We may earn a commission, at no cost to you, if you purchase through links.
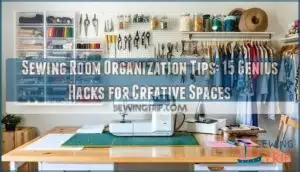
Start by creating three distinct zones: cutting, sewing, and pressing, to streamline your workflow.
Store fabrics upright in clear drawers so you can see everything at a glance, and use pegboards for scissors and tools, keeping frequently used items within arm’s reach of your machine.
Repurpose household items like mason jars for buttons and magnetic strips for pins, as vertical storage maximizes small spaces while maintaining accessibility.
The key is designating a specific home for every item and sticking to it, which enables these strategic tweaks to release productivity levels most sewists never imagine possible.
Table Of Contents
Key Takeaways
- Create three distinct zones – Set up separate areas for cutting, sewing, and pressing within steps of each other to streamline your workflow and reduce wasted motion between tasks.
- Store fabrics upright in clear containers – Use the KonMari method to fold fabrics vertically in transparent drawers or bins, sorted by color, so you’ll see everything at a glance without digging through piles.
- Use vertical storage solutions – Install pegboards for tools, magnetic strips for small metal items, and wall shelves to maximize space while keeping frequently used supplies within arm’s reach of your workspace.
- Assign a specific home for every item – Designate exact storage spots for all supplies and consistently return items after use to maintain organization and prevent clutter from accumulating.
Setting Up Sewing Room
Your sewing room’s foundation starts with three essential work surfaces: a dedicated sewing machine area, a spacious cutting table, and an accessible ironing station.
Three essential surfaces create your sewing room’s powerhouse foundation for seamless creative flow.
Position these zones within a few steps of each other to create a workflow triangle that keeps you moving efficiently through each project phase, forming a logical and efficient foundation.
Essential Work Surfaces
Your sewing room needs three essential work surfaces for peak workspace optimization. Each surface handles specific tasks while maintaining proper ergonomic design.
Smart workstation layout creates seamless task flow between cutting, sewing, and pressing activities.
Essential surfaces include:
- Cutting table – Large, flat surface at proper height for fabric preparation
- Sewing machine tables – Sturdy desk with adequate space for machine and projects
- Ironing station – Heat-resistant surface with storage for pressing tools
- Storage counter – Additional workspace for sewing desk organizers and supplies
- Assembly area – Clean surface for laying out pattern pieces and planning
Minimizing Steps Between Tasks
Your workflow optimization starts with smart space planning.
Position your cutting table, sewing machine, and iron within a few steps of each other. This productivity hack reduces wasted motion and keeps you in the creative flow.
Strategic sewing room layout transforms chaotic back-and-forth into smooth task streamlining.
| Zone | Distance | Time Saved |
|---|---|---|
| Cutting to Sewing | 2-3 steps | 30 seconds |
| Sewing to Pressing | 1-2 steps | 15 seconds |
| Pressing to Cutting | 3-4 steps | 45 seconds |
| Storage to Machine | Arm’s reach | 20 seconds |
| Thread to Scissors | Within view | 10 seconds |
Creating Designated Zones
Picture three distinct islands in your creative space.
Your cutting zone becomes command central with rulers within arm’s reach and measuring tape glued to the table surface.
Position your sewing station nearby, keeping thread, scissors, and presser feet in easy-access organizers.
Finally, establish your pressing area with iron and board ready.
This zone planning creates task flow magic, reducing movement time by 15% while boosting productivity through smart workspace layout and efficiency tips.
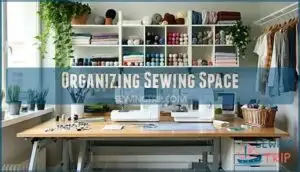
Organizing Sewing Space
Your sewing space transforms from chaotic craft corner to organized oasis when you tackle clutter with purpose.
Smart storage systems and regular maintenance keep your creative sanctuary running smoothly, so you’ll spend more time stitching and less time searching.
Prioritizing Projects
When you’re drowning in half-finished quilts and fabric dreams, project planning becomes your lifeline.
Create priority lists that rank current projects by deadlines and personal excitement levels.
Time allocation matters—dedicate specific hours to active works-in-progress rather than bouncing between fifteen different ideas.
Goal setting transforms chaos into achievable milestones, making your sewing room organization tips actually stick, and helps with time allocation.
Removing Unused Items
Your fabric collection has grown beyond your projects’ needs, creating visual chaos that slows you down.
Start your item purge by removing supplies you haven’t touched in a year—they’re taking prime real estate from active materials.
Decluttering tips include the one-year rule for fabric and notions.
This space savings approach creates a minimalist setup that supports clutterfree creativity and better storage solutions.
Maintaining Storage Systems
Testing your storage systems regularly keeps your sewing room organization running smoothly. You’ll want systems that work for your daily habits, not against them.
- Test accessibility – Can you grab supplies without moving three other containers?
- Check label clarity – Are your labeling systems still making sense months later?
- Evaluate capacity – Do your storage solutions handle your current supply volume?
Shelf management and inventory control prevent your carefully planned sewing room storage from becoming chaotic again. Maintenance tips include weekly quick tidies and monthly system reviews.
Effective storage solutions require implementing a storage maintenance routine to guarantee longevity and efficiency.
Efficient Fabric Storage
Your fabric collection deserves a storage system that keeps every piece visible and accessible for your next creative project.
Smart organization transforms your stash from a chaotic pile into an inspiring display that sparks creativity and saves precious sewing time.
Folding Fabric Upright
Standing fabric storage transforms chaotic piles into organized displays.
You’ll maximize space while protecting your textiles from wrinkles and damage.
Apply the KonMari method by folding fabric upright in drawers or fabric storage bins.
Using proper fabric storage bins can help maintain the organization of your sewing room.
| Fabric Type | Folding Technique | Storage Method | Benefits |
|---|---|---|---|
| Cotton | Tri-fold method | Standing in bins | Prevents creases |
| Quilting fabrics | Roll and stand | Fabric storage solutions | Easy color sorting |
| Knits | Gentle fold | Drawer dividers | Maintains stretch |
| Delicates | Tissue wrap fold | Individual compartments | Fabric care protection |
This folding technique keeps fabrics visible and accessible like a fabric shop display, utilizing proper storage and folding techniques to achieve easy color sorting and fabric care protection.
Using Clear Drawers
Clear drawers transform your sewing room organization by letting you see everything at a glance.
Transform chaos into creative clarity with transparent storage that shows your supplies at a glance.
These transparent storage solutions eliminate the guessing game of what’s inside each drawer. You’ll spend less time hunting for supplies and more time creating.
Stack clear containers vertically to maximize space while maintaining visibility. Label each drawer for quick identification.
This organization system keeps your fabric storage bins accessible and your sewing supply boxes perfectly organized. Effective space planning strategies are essential for a well-organized sewing room, using clear drawers and effective space planning.
Sorting Fabric by Color
Beyond typical storage methods, color-coded storage transforms your sewing space into a visual rainbow that sparks creativity.
This fabric sorting approach reduces project planning time by 40% while making fabric organization feel effortless and inspiring.
- Sort fabrics from light to dark within each color family for optical clarity
- Use clear bins with colored handles for instant hue organization identification
- Roll fabric around foam boards to create consistent color blocking displays
- Label sections by warm and cool tones for streamlined tint management
- Rotate newest fabrics to back, encouraging use of existing color inventory
By implementing these steps, you can create a well-organized sewing space that promotes effortless fabric management and sparks imagination.
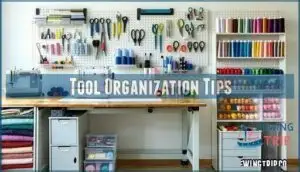
Tool Organization Tips
Your sewing tools need homes that keep them visible and within reach while you work.
Smart storage solutions like pegboards, magnetic strips, and drawer organizers transform scattered supplies into an efficient system that saves time and reduces frustration, utilizing smart storage to improve workflow.
Using Pegboards
Pegboards transform sewing room organization by maximizing vertical storage space.
Install your pegboard near work surfaces for easy tool access during projects.
Use adjustable hooks for scissors and rotary cutters, while clear bins hold small notions.
Group tools by function—cutting tools together, marking tools nearby.
This DIY pegboard solution reduces countertop clutter and keeps essentials visible.
The use of proper pegboard hooks is essential for a functional and organized workspace with proper tool access and maximizing storage.
Storing Scissors and Pens
Kitchen organizers like IKEA’s Grundtal system transform chaotic tool storage into streamlined efficiency.
Position scissor clips and pencil holders within arm’s reach of your workspace for instant access.
Desk organizers with compartments separate different pen types while storage trays keep rotary cutters secure.
This sewing room organization approach prevents hunting through drawers mid-project, keeping your creative flow uninterrupted, and is a key part of using streamlined efficiency to enhance your work.
Utilizing Magnet Boards
Magnetic strips transform your sewing space into an organized powerhouse.
Install magnet boards with metal container storage above your workspace to keep buttons, snaps, and embellishments visible yet secure.
These magnetic strips hold small metal tools like scissors and seam rippers within arm’s reach.
Your button organization becomes effortless when embellishment holders stick directly to the magnetic surface, creating instant storage solutions for your sewing room setup, making it an essential part of your sewing room.
Creating Workable Zones
Creating distinct zones for your three main activities turns chaos into calm workflow.
You’ll cut prep time and boost your sewing enjoyment when cutting, stitching, and pressing each have their own dedicated space.
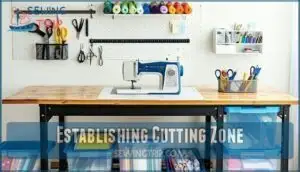
Establishing Cutting Zone
Your cutting table anchors your fabric prep workflow.
Position it near your storage containers with measurement guides within arm’s reach.
Create an organized cutting zone that transforms chaos into precision.
- Mount a measuring tape directly to your cutting table edge for instant reference
- Install a ruler bar above the table to keep straight edges accessible
- Place scissor storage within one step of your work surface
- Position cutting tools in a desktop organizer for quick selection
- Keep fabric bins underneath the table for seamless material access
Setting Up Sewing Zone
Position your sewing machine at elbow height to prevent shoulder strain during long sessions.
Create your sewing station with adequate lighting overhead and keep thread, scissors, and seam ripper within arm’s reach.
Store bobbins in clear containers nearby for quick access. This ergonomic setup streamlines task flow and transforms your workspace layout into an efficient creative hub.
Designating Ironing Zone
Your ironing board becomes the unsung hero of professional-looking projects when positioned strategically within your sewing workflow.
Place your ironing surface near your sewing machine to minimize steps between stitching and pressing.
Install heat resistance mats beneath steam stations to protect surfaces.
Store pressing tools in nearby drawers or hanging organizers, and consider wall-mounted iron storage to free valuable counter space while maintaining easy access.
Budget Friendly Solutions
You don’t need to spend a fortune to organize your sewing space effectively. Simple household items and smart furniture arrangements can transform your room without breaking the bank.
Reusing Household Items
Transform everyday items into brilliant sewing storage with creative reuse.
Ice cube trays compartmentalize buttons perfectly, while spice racks display thread spools beautifully.
Repurpose glass jars for pins and notions, creating clear visibility.
Shoe boxes become fabric organizers, and egg cartons hold small embellishments securely.
These DIY solutions and household hacks deliver upcycled organizers that maximize space affordably.
Effective fabric storage often relies on proper fabric organizers to keep the sewing room tidy, using fabric organizers for a tidy space.
Rearranging Furniture
Rather than buying new storage solutions, you’ll often find better sewing room organization through smart furniture arrangement.
Move your cutting table closer to fabric storage for streamlined workflow efficiency.
Angle your sewing machine toward natural light while keeping thread storage within arm’s reach.
This strategic room redesign creates an ideal layout that transforms cramped spaces into functional creative zones without spending money.
Using Filing Cabinets
Filing cabinets reveal clever storage solutions for sewing room organization without breaking your budget.
You’ll transform standard office furniture into fabric storage powerhouses by sliding materials into file folders like a mini fabric shop.
Cabinet labels and folder systems keep everything visible and accessible.
Store patterns, interfacing, and batting in organized sections.
This filing cabinet approach maximizes vertical space while maintaining neat sewing supplies storage, creating a system that is both efficient and accessible.
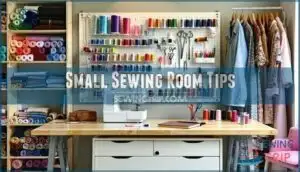
Small Sewing Room Tips
Working with a small sewing room means making every square inch count through smart choices and creative solutions.
You’ll transform your tight quarters into a functional creative haven by focusing on what matters most and using space-saving tricks that maximize both storage and workflow.
Purging Unused Items
Start with a storage purge to reclaim your sewing space. Decluttering tips begin with sorting items into keep, donate, and toss piles.
Remove broken tools, expired notions, and fabric you’ll never use. This donation guide approach creates a clutterfree workspace instantly.
Storage bags help contain items leaving your room. Proper item sorting and clutter control transform cramped quarters into functional studios.
Effective sewing room organization relies on evaluating your space optimization needs to create a more efficient workspace.
Prioritizing Essentials
Focus your energy on the essentials that fuel your Daily Routine.
Essential Tools like your sewing machine, cutting mat, and basic notions deserve prime real estate in your workspace.
Supply Management becomes manageable when you keep only what supports active projects.
Task Prioritization means choosing quality over quantity—your sewing room organization thrives when sewing storage ideas center around sewing room essentials you actually use, creating effective sewing space tips.
Utilizing Vertical Space
Wall Shelves and Pegboards transform cramped sewing rooms into organized havens. Think beyond floor space—your walls hold untapped potential for Storage Racks and Hanging Baskets.
- Install adjustable Wall Shelves for fabric bins and pattern storage
- Mount Pegboards with hooks for scissors and thread spools
- Add Hanging Baskets at eye level for quick access to notions
- Use Loft Storage above doorways for seasonal supplies
These vertical storage solutions maximize every inch without sacrificing workspace, utilizing Loft Storage and creating an efficient space with Hanging Baskets.
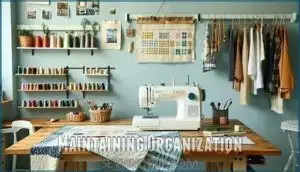
Maintaining Organization
You’ll want to stay on top of your organized sewing space because clutter creeps back faster than you can say "fabric stash."
The key is building simple maintenance habits that keep your creative sanctuary functional and inspiring without turning into a weekend-long reorganization project.
Regular Sorting
Through consistent sorting habits, you’ll transform chaotic spaces into organized sanctuaries.
Weekly fifteen-minute sessions reduce deep cleaning by 70%. Monthly fabric inventory prevents duplicate purchases. Create designated spots for Daily Purge items and implement Task Segmentation for efficient Workspace Cleanup.
Effective sewing room organization relies on proper thread storage systems to maintain a clutter-free environment.
| Sorting Schedule | Focus Area |
|---|---|
| Weekly | Supply Editing and tool returns |
| Bi-weekly | Fabric storage reorganization |
| Monthly | Complete sewing room organization audit |
| Seasonally | Major purge and prioritize sessions |
| Annually | Routine Maintenance overhaul |
Editing Storage Systems
Your sewing room storage systems need regular editing to stay functional.
Test each storage solution monthly—if you’re wrestling with containers or can’t find supplies quickly, it’s time for change.
Swap out cramped storage hacks for better space optimization solutions. Update labeling systems when categories shift.
Adjust shelf management as your fabric collection grows. Effective inventory control means your sewing room organization systems evolve with your needs.
Effective inventory control means your systems are always up to date.
Preventing Clutter Accumulation
Daily cleanup habits prevent clutter from taking over your creative space.
Store each item immediately after use—threads back on spools, fabric scraps in designated bins.
Set a five-minute timer at session’s end for quick sewing room organization.
These simple storage hacks maintain your organized systems without overwhelming daily effort, keeping workspace optimization achievable.
Frequently Asked Questions (FAQs)
How to organize a sewing room?
Ever wondered why your creative haven feels more like chaos than calm?
Start by decluttering ruthlessly—purge unused supplies and unfinished projects.
Create distinct zones for cutting, sewing, and pressing. Store fabrics upright in clear containers, sorted by color.
Use pegboards for tools within arm’s reach.
How to organize a tailoring room?
Create three distinct zones: cutting, sewing, and pressing.
Position your cutting table centrally with rulers nearby. Store fabric vertically in clear bins by color.
Keep frequently used tools within arm’s reach using pegboards and magnetic holders.
What not to do in a sewing room?
Don’t block pathways between workstations, pile fabric on your cutting table, store sharp tools loosely, work in poor lighting, or skip decluttering regularly—chaos kills creativity and productivity.
What does every sewing room need?
You’ll need three essential work zones: a dedicated sewing machine area, cutting space, and ironing station. Add proper lighting, comfortable seating, organized storage for supplies, and efficient workflow between stations.
How often should I reorganize my sewing space?
Annual decluttering reduces workspace clutter by 30%, like spring cleaning your creative sanctuary. You’ll maintain peak efficiency by reorganizing quarterly, doing weekly touch-ups, and sorting supplies immediately after each project.
Whats the ideal sewing room temperature and humidity?
When asked about temperature and humidity: Maintain your workspace between 65-75°F with 45-55% humidity.
This keeps fabrics flexible, prevents static buildup, and guarantees you’re comfortable during long sewing sessions too.
Maintain your workspace between 65-75°F with 45-55% humidity.
This keeps fabrics flexible, prevents static buildup, and guarantees you’re comfortable during long sewing sessions.
How do I handle pattern storage efficiently?
Hang patterns on racks or file them vertically in folders to prevent wrinkles and damage. Sort by garment type or frequency of use for quick access.
What lighting wattage works best for detail work?
For detail work, you’ll want 100-watt equivalent LED bulbs at 5,000-6,500K color temperature. Task lighting strips or adjustable lamps work brilliantly for precision projects.
Should I store interfacing flat or rolled?
Store interfacing flat in drawers or on shelves to prevent creases and maintain its structure.
Rolling can create permanent wrinkles that won’t press out, affecting how it bonds with your fabric during application.
Conclusion
Ironically, the most organized sewing rooms often belong to sewists who swore they’d never be "that organized person."
Yet here you are, transforming chaos into creative bliss.
These sewing room organization tips aren’t just storage tricks—they’re productivity game-changers that’ll revolutionize your crafting experience.
You’ll spend more time creating and less time hunting for supplies.
Your newly organized space will inspire projects you never thought possible.
Start with one zone, then watch the magic spread throughout your entire creative sanctuary.
- https://www.thelittlemushroomcap.com/revamping-sewing-space-the-ultimate-guide-to-organizing-your-sewing-room/
- https://www.incolororder.com/2022/03/ideas-for-storing-and-organizing-sewing.html
- https://www.stringandstory.com/blog/organized
- https://www.diaryofaquilter.com/organize-your-sewing-room/
- https://pattymacmakes.com/small-sewing-room-ideas/

