This site is supported by our readers. We may earn a commission, at no cost to you, if you purchase through links.
Your hands can transform a flat piece of fabric into something you’ll wear, use, or gift—no sophisticated degree required. Sewing school lessons for beginners open this door wider than you might think, teaching you skills that once took years of apprenticeship but now fit into manageable evening sessions.
The beauty of learning to sew today is that you don’t need a room full of expensive equipment or a grandmother whispering techniques over your shoulder. You need a handful of essential tools, a clear workspace, and the willingness to pull out a few crooked stitches along the way.
Once you master the basics—threading a machine, sewing a straight seam, hemming without tears—you’ll discover that creating handmade items isn’t just possible, it’s genuinely enjoyable.
Table Of Contents
Key Takeaways
- You don’t need expensive equipment or years of training to start sewing—just essential tools like a beginner sewing machine ($150-$300), sharp shears, pins, and cotton fabric to build confidence through manageable evening sessions.
- Mastering foundational skills like threading your machine correctly, sewing straight seams, and adjusting tension prevents 80% of common problems and transforms frustrating projects into enjoyable creative experiences.
- Starting with simple projects like tote bags, pillowcases, and elastic-waist skirts lets you practice real techniques on items you’ll actually use while building the confidence to tackle more complex garments.
- Creating a safe, well-lit workspace with organized supplies and practicing basic hand stitches alongside machine work gives you the complete skill set to repair, alter, and create handmade items independently.
Essential Sewing Tools for Beginners
Walking into your first sewing class is exciting, but you might wonder what you actually need to get started. The good news is that you don’t need a fancy studio full of expensive equipment to learn the basics.
Let’s look at the essential tools that’ll set you up for success without breaking the bank.
Choosing The Right Sewing Machine
You’ll want to pick a machine that fits your budget—most beginner models cost between $150 and $300—and lasts through your Sewing 101 journey.
Look for ergonomic features like speed control and automatic threading to master sewing techniques comfortably. A good machine lifespan is 10–20 years with care, and stitch variety (around 12–100 options) plus adequate motor power will support your growing sewing skills beautifully!
To guarantee longevity, consider a machine with durable metal components.
Must-Have Sewing Notions and Accessories
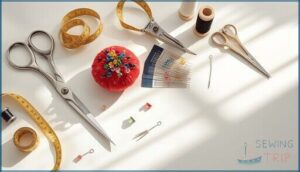
Once you’ve chosen your machine, stocking up on Essential Notions becomes your next adventure! You’ll need sharp 8–9-inch shears for Cutting Accuracy and a flexible 60-inch tape among your Measuring Tools. Don’t forget:
- Glass-head pins and a pincushion for Holding Devices
- A trusty seam ripper for fixes
- Multiple needle sizes (70, 80, 90)
- All-purpose polyester thread in black and white for Thread Selection
These basics power every Sewing 101 project ahead! Many projects also require specialized sewing accessories to achieve creative vision.
Selecting Quality Fabrics and Threads
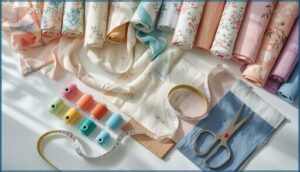
With your tools ready, smart fabric selection sets the foundation for successful sewing projects! Start with stable woven cottons—quilting weight at 4–5 oz per square yard works easily and responds beautifully to your iron. Cotton–polyester blends boost durability with minimal shrinkage (3.5–5.5%), perfect for sewing classes for beginners.
Here’s your quick-reference guide:
| Fabric Type | Fiber Content | Best Beginner Uses |
|---|---|---|
| Quilting cotton | 95–100% cotton | Pillowcases, simple skirts |
| Cotton blend | 60% cotton / 40% polyester | Aprons, tote bags |
| Lightweight denim | Cotton twill, 10–14 oz | Sturdy bags, casual wear |
| Polyester | 100% synthetic | High-wash items, accessories |
| Linen | Flax fiber | Breathable garments (with practice) |
Always prewash fabrics to test colorfastness and remove excess dye—cotton absorbs dye deeply but can bleed onto lighter threads without proper rinsing.
For thread selection, all-purpose polyester (Tex 25–35) delivers excellent seam strength across most fabrics while resisting shrinkage. Match your thread to fabric weight: lighter threads for quilting cotton, heavier (Tex 70–90) for denim projects. These sewing techniques and tips help prevent puckering and keep your seams strong through countless washes!
Organizing Your Sewing Supplies
Once you’ve picked out your fabrics, keeping your supplies organized is like giving yourself a head start every time you sew. Smart storage solutions—think clear bins, rolling carts, and drawer dividers—make supply categorization easy.
Space optimization matters, especially for beginner setups. A tidy sewing area boosts motivation and calm, making DIY crafting and sewing projects feel welcoming, not overwhelming!
Setting Up Your First Sewing Workspace
You’ve got your tools ready, and now it’s time to carve out a space where the magic happens. A good sewing workspace isn’t just about having a table—it’s about creating an area where you feel comfortable, safe, and ready to create.
Let’s walk through how to set up a beginner-friendly workspace that’ll make every project easier and more enjoyable.
Creating a Comfortable and Safe Sewing Area
Your sewing studio should feel like a safe haven, not a hazard zone. Start by clearing pathways—trip hazards like fabric scraps and cords on the floor can turn your creative space into an injury waiting to happen.
Store sharp tools securely, keep your sewing machine stable on a sturdy table, and guarantee good air quality with ventilation.
Fire prevention matters too—unplug irons when you’re not pressing!
Lighting and Ergonomic Considerations
Good light makes all the difference when you’re learning sewing skills—aim for task lighting around 300–500 lux near your needle to avoid squinting. Avoid harsh blue light LEDs for eye comfort.
Set your workstation height so your elbows rest at 90 degrees, protecting your shoulders and wrists. Take posture breaks every hour; ergonomic seating with proper legroom keeps sewing techniques enjoyable, not painful, as you tackle DIY projects!
Maintaining Your Sewing Equipment
After every eight hours of stitching, swap your needle—dull tips ruin fabric and skip stitches. Brush out lint from the bobbin area weekly to keep your sewing machines humming smoothly. Follow the cleaning schedule in your manual, usually every 300 hours for oiling.
Check cords for damage, unplug during needle replacement, and cover your sewing studio equipment between projects for electrical safety and longevity.
Learning Basic Sewing Machine Skills
Learning to use your sewing machine doesn’t have to feel overwhelming. Once you understand a few basic operations, you’ll gain confidence with every stitch you make.
Let’s walk through the essential skills that’ll help you master your machine and troubleshoot any hiccups along the way.
Threading and Operating The Machine
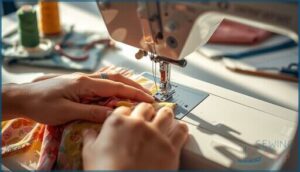
Learning to thread your machine correctly is where you’ll prevent most frustrations—threading errors cause up to 80% of stitch problems. Before you start, turn off your machine for safety. Follow your manual’s threading path carefully, checking each guide and tension disc.
Once threaded, test on scrap fabric. Getting this right means fewer machine malfunctions and a smoother sewing journey ahead.
Practicing Straight and Zigzag Stitches
Think of these foundational stitches as your sewing alphabet—master them, and you’ll open up countless projects! Most sewing courses for beginners dedicate significant time here because these skills directly impact your confidence and success.
- Practice straight stitches ⅛ to ⅜ inch from fabric edges to develop stitch length control and muscle memory
- Master zigzag stitches for stretch fabrics and seam finishing methods that prevent fraying
- Use cotton or muslin for predictable feedback while learning proper fabric handling techniques
- Adjust needle size impact based on your material—wrong needles create uneven stitches
- Balance thread tension while practicing both sewing techniques and patterns for professional results
Adjusting Tension and Stitch Settings
Your sewing machine has a sweet spot—that magical thread tension balance where stitches lock perfectly in fabric’s center. Start with a stitch length guide setting around 2.5-3 mm for most projects, then adjust fabric type settings based on weight. These sophisticated adjustments transform beginner skill level work into professional results!
Sewing courses for beginners emphasize testing on scraps before diving into your project, making troubleshooting stitches simple and stress-free.
Troubleshooting Common Sewing Issues
Once you’ve found those perfect settings, you’ll want to know what to do when hiccups happen. Thread breakage and needle problems usually signal improper threading—accounting for 99% of stitch troubles. Fabric feeding issues often come from lint-clogged feed dogs, while mechanical issues stem from incorrect tension adjustment.
- Re-thread your machine completely when stitches act up
- Replace needles after eight hours of sewing or when skipping occurs
- Clean feed dogs regularly to prevent fabric bunching
- Test tension on scraps matching your project fabric weight
Sewing lessons for beginners emphasize these troubleshooting techniques, and most tutorials recommend consulting your machine’s manual for threading paths. With practice, beginner sewing machine repair becomes second nature!
Foundational Sewing Techniques for Beginners
Once you’ve got the hang of your machine, it’s time to build your real sewing toolkit—the hands-on techniques that’ll turn fabric into finished projects.
These foundational skills form the backbone of everything you’ll create, from simple repairs to full garments.
Let’s walk through the essential techniques every beginner needs to master.
Basic Hand Stitches and Their Uses
Before you touch a sewing machine, you’ll want to master a few basic hand stitches. The running stitch is your foundation—perfect for basting and quick seams. Backstitch strength makes it ideal for repairs that won’t pop open. Use whipstitch edges to stop fraying, and try ladder stitch for invisible closures on pillows.
These stitch applications appear in countless sewing projects, and beginner techniques like these build real confidence fast!
Understanding and Sewing Seams
Now that you’ve got hand stitches down, let’s learn to sew seams—the backbone of every sewing project! Plain seams account for about 70–80% of all beginner techniques in sewing classes.
Start with a 5/8-inch seam allowance and 2.5–3.0 mm stitch density. Watch for seam slippage on lightweight fabrics, and you’ll quickly master different seam types as seam strength builds with practice!
Simple Hemming and Finishing Methods
After you’ve mastered seams, finishing edges with clean hems brings your projects to life! Double-fold hems are your go-to for beginners—fold twice to hide raw edges and prevent fraying.
Try rolled hems for delicate scarves or blind hems when you want invisible stitches on dress pants.
No-sew hems using fusible tape work great for quick alterations. Proper edge finishing transforms homemade into handmade!
Attaching Buttons and Fasteners
With a needle and thread in hand, you’ll discover that attaching buttons and fasteners is easier than you think! Button durability improves with four-hole styles for heavy-use areas, while magnetic fasteners offer beginner-friendly alternatives for DIY projects.
Most sewing classes teach thread shanks—those little thread wraps that lift buttons from fabric. Consider these fastener alternatives for your sewing projects:
- Hook and eye closures for fitted garments
- Snaps for quick-release openings
- Velcro for adjustable waistbands
- Grommets for decorative detailing
Machine attachment saves time once you’ve practiced the basics in sewing education!
Beginner Sewing Projects to Build Confidence
Now that you’ve practiced your stitches and mastered the basics, it’s time to put those new skills to work on real projects. Starting with simple, practical items helps you build confidence without feeling overwhelmed.
Let’s look at some beginner-friendly projects that will give you a sense of accomplishment while teaching you valuable techniques.
Easy Tote Bags and Drawstring Pouches
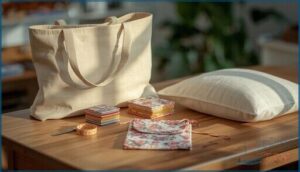
Your first sewn creations—a simple tote bag or drawstring pouch—are more than DIY projects; they’re confidence builders! These beginner sewing patterns teach essential skills like choosing fabric selection, measuring strap lengths, and mastering seam allowances.
With market demand for custom printing and handmade items soaring, you’ll discover how rewarding weaving together practical skills can be while creating something truly useful.
Pillowcases and Home Decor Items
Pillowcases are perfect DIY sewing projects for learning fabric selection and stitch techniques! You’ll need about 1 yard of cotton fabric and can finish in 30 minutes using straight stitches.
These beginner-friendly decor styles teach you practical skills while creating something beautiful for your home. Sewing workshops often start here because it’s where confidence blooms.
Time estimates vary, but most students complete their first pillowcase in one session!
Simple Skirts and Elastic-Waist Pants
Ready to wear what you make? Simple skirts and elastic-waist pants are perfect beginner patterns for garment making—most students finish their first piece in just 20 to 30 minutes!
These DIY sewing projects teach essential skills like reading sewing patterns, measuring fabric choice, and mastering elastic waistbands.
Your sewing education moves from flat projects to real clothes you’ll actually wear. That’s project time well spent!
Aprons and Kitchen Accessories
Apron pattern selection marks your leap into gifts people keep for years—you’ll learn pocket variations and fabric choices that make every project personal.
Kitchen accessory sets combine sustainable materials with solid sewing education, perfect for beginners who want hands-on projects.
Try these DIY fashion staples:
- Basic bib aprons with adjustable neck ties
- Potholders using three layers of insulated batting
- Coordinating tea towels for a complete kitchen set
Frequently Asked Questions (FAQs)
What should a beginner learn in sewing?
You’ll want to master threading your machine, winding bobbins, and practicing straight stitches before anything else.
Most sewing courses build these skills through simple projects, helping you progress confidently on your sewing journey.
How do I start a beginners sewing class?
Starting a beginners sewing class requires smart planning: choose your class size (6–8 students works well), set pricing strategies between $15–$60 per session, design a curriculum length of 8–10 hours, and prioritize safety considerations throughout.
Can I teach myself sewing?
Yes, you can absolutely teach yourself sewing! With online courses and patterns, millions learn independently. Self-teaching offers flexibility, though it demands motivation. Start with simple projects to build skills gradually.
Where to start learning to sew clothes?
Pick a beginner sewing course—classroom or online—that covers basic stitches and simple garment construction.
Start with easy sewing patterns like elastic-waist skirts, then join sewing communities for mentorship and skill progression support.
Do I need my own sewing machine?
Many sewing classes provide machines, so beginners can learn without buying. However, having your own machine at home helps you practice between lessons and build confidence faster.
Around 31% of U.S. households sew regularly.
When do beginner classes typically meet?
Beginner sewing classes usually meet weekday evenings from 6:00 to 8:30 p.m., daytime schedules around 10:00 a.m. to 2:00 p.m., or weekend formats.
Course length runs four to five weeks, with influencing factors like work schedules.
What projects do adults and kids sew?
Stitch your way to success! Adult beginner projects include cushion covers and tote bags, while kids sewing crafts focus on small, practical sewing items. Both learn to sew through giftable sewing projects and upcycled sewing ideas.
Is prior sewing experience required?
No prior sewing experience is required. Most sewing courses welcome absolute beginners with no skill prerequisites.
You’ll start with basic hand stitches and simple projects, building confidence before advancing to more complex techniques and patterns.
How long are sewing workshops?
Most sewing classes run 2 hours per session—the sweet spot for learning machine basics without fatigue.
Intensive workshops stretch to 6-8 hours, while multi-week courses total 10-12 hours spread over five weeks.
How long does it take to learn basic sewing?
You’ll master basic skills like threading and straight seams in two to three weeks with guided instruction at sewing classes, but self-taught learners often need six to nine months of regular practice intensity.
Conclusion
You won’t nail every stitch on your first try—that’s part of the process. But once you’ve worked through these sewing school lessons for beginners, you’ll notice something shift.
Projects that looked intimidating start to feel manageable. Your hands remember the motions. Before long, you’re not just following instructions—you’re creating pieces that reflect your effort, your choices, and your growing confidence.
That’s when sewing stops being a lesson and starts being yours.
- https://www.marketgrowthreports.com/market-reports/home-sewing-machines-market-112738
- https://www.houseofsew.com/sewing-level/
- https://www.sewingworkshop.com/new-blog/sewing-for-beginners
- https://www.seamwork.com/sewing-tutorials/how-to-learn-to-sew-5-steps-for-beginners
- https://www.gathered.how/sewing-and-quilting/sewing/sewing-for-beginners-guide

