This site is supported by our readers. We may earn a commission, at no cost to you, if you purchase through links.
Start with threading needles and tying knots – it’s like learning to tie your shoes, awkward at first but second nature soon. Practice straight stitches on scrap fabric before tackling real projects.
Master the backstitch for strong seams, then move to hemming and basic seam finishing.
Don’t skip learning proper measuring and cutting – precision here saves hours of frustration later.
Table Of Contents
Key Takeaways
- Master the fundamentals first – You’ll progress faster by focusing on threading needles, tying knots, straight stitches, and backstitches rather than jumping into complex techniques.
- Set up your workspace properly – You’ll avoid frustration and mistakes by organizing tools within reach, ensuring good lighting, and positioning your chair at the right height.
- Match your materials correctly – You’ll achieve professional results by selecting the right needle type for your fabric, matching thread weight to your project, and adjusting machine tension properly.
- Practice core techniques daily – You’ll build muscle memory quickly by working on straight seams, hemming, measuring, and cutting precision on scrap fabric before starting real projects.
Sewing Basics Quickly
You’ll master sewing basics quickly when you focus on learning essential terminology, organizing your workspace efficiently, and gathering the right tools from the start.
These foundational skills create a solid base that accelerates your progress through more advanced techniques.
Learning Sewing Terminology
Master sewing terminology before you start stitching—it’s your foundation for success.
Essential sewing lingo includes seam allowance, basting, and backstitch, while fabric terms like grainline and notches appear in every pattern.
Understanding sewing jargon prevents costly mistakes and improves communication with fellow sewers.
You’ll decode pattern language faster and follow tutorials confidently once you’ve built this sewing glossary knowledge base.
Referencing detailed sewing books can also enhance your understanding of these fundamental concepts.
Setting Up Sewing Workspace
Your sewing workspace determines your success rate.
Set up a dedicated sewing station with proper tool storage and lighting setup.
Position your ergonomic chair at the right height for comfortable stitching.
Organize your sewing kit within arm’s reach using bins or drawers.
Good workspace organization prevents fatigue and mistakes during long projects.
Essential Tools and Materials
Essential sewing supplies include sharp fabric scissors, measuring tools like rulers and tape measures, and quality pins for precision.
Your sewing kit needs thread colors that match your projects, proper fabric storage solutions, and reliable sewing notions like seam rippers and thimbles for efficient work.
Having the right sewing scissors is vital for accurate cuts and professional finishes.
Mastering Machine Skills
Your sewing machine is your most important tool, so you’ll need to master its basic operations first.
Learning to choose the right machine, handle needles properly, and adjust tension settings will set you up for successful projects from day one.
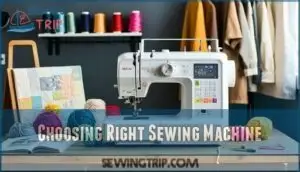
Choosing Right Sewing Machine
Finding the perfect sewing machine transforms your creative journey from frustrating struggle to smooth sailing.
You’ll want to take into account your skill level, budget, and project goals when selecting between mechanical and computerized options.
Choosing the right machine involves understanding sewing machine benefits to enhance your sewing experience.
- Machine Types: Choose mechanical for reliability or computerized for advanced features like automatic threading and LCD displays
- Sewing Speed: Look for variable speed control to master techniques safely while building confidence
- Stitch Options: Start with 20-70 built-in stitches including straight, zigzag, and stretch for versatile project handling
- Portable Machines: Consider weight and size if you’ll move your sewing machine between locations frequently
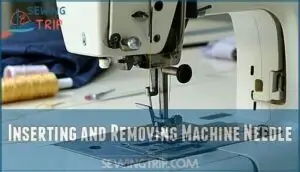
Inserting and Removing Machine Needle
Your machine becomes powerless without the right needle installed correctly.
Turn off your sewing machine before starting any needle work for safety.
Lift the presser foot and raise the needle to its highest position using the handwheel.
Locate the needle clamp screw above the needle.
Loosen this screw counterclockwise—don’t remove it completely.
Pull the old needle straight down to remove it.
Insert your new needle with the flat side facing back, pushing it up until it stops.
Tighten the needle clamp screw clockwise firmly but don’t overtighten to ensure the needle is securely in place for optimal performance and to prevent any potential damage.
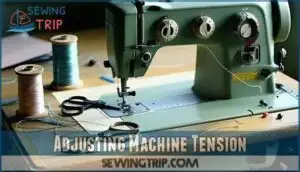
Adjusting Machine Tension
Proper tension creates the foundation for professional-looking seams. You’ll adjust both upper and bobbin threads until they lock perfectly within your fabric’s center, eliminating loops and puckering that scream "homemade." Understanding tension settings is essential for achieving balanced stitches.
5 Signs Your Machine Calibration Needs Attention:
- Loose bobbin loops appearing on fabric’s underside – tighten needle thread tension incrementally
- Visible top thread on fabric’s back surface – loosen upper tension dial slightly
- Fabric puckering along seam lines – both tensions likely too tight for material
- Thread breakage during stitching – check needle condition and thread compatibility
- Uneven stitch formation – rethread entire machine with presser foot raised
Test adjustments on fabric scraps before starting projects. Most sewing machine settings work best at mid-range positions (4-5), but specialty threads require custom calibration. Your sewing machine troubleshooting guide contains specific tension ranges for different materials and thread types.
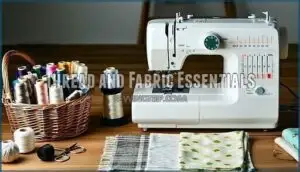
Thread and Fabric Essentials
Selecting the right needle, thread, and fabric combination determines whether your project succeeds or fails before you even start sewing.
You’ll master these essentials quickly by understanding how needle types match specific fabrics and thread weights work together to create strong, professional-looking stitches.
Selecting Right Needle Type
Your needle choice determines whether your fabric cooperates or fights back during every stitch.
Match needle materials and sizes to your fabric’s personality for smooth sewing sessions.
| Needle Type | Best For |
|---|---|
| Universal (sizes 70-90) | Cotton, linen, basic wovens |
| Ballpoint (sizes 70-90) | Knits, jersey, stretch fabrics |
| Sharp/Microtex (sizes 60-80) | Silk, microfiber, dense weaves |
Fabric density dictates needle sizes—lightweight fabrics need smaller needles (70/10), while heavy materials require larger ones (90/14).
Wrong combinations cause skipped stitches, fabric damage, or thread breakage.
Change needles every 6-8 hours of sewing speed variations, as dull points create frustrating results.
To prevent thread issues, consider matching needle size to thread weight.
Choosing Right Thread Weight
Thread weight determines your stitch quality and project durability. Understanding sewing threads helps you match materials perfectly for professional results.
Here’s your Thread Weight Guide for fabric compatibility:
- Light threads (50-60 weight) – Perfect for delicate fabrics and detailed topstitching
- Medium threads (30-40 weight) – Your go-to choice for most cotton and blend projects
- Heavy threads (12-20 weight) – Ideal for denim, canvas, and decorative stitching
Color matching becomes easier when you understand thread types. All-purpose polyester works for most sewing machine thread types, while cotton threads suit natural fabrics best. These sewing skills to learn quickly will transform your project outcomes. Mastering sewing thread selection is essential for achieving desired results.
Understanding Fabric Types
You’ll find fabrics fall into two main camps: natural fibers like cotton and linen, or synthetic ones like polyester.
Fabric density and fiber content directly impact your sewing experience. Cotton’s forgiving nature makes it perfect for building sewing skills to learn quickly.
Weave types affect stretch—wovens stay put while knits give. Match your fabric properties to your project’s needs and thread weight for best results, considering the natural fibers.
Sewing Techniques to Learn
Building strong foundational techniques accelerates your sewing progress from beginner to confident seamstress in weeks rather than months.
You’ll master the core skills that appear in nearly every project, creating muscle memory that makes complex garments feel manageable.
Sewing Techniques Introduction
Building strong foundational techniques accelerates your sewing progress from beginner to confident seamstress in weeks rather than months.
You’ll master the core skills that appear in nearly every project, creating muscle memory that makes complex garments feel manageable.
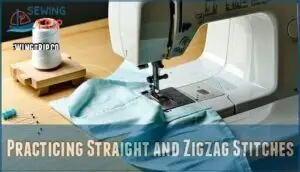
Practicing Straight and Zigzag Stitches
Straight stitches become your foundation—practice maintaining consistent seam allowance and steady fabric tension.
Start slow to achieve uniform stitch length, then increase speed gradually.
Zigzag stitches prevent fabric edges from fraying and accommodate stretch materials.
Adjust thread tension if stitches appear loose or puckered.
Master these fundamental sewing machine stitches, including straight stitches and zigzag stitches, through repeated practice.
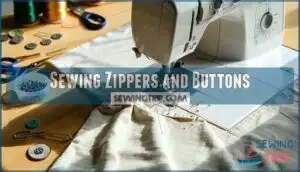
Sewing Zippers and Buttons
Zipper installation becomes straightforward once you understand the basics.
Pin your zipper before stitching to prevent shifting, and use a zipper foot for clean, close stitching near the teeth.
For button attachment, sew through each hole 3-5 times by hand, wrapping thread underneath to create a shank.
Machine buttonholes require proper tension adjustment to avoid puckering.
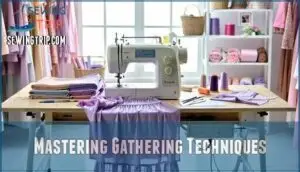
Mastering Gathering Techniques
While gathering might seem complex, you’ll master this essential technique quickly with practice.
Start by sewing two parallel rows of loose basting stitches along your fabric edge. Pull the bobbin threads gently to create even gathers, distributing fullness uniformly.
This gathering technique transforms flat fabric into beautiful ruffles and adds dimension to garments like skirts and sleeves.
To achieve professional results, understanding gathering techniques is essential for creating uniform gathers and mastering the art of gathering techniques.
Improving Sewing Efficiency
Once you’ve mastered basic sewing techniques, you’ll want to tackle more advanced skills that separate beginner sewers from confident crafters.
These three efficiency-boosting techniques—using a seam ripper safely, traversing curves and corners smoothly, and installing zippers with precision—will dramatically improve your project quality while saving you time and frustration, which are key to becoming a skilled sewer with confident crafting abilities.
Using Seam Ripper Safely
When removing stitches becomes necessary, your seam ripper transforms from intimidating tool to trusted ally.
Hold the seam ripper like a pencil, sliding the sharp tip under individual stitches rather than dragging it along the seam.
This stitch correction method prevents fabric damage and guarantees clean seam removal.
Cut every third or fourth stitch, then gently pull the thread – this fabric repair technique saves time while maintaining thread management control for precise sewing basics.
Mastering proper seam ripper techniques is essential for efficient sewing and preventing damage to fabrics.
Sewing Curves and Corners
When mastering sewing curves and corners, slow deliberate movement transforms challenging shapes into manageable tasks.
Your machine’s presser foot becomes your guide through these tricky territories.
Essential curve and corner techniques:
- Slow speed control – Reduce machine speed to maintain precision through rounded edges
- Pivot technique – Stop with needle down, lift presser foot, turn fabric at corners
- Gentle fabric guidance – Let fabric feed naturally without forcing or pulling
- Strategic stopping points – Pause frequently to readjust fabric position on complex arcs
Practice sewing arcs on scrap fabric first—you’ll quickly discover that patience beats speed every time.
Installing Zippers and Making Buttonholes
Perfect your garment finishing with zipper installation and buttonhole making techniques.
Start by marking buttonhole length—measure your button plus 1-2mm. Use narrow zigzag stitches on long sides, wider on short ends.
For zippers, align teeth with seams and stitch 1/4 inch from edges. Adjust sewing machine tension for smooth operation through thick layers.
Frequently Asked Questions (FAQs)
How fast can I learn sewing?
You can learn basic sewing skills in 2-3 weeks with daily practice. Straight seams and simple techniques develop quickly, while advanced skills like tailoring take months to master.
How to get good at sewing fast?
Practice daily on scrap fabric, focusing on straight seams and consistent stitch length.
Master threading, tension adjustment, and basic techniques like backstitching.
Take structured classes for faster progress than self-teaching alone.
What skills can you learn from sewing?
Like a Swiss Army knife, sewing sharpens essential life skills: problem-solving through pattern troubleshooting, patience via precise techniques, creativity in design choices, hand-eye coordination, attention to detail, and self-reliance by creating your own solutions.
It encompasses various skills, including hand-eye coordination, attention to detail, and self-reliance by creating your own solutions.
How do you fix skipped stitches on fabric?
Check your needle first – it might be dull, bent, or wrong for your fabric type.
Rethread both top and bobbin, ensuring proper tension.
Clean lint from the machine and verify you’re using quality thread.
What causes thread to bunch underneath fabric?
Thread bunching underneath fabric stems from incorrect tension settings.
Your upper thread tension‘s too loose compared to bobbin tension, creating loops below.
You’ll also see this with wrong needle size, dull needles, or improper threading that disrupts the delicate balance, particularly when it affects the delicate balance.
How do you prevent fabric from puckering?
Adjust thread tension properly, use correct needle size for your fabric weight, maintain steady sewing speed, and press seams carefully to eliminate puckering issues.
When should you change your sewing needle?
A stitch in time saves nine" applies perfectly here.
You’ll want to change your sewing needle after 6-8 hours of use or immediately if it’s bent, dull, or skipping stitches to maintain clean, professional results.
How do you sew stretchy fabrics without distortion?
Use ballpoint or stretch needles, zigzag stitches instead of straight ones, and gentle tension settings.
Don’t pull the fabric while sewing—let the feed dogs guide it naturally to prevent waves and puckering.
Conclusion
Mastering these seven sewing skills to learn quickly transforms overwhelming projects into manageable tasks.
While complex garments require years to perfect, basic techniques like straight stitching and hemming can be learned in hours.
You’ll progress from fumbling with needles to confidently creating finished pieces.
Remember that consistency beats perfection – practice these fundamentals regularly rather than attempting advanced techniques too soon.
Your sewing journey starts with these essential building blocks, and mastering them will help you confidently create finished pieces.
- https://www.seamwork.com/creativity-and-mindset/the-8-most-important-sewing-skills-to-learn
- https://madamsew.com/blogs/sewing-blog/sewing-techniques-you-should-learn-first
- https://www.dutchlabelshop.com/en_us/blog/top-ways-to-improve-your-sewing-skills/
- https://www.reddit.com/r/sewing/comments/xzolt6/how_do_i_get_better_at_sewing/
- https://homesteading.com/how-to-thread-sewing-machine/

