This site is supported by our readers. We may earn a commission, at no cost to you, if you purchase through links.
 You’ll create adorable stuffed animals using soft fleece or cotton fabric, polyester stuffing, and basic sewing tools. Start by transferring patterns onto fabric, then sew body pieces together using ladder stitch for invisible seams. Turn your creation right-side out and stuff carefully with a blunt tool to push out corners.
Add safety eyes or embroider facial features for younger children. Reinforce joints with double-stitching to guarantee durability.
These sewing tutorials for stuffed animals transform simple materials into treasured companions. The secret lies in mastering three professional techniques that make homemade plushies look store-bought.
Table Of Contents
- Key Takeaways
- Essential Materials for Stuffed Animal Sewing
- Best Stitches and Techniques for Plush Toys
- Free Stuffed Animal Patterns for Beginners
- Step-by-Step Stuffed Animal Construction Process
- Adding Facial Features and Details
- Working With Different Fabric Types
- Popular Stuffed Animal Patterns to Try
- Troubleshooting Common Sewing Problems
- Safety Guidelines for Children’s Stuffed Animals
- Customizing and Personalizing Your Creations
- Frequently Asked Questions (FAQs)
- Conclusion
Key Takeaways
- You’ll need basic supplies like soft fleece or cotton fabric, polyester stuffing, safety eyes, and simple sewing tools to get started with your first stuffed animal project.
- Master three professional techniques—ladder stitching for invisible seams, proper stuffing density, and reinforcing stress points—to make your homemade plushies look store-bought quality.
- Choose beginner-friendly patterns like two-piece designs or simple geometric shapes that let you practice essential skills without getting overwhelmed by complex construction.
- Safety comes first when making toys for children—use embroidered facial features instead of button eyes, secure all attachments with double-stitching, and select non-toxic materials that won’t harm little ones.
Essential Materials for Stuffed Animal Sewing
You’ll need the right supplies to create adorable stuffed animals that last.
Start with soft fleece or cotton fabric, polyester stuffing, safety eyes, and basic sewing tools like scissors and pins.
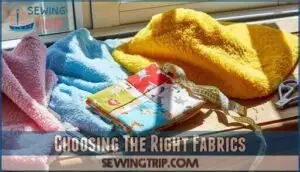
Choosing The Right Fabrics
When choosing plush fabric for stuffed animals, consider fiber content first. Cotton quilting fabric offers durability and colorfastness, while fleece fabric provides stretch and softness.
Check fabric weight—medium-weight cotton works best for beginners. Pattern scale matters too; small prints suit tiny creatures, bold designs fit larger animals.
Test fabric texture by touching it—you’ll want something that feels cuddly and inviting for little hands to squeeze.
Stuffing Types and Safety Considerations
Your plush fabric choice sets the stage, but stuffing materials make or break your stuffed animal’s safety and longevity. You’ll need to think about allergy concerns and flammability testing when selecting fills for children’s toys.
Here are five key stuffing considerations:
- Polyester fiberfill – hypoallergenic and machine-washable for easy care
- Cotton stuffing – natural option that requires more maintenance over time
- Stuffing density – affects firmness and prevents lumpy, uneven textures
- Safety compliance – choose materials meeting current toy safety standards
- Repairing tears – secure containment prevents stuffing exposure hazards
Pick materials that balance comfort with durability for long-lasting stuffed animals. For a sustainable choice, consider using organic cotton stuffing.
Eye Options and Safety Features
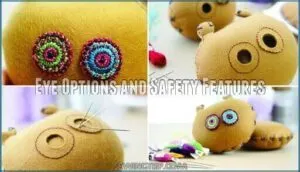
Now let’s talk about giving your stuffed animal eyes that sparkle with personality while keeping little ones safe. Skip button eyes completely – they’re choking hazards waiting to happen.
Safety Eye Alternatives like embroidered facial features and Felt Eye Application work beautifully for Age-Appropriate Eyes. Embroidered Eye Styles using French knots create lasting charm, while appliqué facial features add colorful dimension.
Practice Secure Attachment Methods on scrap fabric first to nail those stitches perfectly.
Basic Sewing Tools and Equipment
Beyond safety features, you’ll need the right tools to bring your stuffed animals to life. Here’s your sewing machine basics toolkit:
- Sewing machine – takes care of most stitching quickly and creates strong seams for durability
- Hand-sewing needles – perfect for closing stuffing openings and attaching delicate details
- Fabric scissors guide – sharp, dedicated shears make clean cuts through multiple fabric layers
Don’t forget measuring tools, explained simply: a ruler and seam ripper for fixing mistakes!
Best Stitches and Techniques for Plush Toys
You’ll master the right stitches that make your stuffed animals strong and adorable. Whether you’re hand-sewing cozy details or machine-stitching sturdy seams, these techniques will transform your plush creations from floppy to wonderful.
Hand Sewing Vs Machine Sewing
Your sewing method impacts everything from speed vs. precision to final stitch strength. Hand sewing offers better fabric control and curve handling, perfect for intricate details and delicate work. Sewing machines excel at project complexity and consistent seams.
Can you make stuffed animals with a sewing machine? Absolutely! However, hand sewing provides peerless precision for small pieces. Master both techniques—your sewing basics toolkit needs this flexibility for professional results.
Stretch Stitches for Fleece and Jersey
Most fleece stitch options work beautifully for plush fabric, but zigzag reigns best. Set your stitch length guide between 2-3mm for jersey needle types.
Preventing bunching requires gentle tension adjustments—think feather-light pressure. Your sewing machine shouldn’t fight stretchy materials.
These sewing basics transform stuffed animal sewing from frustrating to great. Master these techniques, and your sewing projects will thank you!
Reinforcement Stitches for Durability
When your stuffed animal sewing projects need to last through countless hugs, stress point stitching becomes your best friend. Here are five reinforcement techniques that’ll make your creations practically indestructible:
- Double-stitch seam reinforcement at arm and leg attachment points
- Backstitch knot security to prevent unraveling disasters
- Increased stitch density around high-stress areas like necks
- Fabric compatibility checks before choosing reinforcement methods
- Cross-hatching techniques for extra strength in weak spots
These methods ensure your stuffed animal sewing patterns create toys that’ll survive toddler tantrums and teenage cuddles alike.
Seam Finishing Methods
Clean seam finishing transforms amateur sewing projects into professional-looking stuffed animals. Trim seam allowances to ¼ inch, then pink or serge raw edges to prevent fraying. For invisible seams, turn pieces right-side out through small openings.
Hand finishing works perfectly for delicate areas. Use binding techniques on stress points where little hands grab most. These methods make certain your stuffed animal sewing patterns create lasting treasures.
Free Stuffed Animal Patterns for Beginners
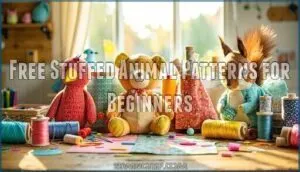
You’ll love starting with these beginner-friendly patterns that require just basic sewing skills and simple shapes.
These free designs include two-piece animals like Warren the Charity Bear, quick circle patterns like the Circle Bird, and fun one-hour projects like the Flying Squirrel Softie that’ll have you creating adorable companions in no time.
Simple Two-Piece Designs
Two-piece masterpieces offer your perfect starting point for beginner projects. Warren the Charity Bear exemplifies this approach—you’ll cut just a front and back piece, creating minimal seams for quick sewing.
These easy shapes make ideal gift ideas since you can’t go wrong with basic construction. Free stuffed animal patterns like this plush stuffed animal design build confidence through simple success.
Circle and Basic Shape Patterns
Start creating geometric animals using basic shapes like circles and squares. The Circle Bird Pattern transforms two simple circles into an adorable plushie – it’s pattern simplification at its finest!
These abstract designs make perfect beginner projects since you’re working with familiar shapes. Cut out your circles, sew around the edges, and stuff.
These free sewing patterns prove that stunning stuffed animal sewing doesn’t require complex curves or tricky angles.
Upcycled Fabric Projects
Beyond basic shapes, clothing repurposing opens exciting doors for creative upcycling. Transform old sweaters into cuddly bears or turn worn jeans into sturdy farm animals. Sustainable sewing doesn’t just reduce textile waste—it creates one-of-a-kind handmade gifts with stories. The act of creating these toys also allows for unique design options.
- Cut sleeves from outgrown sweaters for instant bear bodies
- Use corduroy pants for textured bunny fur and character
- Repurpose flannel shirts into soft, washable fabric scraps
- Convert fleece jackets into multiple small plushies projects
Quick One-Hour Patterns
When you need Last-Minute Gifts, these Beginner-Friendly Designs save the day. The Flying Squirrel Softie takes just one hour with Fast Fabric Choices like fleece. Circle Bird uses two simple shapes with Simplified Sewing Steps.
These free stuffed animal patterns feature Quick Detailing Ideas—embroidered eyes and basic stitching. Perfect plushie patterns when time’s tight but hearts need handmade love.
Step-by-Step Stuffed Animal Construction Process
Now you’ll transform fabric pieces into your very own cuddly companion through three key stages that take you from flat patterns to finished friend.
You’ll learn to transfer patterns accurately, sew pieces with confidence, and master the art of turning and stuffing for that perfect plush feel.
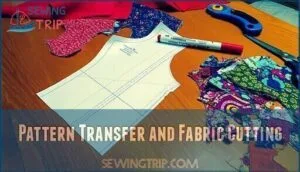
Pattern Transfer and Fabric Cutting
Once you’ve chosen your stuffed animal patterns, accurate pattern transfer becomes your foundation for success. Place patterns on fabric following grain direction for best results. Pin securely and trace with fabric-safe markers, leaving proper seam allowance.
Use sharp cutting tools like rotary cutters for clean edges. Plan efficient layout to get the most out of fabric scraps usage. Double-check pattern accuracy before cutting—measure twice, cut once saves heartache later!
Sewing Body Pieces Together
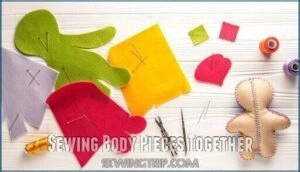
You’ll create invisible seams that make your plush stuffed animals look professionally crafted. Pin matching pieces with right sides together, ensuring perfect seam alignment along curves and joints.
- Match notches and curves – Line up pattern markings for smooth seam alignment
- Use ladder stitch – Creates invisible seams for hand-sewn stuffed animal patterns
- Reinforce joints – Double-stitch areas where limbs attach for joint reinforcement
- Backstitch curves – Prevents puckering on rounded edges of plush stuffed animals
Turning and Stuffing Techniques
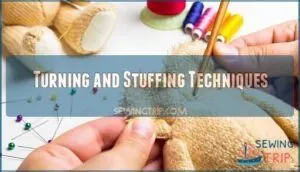
Once your seams are sewn, turning your stuffed animal right-side-out reveals the magic. Use a blunt tool like a chopstick to push out corners gently—inverted seam angles need patience.
Stuff gradually, checking density as you go. Ladder stitch mastery closes openings invisibly. For jointed limbs, stuffing should be packed firmly but leave room for movement.
Proper stuffing tool choices make all the difference in your stuffed animal creation success.
Adding Facial Features and Details
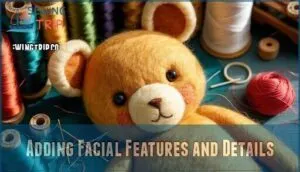
Now comes the exciting part where you’ll bring your stuffed animal to life! You’ll learn simple techniques like embroidering sweet eyes, adding felt noses, and using fabric paint to create perfect expressions that’ll make your creation absolutely adorable.
Embroidered Eyes and Noses
Once you’ve stuffed your plushie perfectly, embroidered facial features bring handmade gifts to life. Embroidery floss types matter—choose six strands for bold features or separate into thinner strands for delicate details. Needle size matters too; use a sharp embroidery needle for precise stitches. Practice stitch directionality and shading techniques on fabric scraps first.
- Start with simple satin stitches for noses, using proper knotting methods to secure thread invisibly
- Create depth with French knots for pupils and backstitch outlines for eye shapes
- Practice shading techniques by blending different floss colors for realistic-looking features
Appliqué Techniques
Appliqué shapes bring personality to your stuffed animals through fabric layering. Cut felt pieces for noses, cheeks, or patches using sharp scissors. Apply fusible web to backing, then iron onto your plush.
For needle turn appliqué, fold raw edges under while stitching. Use decorative stitches like blanket stitch around edges for polished results. This technique creates dimension that makes facial features pop beautifully.
Fabric Paint and Pen Details
Precision becomes your best friend when detailing small areas on stuffed animals. Use fabric paint for bold features like cheeks or stripes, testing color fastness on fabric scraps first.
Fabric pens offer pen precision for tiny details like whiskers or eyelashes. Practice blending techniques on test pieces before applying to your creation. Let each layer dry completely between applications.
This paint application method ensures professional-looking results that’ll make your sewing patterns shine.
Button and Felt Embellishments
Beyond basic sewing patterns, felt shapes and button eyes transform ordinary plushies into personality-packed friends. Button placement requires secure attachment through multiple fabric layers, preventing choking hazards while adding charm.
- Cut felt shapes for ears, paws, or decorative patches
- Use decorative stitching around button eyes for extra security
- Match color coordination between felt feet and main fabric
These embellishments make your stuffed creations truly shine!
Working With Different Fabric Types
You’ll love working with different fabrics because each one brings its own personality to your stuffed animal creations. From cuddly fleece that’s forgiving for beginners to smooth cotton that holds crisp details, choosing the right fabric can make your project shine like a pro’s work.
Fleece Handling Tips
Fleece feels like a dream to work with once you know its quirks. Always check the nap direction—fleece has a grain that affects texture and color depth.
Cut all your stuffed animal sewing pattern pieces going the same way for consistent plushies. Use a rotary cutter for clean edges without stretching.
Stabilize seams with stay tape to prevent wavy edges on your fleece stuffed kitties. Minimize bulk by trimming seam allowances to different lengths.
Cotton Quilting Fabric Techniques
Cotton quilting fabric brings stability to your stuffed animal sewing patterns. Unlike stretchy materials, cotton won’t distort during construction, making it perfect for beginners tackling their first stuffed animals.
Here’s how to work with quilting cotton effectively:
- Fabric Pre-treatment: Always prewash cotton before cutting your sewing pattern to prevent shrinkage after completing your project
- Pattern Matching: Use the fabric’s grain line for consistent seam allowances and professional-looking results
- Quilting Cotton Stability: Take advantage of cotton’s firm weave by using straight stitches throughout construction
Follow washing instructions carefully – cotton holds its shape beautifully when properly cared for.
Faux Fur and Plush Considerations
Working with faux fur transforms your plush animal from ordinary to special! Check pile direction before cutting – all fur should flow the same way. Use 0.25-0.5 inch seam allowance for best results. Brush after sewing to hide stitches and create invisible joins. Anti-static spray prevents flying fur everywhere during construction.
| Aspect | Short Pile | Long Pile |
|---|---|---|
| Fur Length | Easy cutting, clean details | Luxurious look, harder to manage |
| Cleaning | Simple maintenance | Attracts dust, needs brushing |
| Beginner Level | Perfect for first projects | Intermediate skill recommended |
| Pattern Suitability | Complex shapes work well | Simple designs look best |
| Static Reduction | Minimal static issues | Requires anti-static treatment |
Fabric Scrap Utilization
Your fabric scraps can become adorable Scrap Fabric Animals instead of heading to the trash. These Patchwork Plushies showcase creative Zero-Waste Sewing by combining different textures and colors.
Try the Carefree Scrap Fabric Cat pattern for your first Upcycled Stuffed Toys project. Mix cotton scraps with fleece remnants for contrast.
These Fabric Remnant Projects prove small pieces create big smiles.
Popular Stuffed Animal Patterns to Try
You’ll love exploring these adorable patterns that range from woodland foxes and fluffy sheep to playful cats and friendly robots.
These beginner-friendly designs give you clear step-by-step guidance with professional tips that’ll make your stuffed animals look store-bought perfect.
Woodland Creatures (Fox, Squirrel, Bear)
Now you’ll craft adorable woodland companions that capture nature’s charm. These popular sewing patterns bring forest friends to life with beginner-friendly techniques.
- Fox Tailoring: Cut triangular ears and pointed snout pieces for authentic fox proportions
- Squirrel Anatomy: Create bushy tail using gathered fabric strips for realistic texture
- Bear Proportions: Use rounded body pieces with shorter limbs for classic teddy bear appeal
- Woodland Colors: Choose russet, brown, and gray fabrics for natural forest tones
- Realistic Features: Add black nose embroidery and contrast belly patches for character
These stuffed animal sewing patterns transform simple shapes into beloved forest creatures through careful attention to each animal’s distinctive characteristics.
Farm Animals (Sheep, Bunny, Frog)
Three beloved farm animal patterns offer perfect starting points for your plushie journey.
The fleece frog pattern creates adorable amphibian friends with velcro hands that stick together. Corduroy bunny designs transform old pants into cuddly companions through simple upcycling techniques.
The sheep softie pattern uses basic animal anatomy principles, making it incredibly beginner-friendly while delivering professional farm-themed results.
Pet-Inspired Designs (Dog, Cat)
Pet-inspired designs let you capture your furry friend’s personality in plush form. Dog breed plushies work wonderfully with basic patterns—just adjust ears and tails for breeds like Labs or Beagles.
Cat breed plushies shine with simple circle patterns for round faces.
Custom pet portraits in fabric help create realistic pet plushies that honor beloved companions perfectly.
Fantasy and Robot Characters
Create magical creatures that spark imagination! Robot Characters feature geometric shapes and metallic details, while Dragon Designs showcase flowing wings and scales.
The Love Bot pattern offers a perfect starting point for Robot Anatomy exploration. Try Night Fury plush toy patterns for dramatic dragons, or design Alien Softies with quirky tentacles.
Steampunk Plushies combine gears with soft fabrics beautifully. Mythical Hybrids let you blend different creature elements creatively.
Troubleshooting Common Sewing Problems
Don’t worry when things go wrong with your stuffed animal project – it’s completely normal and fixable!
You’ll learn to spot common issues like loose threads, uneven seams, and lumpy stuffing, then master simple techniques to fix them quickly.
Fixing Visible Seams
Visible seams can make your plush toys look unfinished, but fixing them is simpler than you think. Use the ladder stitch for invisible seams by taking small alternating stitches between fabric pieces. Match your thread to the fabric color for perfect seam concealment.
The overcast stitch also works well for reinforcing edges while keeping them nearly invisible on stuffed animals.
Preventing Loose Threads
Loose threads can turn your adorable stuffed animals into messy disasters. To prevent fabric fraying, focus on quality thread selection and proper knot security.
When creating plush toys, use a shorter stitch length for better seam reinforcement. Double your thread, tie bigger knots, and backstitch key stress points to enhance durability.
For extra thread security in your sewing patterns, consider applying clear nail polish on knots.
Achieving Proper Stuffing Density
Getting stuffing density right makes the difference between a huggable friend and a lumpy disappointment. You’ll want that Goldilocks zone – not too firm, not too squishy.
Understuffing issues create floppy stuffed animals that won’t hold their shape. Overstuffing problems cause seams to strain and potentially burst.
- Test firmness as you go – Squeeze gently every few handfuls of stuffing
- Fill corners first – Push stuffing into limbs and extremities before the body
- Add gradually – Small amounts prevent overstuffing problems and make for even distribution
Securing Weak Points
Strengthen stress points where arms, legs, and heads attach to the body using seam reinforcement techniques. Double-stitch these joint stability areas with tight stitch density to prevent tears during play. Focus on knot security by burying thread ends deep within the stuffing.
Check safety eyes and embroidered facial features for proper attachment before finishing your project.
Safety Guidelines for Children’s Stuffed Animals
When you’re making stuffed animals for kids, safety comes first and can’t be skipped. You’ll need to choose the right eyes, secure every part properly, and pick materials that won’t harm little ones who love to cuddle and explore with their mouths.
Age-Appropriate Eye Choices
Your child’s safety starts with choosing the right eyes for their stuffed animals. Use embroidered facial features for babies under 12 months—they’re completely secure and eliminate choking hazards. Toddler-safe eyes made from felt work perfectly for ages 1-3, while safety eyes with locking washers suit preschoolers 3 and older.
Alternatives to eyes like fabric paint offer creative solutions. Always follow Eye Safety Standards when selecting materials for your sewing tutorials.
Secure Attachment Methods
Proper joint reinforcement starts with double-stitching high-stress points where limbs attach to bodies. Create hidden seams by turning pieces inside-out before stuffing. Use internal anchoring techniques – tie knots deep inside the toy, never on the surface.
For safety eyes, push through fabric and secure with washers behind. Skip button eyes entirely. Machine embroidered facial features offer the strongest attachment.
Skip button eyes entirely—machine embroidered facial features offer the strongest, safest attachment for children’s stuffed animals
Knot security prevents heartbreak when little hands tug their beloved companion.
Non-Toxic Material Selection
Your stuffed animal deserves the safest materials possible. Choose organic fabrics like cotton or hemp instead of synthetic options that might contain harmful chemicals.
Look for natural dyes and hypoallergenic fill to prevent skin reactions. Avoid felt with VOC concerns or unsafe embellishments.
When using fabric scraps for your stuffed animal pattern, verify they’re non-toxic first.
Choking Hazard Prevention
Beyond material selection, you need to think like a child playing with your creation. Small parts pose serious risks – avoid button eyes on toys for kids under three years old.
Test seam strength by tugging gently before giving your stuffed animal away. Safety eyes and embroidered facial features work best for small easy stuffed animal for beginners projects.
Customizing and Personalizing Your Creations
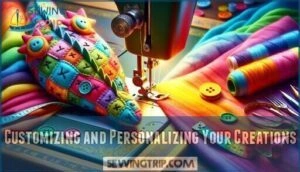
You’ll turn basic patterns into one-of-a-kind treasures that reflect your personal style and creativity.
These simple customization techniques let you adjust sizes, swap colors, and add special details that make each stuffed animal uniquely yours.
Size Adjustments and Scaling
Making your plushie bigger or smaller requires thoughtful Pattern Enlargement strategies that maintain charm and functionality. Here’s how to tackle Proportional Changes:
- Calculate scaling percentages using simple division: desired size ÷ current size × 100
- Use scaling software or print settings to resize digital patterns uniformly
- Adjust Feature Placement to maintain balanced proportions across different sizes
- Test small fabric scraps first to avoid Resizing Challenges with seam allowances
Color and Pattern Variations
Transforming basic sewing patterns starts with smart color choices. You’ll create stunning results by color blocking different fabric sections—try contrasting belly patches or ear tips.
Pattern mixing works beautifully when you combine polka dots with stripes or use themed palettes like ocean blues.
Fabric dyeing transforms plain felt into rainbow hues, while print scaling lets you resize patterns for unique looks. Mix fabric scraps creatively with appliqué facial features for one-of-a-kind designs.
Adding Personal Touches
Personal touches transform your handmade stuffed animal into something truly special. Custom embroidery adds names or dates directly onto fabric. Fabric appliqués create unique patterns and shapes. Painted details work beautifully for whiskers or spots.
Consider embroidered facial features for a polished look, or appliqué facial features for dimension. Add individual patches, unique accessories, or felt details that reflect the recipient’s personality.
Gift-Worthy Finishing Touches
When your stuffed animal is nearly complete, these finishing touches transform it into a memorable gift. Small details make the biggest difference in creating something truly special.
- Presentation Ideas – Wrap your creation in clear cellophane with a colorful ribbon, or place it in a decorative gift box with tissue paper
- Scented Stuffies – Add a small sachet of lavender or vanilla inside before final stitching for a delightful sensory experience
- Weighted Plushies – Include rice-filled pouches in arms or belly for calming, therapeutic weight that soothes anxiety
- Personalized Embroidery – Stitch names, dates, or special messages using contrasting thread colors for a custom touch
Frequently Asked Questions (FAQs)
Can you sew stuffed animals?
Like threading a needle through dreams, you can absolutely sew stuffed animals!
Start with simple patterns using fleece or cotton fabric. Cut your pieces, stitch with straight or zigzag stitches, stuff firmly, and hand-sew the opening closed.
How do you make a stuffed animal sewing pattern?
Start with paper and pen to sketch your design. Draw front and back pieces, then trace onto cardstock for templates. Cut fabric pieces with ¼-inch seam allowances added.
Are there free stuffed animal sewing patterns?
Ironically, you’ll find hundreds of free stuffed animal patterns while spending nothing but time. Sites offer 100+ free patterns for every creature imaginable. You’ll create adorable plushies without breaking your budget.
What are stuffed animal patterns?
Templates guide you through cutting fabric pieces and assembling them into adorable plushies. You’ll find patterns for bears, bunnies, frogs, and more with step-by-step instructions that make creating your own stuffed friends totally doable.
How do I choose a good stuffed animal pattern?
Pick your first pattern by matching your skill level. Beginner-friendly designs feature simple shapes and fewer pieces.
Choose patterns with clear instructions, video tutorials, and fabric recommendations for the smoothest start.
How do you make a stuffed animal shape?
As they say, "Measure twice, cut once!" You’ll create your shape by drafting pattern pieces on paper first.
Cut fabric pieces, pin together, and stitch with seams facing inward, leaving a small opening for stuffing.
Turn right-side out and stuff firmly.
How do you wash stuffed animals safely?
Check your stuffed animal’s care label first. Use cold water, gentle detergent, and delicate cycle for machine washing .
For electronics or delicate parts, spot clean with damp cloth and mild detergent instead.
What thread weight works best for plush?
You’ll want 30 or 40 weight thread for plush projects. Opt for a thicker thread around 30 or 40 weight, with strong polyester thread being your best bet for durability when stuffing.
Can you repair torn seams effectively?
Use a ladder stitch or slip stitch with matching thread. Work small, even stitches while gently pushing stuffing back inside. Keep tension firm but not tight to avoid puckering.
How do you store fabric patterns long-term?
Store fabric patterns in acid-free folders or envelopes, then place them in sealed plastic storage boxes with cedar sachets.
Keep your collection in a cool, dry room away from direct sunlight to prevent deterioration.
Conclusion
Creating your own cuddly companions becomes second nature once you’ve mastered these sewing tutorials for stuffed animals. You’ll discover that transforming simple fabric scraps into treasured keepsakes brings unexpected joy to both maker and recipient.
These techniques open doors to endless creative possibilities, from quick gift solutions to meaningful family heirlooms. Start with basic patterns, then watch your confidence soar as each project becomes more ambitious and rewarding than the last.
- https://www.toynk.com/blogs/news/best-fabric-for-plushies
- https://www.funkyfriendsfactory.com/blog/fabrics-for-sewing-soft-toys/
- https://sewcutepatterns.com/blog/stuffed-animal-soft-toy-making-supplies
- https://www.reddit.com/r/sewhelp/comments/1625mpc/which_hand_stitch_to_use_for_sewing_plushie_parts/
- https://www.instructables.com/Make-a-Custom-Stuffed-Animal/

