This site is supported by our readers. We may earn a commission, at no cost to you, if you purchase through links.
But here’s the good news: once you understand how velvet behaves—its nap direction, pile density, and tendency to creep—you can work with these characteristics instead of fighting them. The right needle, a few strategic tools, and some adjusted techniques transform velvet from intimidating to manageable, letting you create garments and projects with that signature depth and shimmer intact.
Table Of Contents
- Key Takeaways
- What Makes Velvet Unique for Sewing
- Choosing The Best Velvet and Patterns
- Preparing Velvet Before Sewing
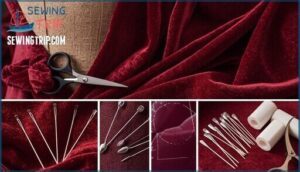
- Essential Tools and Materials for Velvet
- Cutting and Marking Velvet Accurately
- Sewing Techniques for Perfect Velvet Seams
- Finishing, Pressing, and Hemming Velvet
- Caring for and Maintaining Velvet Projects
- Frequently Asked Questions (FAQs)
- Conclusion
Key Takeaways
- Velvet’s unique pile structure creates friction coefficients as low as 0.2 and can produce 15–20% color shifts if cut against the nap, requiring careful attention to nap direction throughout cutting, sewing, and pressing to maintain consistent appearance.
- Using the right tools—including Microtex or ballpoint needles (70/10–80/12), fine polyester thread, specialty presser feet like Teflon or walking feet, and needle boards for pressing—transforms velvet from unmanageable to workable by preventing pile crushing and fabric slippage.
- Hand basting reduces fabric creeping by 75% before machine stitching, while proper stitch settings (2.5–3.0 mm length, 3.0–3.5 tension, reduced presser pressure) prevent seam puckering and pile distortion during construction.
- Single-layer cutting with the pile facing down, steam-hover pressing techniques (keeping the iron 2.5 cm above fabric), and single-fold hems reduce bulk by up to 50% while preserving velvet’s luxurious texture through finishing and long-term care.
What Makes Velvet Unique for Sewing
Velvet isn’t like other fabrics—it’s got personality, and that personality can throw you a curveball if you’re not prepared. The pile, the nap, the way it shifts under your presser foot—these quirks are what make velvet both stunning and tricky to work with.
Here’s what you need to know before you cut your first piece.
Types of Velvet Fabrics
Velvet fabric comes in several distinct types, each suited to different projects. Silk velvet remains the luxury standard, commanding high prices for its exceptional luster and breathability. Modern alternatives blend cotton, polyester, rayon, and nylon to balance durability with affordability. Understanding these fabric types helps you match velvet weight and characteristics to your sewing vision. One popular choice is crushed for its look.
- Silk Velvet: Traditional choice offering greater sheen, though it requires dry cleaning and costs considerably more than synthetic options
- Stretch Velvet: Contains 5–10% spandex for flexibility, making it ideal for fitted garments and comfortable everyday wear
- Crushed Velvet: Features twisted piles creating textured patterns, popular for eveningwear with dramatic visual appeal
- Velveteen: Short-pile alternative weighing 320–400 g/m², exceptionally durable for upholstery and structured projects
Velvet’s Pile and Nap Direction
Beyond choosing the right velvet fabric, understanding pile construction and nap direction is fundamental to sewing velvet successfully. The pile—those upright fibers attached to the woven base—creates velvet’s signature texture, but it also determines how light reflects across your fabric. When you brush your hand along velvet, you’ll notice the color shifts from light to dark depending on nap reflectivity.
That’s why cutting direction matters so much: misaligned nap can create a 15–20% tonal variance between seams. Fiber properties influence how the pile behaves during cutting and maintenance effects like pressing, so you’ll need to respect the nap throughout your entire project.
Velvet’s unique texture comes from the dense pile of threads with a smooth nap.
Common Challenges When Sewing Velvet
Once you understand how nap affects velvet’s appearance, you’ll quickly encounter the practical hurdles that make this fabric notoriously tricky. Fabric slippage tops the list—velvet’s pile creates friction coefficients as low as 0.2, causing layers to shift up to 4 mm per 10 cm seam if you’re not careful.
Seam puckering affects most projects without proper tension adjustments, while pile crushing happens when pressure exceeds safe thresholds during pressing or storage.
Marking errors leave permanent traces on rayon varieties, and tension issues create ridges that ruin your finish—avoiding creeping in velvet requires hand-basting or specialized feet to prevent seam distortion before any ripping becomes necessary.
Choosing The Best Velvet and Patterns
Not all velvet is created equal, and pairing the right fabric with the right pattern can make or break your project. Your choice depends on how the velvet behaves and what you’re trying to create.
Here’s what to think about when selecting velvet and matching it to a pattern that works.
Selecting Velvet by Weight and Drape
Ever wondered why some velvet glides while others stand firm? GSM impact and pile influence shape every yard. Lightweight velvet fabric (under 170 GSM) brings fluid drape, while heavyweight options offer structure. Consider these for your next project:
- GSM impact on drape
- Texture correlation with pile length
- Weight application for durability
- Fabric types and characteristics
- Draping fabric for movement
Pattern Types Suited for Velvet
When you’re choosing velvet patterns, lean into simple silhouettes and bias-cut designs. These highlight velvet’s drape and minimize fuss. Structured jackets work best with cotton or velveteen, while pattern efficiency matters for beginners. Modern examples like the Hansie Top or Plaza Jacket show how pattern selection shapes success—see the table below for emotional inspiration.
| Pattern Type | Velvet Advantage |
|---|---|
| Bias-cut Skirt | Fluid movement |
| Simple Top | Minimal distortion |
| Structured Jacket | Sharp outlines |
| A-line Dress | Even drape |
Considering Fit, Silhouette, and Design Details
Harmony between velvet drape and silhouette choice is essential. You’ll want to:
- Allow extra ease allowance for less stretch in fitted garments.
- Align nap direction for consistent tone and smooth seams.
- Prioritize detail visibility—limit topstitching and use linings for comfort.
When choosing velvet patterns, focus on fit, strategic closures, and lining velvet garments to avoid bulk and friction.
Preparing Velvet Before Sewing
Before you start sewing velvet, a little prep work goes a long way. Handling this fabric with care sets you up for a smoother experience. Here’s what you’ll want to think about first.
Prewashing and Preshrinking Velvet
Did you know velvet’s fiber shrinkage can change your project’s fit by up to 8%? Prewashing velvet fabric isn’t just about dye release—it’s about fabric preparation.
Use home preshrinking methods like steam or gentle hand washing, adjusting for temperature effects. Always test with a swatch to gauge fabric shrinkage, especially before cutting or sewing.
Managing Velvet Nap and Grain
Nap direction in velvet is like a hidden compass—ignore it, and your project’s color and texture can go off course. Always check the pile direction and align your fabric grain before cutting.
Use practical testing, like a nap test or fingertip glide, to confirm consistency. Stabilize with tissue paper, and remember: consistent cutting techniques prevent mismatched panels and uneven sheen.
Creating and Adjusting Pattern Pieces
Ever tried wrangling velvet pattern pieces and felt like you’re herding cats? Nap alignment is non-negotiable—every piece must follow the grainline.
Add extra seam allowance for fabric bulk, minimize pattern pieces to reduce waste, and use silk thread tailor’s tacks for marking.
Don’t skip precise fitting adjustments, or your cutting layout may sabotage that luxurious finish.
Essential Tools and Materials for Velvet
Having the right tools and materials makes sewing velvet much smoother. You’ll want to pay attention to a few key choices before you start.
Here’s what you’ll need for the best results.
Recommended Needles and Threads
Needle selection is your velvet project’s backbone—choose wisely, and seams sing.
For smooth sewing, pair these essentials:
- Microtex or universal needles (70/10–80/12) for standard velvet
- Ballpoint or stretch needles for stretch velvet
- Fine polyester thread for strong, clean stitch appearance
- Test tension adjustments and replace needles often for consistent results
Maintenance practices matter—don’t skip them.
Specialty Presser Feet and Accessories
Once your needle’s sorted, specialty presser feet become your velvet allies. A Teflon foot glides smoothly, while a walking foot keeps layers from creeping.
Pressure adjustment is key—too much flattens the pile. Foot compatibility is easy with shank adapters.
Needle boards and a velvet pressing cloth protect texture, and don’t forget regular roller maintenance for perfect seams.
Stabilizers, Tapes, and Marking Tools
Once your presser foot is sorted, Stabilizer Selection steps in to support velvet’s stretch and pile. Adhesive Application, like spray or stick-back stabilizers, keeps fabric steady for embroidery.
Marking Methods matter—tailors tacks and fabric markers prevent nap damage, while fabric clips sidestep punctures.
Edge Control with bias tape or organza keeps seams crisp, especially when Combining Systems for layered projects.
Cutting and Marking Velvet Accurately
Getting velvet ready for sewing starts with careful cutting and marking. This step takes a steady hand and the right approach to avoid damaging the fabric’s delicate pile.
Here’s how you can get crisp, accurate pieces every time.
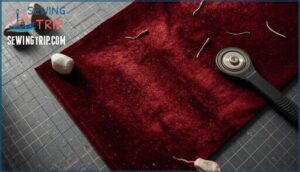
Cutting Velvet in a Single Layer
If you want crisp results, cutting velvet in a single layer is essential. Nap direction and grain accuracy matter—missteps here can lead to mismatched shading or distorted seams.
Lay your velvet pile-side down on a clean cutting surface, use pattern weights instead of pins, and keep fiber management in mind for a perfect finish.
Using Rotary Cutters and Tissue Paper
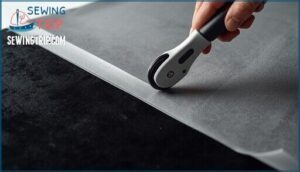
Once your velvet is laid flat, grab a 45mm rotary cutter and layer lightweight tissue paper (around 12gsm) beneath the fabric. This pairing keeps nap directionality true, prevents slippage, and extends blade lifespan.
For smoother results, try these:
- Layering techniques with tissue
- Sharp blade maintenance
- Always cut with nap direction in mind
Transferring Markings Without Damaging Pile
When marking velvet fabric, you’ll want to sidestep tailors chalk and heavy fabric markers. Tailors tacks, pounce powders, and basting underlining all protect the pile’s texture.
Ceramic pencils offer crisp lines for quick jobs, while steam realignment restores nap if needed.
These marking techniques keep your project precise and your velvet’s lush finish untouched.
Sewing Techniques for Perfect Velvet Seams
Getting velvet seams just right takes a little extra care and the right approach. You’ll need to think about how the fabric moves, how your stitches land, and which sewing methods suit your project best.
Here’s what to keep in mind as you start stitching velvet.
Basting and Preventing Fabric Creeping
When velvet layers slide against each other, it’s because the pile creates uneven friction that causes up to 10 mm of shift per 25 cm seam. Hand basting reduces this creeping by 75%, locking layers together before machine stitching.
You can also use spray adhesive, Wonder tape, or fabric glue along seam allowances for temporary stabilization. Basting velvet fabric with diagonal stitches prevents slippage, especially on curves where pile distortion peaks.
Stitch Settings and Machine Adjustments
Why do your machine settings matter so much? Tension calibration at 3.0–3.5 prevents seam puckering, while a longer stitch length of 2.5–3.0 mm keeps pile intact.
Set presser pressure to 2–3 to avoid crushing velvet’s nap.
Choose universal or sharp needles sized 70/10–80/12, and adjust your feed dog or use a walking foot to prevent fabric shifting during sewing.
Hand Vs. Machine Sewing for Velvet
Should you reach for needle and thread or trust your machine? Hand basting prevents fabric creeping on curves and bias edges, while machine stitching delivers consistent speed—up to 10 times faster for straight seams.
- Seam Durability: Hand sewing techniques like saddle stitching offer 25% greater tensile strength than standard machine stitching
- Fabric Control: Hand basting every seam before machine stitching ensures precise alignment and prevents pile distortion
- Stitch Precision: Machine sewing provides uniform 2.5–3.0 mm stitches, but hand stitching allows tension adjustment per stitch
- Application Cases: Use hand finishing for hems and details; machine stitch linings and straight seams for sewing speed
Finishing, Pressing, and Hemming Velvet
Once your seams are sewn, the real finesse begins with how you finish, press, and hem your velvet. These final steps can make or break the luxurious look you’re after, so it’s worth getting them right.
Let’s walk through the techniques that’ll keep your velvet looking plush and professional from seam to hem.
Seam Finishes That Prevent Bulk
The key to professional velvet seams is to keep them light. Serged seams and zigzag finishes reduce bulk by up to 20% compared to bound finishes, which trap thickness. Always trim seam allowances to ¼ inch, then grade them—cutting one layer slightly smaller prevents ridging on the pile surface by roughly 35%.
This table shows your best options:
| Seam Type | Best For |
|---|---|
| Serged seams | Most velvet weights; durable through 15+ washes |
| Open zigzag finishes | Rayon and acetate velvets; heat-sensitive fabrics |
| Catchstitched hems | Silk velvet; maintains drape without stiffness |
| Single-fold blindstitched hems | Stretch velvet; preserves elasticity |
| Hand-overcast seams | Luxury pieces; increases flexibility by 12% |
Pre-serging raw edges before construction reduces fiber shedding by 70%. Skip French seams—they add 50–65% more bulk and create visible ridges. Grading combined with steaming from above the pile keeps everything smooth without crushing.
Pressing Velvet Without Crushing
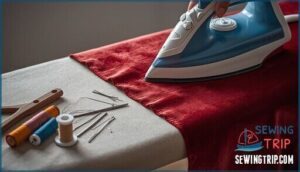
Direct heat and pressure flatten velvet permanently—fibers lose up to 60% of their rebound after just 15 seconds under an iron. That’s why pressing velvet fabric demands steam iron hover techniques, keeping the iron 2.5 cm above the surface. Use a velvet pressing cloth or needle board to protect pile during steaming techniques.
Adjust fabric adjustments based on type: silk velvet tolerates 120–160°C, synthetics max at 135°C. For pile restoration, gentle brushing after steam recovers 80% of texture.
Preventive care means avoiding repeated heat cycles and allowing 30 minutes of air drying.
Effective Hemming Methods for Velvet
Once you’ve mastered pressing, hemming velvet effectively comes next. Hang your project for 24 hours before marking—stretch velvet can lengthen up to 2.5 cm. Use fine polyester thread and a blind hem stitch or slip stitch for invisible finishes. Choose single-fold hems to reduce bulk by 50%, and finish raw edges with serging or zigzag stitches.
Hand-hemming over a tailor’s ham creates smooth curves, while walking feet reduce slippage by 40%. Properly finished hems stay uniform within 0.3 cm even after dry cleaning, with appearance outcomes showing near-invisible results when thread matches fabric color closely.
Hemming techniques that work:
- Thread selection matters: Fine silk or polyester thread with 70/10 needles prevents pile damage while keeping stitches nearly invisible
- Hem relaxation saves adjustments: Fabric settles naturally after hanging, preventing uneven hemlines across different grain directions
- Construction techniques reduce bulk: Single-fold hems with catchstitching show 20–30% more elasticity than straight stitches on curves
- Finishing tools preserve texture: Use velvet boards or thick towels during final pressing to maintain 95% pile height retention
Caring for and Maintaining Velvet Projects
Once you’ve sewn your velvet masterpiece, the work isn’t quite done. Proper care keeps that luxurious pile looking fresh and prevents damage over time.
Here’s how to clean, store, and even make the most of your leftover scraps.
Cleaning Velvet Garments and Decor
When velvet garment care requires attention, your approach matters. Spot clean small stains immediately—blotting with cool water and mild soap removes over 90% of marks on synthetics. Stain removal success drops sharply after ten minutes, so speed counts.
Washable velvets tolerate gentle cycle washing below 30°C, but professional cleaning or dry cleaning preserves pile structure best, maintaining texture far better than home washing methods. For drying methods, always air-dry flat; machine drying crushes pile permanently.
Velvet preservation starts with proper technique.
Storing Velvet to Prevent Damage
Once you’ve cleaned velvet, proper storage becomes your next defense against pile damage. Humidity control between 45% and 50% prevents mildew—over 70% RH for three months invites mold growth, especially on silk velvet.
Store garments on padded hangers with 3 cm spacing to avoid friction. Garment bags made from cotton allow airflow, while plastic traps condensation.
For archival storage, use acid-free tissue and keep temperatures between 16°C and 20°C to maintain shape retention and pile preservation.
Managing Velvet Scraps and Reducing Waste
Beyond proper storage, you can reduce waste by repurposing velvet scraps into patchwork projects or appliques. Fifteen percent of fabric becomes offcuts during production—sustainable sourcing with recycled polyester or organic cotton lowers this impact.
Upcycling velvet into accessories or quilts keeps non-biodegradable synthetics from landfills, while viscose options biodegrade within four months under proper conditions.
Recycling options and biodegradability factors depend on fiber content, so check labels before discarding.
Frequently Asked Questions (FAQs)
What kind of thread should I use when sewing velvet?
Quality thread fiber makes or breaks your fabric weaving project, especially with delicate materials. For sewing velvet, polyester or silk thread selection works best—polyester for strength, silk for smooth seams.
Match color carefully, choose appropriate thread weight, and use special finishes that prevent breaks. Pair with proper needle selection for impeccable sewing velvet techniques.
How do I clean velvet garments?
Most velvet, especially silk or rayon pieces, needs professional dry cleaning for best results. Spot cleaning with a damp cloth works for minor stains, while steaming refreshes fabric and removes odors. Some synthetic velvets tolerate gentle hand wash in cold water—always check your care label first.
What alterations are recommended for velvet garments?
When adjusting garments, focus on hemming techniques like hanging pieces for 24 hours before marking, preventing puckering.
Seam adjustments and sleeve alterations work well with careful pinning.
Maintain pile integrity through gentle pressing challenges using needle boards and protective cloths throughout garment construction.
What grain should velvet be cut on?
Just like a compass guides you north, fabric grainline keeps velvet stable and true. You’ll want to cut velvet on the lengthwise grain, parallel to the selvage, which preserves drape and prevents distortion while ensuring consistent nap direction throughout your project.
How do I store unfinished velvet projects?
You can store unfinished velvet projects in covered containers lined with acid-free tissue paper to prevent dust accumulation and pile damage. Keep them flat in a climate-controlled space below 50% humidity to reduce mold risk and fabric deterioration.
Organizing UFOs minimizes project anxiety.
Can velvet be washed in a machine?
Some velvet types can handle machine washing, while others demand dry cleaning—it all depends on fiber content. Polyester and crushed velvet tolerate gentle cycles with cold water and mild detergent, but silk velvet risks damage.
Always check care labels, use mesh bags for damage prevention, and air dry flat to avoid fabric shrinkage.
Whats the best way to remove wrinkles?
Steam is your best friend when wrinkles appear. Hold a garment steamer 1-2 inches from the fabric, sweeping gently without direct contact.
If you prefer ironing velvet, use a low steam iron on the wrong side with a pressing cloth.
How do you handle fraying velvet edges?
Fraying doesn’t have to unravel your project like a loose thread on opening night. Prevent it with pre-cutting stiffening using fabric starch or fray check applied before trimming seam allowances.
After cutting, seal edges using serging techniques with your serger or try an overcasting stitch on your machine. Stabilizer options like fusible interfacing add durability, while bias tape encloses raw edges beautifully.
Choose sharp needles to minimize pile damage during seam finishing.
Can you sew stretchy velvet on regular machines?
Yes, you can sew stretch velvet on regular machines. Use a size 75/11 stretch needle, set your stitch length to 5-3mm, and adjust tension between 3 and A walking foot helps prevent slipping.
What interfacing works best with velvet fabric?
If you want to add structure to velvet, sew-in interfacing—especially silk organza—is your best friend because fusible interfacing can crush the pile and ruin that luxurious texture you’re working so hard to preserve.
Conclusion
Yes, sewing velvet takes patience—but it doesn’t require wizardry. Once you’ve mastered nap direction, chosen the right needle, and learned to handle that slippery pile with steady hands, you’ll find velvet becomes predictable.
Think of it like learning to drive on ice: intimidating at first, but manageable once you understand the physics.
Your seams will lie flat, your hems won’t pucker, and that lustrous surface will stay intact from first stitch to final press.
- https://patents.google.com/patent/CN103668822A/en
- https://icefabrics.com/blogs/news/choosing-the-right-velvet-fabric-types-textures-and-trends-of-velvet
- https://www.threadsmagazine.com/2020/02/10/how-to-sew-velvet-like-a-pro
- https://www.sewingworkshop.com/new-blog/sewing-with-velvet
- https://weallsew.com/sewing-with-the-irresistible-but-tricky-velvet/

