This site is supported by our readers. We may earn a commission, at no cost to you, if you purchase through links.

Wear closed-toe shoes—dropped shears can turn your toes into pincushions faster than you’d expect. Replace dull blades immediately since they’re more dangerous than sharp ones, requiring extra pressure that leads to slips.
Create designated spots for every tool so you’re not fishing around blind. Keep your workspace well-lit and clutter-free—good visibility prevents accidents.
Master these basics and you’ll discover techniques that turn potential hazards into precision tools.
Table Of Contents
Key Takeaways
- Store cutting tools properly – Keep rotary cutters with guards closed, needles in cushions, and scissors in designated spots to prevent accidents and maintain workspace safety.
- Wear closed-toe shoes – Dropped shears and scattered pins can cause serious foot injuries, so protect your feet with proper footwear every time you sew.
- Replace dull blades immediately – Sharp blades are safer than dull ones since they require less pressure and won’t slip, reducing your risk of cuts and injuries.
- Maintain good lighting and organization – A well-lit, clutter-free workspace helps you see hazards clearly and prevents dangerous fumbling for tools in shadows or mess.
Sewing Room Hazards
Your sewing room might seem like a peaceful creative haven, but it’s actually packed with more sharp hazards than a medieval armory.
From needles that can turn into tiny projectiles to rotary cutters that slice through more than just fabric, understanding these risks is your first step toward safe, injury-free crafting, and it is crucial for injury-free environments.
Sharp Object Injuries
Sharp objects in your sewing room aren’t just tools—they’re injury statistics waiting to happen.
Every pin is a potential puncture wound in disguise.
With needlestick injuries comprising 30,000 annual cases and sharp objects causing 18% of home hand injuries, sewing safety demands respect.
Your fingers face the highest risk, especially when you’re rushing through projects.
Understanding these sewing hazards and injury prevention basics helps you report incidents properly and practice first aid when accidents occur, keeping your creative space both productive and safe.
Healthcare workers face similar risks, so understanding sharp injury prevention is essential across various settings, emphasizing the importance of sewing safety and sharp injury prevention.
Needle Breakage Risks
Broken needles can turn into dangerous projectiles, threatening your eyes and face.
When you’re pushing through thick material or hitting metal bones, needle breakage spikes dramatically.
Poor needle quality and incorrect thread tension compound these risks.
Always slow your sewing speed when tackling challenging fabrics, and verify proper machine maintenance.
Remember: a broken sewing machine needle isn’t just an inconvenience—it’s a safety hazard waiting to happen, which is why it’s crucial to address the issue promptly to avoid any potential inconvenience.
Metal Bones in Garments
Metal bones transform your garment construction but demand respect.
These steel reinforcements can snap needles like twigs, turning your sewing machine into a projectile launcher.
Here’s your safety checklist:
- File bone ends smooth before inserting into channels
- Use heavy-duty needles designed for thick materials
- Sew slowly around boned areas to maintain control
- Keep pliers handy for safe bone handling and adjustments
Choose your needle type wisely—leather or denim needles handle metal encounters better than universal ones.
For maximum flexibility in corsets, consider using spiral steel bones.
Your garment style determines bone placement, so plan channels carefully to avoid surprise encounters during construction.
Quick Sewing Dangers
After working with metal bones, you might feel tempted to speed things up. But racing through projects brings real Speed Sewing Risks.
Rushed Stitching Errors, Seam Allowance Neglect, and Fatigue-Related Accidents often follow. Impatience Hazards can lead to sewing injuries, like poking your finger or worse.
Maintaining a safe workspace includes preventing tripping hazards. Slow down, double-check your sewing needle handling, and avoid preventable sewing accidents with sharp objects to minimize Sewing Injuries and ensure a safe working environment with preventing tripping hazards.
Cutting Tool Safety
You’ll want to treat your cutting tools with the same respect you’d give a loaded weapon—they’re sharp, they’re fast, and they don’t care if your finger gets in the way.
Proper storage, safe disposal, and consistent safety habits will keep your digits intact and your sewing projects blood-free.
Proper Storage Methods
Keep your scissors, pins, and needles organized in secure containers near your workspace.
Use magnetic strips to catch wayward pins, drawer dividers for separation, and labeled storage for quick identification.
A corkboard keeps hand needles visible and accessible. A magnetic pin cushion can also keep pins readily available.
This sharp object safety system prevents tools from becoming floor hazards while maintaining sewing organization efficiency.
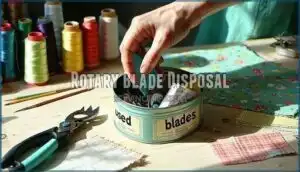
Rotary Blade Disposal
When your rotary cutter’s blade becomes dull, disposal matters for everyone’s safety.
Never toss loose blades in trash—they’re injury magnets for sanitation workers.
Safe containers like mint tins or old medicine bottles work perfectly.
Secure lids with tape when full, and label clearly "USED BLADES."
Knowing when to replace them is important, as dull blades fray fabric instead of slicing.
Some manufacturers offer blade recycling programs, trading old ones for discounts on replacements.
Blade Guard Importance
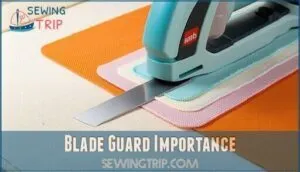
That rotary cutter blade guard isn’t just decoration—it’s your first line of defense against serious injuries.
That blade guard is the only thing standing between you and a trip to the ER.
Think of Guard Engagement as a reflex you’ll build through constant practice. Every single cut ends with that blade guard snapping back into place, no exceptions.
Here’s why Safety Protocols matter for your cutting tools:
- Accidental Cuts prevention: Exposed blades cause deep lacerations in seconds
- Foot Injuries protection: Dropped cutters become dangerous projectiles
- Industrial Settings standard: Professional fabric cutting facilities mandate blade guards
Your rotary cutter might feel like a harmless extension of your hand, but it’s designed for injury prevention first. Only expose that blade when you’re positioned directly over fabric, then immediately engage the guard. This simple habit separates safe sewers from emergency room statistics.
You can often find a replacement cutter guard online.
Closed-Toe Shoe Protection
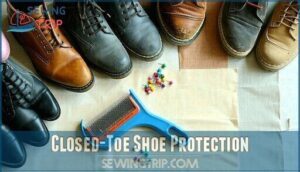
Protecting your feet isn’t just smart—it’s essential for sewing safety tips and hazard prevention.
Closed-toe shoes create a barrier against dropped rotary cutters, scattered pins, and sharp scissors.
Your shoe material safety matters; leather or thick canvas provides better protection than thin fabric.
Sole thickness matters too, preventing needles from penetrating through.
Choose slip-resistant shoes meeting workplace footwear standards to avoid accidents on fabric scraps.
Machine Sewing Precautions
When you’re machine sewing, your fingers get dangerously close to that needle moving at lightning speed—one slip and you’ll know exactly why they call it a "needlestick injury."
Machine sewing accounts for over 80% of sharp object incidents in textile work, so mastering these precautions isn’t just smart, it’s essential for keeping all ten fingers intact and avoiding a serious "injury".
Needlestick Prevention
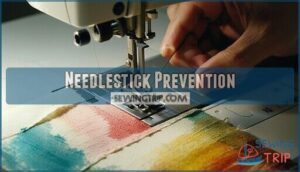
When you’re machine sewing, your fingers can become dangerously close to that needle dancing up and down at lightning speed.
Keep your hands positioned safely away from the presser foot, and never try to guide fabric directly under the needle.
If you feel resistance or hear unusual sounds, stop immediately and manually turn the flywheel to assess the situation.
Proper needle handling and regular machine maintenance will keep your fingers intact and your projects flowing smoothly.
Small Seam Allowances
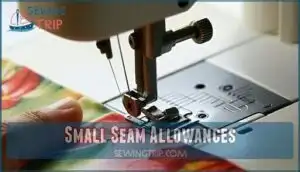
When sewing small seam allowances, your fingers naturally move closer to the presser foot, creating seam allowance risks and increasing needlestick potential.
Fabric slippage becomes more likely with narrow margins, making precision sewing challenging.
Pay extra attention during these moments – slow down your machine speed and use reinforcement techniques like stay-stitching. Accurate cutting from the start helps maintain consistent small allowances, reducing the need for dangerous adjustments mid-seam.
Metal Bone Precautions
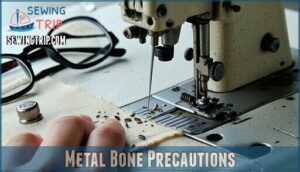
When sewing over metal bones in corsets or structured garments, you’re basically playing chicken with your needle. These rigid elements can snap needles instantly, sending metal fragments flying toward your face.
Always reduce your sewing speed to a crawl when approaching bone placement areas. Consider switching to heavy-duty needles with extra needle strength, and keep protective gear like safety glasses handy.
For delicate hand sewing near bones, use thimbles and maintain deliberate, controlled movements. These sewing safety precautions prevent dangerous needle breakage that ranks among the top sewing dangers.
Regular maintenance helps prevent potential machine breakdowns.
Correct Needle Selection
Beyond avoiding metal bones, your needle choice directly impacts sewing safety.
Using the wrong needle sizes or types creates dangerous situations—needles bend, break, or skip stitches when mismatched with fabric types.
Choose universal needles for most projects, ballpoint for knits, and sharp microtex for delicates.
Match needle point and thread pairing to prevent damage and guarantee smooth, safe stitching on your sewing machine.
Refer to a complete needle guide for assistance.
Workspace Organization Tips
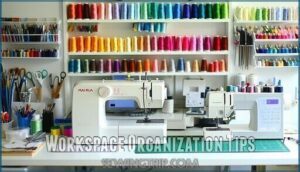
A clean, organized sewing space isn’t just about looking professional—it’s your first line of defense against accidents with sharp tools.
You’ll work faster and safer when you can see exactly where every needle, pin, and blade belongs, plus you won’t waste time hunting for that rotary cutter that’s hiding under fabric scraps, which is why a clean space is also about working faster.
Regular Cleaning Schedules
Post-sewing cleanup sessions transform chaotic workspaces into safe havens.
Your schedule frequency matters—daily tidying prevents dangerous debris accumulation while weekly deep cleans guarantee thorough tool maintenance and floor safety.
Essential preventative measures for sewing room organization:
- Daily 5-minute sweep – Remove fabric scraps that hide sharp objects and maintain clear sight lines to your sewing supplies
- Weekly vacuum ritual – Target carpeted areas where pins land point-up, focusing on high-traffic zones around cutting tables
- Monthly tool audit – Inspect all cutting implements for damage, clean machine components, and reorganize storage systems
- Seasonal deep clean – Declutter entire workspace, check safety equipment, and update sewing safety precautions protocols
Tool Visibility Importance
When you can clearly see every tool in your workspace, you’re less likely to grab the wrong end of scissors or fumble for a rotary cutter.
Good Tool Placement with strong Color Contrast against your work surface makes sharp objects instantly recognizable.
Strategic Shadow Reduction through proper lighting eliminates those sneaky hiding spots where needles love to disappear.
Your Organized Layout and Visual Cues transform sewing safety from guesswork into second nature.
Clutter-Free Workspaces
Transform your sewing area into a safety haven by mastering clutter-free workspaces.
You’ll discover that organized storage and decluttering benefits extend beyond aesthetics – they’re your first line of defense against accidents.
A streamlined sewing environment creates tool accessibility while promoting ergonomic setup and essential safety habits.
- Clear surfaces save lives – Hidden rotary cutters become foot-slicing landmines
- One project rule – Multiple WIPs create chaos where accidents lurk
- Daily 5-minute reset – Small habits prevent major disasters
- Everything has a home – Wandering scissors are accidents waiting to happen
- Clean as you go – Fabric scraps hide deadly pins like camouflaged traps
Proper Lighting Techniques
Proper lighting transforms your sewing area from a potential danger zone into a creative haven.
Task lighting from adjustable desk lamps targets your work, while ambient lighting fills the room evenly.
Choose daylight-balanced bulbs to reduce eye strain and prevent shadows that hide pins.
Position lights to minimize glare on fabric surfaces, creating a safer sewing environment.
Personal Safety Measures
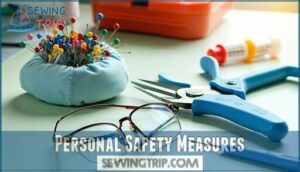
Beyond organizing your workspace, you’ll need to develop smart habits for handling sharp objects safely throughout your sewing process.
These personal safety measures can mean the difference between a productive sewing session and an unexpected trip to the emergency room, highlighting the importance of personal safety.
Disposing of Sharp Objects
Never overlook proper needle disposal methods – it’s your safety net.
Use an old spice jar with shaker holes for worn sewing needles and machine needles.
Always apply container safety labels to prevent mix-ups.
When handling full container disposal, secure the lid tightly before throwing away.
This spice jar reuse trick keeps sharp needles contained safely.
Keep a magnet nearby for locating lost pins during your sewing sessions.
Ironing Safety Precautions
Your iron’s hot surface can reach 400°F, making burn prevention essential while creating your masterpieces.
Always unplug your iron immediately after use—even auto-shutoff models can reheat if bumped.
Store irons on high shelves for child safety and pet safety, and consider silicone finger guards for extra protection when maneuvering around hot surfaces and steam.
Fire Hazard Prevention
Beyond burns and hot surfaces, your sewing room holds combustible materials that create fire hazards.
Fabric scraps, lint, and synthetic fibers ignite quickly when exposed to heat.
Keep your ironing board clear of loose materials, and never leave irons unattended near outlets.
Install smoke detectors in your sewing space and regularly clean dust from electrical cords to prevent dangerous sparks.
To further guarantee safety, consider unplugging appliances before adjustments to ensure a safe environment and prevent fire hazards.
Ergonomic Practices Importance
Your posture awareness directly impacts sewing safety practices and long-term comfort.
Position your workspace at eye level and maintain straight shoulders to reduce strain on your neck and back.
Strategic tool placement within arm’s reach prevents awkward twisting that leads to accidents.
Proper lighting impact can’t be overstated—bright, even illumination reduces eye fatigue and improves precision.
Smart break frequency every twenty minutes keeps your hands nimble and mind sharp, making sewing ergonomics a game-changer for both safety and creativity.
Frequently Asked Questions (FAQs)
What is the sharp thing used for sewing?
You’ll wield needles like tiny steel swords, piercing fabric with precision.
Needles are your primary sharp tool, along with scissors, rotary cutters, and pins that transform raw materials into finished creations.
Should I give the guy the sewing needle?
You shouldn’t casually hand someone a sewing needle without knowing their experience level and safety awareness.
Needles require careful handling since they’re sharp and can cause injuries if misused or dropped.
What is the sharpest needle for sewing?
Before Gutenberg’s printing press revolutionized text, needles were crafted by hand.
You’ll want leather needles for the sharpest point—they’re designed to pierce tough materials cleanly without tearing, making them perfect for precision work.
What first aid supplies should sewing rooms have?
You’ll need bandages, antiseptic wipes, tweezers for splinter removal, and instant cold packs for swelling. Keep scissors for cutting medical tape and disposable gloves to handle blood safely.
How do you treat minor needle puncture wounds?
When you’ve been "kissed" by a wayward needle, clean the tiny wound with soap and water.
Then apply pressure with a clean cloth, check for embedded fragments, apply antibiotic ointment.
And bandage if needed.
Are there age restrictions for children using scissors?
Children can safely use scissors with proper supervision starting around age 3-
You’ll want child-safe scissors with rounded tips initially, then progress to sharper ones as they develop motor skills and demonstrate responsibility.
What insurance covers sewing-related home accidents?
Your homeowners insurance typically covers needle punctures and cuts through medical payments coverage.
Personal liability coverage pays medical bills, lost income, and other damages from home accidents up to policy limits, which can include medical payments.
How often should you replace dull cutting blades?
Are your blades cutting like butter or fighting you every step?
Replace rotary cutter blades after 8-12 hours of use or when they start dragging, skipping, or requiring extra pressure to cut cleanly through fabric.
Conclusion
Smart sewing with sharp objects becomes second nature once you’ve built these safety habits into your routine.
You’ll work faster and more confidently when you’re not worried about accidents lurking around every corner.
Remember, a few seconds spent properly storing that rotary cutter or switching on better lighting can save you hours of dealing with injuries.
Your fingers will thank you, and your projects will show the difference that comes from relaxed, focused stitching.


