This site is supported by our readers. We may earn a commission, at no cost to you, if you purchase through links.

Altering shirts to perfection isn’t rocket science if you focus on taking in the sides. First, start by pinning fabric around the waist and hips while your shirt is inside-out, then carefully mark these spots.
Grab a sewing machine to stitch along these marks, maintaining symmetry. Take it slow—sewing isn’t a race, and a collected pace avoids complications.
Voilà! Your shirt now flatters your hard-earned figure. Mastering “taking in shirt sides easily” might just reveal newfound confidence. Think you’ve nailed it, or need a pro’s touch? Stay tuned!
Table Of Contents
Key Takeaways
- Master the Basics: Start by turning your shirt inside out and pinning the excess fabric around your bust and hips, like you’re prepping for a tailor’s runway show. Trust those pins—they’re your guide to achieving a sleek, flattering fit.
- Precision Tools Are Key: Don’t skimp on the essentials. A sewing machine, a set of sharp straight pins, and a trusty measuring tape will become your partners in crime. Think of them as the Avengers of your sewing toolkit—each playing a vital role in your success.
- Take It Slow and Steady: Remember, this isn’t a race. Sew at a calm, collected pace, and you’ll avoid the disaster of crooked seams. It’s like a leisurely stroll through the park—enjoy the process and appreciate the transformation.
- Embrace Mistakes as Learnings: Got a wonky seam? No worries—your seam ripper is there to save the day from those sewing snafus. Consider mistakes like those old high school math tests; they’re just practice in disguise, helping you refine your craft.
Identifying the Perfect Fit
You’re not alone if your shirts fit perfectly in the shoulders but turn into parachutes at the waist.
Taking in the side seams can save you from looking like a sailboat and give you that sleek, fitted appearance everyone admires.
Common Issues With Shirt Fitting
Struggling with shirts that fit well in the shoulders but feel loose around the waist and hips? You’re not alone! This common fit issue can be easily remedied by taking in the side seams.
Say goodbye to that boxy, unflattering look and hello to a refined, figure-flattering silhouette.
Benefits of Taking in the Side Seams
When your shirt’s loose fit annoys you, taking in the side seams can work wonders.
An improved silhouette and enhanced comfort lead to a flattering fit that boosts your confidence.
It’s akin to finding a magic wand for your wardrobe, turning a shapeless tent into a stylish favorite.
Grab your sewing machine and transform!
Choosing the Right Fabric for Alteration
Choosing the right fabric for alteration isn’t rocket science, but it does involve some fun detective work. Consider the fabric weight and stretch potential—nobody wants a shirt tighter than an elephant’s trunk after sewing ease!
Opt for wrinkle-resistant materials, and make sure color matching is good.
With knits, a zig-zag stitch works wonders for taking in shirt sides.
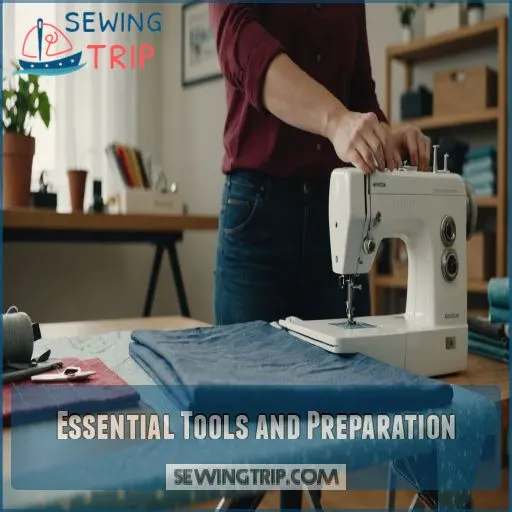
Essential Tools and Preparation
Before you start altering your shirts, gather essential tools like a sewing machine and measuring tape to make sure the process goes smoothly.
You don’t want to end up as the person who’d a perfectly fitting shirt but couldn’t find scissors to cut the thread!
Must-Have Tools for Altering Shirts
To take in those shirt sides, you’ll need a few key tools. A sewing machine or serger is a must, along with a trusty measuring tape and some straight pins.
Don’t forget the iron – it’ll help you press those seams to perfection.
And a seam ripper is a lifesaver for any slip-ups.
Measuring Techniques for a Flattering Fit
Honestly, measuring for a flattering fit isn’t rocket science — it just takes a bit of savvy.
Start by pinching the fabric at the bust, waist, and hips to identify excess.
- Use a fabric marker to note these measurements.
- Check alignment for symmetry.
- Trust your instincts; your body’s unique, and measurement guarantees personalized perfection!
Using a Reference Shirt for Guidance
Having a well-fitting reference shirt on hand is a game-changer. Use it to compare patterns, analyze proportions, and make sure your alterations maintain the shirt’s original style.
Drape the fabric, pin it, and double-check the fit – this will help you take in the sides with confidence and precision.
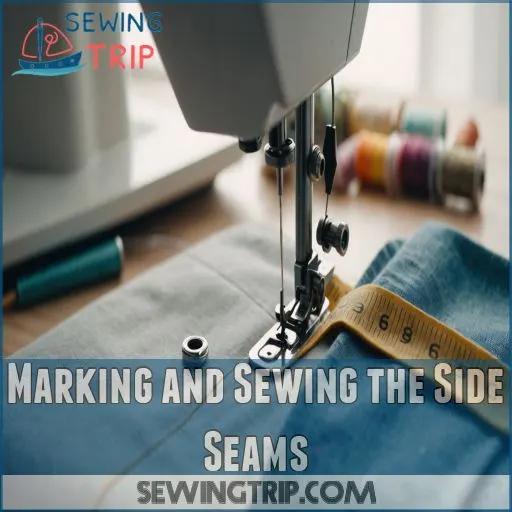
Marking and Sewing the Side Seams
Turning your shirt inside out and pressing it flat might sound like you’ve accidentally joined a laundry wrecker’s club, but it’s actually the first step to achieving that dream fit.
With a few strategic marks using pins or chalk, you’ll be on your way to transforming your shirt from shapeless to sleek.
Turning the Shirt Inside Out and Pressing Flat
You’re all set with your tools, ready to start turning that shirt into a masterpiece! Begin by flipping the shirt inside out like you’re switching gears in Central Park traffic.
Press it flat with an iron to remove wrinkles. A few good passes with proper ironing techniques should align seams and preserve shirt shape.
It’s like playing home decorator, but without the wallpaper and mismatched cushions! This step is imperative for avoiding fabric puckering.
Trust me, you’ll thank yourself when taking in shirt sides easily. This preparation is key to a successful project, and it’s worth the extra effort to get it right from the start, creating a great foundation.
Marking the Areas for Alteration With Pins or Chalk
Now that your shirt is inside out and pressed flat, it’s time for the fun part—marking.
Think of yourself as an artist, using pins or chalk to sketch your perfect fit. For effective marking techniques, align your seams carefully, ensuring even spacing like a pro architect measuring a blueprint.
Choosing the right marking tools is key; chalk is gentle on delicate fabrics, while pins offer precision.
Just like a game of connect the dots, follow your guide shirt’s lines and let creativity stitch your vision together, think like a pro architect and use a Kitchener Stitch to create a seamless finish.
Finishing Touches and Additional Tips
You’ve sewn your side seams, and now it’s time for the finishing touches to complete your tailor-made masterpiece.
Hemming the Bottom Edge of the Shirt
While you’re handling the side seams, hem the bottom edge for a complete touch.
Choose a strong stitch type for edge durability. Check fabric compatibility—some fabrics sing better with certain stitches.
Mind your seam allowance and don’t skip proper ironing techniques for a sleek finish. Learn about sewing curves for a beautiful result.
Using a Seam Ripper for Mistakes
Oops, made a mistake? No worries – that’s what the trusty seam ripper is for!
Gently slide the blade under the stitches, taking care not to snag the fabric. With a little patience, you’ll have that error fixed in no time.
- Use a sharp, fine-tipped seam ripper.
- Work slowly and carefully to avoid cutting the fabric.
- Dispose of loose threads properly to keep your workspace clean.
Taking Your Time to Avoid Errors
If you’ve embraced your seam ripper, great news— patience is your best friend now.
Slow and steady wins the sewing race.
Relax, enjoy the process, and confirm seam alignment.
Adjust thread tension as needed, and let’s aim for error reduction perfection by checking for signs of tension imbalance!
Practicing for Perfect Results
Mastering sewing skills requires consistent practice and learning advanced techniques.
Think of each shirt alteration as a friendly dance with fabric and thread.
Embrace the trial and error process, letting patience build your confidence.
With persistence, you’ll transform mistakes into learning opportunities, becoming truly skilled.
Achieving a Tailored Look With Confidence
You’ve done it—transformed your shirt to fit perfectly.
but sharing your handiwork online lets you gather supportive feedback and feel proud of your skills.
Consider professional help for those stubborn shirts with tricky seams while enjoying the confidence boost of well-fitting clothes.
Sharing Your Results and Getting Feedback
Once you’ve completed your shirt alteration, share your impressive results online!
Post before-and-after photos on social media, join DIY sewing groups, and seek feedback from friends. Their praise will boost your confidence and inspire others to tackle their own tailoring projects.
Embrace the joy of a perfectly fitted shirt!
- Share your transformation on social media platforms.
- Engage with sewing enthusiasts in online forums.
- Invite trusted friends to critique your handiwork.
- Connect with local DIY sewing groups for support.
Considering Professional Help for Complex Alterations
Sometimes, tackling complex alterations is like wrestling a bear. It’s wise to seek a tailor’s expertise.
Weigh the pros and cons:
| Aspect | DIY Approach |
|---|---|
| Cost vs DIY | Effective |
| Finding a Tailor | Convenient |
| Quality | Professional |
| Time Investment | Minimal |
| Expertise | Guaranteed |
Let the pros handle it, while you enjoy freedom and a flawless fit!
Enjoying the Benefits of a Well-Fitting Shirt
With your newly customized shirt, you’ll exude confidence and style.
No more swimming in excess fabric – the perfect fit accentuates your figure and elevates your overall look, especially when you use the right techniques for stabilizing stretchy fabrics.
Embrace the power of a well-fitting garment; it’s a game-changer for your wardrobe and self-assurance.
Enjoy the compliments and the effortless sophistication.
Frequently Asked Questions (FAQs)
How to make a shirt tighter around the waist?
To tighten a shirt around the waist, turn it inside out, mark excess fabric from bust to hips, and sew along these lines.
Use a sewing machine or serger for a polished finish, ensuring even adjustments.
How to take in the sides of a dress shirt?
Turn the shirt inside out, mark where you need narrowing.
Use pins as guides and try a reference shirt.
Keep stitches consistent for a custom fitted shirt finish.
Voilà, you’ve mastered the art of a custom finish.
How to take in shirts that are too big?
Is your shirt more tent than top? Pin the excess fabric at the bust, waist, and hips, mark evenly inside-out, and sew a smooth line from sleeve to hem.
Channel your inner tailor and reclaim your silhouette.
How to hem the sides of a shirt?
Grab your shirt like you’re tackling a wild project.
Measure precisely, pin along the sides, and sew confidently from sleeves to hem.
Press your seams like you’re ironing out life’s wrinkles—feeling proud and accomplished with each stitch, feeling proud and accomplished with each stitch.
How do I ensure the new seam blends seamlessly?
Align your sewing style with a cat’s graceful stealth. Pin carefully, matching fabric edges.
Sew at a steady pace, maintaining consistent stitch tension.
Double-check symmetry with chalk lines, ensuring the seam becomes as invisible as a magician’s trick.
What if the shirt fabric is delicate or stretchy?
Delicate draping demands delicate stitching. Use a ballpoint needle to avoid snags and try a zigzag or stretch stitch for flexibility.
Tread lightly like tiptoeing through a tulip garden to maintain fabric grace and glamor.
Can I take in the sleeves as well?
Taking in the sleeves is a breeze. Just pinch the excess fabric, mark it, and sew it down – voila, a custom fit from top to bottom. Easy peasy!
How do I handle uneven body shapes when pinning?
When dealing with uneven body shapes, mark key areas with different colored pins to distinguish variations.
It’s like giving each side a unique setting on the dial, ensuring a custom fit personalized to your individuality.
Is it possible to adjust the neckline or armholes?
Picture it: Your shirt’s too loose; you’re swimming in fabric!
To adjust necklines or armholes, carefully unpick seams, trim excess fabric, and resew.
Think of it as giving your shirt a stylish, new frame.
Conclusion
Absolutely, taking in shirt sides is the ultimate sartorial superpower! With a little patience and practice, you’ll be altering your wardrobe like a pro, creating a customized look that flatters your unique figure.
Mastering the art of "taking in shirt sides easily" will have you strutting with newfound confidence, turning heads wherever you go.
So, what’re you waiting for? Grab those pins and thread, and let’s get sewing with newfound confidence!


