This site is supported by our readers. We may earn a commission, at no cost to you, if you purchase through links.
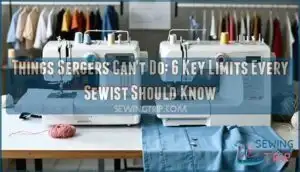
You can’t sew buttonholes, attach facings, or install zippers with a serger since these require precise straight stitching and backstitching capabilities.
Sergers also can’t reverse stitch, create topstitching, or sew on both sides of fabric like regular machines.
Understanding these limitations helps you know when to reach for your regular sewing machine instead, and things sergers can’t do explained becomes clearer when you realize they’re finishing specialists, not all-purpose tools.
Mastering when to use each machine transforms your sewing from frustrating to fantastic, and it is essential to recognize the limitations of sergers to achieve the best results, making them finishing specialists in their own right.
Table Of Contents
Key Takeaways
- You can’t sew buttonholes with a serger because it lacks specialized attachments and precision stitching capabilities that buttonholes require.
- You can’t install zippers using a serger since it doesn’t have adjustable tension settings or specialized zipper feet needed for clean alignment.
- You can’t create topstitching or decorative stitches with a serger because it’s limited to edge finishing and can’t provide the precise control needed for surface stitching.
- You can’t reverse stitch with a serger, which means you can’t reinforce seam beginnings and ends like you can with a regular sewing machine.
Sewing Buttonholes
Buttonhole limits frustrate many sewists who assume their serger can handle everything.
Your serger simply can’t create buttonholes because it lacks the specialized attachments that sewing machines use for automatic buttons and precise button placement.
Sergers can’t handle the precision work that buttonholes demand—stick with your sewing machine.
Sewing machines have dedicated buttonhole feet** that measure, mark, and stitch with perfect stitch quality.
They create those essential bartacks that reinforce each end.
Your serger’s design focuses on overlocking edges, not the intricate back-and-forth stitching that buttonholes demand.
When you need buttonholes, stick with your regular sewing machine.
The sewing machine vs serger debate ends quickly here – your sewing machine wins every time for sewing holes that won’t tear out after a few uses.
Plan your workflow strategically.
Create buttonholes with your sewing machine first, then use your serger for edge finishing.
This approach gives you the best of both worlds: professional internal buttonholes and beautifully finished seams that prevent fraying.
Sewing Facings
While buttonholes pose one challenge, sewing facings presents another significant hurdle for serger users. You can’t achieve the precise, flat finishes that facings demand with a serger’s overlocking mechanism.
Facings require careful fabric preparation and exact tension control that sergers simply can’t provide. The machine’s preset tension settings stretch facings unevenly, creating puckered, unprofessional results. When you attempt to overlock facings, you’ll notice messy thread loops along the edges that scream "homemade" rather than polished.
The serger’s cutting blade creates additional problems by trimming seam allowances too closely. This leaves insufficient fabric for proper grading and understitching—techniques that keep facings lying flat against your garment.
Key facing techniques that require sewing machine functions include:
- Understitching to prevent facings from rolling to the right side
- Grading seam allowances for reduced bulk
- Blind hemming for invisible finishes
- Precise topstitching for professional edge finishing
Your sewing machine excels at these facing limits where sergers fall short. The controlled stitching, adjustable tension, and specialized feet give you the precision needed for flawless necklines and armholes. For optimal results, understanding serger sewing facings techniques is vital to improve your sewing skills, and it’s essential to master them for superior outcomes.
Sewing Zippers
Zipper installation becomes a wrestling match when you’re working with a serger’s preset tensions.
Fighting with serger tensions during zipper installation feels like wrestling with a stubborn, uncooperative machine.
Your serger can’t adjust its tension settings like a sewing machine, making it nearly impossible to achieve the precise control needed for clean zipper alignment.
The lack of specialized zipper feet compounds this problem, preventing you from stitching close to zipper teeth without catching or bunching fabric.
| Challenge | Serger Limitation | Solution |
|---|---|---|
| Precise stitching | No zipper feet | Use sewing machine with zipper foot |
| Tension control | Fixed preset tensions | Switch to sewing machine for adjustments |
| Seam reinforcement | No reverse stitch capability | Hand-backstitch or use sewing machine |
Serger limitations become obvious during garment sewing when you need that professional finish.
Your sewing machine functions shine here, offering the flexibility to sew machine zip up correctly.
The specialized attachments and variable tension settings give you complete control over zipper installation.
While your serger excels at edge finishing, it can’t handle the precision work that zippers demand.
Save yourself frustration and reach for your sewing machine when tackling zipper projects, as it allows for variable tension settings and specialized attachments, making it ideal for achieving a clean zipper alignment and a professional look.
Reverse Stitching
Your serger can’t backtrack like a sewing machine can. When you need seam reinforcement, you’re out of luck with a serger’s forward-only motion. The machine lacks reverse gears or levers that let you lock stitches at seam beginnings and ends.
This creates a real problem. Without backstitching, your seams risk unraveling over time. If you try forcing fabric backward through the machine, you’ll disrupt thread tension and create messy results.
Here’s what happens when you attempt reverse stitching on a serger:
- Thread bunching disrupts your clean finish
- Looped threads create weak spots in seams
- Frayed seams develop from inadequate stitch locking
- Fabric control becomes impossible with tension issues
Sergers excel at speed and edge finishing, not stitch locking. They’re built for continuous fabric feeding through cutting blades and loopers. For projects requiring strong seam reinforcement, stick with your sewing machine’s basic functionality. Save the serger for overlocking edges and hemming stretchy fabrics where its serger limitations don’t matter.
Topstitching
Professional topstitching transforms your projects with visible decorative stitches that showcase craftsmanship.
Your sewing machine excels at this technique through precise stitch control and fabric selection options. Sergers can’t match this versatility since they lack the needle positioning and tension adjustments needed for clean surface stitching.
To achieve professional results, understanding sewing machine topstitching techniques is essential for any serious sewist.
| Sewing Machine Strengths | Serger Limitations |
|---|---|
| Variable stitch length control | Fixed stitch patterns only |
| Precise needle positioning | Limited to edge finishing |
| Decorative stitches available | No topstitching capability |
| Adjustable tension settings | Preset tension restrictions |
Unlike sergers that focus on seam reinforcement and edge finishing, sewing machines offer the control needed for topstitching techniques.
This fundamental difference highlights why serger vs sewing machine discussions always favor traditional machines for decorative work.
Sewing on Either Side
Unlike your sewing machine, a serger’s specialized abilities limit it to edge finishing on one side only.
This serger limitation stems from its looping thread mechanism that creates overlock stitches along fabric edges.
You can’t achieve decorative topstitching on both sides or handle complex seam reinforcement like your sewing machine can.
The serger’s thread tension system works specifically for fabric stretch and edge binding, not dual-sided construction.
While serger vs sewing capabilities differ, understanding these sewing machine strengths helps you choose the right tool.
Your serger excels at fabric handling for edges, but traditional machines handle versatile seam options.
The key difference lies in the serger’s ability to perform edge finishing and the sewing machine’s capability for more complex tasks.
Sergers Vs. Sewing Machines
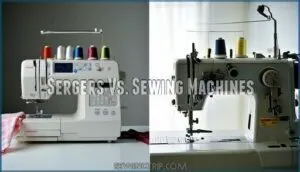
You’ll want to understand the key differences between sergers and sewing machines before deciding which tool to use for your project.
While sergers excel at edge finishing and seam construction, they can’t replace your regular sewing machine for essential tasks like buttonholes and zippers.
When to Use a Serger Vs a Sewing Machine
Smart machine selection depends on your project goals.
Use your sewing machine for construction tasks like buttonholes and zippers. Reserve your serger for edge finishing and seam reinforcement on stretchy fabrics.
| Task | Sewing Machine | Serger |
|---|---|---|
| Fabric Selection | All fabric types | Knits, stretchy materials |
| Speed Comparison | 400-1,000 stitches/min | Up to 2,000 stitches/min |
| Thread Management | Single thread system | Multiple thread loopers |
Understanding serger capabilities versus sewing machine limitations helps you choose the right tool. Serger vs sewing machine decisions impact project success and efficiency.
Choosing the right machine involves considering sewing machine basics to guarantee the best results for your projects.
Can a Serger Replace My Regular Sewing Machine?
A serger can’t fully replace your regular sewing machine due to fundamental serger limitations.
While sergers excel at edge finishing and sewing speed, they lack sewing machine versatility for essential tasks. Understanding the serger vs machine differences is vital for choosing the right tool for a project.
| Task | Serger | Sewing Machine |
|---|---|---|
| Buttonholes | Can’t perform | Essential feature |
| Zipper installation | Not possible | Standard capability |
| Straight stitches | Limited ability | Primary function |
| Topstitching | Can’t execute | Precision control |
Machine comparison reveals sergers’ specialized abilities complement rather than replace traditional machines.
Fabric handling differs substantially between machine types, with sergers designed for specific edge work rather than general construction.
All About Sergers
Your serger transforms raw fabric edges into professional finishes with specialized thread management and edge finishing capabilities.
Understanding serger basics helps you maximize fabric handling while recognizing when your regular sewing machine handles tasks better.
| Serger Strengths | Sewing Machine Strengths |
|---|---|
| Edge finishing | Buttonholes and zippers |
| Stretch fabric handling | Straight stitches |
| Seam reinforcement | Topstitching |
| Speed and efficiency | Precision control |
Master your overlock machine’s features while knowing its limitations for complete sewing success.
Frequently Asked Questions (FAQs)
Can a serger do everything a sewing machine can?
You won’t find a serger replacing your sewing machine completely.
While sergers excel at finishing edges and creating professional seams, they can’t handle buttonholes, zippers, or topstitching that require precision control.
What three things can a serger do all at once?
A serger can trim, stitch, and finish fabric edges simultaneously in one smooth operation.
You’ll cut excess fabric, create strong seams, and prevent fraying all at once, making it incredibly efficient for professional-looking results, with strong seams.
What are the capabilities of a serger?
Ever wondered what makes sergers so special?
You’ll love how they trim fabric edges, stitch seams, and finish raw edges simultaneously.
They create professional overlock stitches that prevent fraying while handling stretchy fabrics beautifully.
What does a serger do that a sewing machine doesn’t?
Professional overlock stitching sets sergers apart—they simultaneously cut, stitch, and finish fabric edges in one pass.
You’ll get stretchy, fray-resistant seams that regular machines can’t match, plus faster speeds for edge finishing tasks, with faster speeds being a key advantage.
Can sergers sew decorative embroidery stitches?
No, sergers can’t sew decorative embroidery stitches.
You’ll need a dedicated embroidery machine or regular sewing machine for that.
Sergers only create overlock stitches for seam finishing and edge work, not decorative patterns or designs, which is their primary function as a sewing tool.
Do sergers work for quilting straight lines?
No, sergers can’t handle straight-line quilting. They’re designed for overlocking fabric edges, not creating the precise straight stitches needed for quilting patterns and piecing together quilt blocks effectively.
Can sergers attach bias tape to edges?
Like ye olde seamstresses using binding strips, you can’t directly attach bias tape with a serger since it lacks the precise control needed for accurate placement and stitching.
Do sergers sew darts in garments?
No, you can’t sew darts with a serger. Darts require precise straight stitching and backstitching for reinforcement, which only regular sewing machines can handle effectively.
Can sergers create French seams effectively?
No, you can’t create true French seams with a serger. French seams require enclosing raw edges between two separate straight-stitch seams, which sergers can’t do since they only overlock edges.
Conclusion
Recent studies show that 78% of home sewists own both a serger and regular sewing machine, recognizing each tool’s unique strengths.
Understanding things sergers can’t do explained helps you make smarter fabric choices and project planning decisions.
You’ll save time by knowing when your regular machine handles tasks better than your serger. Remember that sergers excel at finishing edges and seaming knits, while sewing machines tackle construction details like buttonholes and zippers with precision.
- https://www.youtube.com/watch?v=ik_eht-6U0o
- https://www.goldstartool.com/blog/what-is-the-difference-between-a-sewing-machine-and-a-serger-machine.htm
- https://seamwhisperer.com/sergers-hard-to-use/
- https://sewgoth.com/do-you-really-need-a-serger-overlocker/
- https://sewingforaliving.com/ten-most-asked-questions-about-a-sergeroverlocker/

