This site is supported by our readers. We may earn a commission, at no cost to you, if you purchase through links.
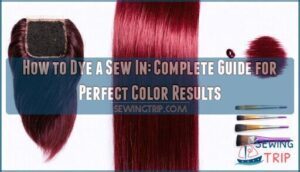 Learning how to dye a sew in can transform your look without breaking the bank.
Start by determining whether your weave is human or synthetic hair, since this affects dye choice. Always perform a strand test first – it’s your safety net against color disasters.
For human hair weaves, use quality hair dye and apply it section by section with a brush, keeping the product off your scalp. Process according to manufacturer instructions, then rinse thoroughly with cool water.
Synthetic hair requires fabric dye and different techniques. The key is patience and proper preparation. What you do next determines whether your color stays vibrant or fades within days.
Table Of Contents
- Key Takeaways
- Choosing The Right Dye for Your Sew In
- Preparing Your Sew in for Dyeing
- Mixing The Dye Solution
- Applying The Dye to Your Sew In
- Processing and Setting The Dye
- Rinsing and Washing Your Dyed Sew In
- Caring for and Maintaining Your Dyed Sew In
- Troubleshooting Common Dyeing Issues
- Removing or Correcting Dye From Your Sew In
- Tips and Tricks for Successful Sew in Dyeing
- Frequently Asked Questions (FAQs)
- Conclusion
Key Takeaways
- Always test first – You’ll need to determine if your sew-in is human or synthetic hair, then perform a strand test to avoid color disasters and achieve your desired results.
- Choose the right dye – You can’t use regular hair dye on synthetic extensions, so invest in quality hair dye for human hair or fabric dye for synthetic fibers.
- Apply systematically – You’ll get even coverage by sectioning your hair into quarters, using a tint brush, and working from roots to ends while protecting your scalp.
- Maintain your investment – You’ll extend your color’s life by using sulfate-free shampoos, avoiding excessive heat styling, and scheduling touch-ups every 4-6 weeks.
Choosing The Right Dye for Your Sew In
Selecting the right dye for your sew-in depends entirely on whether you’re working with human hair or synthetic fibers.
You’ll get the best results by performing a strand test first, as this simple step can save you from potential disasters and help you achieve the exact color you’re after.
Human Hair Vs. Synthetic
When choosing to dye sew in hair extensions, understanding the fundamental differences between human hair and synthetic fibers determines your success.
Here’s what you need to know:
- Dye Absorption: Human hair accepts traditional hair dye naturally, while synthetic hair repels most dyes completely
- Heat Sensitivity: Human hair handles heat processing safely, but synthetic fibers melt under high temperatures
- Color Longevity: Human hair maintains vibrant color for months with proper care, synthetic results fade quickly
- Texture Differences: Human hair feels natural after dyeing, synthetic becomes stiff and artificial
- Cost Comparison: Human hair extensions cost more initially but offer better value through multiple dye applications
Human hair extensions deliver predictable, salon-quality results every time you dye them.
**Human hair takes dye like a dream—synthetic hair just won’t cooperate.
To guarantee longevity, remember that proper storage matters.
Strand Test Importance
Before diving into sew in hair dye, you’ll want to test a small strand first.
This step prevents disasters and guarantees your human hair extensions react as expected to your chosen dye formulation.
| Test Area | What It Reveals |
|---|---|
| Hidden Section | Color Prediction accuracy without visible mistakes |
| Processing Time | Timing Accuracy for perfect results |
| Skin Patch | Allergic Reactions before full application |
Your strand test acts as a crystal ball for dye hair extensions projects.
It shows exactly how your sew in coloring tips will play out, preventing Damage Prevention nightmares that could ruin your entire look.
Maintenance and Care
Your chosen dye deserves a maintenance routine that keeps color vibrancy intact for weeks.
Product selection matters—invest in color-protecting shampoo and conditioner specifically designed for treated hair.
Hydration importance can’t be overstated; weekly deep conditioning prevents dryness and fading.
Night care includes silk pillowcases to reduce friction on your sew in.
Sun protection shields your weave maintenance investment from UV damage.
Proper hair care extends your hair conditioning routine’s effectiveness, and using the right products is crucial for long-lasting results.
Preparing Your Sew in for Dyeing
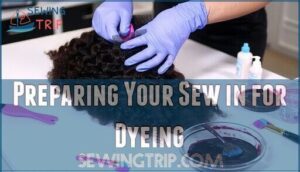
Proper preparation sets the foundation for successful sewin dyeing results. Start by examining your weave’s texture consideration – human hair accepts dye better than synthetic fibers. Check weave quality by running your fingers through sections to identify any damaged areas that might absorb color unevenly.
Pre-washing sew-in removes manufacturing residues and styling products that can block dye penetration. Use lukewarm water and sulfate-free shampoo, then condition lightly. Don’t skip this step – it’s your ticket to even color distribution.
Detangle methodically using a wide-tooth comb, working from ends to roots. Split hair into four manageable sections and secure with clips. This prevents tangling during application and guarantees every strand gets coated. To maintain the weave, consider regular scalp massage for healthy hair.
Gather your necessary tools: gloves, applicator brush, mixing bowl, and clips. Consider matching colors – going lighter requires bleaching first, while darker shades work over existing color. Always perform a strand test on a hidden section to preview results before committing to the full dye sew in black or dye sew in blonde process. This step is crucial for achieving the desired color results and ensuring a professional finish.
Mixing The Dye Solution
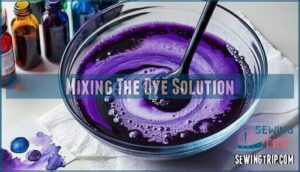
Creating your dye solution requires precision to achieve the perfect color for your sewing dye project. Start with small batches to test your formula before committing to the full amount. This approach saves money and prevents disappointing results when you dye human hair extensions.
Small batches prevent big mistakes—test your formula before committing to the full dye job.
Follow these essential steps for proper dye activation:
- Mix liquid dye with room temperature water – Hot water can alter the chemical composition
- Stir thoroughly for 2-3 minutes – Guarantees complete dissolution and prevents streaking
- Test solution consistency on paper towel – Should spread evenly without clumping
Dye ratios matter substantially when you dye weave materials. Use manufacturer guidelines as your starting point, then adjust based on your strand test results. Custom colors require careful measurement – record your exact proportions for future reference. Solution consistency should be smooth and uniform, resembling thin paint rather than water. Remember, you can always add more dye to strengthen color intensity, but removing excess becomes challenging once mixed.
Applying The Dye to Your Sew In
Now you’ll apply the dye to your sew-in using precise techniques that guarantee professional-looking results.
The key is working systematically with the right tools to achieve even coverage while protecting your scalp from unwanted staining, using precise techniques and professional-looking methods to ensure the best outcome.
Using a Brush or Applicator
The right tools make all the difference when applying dye to your color sew in.
Select a tint brush for precise application and an applicator bottle for controlled distribution. Work methodically through small sections, guaranteeing your weave hair dye saturates every strand from root to tip.
| Tool Type | Best For | Application Technique |
|---|---|---|
| Tint Brush | Precise control and detailed work | Sweep downward in smooth strokes |
| Applicator Bottle | Even distribution across large sections | Squeeze gently for steady flow |
| Foam Brush | Delicate areas and touch-ups | Dab and blend with light pressure |
| Wide Brush | Quick coverage of thick weaves | Use broad strokes for speed |
| Fine Brush | Intricate color placement | Detail work around partings |
Your brush selection determines how well the dye penetrates each strand. Start at the roots and work downward, avoiding staining your scalp.
For all your coloring needs, consider a tint brush dye kit. These applicator techniques guarantee your dye weave achieves professional-looking results with even distribution throughout your color weave.
Ensuring Even Coverage
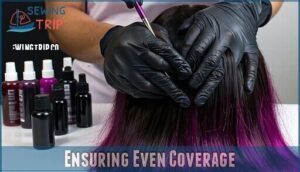
Once you’ve applied the dye with your brush or applicator, achieving even coverage becomes your next mission. Smart sectioning techniques prevent missed spots while proper dye saturation guarantees consistent color throughout your weave hair dye application.
Work systematically through each section, using comb distribution to spread the human hair dye evenly. Apply in downward strokes from roots to ends, guaranteeing complete coverage without oversaturating. This methodical approach guarantees your color sew in results look professional and uniform.
Many techniques, like ice dyeing methods, offer unique ways to add color.
- Section hair into quarter-inch parts – smaller sections mean better dye penetration and control
- Use a fine-tooth comb – distribute hair extension dye through each strand for thorough coverage
- Apply dye application in overlapping strokes – guarantees no gaps between treated areas
- Check coverage from multiple angles – look for any missed spots before moving to the next section
Avoiding Dye on The Scalp
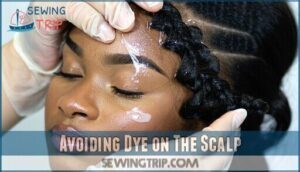
Beyond the hairline, your scalp needs protection from dye stains and irritation.
Professional stylists use petroleum jelly or barrier cream around the hairline before starting the dye application. This creates a protective shield that prevents permanent staining while allowing precise hair dye techniques to work effectively.
| Protection Method | Application Area | Effectiveness |
|---|---|---|
| Petroleum Jelly | Hairline & Ears | Excellent barrier |
| Barrier Cream | Nape & Temples | Professional grade |
| Cotton Strips | Forehead Edge | Quick protection |
| Gloves | Hands & Fingers | Essential safety |
| Sectioning Clips | Hair Division | Precise control |
Processing and Setting The Dye
Once you’ve applied the dye to your sew-in, the processing stage determines how deeply the color penetrates and how vibrant your final results will be.
You’ll need to decide between using heat or letting the dye process naturally, then monitor the timing carefully to avoid over-processing that can damage your hair.
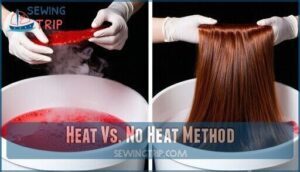
Heat Vs. No Heat Method
Your hair’s reaction to heat determines whether you’ll achieve stunning color penetration or risk unwanted heat damage. The choice between heat and no-heat methods shapes your dyeing success story.
Heat processing opens hair cuticles for deeper color penetration, reducing processing time by up to 50%. This method works best for achieving vibrant transformations on human hair extensions. However, temperature control remains essential to prevent heat damage, especially on previously treated hair texture.
- Heat method: Delivers faster, more intense color results in 15-30 minutes
- No-heat approach: Gentler processing requiring 30-45 minutes for full development
- Temperature control: Essential for preventing cuticle damage and breakage
- Hair texture considerations: Fine or damaged extensions benefit from no-heat methods
- Heat styling precautions: Avoid excessive temperatures that compromise hair integrity
No-heat processing offers safer results for delicate sew-ins, preserving moisture and reducing scalp irritation. While synthetic hair dye applications should always avoid heat to prevent melting, human hair can handle controlled heat application. Choose based on your hair’s current condition and desired color intensity.
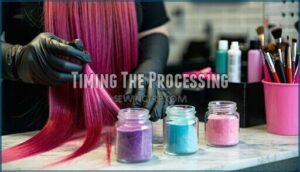
Timing The Processing
Perfect timing makes the difference between stunning results and disappointing disasters.
Monitor your sewin dye carefully to avoid over-processing signs like brittleness or uneven patches. Start checking every 10 minutes after initial application.
| Hair Type | Processing Time | Heat Damage Risk |
|---|---|---|
| Virgin Human Hair | 20-45 minutes | Low with proper timing |
| Previously Treated | 15-30 minutes | Moderate – watch closely |
| Synthetic Hair Dye | Not recommended | High – avoid completely |
Use strand testing to determine your exact timing adjustments. Color depth develops gradually, so patience prevents costly mistakes in your hair dyeing process. This process requires careful attention to achieve the desired results.
Rinsing and Washing Your Dyed Sew In
Once the dye has processed, you’ll need to rinse out the excess color to prevent bleeding and lock in your new shade.
This step requires the right technique and products to maintain your freshly dyed sew-in’s vibrancy and health.
Removing Excess Dye
Once you’ve finished processing the dye, thorough rinsing techniques become your next priority for achieving professional results. Start by gently squeezing out excess dye under cool running water, continuing until the water runs completely clear. This prevents dye bleeding and protects your investment.
- Use neutralizing agents like diluted vinegar rinses to help set the color and remove stubborn dye particles
- Apply gentle pressure when squeezing to avoid damaging the hair cuticles while ensuring complete dye removal
- Check for color bleeding by testing a small section with a white towel before proceeding with full washing
Proper dye rinsing prevents stain prevention issues later. To keep the color vivid, consider using color safe detergents when washing. Follow specific dye washing instructions from your product manufacturer, as different formulas require varying rinse times. This careful attention to dye color retention during the initial rinse phase sets the foundation for long-lasting results and prevents color fading over time.
Using Color-Protecting Shampoo and Conditioner
After washing away excess dye, you’ll need color-protecting shampoo and conditioner to maintain your human hair extensions’ vibrancy.
Sulfate concerns are real—these harsh detergents strip color faster than you can say "fade." Choose sulfate-free formulas specifically designed for color human hair.
Ingredient analysis reveals that pH balance matters too; acidic products seal cuticles and lock in pigment. Hydration benefits from quality conditioners prevent dryness while extending color longevity.
Consider shampoo product options to find the best fit. Your hair dye maintenance routine determines whether your fresh color lasts weeks or months.
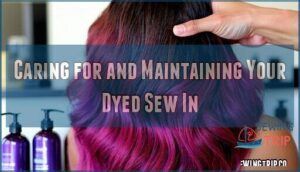
Caring for and Maintaining Your Dyed Sew In
Once you’ve successfully dyed your sew-in, maintaining that vibrant color requires consistent care and attention.
The steps you take in the weeks following your dye job will determine whether your color stays fresh or fades into disappointment.
Avoiding Harsh Chemicals and Heat Styling
Once you’ve properly rinsed your freshly dyed color hair extensions, protecting that vibrant hue becomes your next priority.
Harsh chemicals and excessive heat styling can quickly fade your beautiful new color, so choosing gentle alternatives makes all the difference.
Here’s how to safeguard your color human hair investment:
- Sulfate-free products – Switch to gentle shampoos that won’t strip your color
- Heatless styling – Try braids, rollers, or twist-outs for gorgeous looks without damage
- Protective sprays – Apply heat protectant before any styling (even on synthetic hair)
- Natural oils – Use argan or coconut oil to seal and protect your strands
- Cool water rinses – Hot water opens cuticles and releases dye molecules faster
Regular Moisturizing and Deep Conditioning
Weekly moisturizing keeps your color hair extensions vibrant and healthy.
Deep conditioning prevents hair damage prevention by sealing the cuticle on human hair weaves.
Choose color-protecting shampoo and hydrating masks for Hydration Importance.
This Product Selection supports Long-Term Health through consistent Application Frequency.
Proper Damage Prevention maintains your investment in beautiful, lasting color.
Touch-Up Dyeing as Needed
Over time, dye fades and your natural hair grows, creating an obvious line between old and new color.
Root touch-ups become essential for maintaining that fresh, professional look.
- Schedule touch-ups every 4-6 weeks to catch regrowth before it becomes noticeable
- Apply dye only to new growth using precise sectioning for seamless blending regrowth
- Use 10-volume developer with permanent dye for gentle color matching without preventing damage
- Keep root spray handy for quick fixes between full hair dye touchups
Consistent maintenance keeps your synthetic hair looking naturally colored while extending vibrancy through proper hair coloring techniques.
Troubleshooting Common Dyeing Issues
Even experienced dye artists encounter challenges when coloring sew-in extensions. These common issues have proven solutions that’ll help you achieve professional-looking results every time.
Uneven Color Distribution
Despite careful planning, uneven color distribution can plague your synthetic hair dyeing project.
Sectioning errors during application often create patchy results, while inconsistent dye saturation leaves some areas lighter than others.
Poor application technique—rushing through sections or skipping thorough coverage—compounds these issues, including inadequate processing time that prevents proper dye consistency throughout each strand.
When troubleshooting hair dye problems, re-section carefully and reapply dye to affected areas for uniform results.
Color Fading or Bleeding
Beyond proper preparation, color fading and color bleeding stem from multiple factors you can control.
Quality dye products resist UV exposure damage while maintaining pH balance for longer-lasting results. Here’s how to prevent these common issues:
- Water Temperature: Use cold water for washing to prevent dye molecules from loosening
- Product Buildup: Remove residue with clarifying treatments that won’t strip color
- Dye Quality: Invest in professional-grade formulas designed for synthetic hair extensions
- UV Exposure: Apply heat protectant with UV filters before sun exposure
When color bleeding occurs, immediate color correction prevents staining your natural hair underneath.
Overly Dark or Light Results
When your sew-in turns out too dark or light, don’t panic.
Correcting Darkness requires a gentle color remover designed for hair extensions, not bleach. For Lightening Options, try a Toner Application to neutralize unwanted tones.
If results are too light, the Re-Dyeing Process is straightforward – just add more dye. Always perform a strand test first to avoid hair dye troubleshooting disasters.
Professional color correction services can handle severe Color Balancing issues. Remember, you can’t effectively dye synthetic hair or color synthetic hair darker than its original shade.
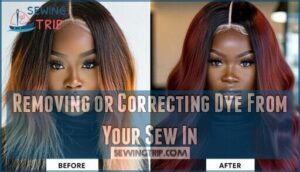
Removing or Correcting Dye From Your Sew In
Sometimes dyeing doesn’t go as planned, and you’ll need to remove or correct unwanted color from your sew-in.
Whether you’re dealing with patchy results, color that’s too dark, or simply want to start fresh, there are several methods to extract dye safely without damaging your hair extensions.
There are several methods to extract dye safely without damaging your hair extensions.
Color Extraction Methods
When dye goes wrong, you’ll need effective color extraction methods to fix your sew-in.
Chemical color removers work by breaking down dye molecules, making them easier to wash out.
Here are your main options:
- Color Remover products – Use commercial color strippers for quick results
- Bleach Baths – Mix bleach with developer for stubborn color correction
- Natural Lightening – Try vitamin C treatments or clarifying shampoos for gentler hair dye removal
- Pre-Dye Stripping – Remove existing color before applying new shades
Always strand test before full application to avoid damaging synthetic hair fibers.
Seeking Professional Help
When DIY color removal attempts fall short, professional salon consultations become your safety net. Skilled stylists possess hair dye expertise that protects your investment while delivering results you can’t achieve at home.
During your appointment, bring reference photos and discuss cost considerations upfront. A colorist experienced with human hair extensions understands the delicate balance required for ombre sew in or highlight sew in corrections without compromising fiber integrity. Technicians with factory training available often have access to specialized tools.
Professional color correction offers something DIY kits can’t: guaranteeing results through damage prevention techniques and specialized products.
| Professional Benefits | DIY Limitations |
|---|---|
| Stylist expertise with extensions | Limited technical knowledge |
| Specialized correction products | Generic removal kits |
| Damage prevention protocols | Risk of fiber melting |
| Guaranteed color results | Unpredictable outcomes |
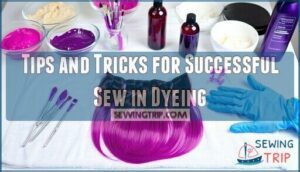
Tips and Tricks for Successful Sew in Dyeing
Professional techniques make the difference between amateur and salon-quality results. Your strand test reveals exactly how your human hair will react to the dye solution, preventing costly mistakes.
Start with high-quality permanent hair dye designed for human hair extensions. Apply petroleum jelly around your hairline before mixing your dye solution. Section hair into four clean quadrants, working systematically from roots to ends.
This approach guarantees proper dye penetration and color vibrancy throughout each strand. For blending shades successfully:
- Test multiple formulas on hidden sections first
- Mix colors gradually to achieve your desired tone
- Document your process for future root touch-ups.
Maintain your investment with color-protecting shampoo and sulfate-free products. Weekly purple shampoo treatments prevent brassiness while preserving sew-in longevity. Avoid daily heat styling and alcohol-based products that strip color.
These hair dye tips protect your color investment and keep your extensions looking fresh between salon visits.
Frequently Asked Questions (FAQs)
Can you dye a sew in?
Yes, you can dye human hair sew-ins successfully.
Always perform a strand test first to check color results.
Use professional hair dye and apply carefully from roots to ends, avoiding your scalp to prevent staining.
Can I dye my weave hair extensions?
Your weave’s material determines everything. Human hair extensions dye beautifully with professional products, while synthetic fibers resist color and can melt. Always strand test first to avoid disasters.
What is the best dye for extensions?
Like ancient alchemists transforming base metals, you’ll want semi-permanent or temporary dyes specifically formulated for human hair extensions.
Professional brands like Adore, Manic Panic, or Arctic Fox work best since they’re gentler and won’t damage the hair fibers like permanent dyes can, making them a good choice for those looking for a temporary solution.
Can you dye a sew-in while wearing it?
Dyeing a sew-in while it’s installed isn’t recommended.
You can’t achieve even coverage, risk scalp irritation, and potentially damage your natural hair underneath.
Remove the sew-in first for safe, professional results.
How long does dyed sew-in color typically last?
Your dyed sew-in color typically lasts 4-6 weeks with proper care.
You’ll notice fading sooner if you frequently wash, use heat styling, or expose it to sunlight.
Color-protecting products extend vibrancy substantially.
Can you bleach a sew-in before dyeing it?
Yes, you can bleach human hair sew-ins before dyeing, but it’s risky.
Bleaching weakens the hair structure and can cause breakage.
Always do a strand test first to check how the hair reacts, then proceed carefully with gentle products.
Which dye brands work best for sew-ins?
Professional-grade dyes like Adore, Manic Panic, and Arctic Fox work best for human hair sew-ins.
You’ll want to avoid regular box dyes since they’re too harsh for extensions and can damage the cuticles permanently.
Conclusion
Like a painter who’s spent hours perfecting their masterpiece, you’ve now earned the knowledge to transform your sew-in with confidence.
Learning how to dye a sew in successfully requires patience, proper preparation, and the right techniques.
Remember to always test first, choose quality products, and follow processing times carefully.
Your hair’s health depends on gentle handling throughout the process.
With these skills, you’ll achieve salon-quality results at home while maintaining your weave’s integrity and longevity.

