This site is supported by our readers. We may earn a commission, at no cost to you, if you purchase through links.
Your first project looked perfect in your head. The fabric was gorgeous, the pattern seemed straightforward, and you could already picture yourself wearing that handmade dress. Then reality hit—puckered seams, a crooked hemline, and sleeves that somehow ended up two different lengths. Sound familiar?
Most beginners don’t struggle because they lack talent or creativity. They stumble because nobody warned them about the sneaky pitfalls hiding in every step, from choosing fabric to threading the machine.
The good news? These mistakes are incredibly common, totally fixable, and easier to avoid than you think. Once you know what trips up new sewers, you’ll skip the frustration and start creating projects you’re actually proud to show off.
Table Of Contents
Key Takeaways
- Most beginner sewing failures stem from choosing the wrong fabric and thread combinations—cotton can shrink up to 10% if you skip pre-washing, and mismatched thread weight causes puckering or breakage that ruins your seams.
- Using dull needles or the wrong needle type for your fabric causes skipped stitches, snags, and holes, so swap your needle every 8-10 hours of sewing and match ballpoint needles to knits, sharp needles to delicates, and universal needles to everyday wovens.
- Skipping fabric prep steps like pre-washing, pressing, and aligning grainlines leads to twisted hems, warped seams, and garments that shrink or bleed color after the first wash—always press fabric flat and check that pattern arrows run parallel to the selvage before cutting.
- Poor technique like forgetting to backstitch at seam ends, rushing through stitches, or skipping the iron between steps makes the difference between projects that look homemade versus handmade—slow down, press every seam, and pin fabric every 1-2 inches for accuracy.
Choosing The Wrong Fabric and Thread
Picking fabric and thread seems simple enough, but it’s one of those sneaky places where beginners trip up without even realizing it. You might fall in love with a gorgeous fabric, only to discover halfway through your project that it fights you at every seam.
Let’s walk through what you need to know about fabric properties, beginner-friendly choices, and matching your thread so you can avoid these frustrating mistakes from the start.
Understanding Fabric Properties
When fabric properties feel like a foreign language, remember that smart fabric selection starts with just a few key details. Understanding what you’re working with can make or break your first project:
- Fiber content determines shrinkage—cotton often shrinks 5% to 16% if you skip prewashing
- Fabric weight (measured in GSM) affects drape and structure
- Stretch percentage guides whether your fabric suits knit or woven patterns
Woven fabrics offer stability, while knits provide flexibility. Knit fabrics stretch more easily than wovens. Colorfastness matters too, since unstable dyes bleed onto other fabric choices during washing.
Selecting Beginner-Friendly Fabrics
Once you know the basics of fiber content and fabric weight, it’s time to pick smart starter materials. Cotton broadcloth and quilting cotton top the list because they’re forgiving and stable—over 60% of new sewists rely on them for early projects. Beginners should also consider the fabric’s breathability for comfortable wear. Stay away from slippery satins or stretchy jerseys at first; they shift and frustrate beginners.
| Beginner-Friendly Fabrics | Fabrics to Avoid |
|---|---|
| Cotton broadcloth | Satin |
| Quilting cotton | Silk |
| Cotton flannel | Jersey knits |
| Medium-weight cotton | Velvet |
| Plain-weave cotton | Sequined fabric |
Matching Thread Type to Fabric
After you’ve chosen the right fabric, your next move is picking thread that works with it. Fiber compatibility matters—polyester all-purpose thread brings about 30% more strength than cotton, making it ideal for everyday garments and knits.
Thread weight should match fabric type: lightweight Tex 8–25 for delicates, medium Tex 25–40 for quilting cottons, and heavy Tex 40+ for denim.
Color visibility counts too—lay a single strand on your fabric to see how it’ll blend.
Avoiding Common Fabric Selection Errors
Now that you’ve got thread sorted, let’s talk about avoiding fabric disasters. About 63% of beginners pick fabric that’s too heavy for their pattern—think denim when the design needs poplin.
Check fabric weight (aim for 80–200 GSM for first projects), skip slippery satins and sequins, and read fiber content labels.
Matching fabric type to your skill level prevents frustration and keeps your project on track.
Incorrect Needle and Tool Usage
Your needles and tools are the backbone of every sewing project, and using the wrong ones can turn a fun afternoon into a frustrating mess. A lot of beginners don’t realize that needles wear out or that regular scissors can wreck your fabric edges.
Let’s walk through the essential tool choices that’ll save you headaches and keep your projects looking sharp.
Choosing The Right Needle for Your Fabric
You’ve matched your fabric, thread’s ready to go—but are you using the right sewing machine needle? Choosing the right needle prevents skipped stitches and fabric damage. A needle size guide helps you pair needle types with fabric weave type, whether you’re working with delicate silk or heavy denim. Thread-needle pairing matters too!
- Universal needles (80/12) work great for everyday cotton and woven fabrics
- Ballpoint needles glide through knits without snagging or creating runs
- Sharp Microtex needles deliver precision on tightly woven materials like silk
Needlepoint types exist for a reason—matching them to your project saves frustration. Start with medium sizes and adjust based on how your fabric responds during test stitching.
Recognizing Signs of Needle Wear
A worn sewing needle whispers clues before it fails entirely. Watch for fabric damage like tiny holes or snags, skipped stitches that interrupt your seam, and thread fraying near the needle eye. Listen, too—unusual machine noise or resistance means trouble.
Choosing the right needle matters, but broken needles or dull tips ruin projects fast. Replace your needle every eight to ten hours of sewing to keep things running smoothly!
Using Fabric-Only Scissors for Clean Cuts
Special scissors made just for fabric aren’t a luxury—they’re your secret weapon for cutting precision. Those sharp blades slice through material without fraying or snagging, keeping your edges clean and your fabric selection for beginners stress-free.
Using regular scissors for cutting fabric? That’s a fast track to material damage, dull blades, and wonky seams. Keep your sewing tools dedicated to fabric only, and watch your quality control soar!
Familiarizing Yourself With Essential Sewing Tools
Think of your sewing kit as a toolkit: each piece has its own job, and knowing them well saves hours of frustration. Over 92% of starter sewing kits include these essentials, so get comfortable with each one:
- Seam ripper – your best friend for correcting mistakes with 90% more efficiency
- Marking tool – transfers pattern details with precision
- Special scissors – cuts fabric cleanly without fraying
Budget-friendly tools and multi-purpose tools work great for beginners. Keep your sewing tools organized and maintain them regularly—tool maintenance prevents problems before they start!
Skipping Fabric Preparation Steps
You’ve picked out your fabric, and you’re ready to cut into it—but hold on a second. Skipping the prep work might seem like a time-saver, but it’s actually setting you up for heartbreak down the road.
Let’s walk through the essential steps that’ll save you from twisted seams, surprise shrinkage, and a whole lot of frustration.
Importance of Pre-Washing Fabric
You wouldn’t cut a wedding cake without letting it settle, right? Pre-washing fabric is your best insurance against shrinkage control nightmares and dye release disasters. Cotton can shrink up to 10% in length—that’s a full size lost on your first wash! Proper fabric preparation techniques protect fit accuracy and prevent color bleeding when fabric mixing in projects, meeting consumer expectations for lasting quality.
Pre-washing fabric is your best insurance against shrinkage nightmares and dye disasters that can cost you a full size on the first wash
| Fiber Type | Typical Shrinkage | Pre-Wash Priority |
|---|---|---|
| Cotton/Linen | 5–10% (warp direction) | Essential |
| Wool | 3.5–4% (both directions) | High |
| Silk Crepe | Up to 10% (length) | Critical |
| Polyester/Nylon | 1–3% (minimal) | Optional |
| Blended Fabrics | Varies by fiber mix | Recommended |
Avoiding fabric manipulation errors starts with simple fabric preparation: wash your yardage exactly how you’ll wash the finished garment, using the same water temperature and dryer settings to stabilize dimensional change before you ever pick up your scissors.
Pressing Fabric Before Cutting
Unpressed fabric is like trying to draw a straight line on crumpled paper—those wrinkles throw off your Cutting Accuracy by several millimeters! Pressing fabric before cutting is never optional because it ensures Dimensional Stability and prevents costly mistakes.
Follow these Beginner Recommendations:
- Test Heat Settings on a fabric scrap first to avoid Fabric Damage
- Use steam to relax fibers and stabilize dimensions after pre-washing fabric
- Press larger sections before cutting smaller pattern pieces
- Lift and set your iron instead of sliding to prevent stretching
Smart fabric preparation techniques make all the difference!
Handling Fabric Shrinkage and Color Bleeding
Pre-washing fabric saves your project from disaster—cotton shrinks 3–5% and linen up to 10% in the first wash! Calculate shrinkage by measuring a 10-inch square before and after laundering, then adjust your yardage.
Prevent color bleeding by sorting darks from lights, washing in cold water, and using color-catcher sheets. Dye fixatives help lock in vivid colors, especially for high-contrast designs!
Preparing Fabric for Accurate Cutting
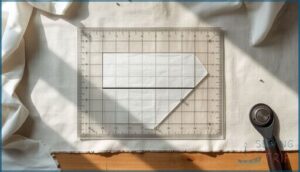
Now that you’ve handled pre-washing fabric and shrinkage, you’re ready to set up for precise cuts. Follow grain lines carefully—off-grain cutting can twist your garment by 80%! Squaring fabric against your mat’s grid and ironing out wrinkles prevents distortion.
Here’s your prep checklist:
- Smooth fabric completely flat, removing all wrinkles
- Align selvages parallel for grain alignment
- Match edges to mat grid lines at 90 degrees
- Mark pattern markings with chalk or pen
- Double-check measuring accurately before cutting tools touch fabric
Visual checks now save hours later!
Measuring and Cutting Mistakes
Measuring and cutting might seem straightforward, but they’re actually where a lot of beginners trip up—and those mistakes can throw off your entire project before you even start sewing. Getting your measurements right and understanding how to cut fabric properly makes the difference between a garment that fits beautifully and one that just doesn’t work.
Let’s walk through the key areas where things tend to go wrong, so you can measure and cut with confidence from the start.
Taking Accurate Body and Pattern Measurements
Measuring accurately is your ticket to clothes that actually fit! You’ll need a flexible tape measure and snug clothing to capture your bust, waist, and hip—plus high bust for fitted tops.
Take each measurement twice and record both centimeters and inches. Then compare your body measurements to the pattern’s finished dimensions to calculate pattern ease and check whether you’ll need to grade between sizes.
Understanding and Aligning Grainlines
Once you’ve got your measurements down, understanding fabric grainlines keeps everything from going wonky. The grainline—that arrow on your pattern—should run parallel to the selvage for proper drape. Cutting off-grain causes twisted hems and rippling seams, reducing garment fit by up to 20%!
Here’s how to nail accurate alignment:
- Match pattern arrows exactly parallel to selvage edges
- Pin carefully before cutting to prevent shifting
- Use a ruler to double-check grainline placement
- Practice on scrap fabric first
Paying attention to grainline identification saves you from warped, ill-fitting results. Fabrics like gingham show visible gridlines, making marking challenges easier for beginners!
Using The Correct Seam Allowance
A tiny slip in seam allowance can throw off your entire project! Most garment patterns use 5/8 inch (1.5 cm), while quilting calls for 1/4 inch (0.6 cm). Ignoring pattern instructions affects garment fit and seam strength—just half a centimeter off across multiple seams changes your waistline by inches!
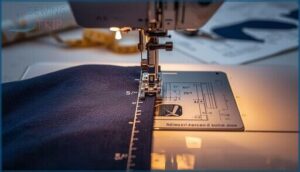
Use your machine’s throat plate markings as a seam allowance guide, practice accuracy techniques on scraps, and always check those pattern sheets first to avoid common beginner sewing mistakes.
Transferring Pattern Markings Accurately
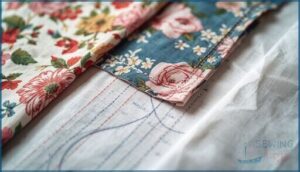
Without accurate pattern markings, you’re sewing blind—and that creates major placement defects. Notches, darts, and fold lines aren’t optional decorations; they’re your roadmap to professional results and waste reduction!
Choose your marking tool wisely:
- Test chalk or water-soluble pens on fabric scraps first
- Use tracing wheels for internal markings like darts
- Transfer all pattern symbols before removing pattern pieces
- Mark both fabric layers when cutting doubles
- Check marking durability under handling and light
Sewing Machine Setup and Operation Errors
Your sewing machine isn’t out to get you, but it won’t do you any favors if you skip the setup basics. A lot of beginners jump straight into projects without understanding tension, testing stitches, or even knowing what all those buttons do.
Let’s cover the essential machine mistakes that trip people up and how you can sidestep them from day one.
Setting Correct Thread Tension and Stitch Length
Think of thread tension and stitch length as best friends—they need to work together! Balanced tension lets stitches lock inside your fabric, preventing seam puckering or thread breakage. For most projects, aim for 10–12 stitches per inch.
Here’s a quick guide:
| Setting | Result | Common Issue |
|---|---|---|
| Balanced tension | Flat, secure seams | None—perfect! |
| Too loose | Loopy stitches | Seam opening |
| Too tight | Puckered fabric | Thread snaps |
Match your needle size to thread weight, and always check your sewing machine settings before starting!
Practicing on Scrap Fabric Before Starting
Before you touch your project fabric, grab a scrap of the same material and test your tension calibration. A 10–20 cm piece saves you from heartbreak and material waste!
Practicing on test scraps helps you spot looping, puckering, or skipped stitches before they ruin your main piece. This simple skill-building step cuts down seam-ripping by 30–50%, and it only takes two minutes.
Regular Sewing Machine Cleaning and Maintenance
Your sewing machine needs care just like a favorite pair of scissors—neglect it, and you’ll pay in jams, skipped stitches, and frustration. In fact, about 65% of machine troubles come from poor maintenance!
Keep your machine happy with:
- Lint removal after every 8–10 hours of sewing
- Brushing feed dogs and bobbin area weekly
- Oiling machine parts per your manual
- Using proper cleaning tools like lint brushes
- Professional servicing yearly ($130–$200)
Regular care extends machine longevity by years!
Getting Comfortable With Sewing Machine Controls
Most entry-level machines offer 5–20 stitches, but mastering straight stitch, zigzag, and backstitch comes first. Spend time adjusting speed control via your foot pedal—keeping your heel down helps you modulate smoothly.
Practice stitch selection and tension adjustment on scrap fabric before diving into projects. Get cozy with your presser foot, feed dogs, and thread management basics.
Understanding sewing machine basics now saves you from countless headaches later!
Poor Sewing Technique and Execution
You can know all the right steps and still end up with wonky seams or unraveling stitches. Poor technique sneaks in when you’re excited to finish, skip the small stuff, or just haven’t built up the muscle memory yet.
Let’s look at the hands-on mistakes that trip up most beginners and how to fix them before they ruin your project.
Backstitching to Secure Seams
When you skip backstitching at the start and finish of your seams, you’re inviting disaster—seams unravel five times faster under stress. This is one of the most common sewing mistakes beginners make, but avoiding unraveling is easy! Just reverse-stitch for about half an inch at both ends to lock everything in place.
The importance of backstitching can’t be overstated, especially at stress points where tension builds. For delicate fabrics prone to thread jamming, try hand backstitching or explore backstitch alternatives like reducing stitch length. Proper seam reinforcement saves you from frustrating repairs later!
Pinning and Clipping for Accurate Seams
Pin placement is crucial for seam accuracy. Studies show that placing pins every 1–2 inches along straight seams prevents fabric shifting. Horizontal pinning a quarter-inch from the edge provides better stability than vertical pinning. For curves, you’ll need twice as many pins to avoid puckering.
Clip usage works great for thick layers, but pins win for precision. Match your pinning technique to your fabric type, and those wobbly seams will disappear.
Pressing Seams for a Professional Finish
After pinning, grab your iron—pressing seams correctly makes the difference between homemade and handmade. A 2018 survey found students who pressed every seam reduced puckering by 40%.
First, press the seam flat to set stitches, then open the seam allowance.
Check your heat settings for fabric safety: cotton tolerates high heat, but synthetics melt easily, so use an ironing board and press cloth when needed.
Controlling Sewing Speed and Avoiding Rushing
Speed-accuracy trade-off is real: sewing too fast guarantees wonky seams. Research shows beginners who slow down achieve higher accuracy and build skills that stick, even when tired.
Most household machines run 400–800 stitches per minute, but you don’t need max speed! Practice speed control on paper first, adjust your machine’s settings, and get comfortable with the pedal.
Rushing the process backfires—controlled sewing wins every time.
Top 5 Beginner Sewing Tools and Kits
You can avoid most beginner mistakes by starting with the right tools in your sewing kit. The good news is, you don’t need fancy equipment to get great results.
Here are five beginner-friendly tools that’ll help you build skills and confidence from day one.
1. VLOXO Cordless Electric Multi Cutter
You’ll breeze through cutting performance challenges with the VLOXO Cordless Electric Multi Cutter—it’s revolutionary for avoiding sewing errors that trip up beginners. This tool addresses one of the most common sewing mistakes: using dull scissors that make you want to pull your hair out!
With its 16.8V motor and four speed settings, you’ll slice through fabric, leather, and even cardboard effortlessly. The ergonomics feel comfortable in your hand, safety features prevent accidents, and its strong market position proves it’s trusted by sewers everywhere. Plus, impressive battery runtime means you won’t stop mid-project!
Best For: Sewers, crafters, and DIYers who cut a lot of fabric or thick materials and want to save their hands from fatigue—especially helpful if you have arthritis or grip issues.
- Powerful 16.8V motor with four speed settings cuts through fabric, leather, cardboard, and multi-layer materials way faster than manual scissors
- Long battery life (3-4 hours per charge) with swappable battery packs means you can work through big projects without interruption
- Ergonomic design with safety lock and blade guard keeps you comfortable and protected during extended cutting sessions
- Struggles with precision work and tight curves, so it’s not great for delicate or intricate cutting tasks
- The activation button placement feels awkward to some users during operation
- No wall charger included—you only get a USB-C cable, which might be inconvenient if you don’t have a compatible adapter handy
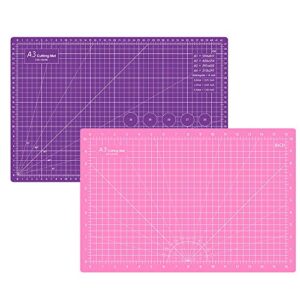
2. Headley Tools Self Healing Cutting Mat
A quality cutting mat is your best friend for avoiding sewing errors that come from wobbly cuts and misaligned measurements. The Headley Tools Self Healing Cutting Mat brings measurement accuracy and mat stability to your workspace with its 12 x 18-inch surface—perfect for sewing for beginners tackling small to medium projects.
Its self-healing quality protects your blades, extending blade longevity while the double-sided inch and metric grids prevent common sewing mistakes. The five-layer PVC construction ensures project suitability across quilting, scrapbooking, and fabric work without warping!
Best For: Quilters, sewers, and crafters working on small to medium projects who need a durable surface with clear measurements and protection for both their blades and work surfaces.
- Five-layer PVC construction stays flat and resists warping, even with direct sunlight exposure, providing a stable cutting surface that lasts.
- Double-sided design with both inch and metric measurements makes it versatile for different patterns and projects without needing to flip or convert units.
- Self-healing surface reseals after cuts to keep the mat smooth and extend its lifespan, while also protecting rotary and straight blades from dulling quickly.
- Some users report the self-healing feature doesn’t work perfectly, with deeper cuts potentially leaving permanent marks over time.
- Strong chemical smell out of the box that may require airing out before comfortable use.
- 12 x 18-inch size limits use to smaller projects and may not provide enough workspace for larger quilting or sewing tasks.
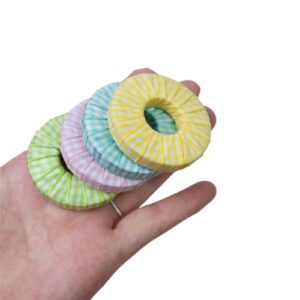
3. Fabric Pattern Weights Sewing Metal Set
Holding your pattern pieces steady during cutting is one of the most overlooked ways to avoid sewing mistakes, and metal pattern weights offer beginners a smart alternative to pins. These 4-piece sets (often weighing around 356g total) feature durable steel or zinc alloy composition that prevents fabric shifting without piercing your pattern.
DIY alternatives like hardware-store washers deliver similar beginner workflows at lower cost, while fabric-covered versions provide safety ergonomics by protecting rulers and delicate fabrics.
For common sewing mistakes in cutting accuracy, this tool beats pinning every time!
Best For: Beginner sewists and hobbyists who want faster, more accurate pattern cutting without damaging their fabric or patterns with pins.
- Keeps fabric and patterns flat during rotary cutting, reducing shifting and distortion that leads to mistakes
- No holes left in paper patterns, so you can reuse them multiple times without wear
- Easy to reposition along grainlines for quick adjustments—just slide them instead of repinning
- Manual measurement may vary slightly (up to 1cm), so exact sizing isn’t guaranteed
- Colors can look different from photos depending on your monitor
- Requires careful handling since metal can scratch rulers or damage fabric if edges aren’t covered
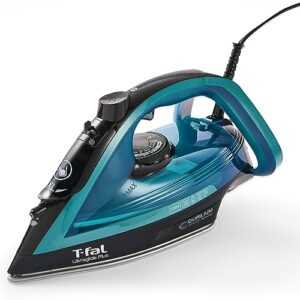
4. T Fal Ultraglide Plus Steam Iron
Pressing seams properly is where your beginner sewing projects look polished or homemade, and the T-Fal Ultraglide Plus delivers 1800W power with a Durilium AirGlide soleplate that glides like butter on cotton and silk.
Its 30 g/minute steam output overcomes stubborn creases, while safety functions include auto-off and anti-drip features that prevent water stains—common sewing mistakes when rushing.
User feedback averages 4.8/5, with beginners loving the precision tip for collars and seams. Scale management through removable anti-calc components keeps performance steady, making this steam iron essential for avoiding sewing mistakes through crisp, professional pressing.
Best For: Beginner sewers and home users who need reliable steam power and precise control for pressing seams, collars, and delicate fabrics without constant refilling or safety worries.
- Strong 1800W heating with 30 g/min continuous steam (up to 100 g/min boost) tackles stubborn wrinkles on everything from cotton to silk, plus the Durilium AirGlide soleplate glides smoothly without snagging.
- Precision tip reaches tight spots like button plackets and collar points—essential for crisp sewing finishes—while 30% more steam holes than older models give better coverage across the entire plate.
- Auto-off after 30 seconds on its side or 8 minutes upright prevents accidents, and the anti-drip system stops water stains on delicate fabrics when you’re working at lower temps.
- Some users report water leakage or dripping issues despite the anti-drip feature, which can frustrate anyone working with silk or light-colored fabrics.
- Quality control seems inconsistent—a few customers received units that appeared opened or used, and the return process can be costly and complicated.
- Cord length complaints pop up in reviews, so if your sewing table or ironing board is far from an outlet, you might need an extension cord.
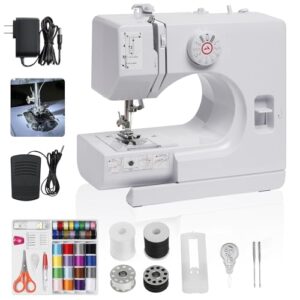
5. Mini Sewing Machine Beginner Friendly Kit
Starting with the right sewing machine prevents beginner sewing mistakes before they happen. The BSHAPPLUS mini machine kit (around $50 discounted from $93) includes 12 stitches, a foot pedal, and 42 accessories—everything beginners need to practice backstitching and seam control.
Its ease-of-use shines through two-speed settings and clear stitch selectors, though operational issues like thread tension problems and machine limitations with thick fabrics remind you to test on scraps first.
Safety concerns about exposed needles mean supervised use for younger sewers practicing beginner sewing tips.
Best For: Beginners tackling small repairs and simple projects who want an affordable, portable machine with basic stitches and a full accessory kit to learn on.
- Comes with everything you need to start—12 stitches, foot pedal, built-in light, and 42 accessories for around $50
- Two-speed settings and clear controls make it easier to practice and build confidence without feeling overwhelmed
- Lightweight and compact enough to store easily or take with you, perfect for small spaces or travel
- Struggles with thick fabrics or multiple layers due to low motor power, limiting what you can sew
- Thread tension issues and flimsy build quality can lead to frustrating jams and skipped stitches
- Noisy operation and exposed needle parts require careful handling, especially if kids are using it
Frequently Asked Questions (FAQs)
Do you learn more from your mistakes in sewing?
Absolutely—error retention in sewing sharpens problem-solving skills and builds motivation resilience.
Learning from sewing mistakes transforms beginner tips into lasting knowledge sharing, turning costly mistakes into skill transfer opportunities that stick with you forever.
How to avoid mistakes in sewing?
Avoiding costly mistakes starts with consistent practice and seeking guidance from experienced sewers. Mindful sewing, proper lighting, and understanding ergonomics help sewing beginners develop skills while learning from sewing mistakes intermediate crafters still encounter.
What are the worst beginner sewing mistakes?
Like a blacksmith choosing the wrong hammer, beginner sewing projects suffer most from rushed needle mismatch and unsecured seams.
Skipping fabric choice preparation and avoiding costly mistakes through proper pressing prevents most sewing mistakes intermediate sewers face.
Are sewing mistakes sabotaging your projects?
Yes, sewing mistakes can absolutely sabotage your projects. Beginner frustration factors like skipped stitches from wrong needles impact success rates greatly. Understanding your skill level and the learning curve helps minimize project sabotage.
What is the first thing a beginner should sew?
Start with a simple pillowcase project or tote bag—both are beginner-friendly sewing projects using rectangular shapes and straight seams.
These flat décor and accessory projects teach essential sewing techniques for beginners without overwhelming you.
What are the 7 common sewing machine troubles?
Common sewing machine troubles include thread tension problems, skipped stitches from dull needles, fabric puckering, birdnesting under fabric, machine jamming from lint buildup, uneven feeding, and power issues from incorrect threading or electrical connections.
What is the most important sewing rule?
Think of every stitch as a handshake with a sharp needle—sewing safety always comes first. Protect your fingers, unplug before adjustments, and create an organized workspace to prevent injuries.
How do I choose the right needle for my project?
Match your needle type to fabric structure—ballpoint for knits, sharp for delicates, universal for most wovens—and choose the size by fabric weight: 70/10 for lightweight, 80/12 for medium, 100/16 for heavy materials.
Whats the best way to organize my sewing supplies?
Ever heard that messy workspaces kill creativity? It’s actually the opposite—organization frees your mind!
Use vertical storage, rolling carts, and project grouping to keep supplies visible, giving you more time to sew instead of search.
How often should I clean and oil my sewing machine?
You should clean your sewing machine every 2-3 bobbins or after 4 hours of sewing. Oil it following your manual’s guidelines, and schedule professional servicing annually to keep everything running smoothly!
Conclusion
Everyone stumbles out of the gate, but now you know exactly where those tripping points hide. The top sewing mistakes beginners make aren’t signs you’re hopeless—they’re just part of the learning curve.
Armed with the right fabric, sharp tools, and a little patience, you’ll breeze past the pitfalls that used to derail your projects. So thread that machine, take a breath, and start stitching with confidence. You’ve got this.

