This site is supported by our readers. We may earn a commission, at no cost to you, if you purchase through links.
Start by inspecting the knives for dullness or damage.
Then, adjust the upper and lower knives to make sure they’re aligned properly.
Cleaning the knife assembly and checking thread tension and quality can also help resolve issues.
If you’re still having trouble, it might be time to replace the serger knife.
Table Of Contents
Key Takeaways
- You’re not alone in the frustration of dealing with serger knife problems—uneven cutting, fabric puckering, and thread breakage can quickly derail your sewing project. To get your serger humming smoothly again, check your knife alignment, thread tension, and fabric type. A little tweak can make a big difference!
- Don’t let a dull or damaged knife bring your sewing project to a screeching halt. Regularly inspect your knives for signs of dullness or damage, and adjust or replace them as needed. It’s an easy fix that’ll save you from a world of cutting issues.
- To prevent serger knife problems, you’ll want to regularly clean out lint and debris, adjust the tension, and sharpen or replace the knife as needed. Think of it as routine maintenance for your trusty serger sidekick—it’ll keep your machine running smoothly and prevent those pesky cutting issues.
- When your serger knife starts acting up, don’t stress! Take a deep breath, consult your user manual, and walk through the troubleshooting steps. You’ve got this! By adjusting your serger settings, thread tension, and knife alignment, you’ll be slicing through fabrics with ease in no time.
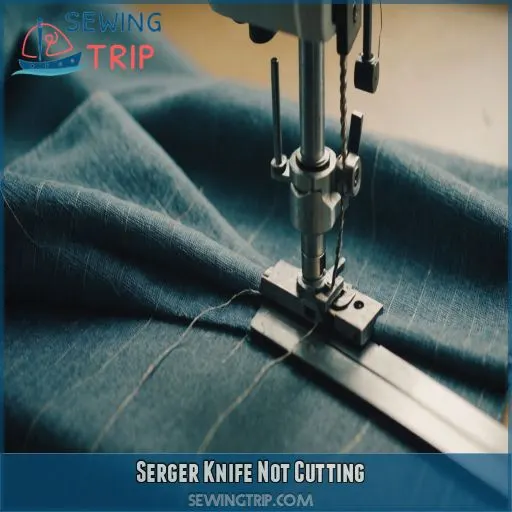
Serger Knife Not Cutting
You’re in the middle of a sewing project and your serger knife suddenly stops cutting – frustrating, right? Don’t worry, troubleshooting serger knife problems is easier than you think, and with a few simple checks, you’ll be back to sewing smoothly in no time.
Inspecting the Knives for Dullness or Damage
Time to get up close and personal with your serger knives! Inspecting them regularly can save you from a world of cutting issues. Look for signs of dullness or damage, such as nicks, rust, or uneven wear. Use a magnifying glass or lamp to spot any problems. Regular inspection helps prevent serger knife problems and guarantees smooth cutting.
Adjusting the Upper and Lower Knives
Now that you’ve inspected the knives, it’s time to adjust them. Proper alignment is key to smooth cutting. Here are some Knife Alignment Tips to keep in mind:
- Check the manual: Refer to your serger’s manual for specific instructions on adjusting the upper and lower knives.
- Set the lower knife: Adjust the lower knife to the recommended height for your fabric type.
- Align the upper knife: Position the upper knife at a slight angle, ensuring proper clearance.
- Test and adjust: Test the knives and adjust as needed to achieve smooth, even cutting.
Cleaning the Knife Assembly
You’re just a step away from a smoothly cutting serger! Now, let’s tackle the knife assembly. Lint and debris can cause serger problems, so regular cleaning is a must. Use a soft-bristled brush or compressed air to gently remove lint. For tougher buildup, a small, dry paintbrush can be a hero.
| Cleaning Method | Frequency |
|---|---|
| Soft-bristled brush | After each use |
| Compressed air | Weekly |
| Small, dry paintbrush | As needed |
Checking Thread Tension and Quality
- Thread quality types: cotton, polyester, or stretch threads can affect tension
- Tension testing methods: use the built-in tension dials or a separate tension gauge
- Tension troubleshooting: adjust dials, check for tangles or twists
- Thread quality impact: poor quality threads can cause uneven stitching, skipped stitches, or thread breaks
Common Serger Knife Problems
You’re not alone in the frustration of dealing with serger knife problems – uneven cutting, fabric puckering, and thread breakage can quickly derail your sewing project. Let’s tackle these common issues head-on and get your serger humming smoothly again, so you can focus on creating something amazing!
Uneven Cutting and Fabric Puckering
Uneven cutting and fabric puckering can be frustrating, but there are a few things you can check to fix the problem.
First, make sure your fabric tension, needle size, and thread quality are all correct.
Second, check that your knife is properly aligned and adjust the presser foot pressure.
If your fabric is still puckering, try tweaking the differential feed or stitch length.
These small adjustments can make a big difference in achieving smooth, even cuts.
Knife Vibration and Noise
Don’t let a vibrating serger knife get on your nerves! Identify the culprit behind the noise: it might be a dull or loose blade, misaligned upper and lower knives, or incorrect thread tension. Check your serger’s manual for troubleshooting tips and adjust the knives accordingly. Regular maintenance can prevent these issues, so make it a habit!
Thread Breakage and Tangles
Thread breakage and tangles can be a real pain.
To avoid these frustrating issues, check your thread tension and quality.
Make sure your knife alignment is correct and consider the fabric type.
Review your serger threading to prevent unthreading needles, needle breaks, and fabric jams.
A little tweak can make all the difference!
Adjusting the Serger Knife
You’re just a tweak away from getting your serger knife back in action. Adjusting the serger knife is a relatively simple process that requires some basic steps, and with these easy-to-follow instructions, you’ll be cutting like a pro in no time.
Accessing the Knife Assembly
To access the knife assembly, start by turning off and unplugging your serger – safety first! Locate the front cover and remove any screws or clips holding it in place. Gently pry the cover open, taking care not to touch the sharp knives. You may need a screwdriver or Allen wrench, so have those handy.
Adjusting the Lower Knife Height
Now that you’ve accessed the knife assembly, it’s time to adjust the lower knife height. Use the screw to adjust the height, ensuring proper alignment with the upper knife. If your fabric feeds poorly, a wonky lower knife might be the culprit. Check your serger manual for specific guidance, and don’t hesitate to tweak the height for varying fabric thicknesses.
Fine-Tuning the Upper Knife Position
Now that you’ve adjusted the lower knife height, it’s time to fine-tune the upper knife position. Gently tweak the upper knife’s alignment to make sure it’s parallel to the lower knife. Check for fabric puckering or uneven cutting, and adjust the blade tension as needed. This will give you great cutting quality for all your sewing projects.
Reassembling the Serger
Now that you’ve fine-tuned the upper knife position, it’s time to reassemble your serger. Make sure the knife is securely in place, and the screw is tightened just right – not too loose, not too tight. Replace the cover, and adjust the tension as needed. Double-check the serger’s alignment, and you’re good to go!
Serger Knife Replacement
Replacing your serger knife can seem scary, but it’s a relatively simple process that’ll get your machine cutting smoothly again in no time. In this section, you’ll learn when to replace the serger knife, how to choose the right replacement, and how to install it with ease.
When to Replace the Serger Knife
- You notice a decline in cutting quality or frequent breaks
- The knife shows signs of wear, like dullness or rust spots
- Fabric keeps jamming, and you’re at your wit’s end
Choosing the Right Replacement Knife
Now that you know it’s time to replace your serger knife, let’s pick the perfect one! Check your serger model to make sure it’s compatible. Popular brands like Brother, Singer, and Janome offer a range of knife types. Consider the replacement cost and whether you need a carbon or stainless steel knife. Choose wisely, and your serger will thank you!
Installing the New Knife
Time to bring your serger back to life! Installing the new knife is a breeze. Align the knife with the serger’s guide, ensuring it’s securely seated. Check your serger model’s manual for specific instructions. Adjust the tension to perfection, and you’re good to go! A sharp new blade will make all the difference in your sewing projects.
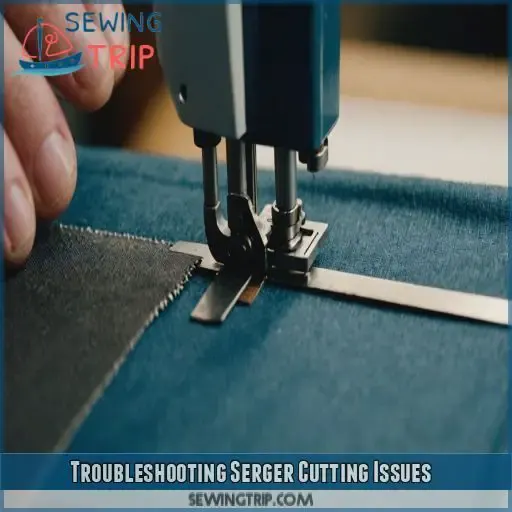
Troubleshooting Serger Cutting Issues
You’re facing serger cutting issues, and it’s frustrating – but don’t worry, we’re here to help. In this section, we’ll walk you through the troubleshooting process to identify and fix common serger knife problems, so you can get back to sewing with ease.
Checking the Differential Feed
Let’s get your serger knife issues under control. Checking the differential feed is key to preventing fabric slippage and ensuring an even fabric feed. To do this, refer to your user manual and adjust the tension as needed. By making these tweaks, you’ll be on your way to stress-free serging.
Adjusting the Stitch Length
Now that you’ve checked the differential feed, let’s tweak the stitch length.
If it’s too short, the fabric might pucker or distort.
Increase the stitch length for thicker fabrics or decrease it for thinner ones.
Adjust the serger settings and tension accordingly, and don’t forget to choose the right needle for the job.
This will help you achieve a smooth, even cut.
Inspecting the Presser Foot and Feed Dogs
Time to get up close and personal with your serger’s presser foot and feed dogs!
Check the presser foot pressure – is it too tight or too loose?
Make sure the feed dogs are clean and aligned properly.
Fabric slipping or bunching up? It might be a sign of presser foot damage.
Adjust and clean as needed to get your serger humming smoothly again.
Consulting the User Manual
When in doubt, crack open that user manual! It’s your go-to guide for troubleshooting serger cutting issues. Don’t be afraid to consult it for:
- Model-specific troubleshooting steps: Find solutions made specifically for your serger model.
- Diagram guidance: Visualize the inner workings of your serger and identify problem areas.
- Safety precautions and warranty info: Stay safe and informed while fixing your serger.
Serger Knife Maintenance
You’ve mastered the art of serging, but your trusty machine’s knife is acting up – don’t worry, a little maintenance can work wonders! Regular serger knife maintenance is key to preventing cutting issues, and it’s easier than you think to keep your knife in top shape with simple tasks like cleaning, oiling, and checking for lint and debris.
Regular Cleaning and Oiling
Regular cleaning and oiling are essential for your serger’s longevity. Clean your serger every 1-3 months, depending on usage. Use compressed air or a small brush to remove lint and debris. Oil your serger every 6-12 months with a few drops of sewing machine oil. Refer to your user manual for specific oiling instructions and guidelines.
Checking for Lint and Debris
Now that you’ve got your serger cleaned and oiled, it’s time to tackle the pesky lint and debris that can clog your machine. Regularly check for fabric fiber buildup, especially around the loopers. Use a small brush or a lint roller to remove any stray threads. Your serger (and your sanity) will thank you for it!
Scheduling Professional Servicing
Don’t be a serger slacker! Regular maintenance is key to avoiding knife catastrophes. Schedule professional servicing every 1-2 years or after 500 hours of use. Research local technicians and compare prices (expect to pay $50-$200). Check their expertise levels and reviews to guarantee your serger is in good hands. Trust us, your serger (and wallet) will thank you!
Storing the Serger Properly
When you’re done serging, store your machine properly to keep it running smoothly. Invest in a serger storage case or cover to shield it from dust and debris. Regularly clean your machine, and consider a fabric dust protection cover for added security. Organize your equipment and accessories with storage bins or baskets to keep everything within reach.
Serger Knife Safety
As you tackle serger knife problems, don’t forget the most important thing: your safety. To avoid any accidental cuts or injuries, it’s necessary to handle the knives with care, unplug the serger during maintenance, and use protective gear to keep those fingers intact.
Handling the Knives With Care
In the context of serger knife handling, safety has to be your top priority. These bad boys are sharp, and one wrong move can lead to an unwanted trip to the ER. Here are some knife handling techniques and storage options to keep you and your blades in tip-top shape:
- Always unplug your serger before handling the knives.
- Take your time and go slow. These knives are sharp enough to slice through fabric like butter, so there’s no need to rush and risk an accident.
- Store your serger knives in a safe place when not in use. A designated storage case or compartment is ideal.
- Keep knives away from children and pets. It’s not worth the risk of having them within reach.
- Regularly inspect your knives for any damage or dull spots. A dull knife is more dangerous than a sharp one, as it can slip and cause accidents.
Avoiding Accidental Cuts
Now that you’re handling those sharp knives with care, let’s talk about avoiding accidental cuts. Keep your fingers curled under and out of the way, and never reach over the knife. Wear protective gear like gloves or finger guards, and make sure your workspace is clear of clutter and tripping hazards. Your safety is worth the extra caution!
Unplugging the Serger During Maintenance
When performing maintenance on your serger, remember to unplug it first – your safety depends on it! A simple yet vital step, unplugging the power cord prevents accidental starts and electrical shocks. Make it a habit to disconnect the serger during cleaning, oiling, or replacing parts to safeguard your well-being and the machine’s longevity.
Using Protective Gear
Now that you’ve unplugged your serger, it’s time to gear up! Put on those gloves designed specifically for sergers to prevent accidental cuts. Safety glasses are also a must to protect your peepers from flying threads. Use a cutting mat for extra protection, and consider a finger guard or serging hand guard for added peace of mind.
Serger Knife Compatibility
To achieve serger knife compatibility, you want to verify you’re using the right knife for your machine to avoid any cutting issues or damage. By checking your serger model and knife type, you can guarantee a smooth and safe operation, and prevent those frustrating moments when your serger just won’t cut it (literally!).
Checking the Serger Model and Knife Type
Time to get up close and personal with your serger! To guarantee a smooth cutting experience, check your serger model and knife type. Here’s how:
- Verify your serger model: Check the user manual or manufacturer’s website.
- Identify the knife style: Find the specific knife version designed for your serger.
- Confirm compatibility: Match the knife to your serger model for seamless performance.
Ensuring Knife Compatibility
When shopping for a replacement serger knife, make sure it’s compatible with your machine. Check your serger’s manual or manufacturer’s website for recommended knife types and brands. You can also use cross-referencing charts or online resources to find the perfect match. Don’t risk damaging your serger with an incompatible knife – take the time to get it right!
Avoiding Mixing and Matching Knives
Serger knives and compatibility are super important. Don’t mix and match knives, as this can lead to serger damage, void your warranty, and reduce knife lifespan. To avoid performance issues, stick with the recommended knife type for your serger model.
- Check your serger manual for compatible knife types
- Use the manufacturer’s recommended replacement knives
- Avoid using knives from other serger models or brands
Advanced Serger Knife Techniques
You’ve mastered the basics of serger knife troubleshooting.
Now it’s time to take your skills to the next level with advanced techniques.
These techniques will help you tackle even the toughest projects.
In this section, you’ll learn how to adjust your serger knife for heavy-duty projects, delicate fabrics, and custom stitches.
You can get the most out of your serger and create professional-grade finishes with ease.
Using the Serger for Heavy-Duty Projects
Using your serger for heavy-duty projects requires finesse. To tackle thick fabrics like canvas or denim, adjust your serger settings for a longer stitch length and higher thread tension. Regular knife maintenance is also really important. Here’s a quick guide to get you started:
| Fabric Type | Serger Settings |
|---|---|
| Canvas | Length: 3-4, Tension: 5-6 |
| Denim | Length: 3-4, Tension: 6-7 |
| Vinyl | Length: 2-3, Tension: 4-5 |
| Leather | Length: 2-3, Tension: 5-6 |
| Upholstery fabric | Length: 3-4, Tension: 6-7 |
Adjusting the Knife for Thick Fabrics
When working with thick fabrics, you’ll need to adjust your serger knife to avoid broken threads and uneven cuts. Here are some tips to get you started:
- Increase knife pressure: Apply more pressure to the knife to get a clean cut.
- Choose the right stitch length: A longer stitch length can help prevent threads from breaking.
- Adjust tension settings: Tighten the tension to keep threads from tangling.
- Fine-tune feed dog adjustment: Make sure the feed dogs are guiding the fabric smoothly.
Using the Serger for Delicate Fabrics
Now that you’ve mastered adjusting the knife for thick fabrics, let’s tackle delicate ones. When working with lace, silk, or chiffon, reduce the thread tension and stitch length to prevent fabric distortion. Adjust the serger settings for a shorter stitch and lower the knife to minimize cutting. Choose the right fabric and thread combo to achieve a beautiful, professional finish.
Creating Custom Stitches and Designs
Now that you’ve mastered working with delicate fabrics, let’s get creative! With your serger, you can build custom stitch libraries and try decorative stitch ideas. Experiment with serger embroidery and stitch pattern variations to add a personal touch. Don’t be afraid to push boundaries and try new serger design techniques – it’s all about trial and error!
Frequently Asked Questions (FAQs)
Why is my overlocker blade not cutting?
Don’t get cut up about it! If your overlocker blade isn’t cutting, check if it’s dull or damaged, and make sure you have the right thread tension. Refer to your manual or contact a pro for a sharp solution.
When should I replace my serger knife?
Time to swap out that serger knife? If you notice a decline in cutting performance, increased skipped stitches, or fabric fraying, it’s likely time for a replacement – usually every 1-3 years, depending on usage.
Why is my overlocker not forming stitches?
Stitches gone AWOL? Are your threads properly tensioned? Check your overlocker’s thread tension dials and make sure they’re adjusted for your fabric type – a little tweak can make all the difference in forming those perfect stitches!
Why is my serger puckering?
Is your serger puckering? Don’t worry, it’s an easy fix! Check your thread tension, adjust the presser foot pressure, and make sure the feed dogs are clear of obstructions (Source).
How to prevent serger knife from becoming dull quickly?
Gather ’round, medieval serger masters! To prevent your trusty serger knife from becoming dull quickly, clean out lint and debris regularly, adjust the tension, and sharpen or replace it as needed – voilà, cutting-edge mastery!
Can serger knife be sharpened or only replaced?
Sorry to be the bearer of bad news, but serger knives can’t be sharpened – they need to be replaced when dull. Don’t worry, it’s a normal part of serger maintenance, and replacing them is relatively straightforward!
What causes serger knife to vibrate excessively during use?
When your serger knife vibrates excessively, it’s likely due to a dull or damaged blade, incorrect tension, or misalignment. Check the blade’s condition, adjust the tension, and refer to your serger’s manual for alignment guidance (Source).
How to remove stubborn lint from serger knife area?
Got stubborn lint stuck in your serger knife area? Don’t stress! Use compressed air or a small brush to gently sweep it away. For tougher bits, try a cotton swab or a lint roller to get your serger humming smoothly again.
Can serger knife be adjusted for different fabric thickness?
Did you know 80% of serger issues stem from improper knife adjustments? Adjust your serger knife for different fabric thickness by tweaking the upper knife’s height and lateral position – a small change can make a big difference!
Conclusion
Silencing serger struggles is simple! By following these troubleshooting steps, you’ll be slicing through fabrics with ease in no time.
Regular maintenance, proper adjustments, and knowing when to replace your knife will keep your serger singing.
Don’t let dull or damaged knives hold you back – with these tips, you’ll be sewing like a pro and fixing cutting issues fast and easy!

