This site is supported by our readers. We may earn a commission, at no cost to you, if you purchase through links.
That plain crochet blanket sitting on your couch? It’s one border away from looking like a total showstopper. I still remember finishing my first afghan and just staring at the raw edge, thinking something felt unfinished.
Edges are where a project either whispers "handmade" or shouts it proudly! A good border adds structure, hides wonky stitches, and gives your piece that professional finish you see in magazine patterns.
These crochet edging tutorials walk you through the tools, prep steps, and stitch patterns that turn plain pieces into your next favorite creation.
Table Of Contents
- Key Takeaways
- Essential Tools for Crochet Edging
- Preparing Your Project for Crochet Edging
- Step-by-Step Crochet Edging Techniques
- Decorative Crochet Edging Patterns for Projects
- Top 10 Crochet Edging Tools and Guides
- 1. BeCraftee Extra Long Crochet Hook Set
- 2. Crochet Border Design Patterns
- 3. Crochet Border Design Guide
- 4. Crochet Techniques and Tips
- 5. Crochet Stitch Dictionary Guide
- 6. Crochet Hat Patterns Guide
- 7. Crochet Animal Patterns Guide
- 8. Crochet Stitch Bible 500 Stitches
- 9. Tunisian Crochet Stitch Dictionary
- 10. Traditional Crochet Edging Patterns
- Frequently Asked Questions (FAQs)
- Conclusion
Key Takeaways
- Matching your hook size to your yarn weight and keeping tension steady are the biggest factors in getting crisp, even crochet edges.
- Blocking your piece before and after adding a border fixes curling and helps stitches lay flat for a professional finish.
- Single crochet is the easiest go-to edging stitch, while crab stitch, picot-shell combos, and zig-zag bobble borders offer fancier decorative options.
- Prepping your project with accurate stitch counts, markers, and an even foundation round prevents puckering and saves you from ripping out finished rounds.
Essential Tools for Crochet Edging
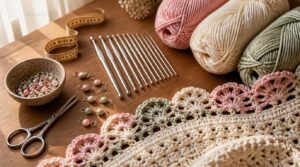
This is where every great edging project starts. I love how the right tools make each stitch feel so much easier! Grab your supplies and let’s go through what you’ll need.
If you’re wondering which items are worth the splurge, this guide to expensive sewing tools worth investing in breaks down what actually pays off in the long run.
Choosing The Right Crochet Hook
Ever wonder why some borders look crisp while others end up wonky? It’s almost always the hook.
Your crochet hook size should match your yarn weight, aluminum for smooth glide, bamboo for warmer grip.
- Check gauge first
- Match hook to yarn
- Test tension
- Pick comfortable grip
- Start simple
Use a gauge square guide to verify stitch count before starting.
Ergonomic grips genuinely reduce fatigue for beginner crochet edging sessions!
Selecting Appropriate Yarn
Once your hook feels right, yarn is your next best friend. Worsted weight yarn offers great durability for blankets, while fiber content shapes texture and drape. Match yarn weight to your hook, check dye lots, and pick colorfast yarn for edges that wash beautifully!
| Fiber | Best For | Care |
|---|---|---|
| Wool | Warmth | Hand wash |
| Cotton | Summer edges | Machine wash |
| Acrylic | Beginners | Easy care |
| Mixed fibers | Durability | Varies |
Using Stitch Markers and Scissors
Grab a few stitch markers before you start your border, they’re small but mighty. This is how you track increases and keep your BOR spot in circular work without losing count!
Clip markers to stitches, not loops, for straight edges. And please, use sharp scissors for clean, precision snipping. Cut yarn tails flush, never leave a straggly bit behind. Safety first, always!
Tapestry Needle for Weaving Ends
Once your border’s done, you’ll need a good craft needle for weaving in ends. This is your last step, so make it count!
Look for a large eye that fits thick yarn tails without splitting fibers. Blunt tips glide through stitches smoothly. Weave in different directions to lock tails tight, then trim close. Stainless steel needles resist bending and last forever!
Preparing Your Project for Crochet Edging
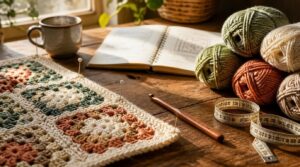
This is the step everyone wants to skip, but trust me, it’s worth it! A little prep now means your edging lays flat and looks great later. Here’s exactly what you need to do before that hook touches your project.
Blocking Your Crochet Piece
That curling edge on your border? Blocking fixes it. This is the step that makes your stitches lay flat and your edge finishing look pro.
I love wet blocking for wool, it gives crisp definition. Steam works great too, just keep it gentle so acrylic doesn’t melt. Pin your piece on a mat, let it dry fully, and watch that border transform! 臨
Counting and Marking Stitches
A few tiny markers save you from ripping out whole rounds later! This is where stitch markers become your best friend.
- Locking markers: stay put, never slip
- Light-colored yarn: easy to spot
- Group counting: count in fives, not one by one
Loose tension skews counts. I love marking every round start, it keeps math simple and errors rare! 臨
Creating an Even Foundation Round
Once your stitches are counted, it’s time to lock in that first round! This is your edge’s flat starting line, so keep tension steady and stitch count exact.
Work into the back loop only for a clean seam, then join with a slip stitch for an invisible join. Block it, and watch puckers or elliptical shapes disappear completely! 臨
Step-by-Step Crochet Edging Techniques
This is where the real fun starts! You’ve got your project ready, and now it’s time to actually make that edge come to life. Let’s walk through each technique step by step, so you can pick your favorite and get stitching!
Single Crochet Border Tutorial
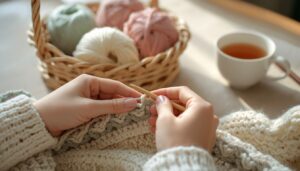
Ready to give your blanket that beautiful finished look? This is the border every crocheter learns first, and honestly, it’s your best friend.
Join yarn at any corner, then single crochet evenly along each edge. At corners, work 2 SC together for a neat turn. Keep tension relaxed:
- Smooth edges
- Rounded corners
- No puckers
- Even stitches
- Happy blanket!
Finish with a slip stitch and weave those ends in!
Crab Stitch (Reverse Single Crochet)
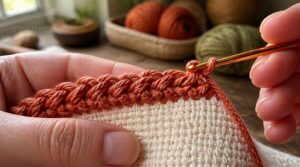
This one looks fancy but it’s really just single crochet done in reverse! The crab stitch border creates that gorgeous cord-like edge you’ve seen on Pinterest.
Work right to left instead of left to right (lefties, go opposite way). Don’t turn your work, just keep going. Keep tension steady for that beautiful twisted look.
At corners, just pivot and keep stitching. So satisfying!
Picot and Shell Borders
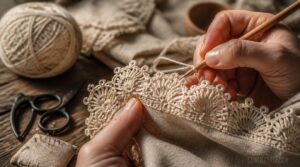
Okay, this combo is pure fairytale magic! Shells and picots together make the dreamiest scalloped edge.
- Try 5-stitch shells for balance
- Place one picot per shell space
- Keep tension even for that rhythm
I love working a crochet picot stitch (chain 3, slip stitch back) between shell clusters. Block your border after for crisp, beautiful scallops every time!
Zig-Zag and Bobble Edging
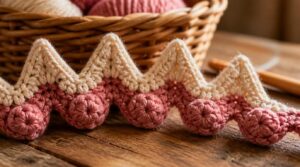
Bold peaks meet playful bumps in this combo, and wow, does it pack a punch! Zig zag edging creates sharp points, while bobble edging adds cozy texture right at each tip.
| Element | Stitch Count | Visual Effect |
|---|---|---|
| Peak | 3-5 sc | Sharp point |
| Bobble | Cluster | Raised bump |
| Valley | Decrease | Wave dip |
This creative crochet border screams handmade love. Keep tension steady for defined peaks!
Tips for Even Tension
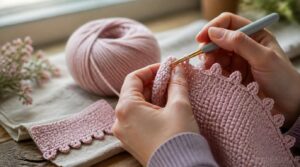
Those sharp peaks only shine with steady hands behind them! Even tension turns a wobbly border into something magazine-worthy.
Steady hands and even tension turn a wobbly border into something truly magazine-worthy
- Use a relaxed grip on hook and yarn
- Keep a consistent yarn path from ball to hook
- Match uniform stitch height on every loop
- Try a quick tension swatch before starting
- Watch your ergonomic hand positioning to avoid fatigue
I love how a calm rhythm makes stitch tension control feel easy!
Decorative Crochet Edging Patterns for Projects
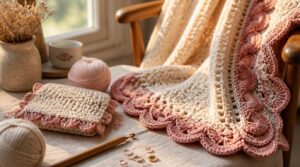
Now that you’ve got the basics down, it’s time for the fun part! This is where your projects really get to shine, whether it’s a cozy blanket or a cute little accessory. Let’s look at some of my favorite edging ideas for every kind of project.
Blanket and Afghan Borders
Blankets are where border magic really shines! I love a ruffled edge on baby blankets, so soft and sweet. Try texture contrast with bobble or zigzag stitches against a smooth panel.
Seasonal color changes turn any afghan into a holiday showstopper. Don’t forget corner turning to keep things crisp, not floppy. Quick, easy edging finishes your blanket beautifully! 臨
Garment and Accessory Edging
Now let’s shrink those big blanket borders down to something wearable! Cuff embellishment loves a tight single crochet, while hemline stability calls for smaller hooks than your main fabric.
Scarves need pliable edging, nothing stiff. Baby garments deserve soft picot loops against sensitive skin.
- Delicate lace cuffs on a cardigan
- Scalloped hat brims
- Tiny shell trims on baby booties
- Seasonal motifs on holiday scarves
Home Decor Edging Ideas
Ever thought your hook and yarn could redecorate a whole room? DIY home décor crochet takes design cues from everywhere, think Garden Stone Borders, Metallic Countertop Edging, and Patchwork Tile Patterns, translated into stitches!
I love mixing Rustic Wood Accents vibes with soft Textile Trim Styles on pillows and runners. This is where crochet border patterns turn everyday pieces into pure personality! ✨
Seasonal and Holiday Border Designs
Once December rolls around, your hooks practically beg for Holiday Color Palettes! I love mixing red and green, or gold and silver for New Year sparkle.
Festive Motif Mix with pinecones, pumpkins, or pastel eggs makes every piece pop. Pick cozy Seasonal Yarn Selection for warmth, then try Holiday Card Edging with picots. These creative crochet borders shine in crochet pattern PDFs and step-by-step video instructions!
Top 10 Crochet Edging Tools and Guides
Ready to level up your edging game? This is your go-to list of tools and guides that make every border look pro. Check out these ten favorites below!
1. BeCraftee Extra Long Crochet Hook Set
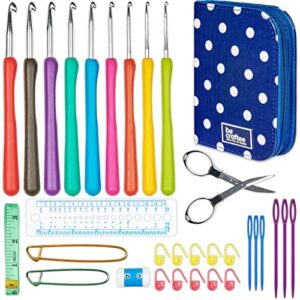
Your hands will thank you after an hour of edging with these hooks in play. This set gives you nine extra-long aluminum hooks, running from B (1.6mm) to J (6.0mm), so almost any yarn weight fits right in.
I love the rubberized grips here. They keep your fingers happy during those long border rounds, and the 6-inch length gives you room to reach across wide blankets without fumbling. Everything tucks into a tidy carrying case, too!
| Best For | This set is best for beginners and experienced crocheters alike who want a comfortable, full-range hook set for both learning stitches and tackling long projects like blankets. |
|---|---|
| Format | Physical kit |
| Skill Level | Beginner to advanced |
| Language | English |
| Digital Version | N/A |
| Photos/Charts | N/A |
| Publication Era | N/A |
| Additional Features |
|
- Soft rubber grips reduce hand fatigue during extended crocheting sessions
- Extra-long, smooth tapered aluminum shafts prevent yarn snagging and make wide projects easier to handle
- Color-coded, size-labeled handles make it easy to grab the right hook quickly
- Rubber grips may wear down over time with heavy, frequent use
- The extra-long shafts can feel bulky for small or intricate projects
- Sizes only range from 2 mm to 8 mm, so finer or larger hooks aren’t included
2. Crochet Border Design Patterns
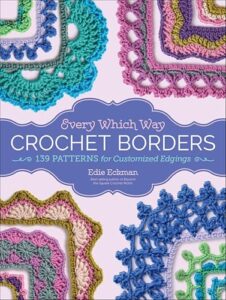
714 pages of pure border magic — that’s what you get here! This book is a total treasure chest, packing in 139 distinct patterns with step-by-step instructions, symbol charts, and close-up photos for every single design.
I love that it covers both round and row construction, so you’re set no matter what shape your project takes. It’s perfect for beginners and seasoned stitchers alike, though the styles reflect trends up through 2017.
| Best For | Crocheters of any skill level who want a go-to reference for adding beautiful, custom borders and edgings to garments and accessories. |
|---|---|
| Format | Printed book |
| Skill Level | Beginner to advanced |
| Language | English |
| Digital Version | None |
| Photos/Charts | Symbol charts, photos |
| Publication Era | 2017 |
| Additional Features |
|
- Massive variety with 139 distinct border patterns to choose from
- Clear symbol charts and close-up photos make each design easy to follow
- Covers both round and row construction for flexibility across projects
- Printed-only format with no digital files included
- At 714 pages, the book can be bulky to carry around
- Patterns reflect styles up to 2017, so newer stitch variations aren’t included
3. Crochet Border Design Guide
150 designs and full-color charts for every single one — that’s what Edie Eckman packs into this guide!
I love how it covers 90-degree corner shaping step by step, since corners trip up so many stitchers. Full-color photos walk you through each technique, so you’re never guessing.
This one’s beginner-friendly but still sparks fresh ideas for pros. Just know it’s print-only, so no digital copy waiting in your inbox.
| Best For | This guide is best for crocheters of any skill level who want to add polished, professional-looking borders and edges to blankets, garments, and other projects without designing patterns from scratch. |
|---|---|
| Format | Printed book |
| Skill Level | Beginner to advanced |
| Language | English |
| Digital Version | None |
| Photos/Charts | Full-color photos, charts |
| Publication Era | 2010 |
| Additional Features |
|
- 150 border designs with full-color charts give you a huge library of options to choose from
- Clear, step-by-step guidance on 90-degree corner shaping takes the guesswork out of tricky corners
- Full-color photos make each technique easy to follow, even for beginners
- Only available in print, so there’s no digital or e-book version
- Focuses solely on crochet borders, so it won’t help with other fiber arts techniques
- Published in 2010, meaning it may not reflect the newest yarns or crochet trends
4. Crochet Techniques and Tips
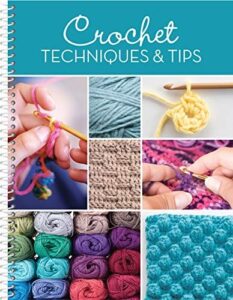
Think of this one as your crochet cheat sheet for everything border-related! It bundles handy tricks together instead of one full guide, which is perfect when you just need a quick fix.
I love that it covers tension control and edge alignment, two things that trip up even confident stitchers. It won’t replace a full tutorial, but it’s great for troubleshooting on the fly.
Keep it nearby for those "wait, why is my edge curling" moments. 臨
| Best For | This spiral-bound guide is best for beginner and experienced crocheters who want a hands-free reference for mastering essential stitches, edging, and joining techniques. |
|---|---|
| Format | Spiral-bound book |
| Skill Level | Beginner to advanced |
| Language | English |
| Digital Version | None |
| Photos/Charts | Full-color photos |
| Publication Era | 2014 |
| Additional Features |
|
- Full-color photos make each stitch and technique easy to follow
- Spiral-bound design lies flat, so it’s easy to reference while you work
- Covers 20 stitches plus increases, decreases, edging, and joining methods
- Reflects 2014 techniques, so newer trends or patterns may be missing
- Only available as a physical book, with no e-book or digital option
- Small page size may limit how much detail comes through in some photos
5. Crochet Stitch Dictionary Guide
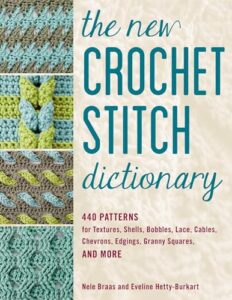
Once you’re past troubleshooting mode, a stitch dictionary becomes your idea book. This one catalogs two hundred essential stitches with clear instructions and visuals, sorted into basic, textured, cluster, and filet styles.
I love that each entry lists gauge and yarn weight, plus US and UK terms side by side. No more guessing games!
Charts and abbreviations get explained too, so picot or shell borders stop feeling like secret code. This is your gateway to fancier edges.
| Best For | This stitch dictionary is best for crochet designers, teachers, and experienced crafters who want a visual reference to expand their stitch repertoire without trial and error. |
|---|---|
| Format | Printed book |
| Skill Level | Beginner to intermediate |
| Language | English |
| Digital Version | None |
| Photos/Charts | Full-color swatches, charts |
| Publication Era | 2021 |
| Additional Features |
|
- Covers 440 distinct crochet stitches with full-color swatches and charted instructions
- Organized into ten thematic chapters, making it easy to find shells, cables, lace, and more
- Great teaching and design resource for building textured or lace projects
- Physical book only, with no digital format available
- Charts require some familiarity with chart-reading, so it may be tricky for beginners
- Focuses on visual reference, so patterns may still need extra yarn or sizing adjustments
6. Crochet Hat Patterns Guide
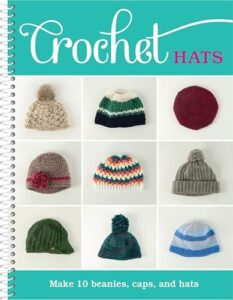
Ready to put those pretty borders on something wearable? This hat guide is your next favorite grab. It packs 10 patterns, from beanies to a beret, plus an ear warmer for quick gifts.
Each project comes with clear photos and real talk on yarn and hook picks. You’ll even learn pom-pom attachment!
At just $7 for 64 spiral-bound pages, it’s beginner-friendly but still challenges intermediate hands. This is the perfect edging playground for your next cozy creation.
| Best For | This guide is best for beginner to intermediate crocheters who want a clear, photo-guided path to making wearable hats and gifts. |
|---|---|
| Format | Spiral-bound book |
| Skill Level | Beginner to intermediate |
| Language | English |
| Digital Version | None |
| Photos/Charts | Photos |
| Publication Era | 2024 |
| Additional Features |
|
- 10 varied patterns (beanies, beret, ear warmer) with clear step-by-step photos
- Helpful tips on yarn selection, hook sizes, and pom-pom attachment
- Affordable at $7 with a convenient spiral-bound format for easy page turning
- Doesn’t include yarn, hooks, or other supplies needed to start
- Some intermediate patterns may be tricky for complete beginners
- As a printed guide, it won’t reflect newer yarn trends or digital pattern updates
7. Crochet Animal Patterns Guide
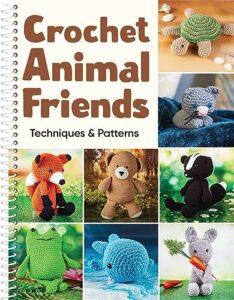
Hats got you hooked? This one’s for the animal lovers. It packs eight full patterns, bear, fox, bunny, frog, turtle, skunk, whale, and cat, with big color photos every step of the way.
I love that it’s spiral-bound, 64 pages, super easy to flip through mid-project. You’ll practice edging skills while stuffing and stitching little creatures for gifts or décor.
Just know it’s print-only, so no app or video backup here!
| Best For | Crochet hobbyists and beginner-to-intermediate crafters who want to make handmade animal plush toys for gifts, décor, or small-scale sales. |
|---|---|
| Format | Spiral-bound book |
| Skill Level | Beginner to intermediate |
| Language | English |
| Digital Version | None |
| Photos/Charts | Full-color photos |
| Publication Era | 2024 |
| Additional Features |
|
- Includes eight complete, clearly illustrated animal patterns (bear, fox, bunny, frog, turtle, skunk, whale, and cat)
- Spiral-bound 64-page format makes it easy to keep open and flip through mid-project
- Covers essential techniques, stitches, and a full supplies list to guide beginners through construction
- Limited to only eight designs, so crafters wanting more variety will need to look elsewhere
- No digital files, apps, or video tutorials to supplement the print instructions
- Some intermediate sections may be tough for absolute beginners without prior crochet experience
8. Crochet Stitch Bible 500 Stitches
Little critters are fun, but if you want the biggest edging library out there, this book is the one. It’s got 500 crochet stitches, each with a photo and diagram so you actually see what you’re making.
I love that it covers shells, picots, bobbles, and zig-zags, perfect for borders! At 288 pages, it’s a hefty reference every crocheter should own.
Just print-only though, no videos here, and it came out in 2015, so newer trendy stitches won’t be inside.
| Best For | Crocheters of any skill level who want one go-to reference packed with a huge variety of stitch options for borders, blankets, shawls, and garments. |
|---|---|
| Format | Printed book |
| Skill Level | Beginner to advanced |
| Language | English |
| Digital Version | None |
| Photos/Charts | Full-color photos |
| Publication Era | 2015 |
| Additional Features |
|
- 500 stitches with full-color photos so you can see exactly what each one looks like before you start
- Covers everything from beginner basics like yarn selection and gauge to finishing techniques
- Huge variety of edging and stitch types (shells, picots, bobbles, zig-zags) great for mixing into custom designs
- Print-only, so there are no videos or digital tutorials to follow along with
- Published in 2015, meaning newer trendy stitches aren’t included
- With 500 stitches, it’s broad but may still miss ultra-specialized or niche patterns
9. Tunisian Crochet Stitch Dictionary
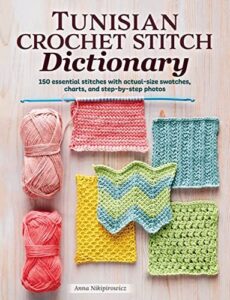
If Tunisian crochet feels like a mystery, this book cracks it wide open. With 150 stitches across nine families, plus life-size swatches, you’ll match gauge perfectly every time.
I love the 16-page fundamentals section for beginners, and the step-by-step photos make tricky stitches like cables click fast.
It’s 176 pages of pure inspiration for blankets, cardigans, and dreamy shawl edges. Just know it’s print-only, one yarn weight throughout, and skips traditional crochet entirely.
| Best For | This book is best for beginner-to-advanced crocheters and knitters who want a thorough, visual reference for mastering Tunisian crochet stitches. |
|---|---|
| Format | Printed book |
| Skill Level | Beginner to advanced |
| Language | English |
| Digital Version | None |
| Photos/Charts | Photos, charts |
| Publication Era | 2023 |
| Additional Features |
|
- 150 stitches with life-size swatches make it easy to check gauge and tension accurately
- The 16-page fundamentals section is a great starting point for newcomers to the technique
- Step-by-step photos help clarify tricky stitches like cables
- Covers only Tunisian crochet, so it won’t help with traditional crochet styles
- Available only in print, with no e-book option
- Swatches are shown in a single yarn weight, so your results may vary with different yarns
10. Traditional Crochet Edging Patterns
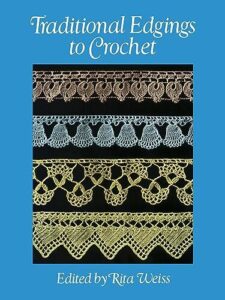
Over 130 vintage edging designs live in this little Dover gem, pulled straight from rare 1940s-50s thread-company leaflets. This is heirloom territory: filet crochet, filigree, pansy and rose motifs galore!
I love how portable it feels at just 48 pages, perfect for tucking into your bag.
Just know it skips yarn and hook sizes, and covers edging only, no full garments. Still, for tablecloths and napkins, it’s a beautiful trim treasury!
| Best For | Crochet lovers who want quick, portable projects to add heirloom-style trim to tablecloths, napkins, placemats, and clothing accessories. |
|---|---|
| Format | Printed book |
| Skill Level | All levels |
| Language | English |
| Digital Version | None |
| Photos/Charts | N/A |
| Publication Era | 2011 |
| Additional Features |
|
- Over 130 vintage edging designs sourced from rare 1940s-50s thread-company leaflets
- Compact 48-page format that’s easy to carry along for crocheting on the go
- Wide variety of styles, including filet crochet, filigree, and floral motifs like pansy and rose
- Doesn’t include yarn or hook size recommendations, so you’ll need to figure those out yourself
- Focuses only on edgings, with no full garment or project patterns
- Thin physical book that may need gentle handling to prevent page damage
Frequently Asked Questions (FAQs)
What is the best stitch for edging in crochet?
Honestly? Single crochet wins for most projects. This is neat, sturdy, and beginner-friendly.
If you want something fancier, crab stitch gives that gorgeous twisted texture. I love both for different reasons—it really depends on your project!
How to crochet a simple edge?
Grab a hook and work a single crochet border right into the edge stitches. Keep your tension even, join corners with a slip stitch, and you’ve got a clean, simple finish that’s perfect for beginners! 臨
How do you get a nice edge when crocheting?
Match your hook to your yarn weight, keep tension steady, and block your piece first. This is the secret combo! Count stitches evenly, mark corners, and you’ll get a smooth, gap-free edge every single time. 臨
How do you crochet a scalloped edge for beginners?
Picture little ocean waves rolling along your blanket’s edge. That’s a scallop!
To start, chain one, single crochet into the first stitch, skip two, then five double crochets into the next one. Repeat and watch the magic bloom!
What yarn weight is best for crochet edging?
Worsted weight is my go-to for most edging projects! It gives clean stitch definition and holds its shape beautifully. For lighter garments, try DK weight, and save fine thread for delicate, heirloom-style borders. 臨
How do I prevent wavy or uneven crochet edging?
Wavy edges usually mean tension trouble, not bad luck! Keep a steady grip, block your finished piece flat, and use the right turning chain height.
Swatch first, and choose a compressing stitch like single crochet to keep borders nice and flat.
Can I add beads or sequins to crochet edging?
Yes, you totally can! I love threading seed beads onto yarn before starting picot or shell edges. Just match bead size to your stitch spacing, and you’ll get sparkly, gorgeous borders without any crowding!
How do I crochet edging on curved or irregular shapes?
The bendiest edges need the straightest thinking! Work extra stitches on outer curves, skip stitches on inner ones, and use flexible stitches like single crochet. Pin, block, and let the curve guide your spacing every step of the way!
What are some creative ideas for customizing crochet edging?
Try contrasting yarn colors to make your border pop, or add tiny flower motifs along the edge. Beaded accents, picot loops, or a twisted cord finish all add personality. This is your chance to make it uniquely yours!
Can polka dot edging suit any yarn weight?
Picture a soft fingering-weight shawl dotted with tiny bumps versus a chunky afghan with bold, eye-catching dots — same pattern, totally different vibes!
This edging adapts beautifully. Just adjust your hook size and stitch count, and any yarn weight works wonderfully. 臨
Conclusion
Funny how the right border always lands just when your blanket needs a little magic. That’s the beauty of crochet edging tutorials—they guide you to transform “almost finished” into “absolutely stunning.”
You pick your tools, prep your stitches, and suddenly your project feels special. Each border is a new adventure, a chance to show off your style. Go ahead, experiment with those edges! The next time you finish a piece, let your border shout, not whisper.