This site is supported by our readers. We may earn a commission, at no cost to you, if you purchase through links.
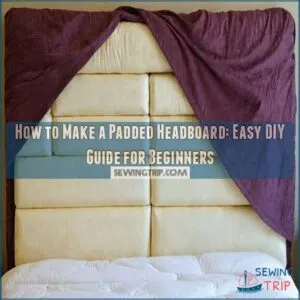
First, measure your bed and choose your design.
You’ll need plywood for the base, foam padding, batting for a soft finish, and fabric to cover it all.
Cut the plywood to size and attach it to your frame.
Next, layer your foam and batting, securing them with staples.
Finally, upholster with your chosen fabric.
It’s easier than you think!
We’ll cover choosing the perfect fabric, considering factors like fabric weight and drape, Understanding Fabric Properties, and avoiding common mistakes in the full guide – you won’t believe how much impact the right tools have on the final look.
Table Of Contents
Key Takeaways
- Measure your bed dimensions carefully, and add extra inches for padding to ensure your headboard fits perfectly.
- Choose durable, style-matching fabric and high-quality foam for your headboard to balance comfort and aesthetics.
- Secure your headboard with a solid frame and neatly attached padding to avoid lumps and unevenness.
- Consider either attaching the headboard directly to the bed frame or wall-mounting it for stability and ease of installation.
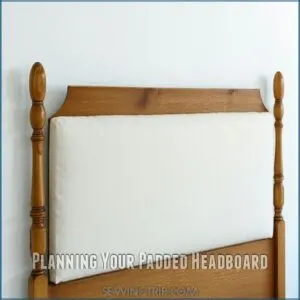
Planning Your Padded Headboard
Before you start your padded headboard project, understanding size charts and pattern grading, like those used in sewing patterns how to adjust sewing pattern size, can be helpful in ensuring a proper fit. Measure your bed and headboard dimensions to make sure a perfect fit.
Choose a style that matches your bedroom decor while considering the level of comfort you want.
Measuring Your Bed and Headboard Dimensions
Measuring your bed and headboard dimensions starts with understanding your bed size. Here’s a quick guide:
- Measure Width and Height: Check the width of your bed and the desired height for the headboard.
- Consider Existing Headboards: If you’re updating, measure the current headboard dimensions.
- Plan for Padding: Add a few inches for extra headboard padding for comfort.
Choosing The Right Style and Design
Before you get started, consider your headboard’s style.
Do you envision a sleek, modern design or something more traditional?
Your headboard size directly impacts the overall look.
Think about fabric choice and color scheme—coordinating with your bedroom’s existing decor.
Tufting options add texture and visual interest.
Find style inspiration online or in magazines to visualize your perfect padded headboard.
This headboard tutorial will guide you through the process.
Remember, headboard design is all about personal preference!
Deciding on The Level of Padding and Comfort
Your padded headboard’s comfort hinges on a few key choices.
Consider your back support needs and firmness preference.
If you’re a side sleeper, a plusher headboard cushion might suit you, while firmer foam and batting offer sturdier support.
To achieve the perfect level of comfort, you can use DIY foam alternatives, such as bed foam, as a budget-friendly option.
Give some thought to material choice and budget considerations too—these decisions will help your headboard match both your sleep position and wallet.
Finding Inspiration and Visualizing The Final Design
Picture yourself curling up with a good book against a plush padded headboard.
You can also browse online for headboard fabric ideas to find the perfect match for your bedroom.
Grab headboard inspiration from Pinterest or magazines.
Collect fabric swatches matching your bedroom style.
Play with shapes and a cozy color palette.
Remember, your DIY headboard reflects you.
A balanced headboard design can turn your sleep haven into an inviting retreat with endless possibilities.
Making a Padded Headboard – 101
Creating a padded headboard is a straightforward project that requires a few essential tools and a bit of planning.
By gathering your materials and understanding key steps, you can avoid common pitfalls and craft a comfortable addition to your bedroom.
Essential Supplies and Tools Needed
You’re ready to gather the supplies for your DIY padded headboard.
Here’s what you’ll need: a staple gun, fabric, foam mattress topper, batting, and a sturdy frame made of wood.
For tools, grab a measuring tape, scissors, and a staple remover.
Think of it like assembling a sandwich, with each layer adding comfort to your upholstered headboard masterpiece.
Key Considerations for a Successful Project
When planning your DIY padded headboard, always balance budget, materials, and your time.
Consider your skills and prioritize safety; those are your core pillars.
Choose quality foam and headboard fabric that align with your style.
Think of them like the secret sauce to a perfect meal.
A thoughtful design makes your upholstered headboard both comfy and eye-catching.
Common Mistakes to Avoid
Thinking about your padded headboard, nobody wants lumpy uneven padding or fabric tension issues.
Avoid poor staple placement, which invites loose seams.
Skipping the right tools leaves you fumbling, potentially ruining your upholstered headboard.
Foam and batting should hug just right—snug as a bug—not too tight, not too loose, and don’t forget, DIY means taking control, not rushing the magic!
Building Your Headboard Frame
Now it’s time to build the frame—the sturdy foundation of your comfy headboard.
You’ll be cutting wood, assembling pieces, and making sure everything’s super strong and stable before adding the padding and fabric.
Cutting The Wood and Assembling The Frame
Now that you’ve gathered your supplies, let’s focus on cutting and assembling the frame.
Opt for lightweight wood like pine to simplify the process.
With your circular or chop saw handy, measure twice and cut once—precision is key.
Assemble the frame snugly, ensuring joints are secure.
Use sturdy screws and brackets; they’re your frame’s backbone, ensuring it stands strong.
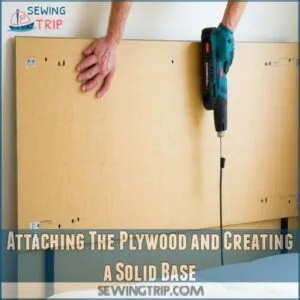
Attaching The Plywood and Creating a Solid Base
Let’s talk about securing plywood for your headboard DIY project.
Start by picking the right plywood thickness—typically around half an inch works well.
Secure the plywood to the headboard frame using screws, ensuring the base feels sturdy.
Properly attaching the plywood provides support for the padding, making the headboard construction both robust and comfortable.
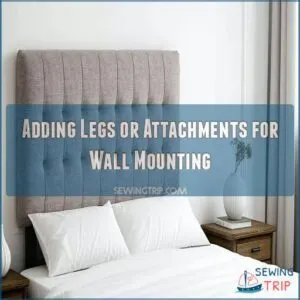
Adding Legs or Attachments for Wall Mounting
Everyone knows that attaching legs or opting for wall mounting can make a significant difference in headboard style and stability.
Pick sleek legs for easy adjustments.
For wall mounting, choose robust hardware options that anchor firmly.
Whether your style is minimalist or grand, these DIY attachments enhance overall comfort.
Experiment with different techniques until your padded headboard perfectly complements your bedroom’s vibe.
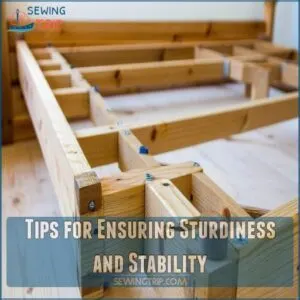
Tips for Ensuring Sturdiness and Stability
Ensuring the sturdiness of your padded headboard is like building a fortress.
Focus on frame reinforcement by choosing high-quality wood and using appropriate screw sizes to enhance joint strength.
A solid support structure is key, so make sure everything aligns tightly.
Remember, stability hinges on precision—keep those screws tight and your foam work neat for a reliably durable headboard.
Adding Padding and Upholstery to Your Headboard
Now comes the fun part: adding padding and upholstery that transform your wooden frame into a cozy, stylish headboard.
You’ll cut and layer foam, batting, and fabric, then secure them neatly for a professional finish.
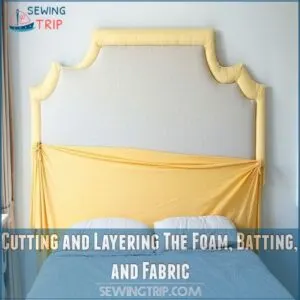
Cutting and Layering The Foam, Batting, and Fabric
You’ve built your frame; now it’s time to bring your vision to life.
Think of foam thickness as the comfort layer, adding just the right cushion.
Layer it with batting for softness and fabric for style.
A trusty staple gun makes sure everything holds tight.
Remember, the fabric choice sets the mood, and mastering fabric tension is your ticket to a plush padded headboard.
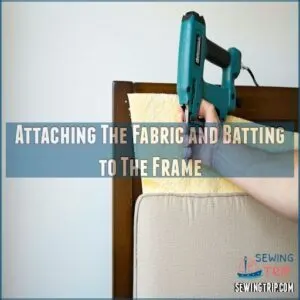
Attaching The Fabric and Batting to The Frame
Now, it’s time to get your hands dirty! Drape the batting over the foam, ensuring even coverage. Use your staple gun to secure the batting to the frame.
Here’s what you’ll do:
- Start in the center, working your way outwards.
- Maintain consistent tension on the fabric to avoid wrinkles.
- Use short, quick staples to prevent tearing.
- Carefully position the fabric to avoid bunching around the edges.
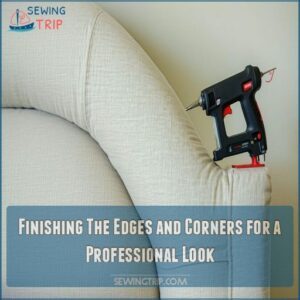
Finishing The Edges and Corners for a Professional Look
Tucking fabric snugly around edges and corners can make your headboard pop like a pro’s work.
Use staple gun techniques with finesse—think corner mitering for that seamless look.
To achieve this, invest in a good staple gun from a reliable source, like one found on staple gun products, which can make a difference in the quality of your work.
Start by wrapping the fabric taut, securing with staples.
A dash of fabric glue helps hold tricky spots.
Batting and foam help create a soft touch, while precise seam finishing polishes the piece.
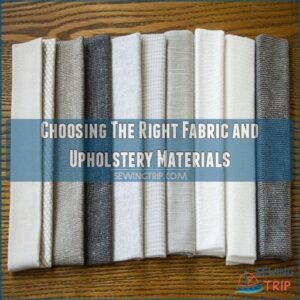
Choosing The Right Fabric and Upholstery Materials
Choosing the right fabric gives your headboard a great feel and lasting quality. Think about fabric durability and stain resistance for easy cleaning.
Picture yourself sinking into a soft texture that matches your decor.
Balancing budget considerations and style, check these perks:
- Color coordination with your room
- Longevity of material
- Texture & feel against the skin
- Ease of maintenance
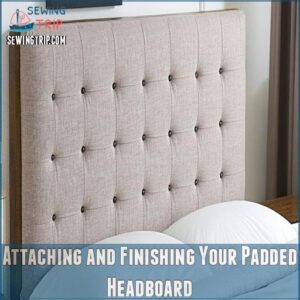
Attaching and Finishing Your Padded Headboard
You’re almost done with your padded headboard—now it’s time to attach it securely and make sure you have a smooth, wrinkle-free finish.
Follow these simple steps to make sure everything fits snugly and looks perfect.
Securing The Headboard to The Bed Frame or Wall
You’ve got two main options for securing your headboard: bed frame attachments or wall mounting methods.
Bed frame attachments offer headboard stability, connecting directly for a seamless fit, and are ideal for headboards made from durable fabrics like faux leather and velvet.
Wall mounting, on the other hand, turns your headboard into a floating masterpiece.
Whichever route you choose, make sure it’s hung securely using reliable DIY installation tips for peace of mind.
Adding Final Touches and Ensuring a Secure Fit
With the headboard secure, make the final touches shine.
Use staples wisely, keeping fabric tension snug for a finished look.
To prevent fabric from slipping, consider using headboard staples for a more secure hold.
Mind those edges, ensuring clean finishes around corners—like wrapping a gift you can’t wait to show off.
Make sure the placement is right, whether you’re hanging headboard or wall mounting, to achieve that extra touch of elegance.
Tips for Avoiding Wrinkles and Ensuring a Smooth Finish
Smooth out wrinkles like a pro—focus on fabric stretching and tension control. Keep these tips in mind:
- Staple Placement: Start from the center and work outwards.
- Seam Allowance: Leave enough fabric for a clean edge.
- Upholstery Tricks: Use batting and fabric glue to secure loose edges.
- Foam and Batting: Smooth layers before securing with staples.
Frequently Asked Questions (FAQs)
Can You DIY a headboard?
You can easily DIY a headboard using materials like foam, fabric, and a staple gun.
It’s a fun project that personalizes your space and doesn’t require fancy tools—just creativity and a bit of patience.
Is This DIY upholstered headboard tutorial easy?
Tackling a DIY upholstered headboard might feel like assembling a puzzling masterpiece, but it’s simple with the right steps.
Using an old headboard, foam, and fabric, you’ll create comfort and style without breaking a sweat.
How do you make a padded headboard?
To make a padded headboard, use an old headboard, egg carton foam, and batting.
Secure foam to the headboard, wrap with batting, and cover with fabric.
Staple everything in place for a cozy, stylish finish.
What is a DIY faux headboard?
A DIY faux headboard is a creative, affordable way to add style to your bedroom.
It simulates a real headboard using materials like fabric, decals, or paint directly on the wall.
This offers a customizable and space-saving design solution.
How long does it take to make a padded headboard?
Crafting a cozy haven like a padded headboard can take anywhere from a leisurely afternoon to a full weekend.
With each staple, you’ll become a master, balancing creativity and practicality,
transforming dreams into a plush reality.
Can You DIY a chevron wood headboard?
You can totally build a chevron headboard. It’ll be a fun project. Gather your wood, measure carefully, cut precisely, and assemble your masterpiece. Enjoy the process!
What do I need to make a padded headboard?
You’ll need an old headboard, foam mattress topper, batting, fabric, and a staple gun.
Gather supplies, wrap the foam, add batting, and secure the fabric to refresh your space with a cozy, stylish headboard makeover.
How do you put padding on a headboard?
Lay the foam mattress topper on the headboard, secure it with a staple gun, add batting for extra cushion, then wrap and staple your chosen fabric around it neatly.
This results in a comfortable, stylish padded headboard.
How thick should foam be for an upholstered headboard?
Did you know that 93% of bedroom comfort is attributed to good design?
Upholstered headboards, with 2 to 3 inches of foam, strike the perfect balance between softness and stability, giving your bedroom an inviting and plush look.
How to attach foam to headboard?
To attach foam to your headboard, use spray adhesive for an even application.
Press the foam firmly onto the backing and smooth out any wrinkles.
Secure with a staple gun around the edges to make sure a snug fit.
What alternative fabrics can I use?
Ever wonder what fabrics you can use for a padded headboard?
Think outside the box with old sheets, vintage tablecloths, or drapes.
Even thrift store finds can add unique flair without breaking the bank.
Happy crafting!
How do I clean a padded headboard?
Gently vacuum your padded headboard regularly to remove dust.
Spot cleaning a padded headboard can be done with a mild fabric cleaner and a damp cloth.
Always test the cleaner in an inconspicuous area first, and dab rather than rub to avoid damage.
Can I install a headboard without drilling?
Yes, you can! Many headboards cleverly utilize existing wall anchors or employ strong adhesive strips for seamless, drill-free installation. It’s simpler than you think!
Whats the budget-friendly way to source materials?
Check thrift stores for fabric or foam remnants, hit garage sales for batting, and browse online marketplaces for used headboards.
Upcycling old materials keeps costs low and promotes sustainability.
Giving your headboard a unique touch.
How do I measure my bed for a headboard?
When measuring your bed for a headboard, think of it like tailoring a suit.
Measure the bed’s width and height to make sure it’s a snug fit.
Consider extra height if you want a dramatic look or extra comfort.
Conclusion
So, you think you can’t build a headboard?
Surprise yourself with this tutorial—how to make a padded headboard isn’t just a dream.
You’ve measured, cut, and stapled, bringing comfort and elegance to your space.
Remember to attach it securely, and voila!
Your custom creation elevates your bedroom’s style but also adds a personal touch.
Go ahead and try DIY with confidence, and let your creativity shine with your very own padded masterpiece.
Enjoy the transformation!

