This site is supported by our readers. We may earn a commission, at no cost to you, if you purchase through links.
You’ve just finished knitting a pair of socks, and there’s one problem: that lumpy, obvious seam across the toe that screams homemade. Professional knitters don’t have this issue because they use Kitchener stitch, a grafting technique that creates an invisible join between two sets of live stitches.
This method mimics the fabric’s natural structure so perfectly that even you won’t be able to spot where the seam begins and ends. The technique works by weaving yarn through stitches in a specific sequence, maintaining the elasticity and drape of your knitting without adding bulk.
Once you master this essential skill, you’ll transform every project that needs a flawless finish—from sock toes to shoulder seams—into work that looks professionally made.
Table Of Contents
Key Takeaways
- Kitchener stitch creates an invisible join between two sets of live stitches by weaving yarn through them in a specific sequence that mimics the fabric’s natural structure, eliminating bulky seams in projects like sock toes and shoulder seams.
- The technique follows a simple four-step pattern—knit off and purl on for the front needle, purl off and knit on for the back needle—that becomes intuitive with practice and works across stockinette, garter, and ribbed fabrics with minor adjustments.
- Success depends on maintaining consistent tension throughout the grafting process, using a yarn tail three to four times the seam width, and checking alignment every few stitches to prevent common mistakes like twisted seams or “ears” at the edges.
- You only need basic supplies you likely already own—your project yarn, a blunt tapestry needle, and your knitting needles—making this professional-looking finish accessible to any knitter willing to practice the rhythm of the stitch sequence.
What is Kitchener Stitch?
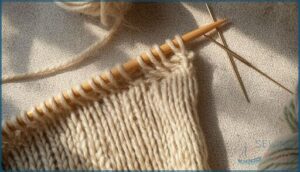
If you’ve ever wished your knitting could disappear into itself without a trace, you’re ready to learn Kitchener stitch. This grafting technique creates a flawless join between two sets of live stitches that looks like it was never seamed at all.
If you’re working on stuffed toys or plush projects, check out these sewing tutorials for stuffed animals to master seam techniques that keep your creations looking polished and professional.
Kitchener stitch creates an invisible join between live stitches that looks like it was never seamed at all
Let’s break down exactly what makes this method so valuable and where you’ll use it most.
Definition and Purpose
Kitchener Stitch is a grafting technique that weaves yarn through two sets of live stitches to create an invisible seam. You’ll work the yarn over and under across the join, bonding opposite edges without adding bulk or visible ridges.
This smooth joining method maintains your fabric’s elasticity and drape, producing a nearly flat surface that matches the surrounding stockinette on both sides.
Key Features of The Technique
This grafting method stands out because it mimics fabric structure stitch by stitch using a tapestry needle. The invisible graft creates a flat seam with no ridge or bulk, so your continuous joining looks identical to the surrounding stockinette stitch.
You’ll find the durable join flexes with your knitting and holds up through repeated wear and washing without breaking or puckering.
Common Uses in Knitting
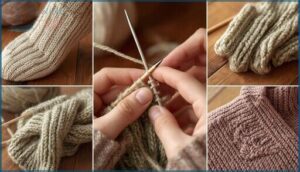
You’ll reach for this technique most often when closing sock toes—those unbroken toes feel smooth against your skin with no bulky ridge.
Garment shoulders benefit too, since invisible seams let fabric drape naturally without stiff joins. Kitchener stitch grafting works beautifully anywhere you want continuous joining in stockinette stitch, from mitten tips to sweater underarms. Understanding the basics of can help you achieve the best results when grafting.
Supplies Needed for Kitchener Stitch
You don’t need a lot of fancy equipment to master Kitchener stitch. In fact, you probably already have most of what you need in your knitting bag.
Let’s walk through the essentials so you can set yourself up for success.
Yarn Selection Tips
The right yarn makes grafting easier and more beautiful. You want fibers that let you see each stitch clearly as you work.
Here’s what to think about:
- Fiber content affects how forgiving your seam will be—wool blends stretch slightly and hide minor tension issues.
- Yarn weight should match your project gauge for a truly invisible join.
- Texture impact matters—smooth yarns show clean stitches, while boucle obscures your work.
- Dye lot consistency prevents color shifts across your seam.
Choosing The Right Needles
You already have your knitting needles holding live stitches, so focus now on needle material and tip sharpness for the grafting itself. Metal needles provide stitch glide that keeps your work from snagging. Bamboo offers needle flex that prevents splitting delicate fibers.
If you’re working with a neckline that gaps after adjustments, fixing pattern alterations for gape necklines will help you achieve a smoother, more professional finish.
Your tapestry needle—sometimes called a yarn needle or darning needle—needs a blunt tip for weaving through stitches without piercing them. This matters for yarn compatibility and clean needlework.
Essential Tools (Tapestry Needle, Scissors)
Your tapestry needle acts as the bridge between live stitches and invisible seams. Choose a blunt-tipped needle with an eye large enough to thread your yarn without forcing it through—metal or plastic both work beautifully for Kitchener Stitch.
- Needle Selection: Match the eye width to your yarn thickness for smooth weaving
- Scissor Maintenance: Keep sharp fabric scissors handy for clean yarn cuts
- Yarn Management: A 4 to 6 cm tapestry needle accommodates most needlework projects comfortably
When selecting your tools, understanding the can make your grafting process much easier.
Preparing Your Knitting for Grafting
Before you start grafting, you need to get your knitting ready. Think of this as setting the stage—everything needs to be in the right place for the magic to happen.
Let’s walk through the three essential prep steps that’ll make your Kitchener stitch smooth and frustration-free.
Setting Up Live Stitches
Live stitches are your building blocks for invisible grafting—they’re the active loops waiting on your needle. Before you begin the Kitchener Stitch setup stage, transfer stitches to a holder or waste yarn to prevent loss. Keep enough yarn slack so your tension stays even. Mark your start with a removable marker, and check stitch orientation carefully so your join aligns perfectly with the fabric edge.
| Setup Step | Why It Matters |
|---|---|
| Transfer to holder | Prevents accidental bind off |
| Leave yarn slack | Maintains even tension |
| Mark starting edge | Keeps sequence aligned |
Positioning Needles Correctly
Think of needle alignment like setting up train tracks—both pieces must run parallel or your grafting will veer off course. Hold your knitting needles side by side with right sides facing:
- Point both needle tips toward the right so stitches sit evenly
- Keep needles at the same height to prevent fabric tension shifts
- Position the working yarn at the back right corner for clean yarn control
- Check that stitch placement looks symmetrical across both needles
Your tapestry needle will weave between these layers, creating smooth joining methods that hide the seam visibility completely.
Measuring and Cutting The Yarn Tail
You’ll need a generous yarn tail to complete your graft without running short midway. Measure and cut about 6 to 8 inches of working yarn—this length gives you enough tail for Yarn Tail Trimming and secure weaving with your tapestry needle.
Following proper Tail Length Guidelines prevents frustration and ensures you have room for Grafting Tension Control and finishing touches in your knitting.
Step-by-Step Kitchener Stitch Tutorial
Now that your stitches are ready, it’s time to work through the actual grafting process. Don’t worry if it feels awkward at first—Kitchener stitch follows a simple pattern that becomes second nature with practice.
Let’s walk through each step so you can create that invisible seam you’re after.
The Initial Setup Stitches
Getting your setup stitches right is like building a solid foundation—it sets the stage for smooth joining. Start by threading your tapestry needle with a yarn tail about three times the width of your knitting.
Then follow these anchor steps:
- Insert the needle purlwise through the first front stitch
- Insert knitwise through the first back stitch
- Keep both stitches on their needles
- Maintain gentle tension as you weave
These initial yarn paths establish proper seam alignment for grafting techniques ahead.
Working The Front and Back Needles
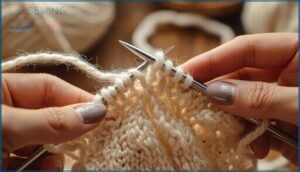
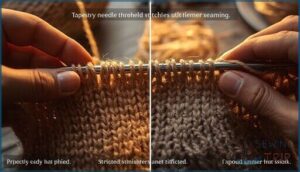
Once your setup anchors those first loops, you’re ready to weave the actual grafted row. The front needle actions move in a knit-off, purl-on rhythm, while back needle actions reverse that pattern—purl-off, knit-on. This yarn path creates a smooth joining row that mimics real knitting.
| Needle | First Action | Second Action |
|---|---|---|
| Front | Knit off | Purl on |
| Back | Purl off | Knit on |
| Sequence | Remove stitch | Hold next stitch |
Pull yarn through after each pass to prevent slack from building.
Repeating The Stitch Sequence
After you’ve worked the front-and-back cycle once, you’ll repeat those sequence steps across all live stitches. Maintaining alignment is simple: knit off, purl on for the front needle, then purl off, knit on for the back needle. Even if your stitch count seems large, tension consistency builds with each repeat.
Some projects require partial repeats at the edges, so watch for those adjustments as you graft.
- Insert tapestry needle knitwise into the front stitch and slip it off.
- Insert purlwise into the next front stitch, leaving it on the needle.
- Insert purlwise into the back stitch and slip it off.
- Insert knitwise into the next back stitch, leaving it on the needle.
- Pull yarn gently to match surrounding fabric tension.
Finishing and Removing Needles
Once your final stitch is grafted, gently slide both needles out of the seam.
Thread your tapestry needle with the yarn tail and weave it through nearby stitches on the wrong side—this secures the join and prevents unraveling. Lightly tug along the seam edges to adjust tension control, then trim the tail close. Your flawless joining is complete.
Tips for a Seamless Join
You’ve learned the steps, but nailing a truly invisible seam takes a few extra tricks.
These tips will help you troubleshoot tension issues, sidestep the most common grafting mistakes, and fine-tune your finished join.
Let’s walk through the small details that make all the difference.
Maintaining Consistent Tension
Tension control makes or breaks your Kitchener stitch. Keep your grip relaxed and use light, even pressure as you work each pass. Yarn management gets easier when you anchor the tail lightly against your work.
Match your stitch rhythm to the fiber response—smooth wool blends flow steadily, while slippery fibers need gentler handling. This joinery technique rewards consistency.
Avoiding Common Mistakes
Misalignment sinks even the best grafting methods. Match your yarn tension to the fabric weight, and check that both stitch alignment and needle sizes stay consistent throughout.
A yarn tail shorter than three times your seam width causes loose joins and visible seam visibility issues. Always pause every four or five stitches to confirm your grafting errors haven’t crept in—mistake prevention starts with regular checkpoints during joined methods that have no visible seams.
Adjusting and Tightening Stitches
Patience transforms a wobbly seam into invisible magic. After grafting four or five stitches knitwise, gently tug the yarn to match your knitting’s original stitch tension—yarn elasticity helps stitches settle evenly.
- Smaller needle size prevents overstretched loops during unified joining
- Light blocking improves seam stability across grafting methods
- Steam sets finishing techniques for uniform joined methods
- Rework loose spots before weaving in your tail
Don’t rush; adjust as you go for impeccable Kitchener stitch results.
Kitchener Stitch Variations and Applications
You’ve mastered the basic Kitchener stitch, but this technique isn’t a one-trick pony.
Different stitch patterns require slight adjustments to keep that invisible seam looking sharp. Let’s explore how to adapt Kitchener stitch for garter, ribbing, and real projects you’ll actually make.
Grafting Stockinette Vs. Garter Stitch
You can use the Kitchener Stitch for both stockinette stitches and Garter Stitch, but each creates different Seam Visibility. Stockinette grafts produce a nearly invisible join with perfect Texture Blending when Stitch Alignment matches the fabric’s V-pattern.
Garter borders grafted with this technique show a more noticeable seam but lie flatter due to better Fabric Elasticity. Choose your approach based on your project’s dominant Knitting Techniques for the most unified joining using basic Grafting Tools.
Using Kitchener Stitch for Ribbing
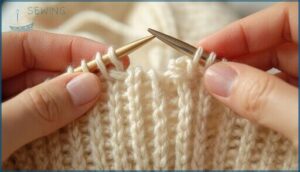
Ribbing demands a modified approach since knit and purl columns need to stay aligned through your graft. Match your Needle Sizes to the Ribbing Patterns you’ve worked, then thread your tapestry needle knitwise through knit stitches and purlwise through purl stitches on both needles. This Kitchener Stitch variation creates Flawless Joining Methods that preserve stretch while showcasing smart Fiber Compatibility across your Knitting project.
- Smooth Yarn Choices help your grafted ribbing vanish into the fabric
- Sharp tapestry needles glide through tight rib stitches without splitting fibers
- Matching stitch types during weaving keeps your columns perfectly straight
- Superwash wools require gentler tension to avoid slipping at the join
- Proper setup means your ribbed tube stretches evenly without visible seams
Creative Project Ideas
Once you’ve mastered this invisible join, you’ll spot dozens of ways to apply it. Craft top-down socks with cohesive toes using Kitchener Stitch, then graduate to Knit Gifts like mittens and fingerless gloves.
Your Joining Methods facilitate Fiber Arts projects such as sweater shoulders and hat crowns. Explore Knitting Patterns that demand invisible grafting, turning everyday Yarn Crafts into polished pieces that showcase your Textile Design skills.
Troubleshooting and Advanced Techniques
Even experienced knitters run into snags when grafting live stitches together. A twisted seam or those pesky little “ears” at the edges can make your work look less polished than you’d like.
Let’s tackle the most common issues and learn how to prevent them before they happen.
Fixing Twisted or Uneven Seams
If your Kitchener Stitch looks twisted, don’t panic—seam repair is straightforward. Tension control is your first fix; adjust the grafted yarn to match your knitting’s gauge.
For serious fabric shifting or twisted stitch issues, carefully unpick the grafted row and rejoin using proper invisible joining methods. Remember these edge finishing essentials:
- Align your live stitches precisely before starting
- Maintain even yarn tension throughout the grafting
- Check both sides as you work the stitch sequence
- Gently tug and adjust after completing the invisible joining
Preventing “Ears” at The Edges
Those pesky bumps at the edge? That’s what knitters call “ears.” After repairing twisted seams, smooth edge tension control prevents these ridges.
Align your grafted rows so loops don’t overlap—this unified joining method keeps edges flat. Work with slightly longer yarn tails and weave them using short passes.
Once finished, try gentle blocking methods for fiber relaxation. These grafting techniques transform bumpy seams into truly invisible seaming methods.
Frequently Asked Questions (FAQs)
What is the Kitchener stitch?
Most knitters would rather tackle a tax return than face invisible grafting.
Yet the Kitchener Stitch tutorial reveals this uniform grafting technique—weaving live stitches knitwise—transforms knitting into one continuous, impeccable fabric without visible seams.
How long tail for kitchener stitch?
You’ll need a yarn tail at least three times the width of your stitches for flawless joining.
For larger projects or heavier yarn, go four times to guarantee smooth grafting tension control throughout.
What is Kitchener stitch knitting?
It sounds complicated, but this invisible grafting method joins live stitches seamlessly.
You’ll weave yarn through front and back needles, creating a smooth join that perfectly mimics knitted fabric—no bulky seams.
What does Kitchener stitch look like?
A perfectly executed Kitchener stitch creates an invisible join where the fabric blends seamlessly.
The grafted area shows continuous stockinette texture with no gaps, bumps, or visible seam—just smooth, interlocking stitches flowing naturally.
How do you use Kitchener stitch?
You use Kitchener stitch by threading yarn through live stitches in a rhythmic pattern—like weaving invisible threads between two worlds.
This expert grafting technique creates impeccable joins in socks, sweaters, and other knitting projects.
What is Kitchener stitch grafting?
Kitchener stitch grafting joins two sets of live stitches invisibly from the right side.
You weave yarn through alternating stitches with a tapestry needle, creating a flawless join that mirrors your knitting’s texture perfectly.
Is Kitchener a good stitch?
Absolutely—it’s one of the best choices for effortless joining. The stitch benefits include invisible seams and exceptional seam quality.
With practice, knitting ease improves, though grafting challenges and yarn compatibility require attention during your Kitchener stitch tutorial.
Can you use Kitchener stitch on circular needles?
Yes, you can graft on circulars. Just keep your front and back stitches on separate needle tips, align them parallel, and follow the standard Kitchener stitch sequence for flawless joins.
How do you graft two different yarn weights?
Grafting techniques succeed when you match fiber blending and adjust tension control carefully.
Hold the heavier yarn slightly looser during continuous joining methods.
Test a swatch first, then use steam for seam finishing that evens out yarn weight differences beautifully.
Is Kitchener stitch reversible on both sides?
When worked with consistent stitch tension and matching yarn selection, the join appears nearly invisible from both sides.
The flawless grafting creates a reversibility test that reveals identical fabric texture on the right and wrong faces.
Conclusion
Here’s the truth: every knitter who learns Kitchener stitch wonders why they waited so long to try it. The technique isn’t as intimidating as it looks—it just requires patience and practice.
Once those first few grafted seams click, you’ll find yourself seeking out projects that showcase invisible joins. Your socks will fit better, your seams will disappear, and your finished pieces will finally match the vision you’d had when you cast on. That’s the real magic.


