This site is supported by our readers. We may earn a commission, at no cost to you, if you purchase through links.
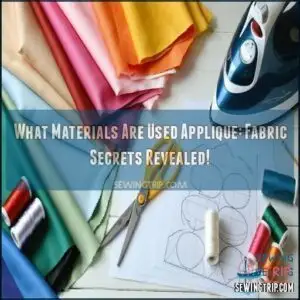 You’ll want a variety of materials for applique, starting with cotton fabric scraps in different colors and textures.
Choose a stable base fabric like cotton or linen that won’t stretch easily. You’ll need sharp fabric scissors, fusible web for iron-on techniques, and lightweight interfacing to prevent fabric distortion.
Thread selection matters too – pick threads that complement your fabric colors and provide strong, decorative stitching. Templates help you cut precise shapes, while an iron and ironing board are essential for creating crisp edges and securing your design.
Your applique toolkit is your creative passport to transforming ordinary fabric into extraordinary art.
Table Of Contents
Key Takeaways
- You’ll need versatile cotton fabric scraps as your primary material, choosing different colors and textures that’ll help you create intricate applique designs with depth and character.
- Invest in essential tools like sharp fabric scissors, fusible web, and a reliable iron, which are crucial for precise cutting, securing fabric pieces, and achieving professional-looking applique projects.
- Select the right base fabric and interfacing carefully, matching the weight and texture to your project’s complexity to prevent stretching and ensure your design maintains its crisp, intended shape.
- Experiment with thread types and embellishments like beads, ribbons, and buttons to transform your applique from a basic craft to a stunning piece of textile art that showcases your creativity.
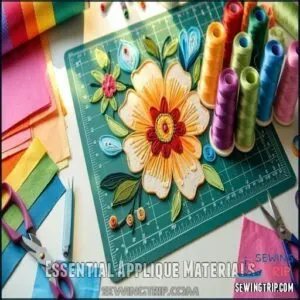
Essential Applique Materials
You’re about to set out on an exciting applique journey that’ll transform your fabric crafting skills forever.
Grab your cotton scraps, fusible web, and sharp scissors, because you’ll need the right materials to turn ordinary fabric into extraordinary art.
Cotton Fabric Scraps
Every crafty quilter knows that cotton fabric scraps are the secret weapons of applique magic. Your leftover fabric pieces are about to become tiny masterpieces waiting to be transformed!
Cotton scraps are your crafty gateway to applique magic—tiny fabric treasures waiting to become extraordinary art!
Here’s how to turn those remnants into creative gold:
- Collect scraps 2" x 2" or larger, sorted by color
- Choose quilting cotton for its rock-solid weave and durability
- Mix patterned and solid pieces to add depth and dimension
Upcycling these fabric treasures isn’t just smart—it’s an art form that breathes new life into every project. You can even create patchwork tote bags with them.
Base Fabric Selection
After cutting your cotton fabric scraps, it’s time to pick the perfect base fabric for your appliqué adventure.
Your backing fabric isn’t just a canvas—it’s your project’s foundation.
Consider fabric weight carefully: lightweight cottons work magic for intricate designs, while medium-weight fabrics rock bold patterns.
Watch for texture harmony and make certain thread count supports clean seams.
Pro tip: Choose a base that complements your appliqué without stealing the spotlight, letting your creative vision shine through.
Template or Pattern
When designing applique projects, your template becomes the blueprint for creativity.
Pattern scaling and design transfer depend on choosing the right template materials like tracing paper, template plastic, or freezer paper.
Start with simple designs, then progress to complex shapes.
Transfer techniques using transfer pens help you transform ideas into fabric masterpieces, turning every project into a unique storytelling canvas.
What Materials Are Used
Ready to discover the art of applique? Your creative journey starts with the right materials! Let’s break down what you’ll need to transform fabric into art:
- Fabric Selection: Grab cotton scraps that spark joy – they’re your canvas for magical designs
- Adhesive Magic: Fusible web acts like crafting glue, holding your pieces perfectly in place
- Cutting Companions: Sharp fabric scissors will be your best friend, making precision cuts a breeze
- Supporting Cast: Stabilizers and interfacing provide the backbone that keeps your design looking crisp
Material sourcing doesn’t have to break the bank. Budget-friendly options like quilting cotton and pre-loved fabric scraps can turn your applique dreams into reality. The key is finding materials that complement your project’s complexity and vision.
Pro tip: Always have a few backup fabric options. Your first choice mightn’t always be the perfect match, and creativity loves a little flexibility!
Fabric Types and Uses
When you’re diving into applique, choosing the right fabric can make or break your project’s success.
Your fabric’s weight, texture, and color are key players that’ll transform your creation from ordinary to extraordinary.
Fabric whispers stories of creativity, waiting to be transformed by your inspired touch and artistic vision.
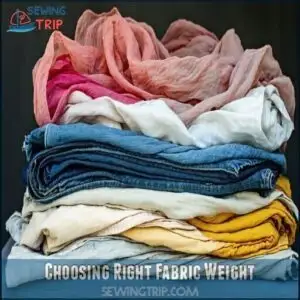
Choosing Right Fabric Weight
When you’re diving into applique, fabric weight becomes your secret weapon.
Different fabric weights dramatically influence your project’s success.
Here’s a quick guide to help you choose wisely:
| Weight | Characteristics | Best For |
|---|---|---|
| Lightweight | Delicate, airy | Intricate designs |
| Medium-weight | Versatile, stable | Most applique projects |
| Heavyweight | Thick, structured | Bold, sturdy applications |
Mastering fabric weight means understanding how different materials interact and complement each other.
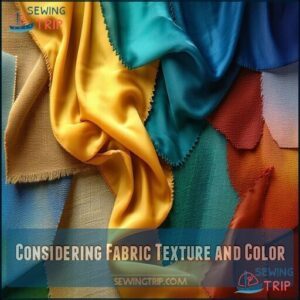
Considering Fabric Texture and Color
When crafting applique, your fabric texture and color choices are like an artist’s palette—each piece telling a unique story.
Mix smooth cottons with textured linens to create visual depth and intrigue. Color harmony matters! Fabric weight affects drape, so choose carefully.
You can learn more about GSM measurement affects the final product.
- Embrace unexpected color combinations
- Layer textures for drama
- Play with visual weight
- Challenge traditional design norms
- Tell a story through fabric
Contrast becomes your creative superpower in applique design, allowing you to create a unique and captivating piece that showcases your artistic expression.
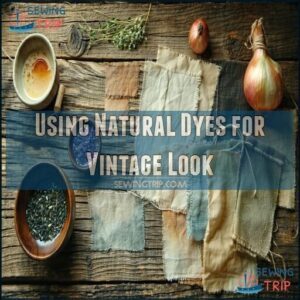
Using Natural Dyes for Vintage Look
When exploring vintage applique techniques, natural dyes transform fabric scraps into timeless treasures.
Kitchen staples like onion skins and tea bags become your color palette. Natural fibers such as cotton, silk, and wool absorb these magical hues beautifully.
Using mordants guarantees colorfastness, while lighter fabrics capture that perfect aged look.
Your DIY dye recipes will breathe new life into applique materials, creating heirloom-worthy designs.
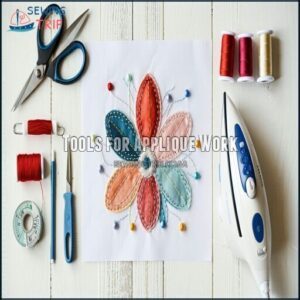
Tools for Applique Work
You’ll need the right tools to transform your fabric scraps into stunning applique masterpieces, so let’s explore the essential equipment that’ll take your craft from basic to brilliant.
Your applique journey starts with sharp scissors, a reliable iron, precise needles, and a few other key tools that’ll help you create intricate designs with professional polish.
Scissors and Cutting Tools
Three essential cutting tools will transform your applique game: specialty scissors, rotary cutters, and precision cutting mats.
Fabric scissors with razor-sharp blades slice through layers like a hot knife through butter, while rotary cutters paired with self-healing cutting mats guarantee clean, crisp template edges.
Selecting the correct scissor type is vital for intricate work.
Keep your tools maintained—blade sharpening isn’t just maintenance, it’s an art form that separates amateur crafters from applique masters.
Iron and Ironing Board
Every serious applique artist knows an exceptional iron is your secret weapon.
Your iron’s temperature settings and steam functionality can make or break your project’s precision. Choose a sturdy ironing board with reliable padding to create a stable pressing surface.
Keep a pressing cloth handy, and consider using spray starch like Best Press for professional-grade results that’ll transform your fabric work from good to stunning.
Many crafters find a specialized applique pressing tool beneficial.
Sewing and Stitching Tools
At the heart of every applique project lies a well-curated collection of sewing and stitching tools that transform fabric into art.
Your success depends on choosing the right companions for your creative journey.
- Select sharp, precision needle types for clean stitches
- Master thread tension for professional-looking results
- Invest in quality cutting tools like rotary cutters
- Use seam rippers to rescue imperfect work
Your sewing machine becomes a powerful ally, turning complex designs into seamless masterpieces.
Don’t forget a trusty thimble to protect your fingers during intricate applique work – your hands are your most valuable tools.
With the right equipment and skills, you can create stunning applique projects.
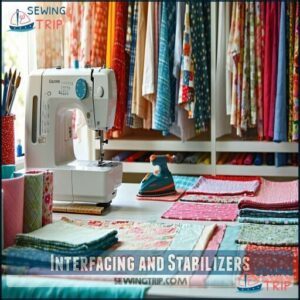
Interfacing and Stabilizers
You’ll want to choose the right interfacing and stabilizers to keep your applique project looking sharp and professional.
These magical materials prevent fabric from stretching, warping, or losing its crisp design, ensuring your creative vision stays exactly as you imagined.
Fusible Web for Iron-on Applique
The iron’s steam rises like a crafting wizard’s wand when fusible web transforms your applique project. This heat-activated adhesive is your secret weapon for flawless fabric designs.
- Bonds fabric pieces instantly
- Creates crisp, professional edges
- Saves hours of hand-stitching
- Compatible with most fabric types
- Allows perfect design positioning
Different fusible web brands offer unique solutions for your project’s needs. Lightweight versions work magic on delicate fabrics, while heavy-duty options support sturdy materials.
Pro tip: always test a small sample first to guarantee seamless web activation and prevent unexpected fabric mishaps during your creative journey.
Choosing Right Interfacing for Fabric
Your fabric’s personality matters when selecting interfacing for applique projects.
Match the interfacing weight carefully—lightweight materials need gentle support, while heavier fabrics demand sturdy stabilization.
Fusible options can provide structure, but sew-in alternatives offer soft draping.
For delicate fabrics, consider how non-fusible affects drape.
Consider your project’s durability and fabric compatibility before choosing. Pro tip: Always test interfacing on scrap fabric first.
Different materials behave differently, so experiment to find the perfect match that’ll make your applique shine like a crafting champion.
Preventing Fabric Stretching
Tame those unruly fabric edges with smart stabilization techniques! When working on delicate applique projects, strategic stabilizer options can prevent unwanted stretching.
Choose lightweight interfacing that matches your fabric’s weight and grain, ensuring maximum fabric stability. Experiment with bias cutting techniques to minimize fabric distortion, and consider varying stitch density for added support.
Temporary basting, freezer paper templates, and fabric clamps become your secret weapons against warping. By understanding different interfacing types and proper fabric preparation, you’ll transform potential stretching nightmares into smooth, professional-looking masterpieces that hold their shape beautifully, utilizing smart stabilization techniques and achieving maximum fabric stability with the right interfacing types.
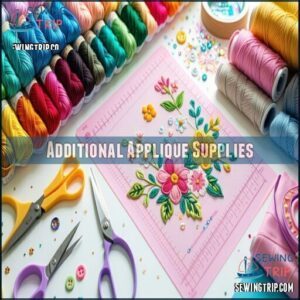
Additional Applique Supplies
You’ll want to stock up on a few extra supplies to make your applique project shine.
From special marking tools to creative embellishments, these additional items will help you take your fabric art from good to absolutely stunning.
These additional items will help you enhance your fabric art.
Threading and Thread Types
Picking the right thread can make or break your applique masterpiece. Your thread choice depends on your project’s fabric and style.
Here’s what you need to know:
- Cotton threads work best for cotton fabrics
- Silk threads shine on delicate silk projects
- Match thread color to your design’s mood
- Consider thread weight for different stitching techniques
- Explore specialty embroidery floss for unique textures
Whether you’re using a sewing machine or hand-stitching, the right thread transforms your applique from good to gorgeous. Selecting specific thread products can enhance your project, making it a true work of art with the perfect thread choice.
Marking and Tracing Tools
After threading your project, you’ll need precise marking tools to bring your design to life.
Water-soluble markers and fabric markers become your secret weapons, vanishing like magic when you’re done. Template plastic creates sturdy stencil guides, while transfer pens make design placement a breeze.
Grab your ruler and tracing paper for pinpoint accuracy in your applique adventure. Choosing the right tool depends on fabric type considerations for the best results, considering the importance of precise marking tools.
Embellishments and Add-ons
Want to transform your applique from basic to brilliant? After tracing your design, it’s time to amp up the wow factor with showstopping embellishments.
Here’s how to make your project pop:
- Sprinkle beads and sequins for eye-catching sparkle
- Attach vintage buttons and whimsical charms as focal points
- Layer ribbon accents to create stunning texture
- Weave delicate lace details for elegant charm
- Incorporate yarn embellishments for unexpected depth
These little touches will turn your applique into a true conversation piece that screams creativity and skill.
Frequently Asked Questions (FAQs)
What materials do you need to make applique?
You’ll need cotton fabric, fusible web, stabilizers, sharp scissors, an iron, rotary cutter, and thread.
With these tools, you’ll transform fabric scraps into beautiful appliqué designs that’ll make your project pop with creativity and style, showcasing your creativity.
Which fabric is best for applique?
Quilting cotton is your applique superhero!
Like a trusty sidekick, it’s tightly woven, pre-washed, and forgiving.
Its versatility, affordability, and wide range of prints make it perfect for bringing your creative fabric designs to life with ease.
What are the different types of applique fabrics?
You’ll discover five fabulous applique fabric types: cotton’s versatility, silk’s elegance, linen’s durability, wool’s richness, and blended fabrics’ practicality.
Each brings unique texture, strength, and character to your creative textile projects, with unique properties that enhance your work.
What is appliqué fabric?
Appliqué fabric is a decorative layer of material sewn or ironed onto a base fabric, creating textured designs through strategic fabric placement and creative stitching techniques.
That transform ordinary textiles into artistic expressions.
How do I choose the best applique material?
Like a painter selecting the perfect canvas, you’ll choose applique materials based on project complexity, fabric weight, and design goals.
Cotton’s versatility, silk’s elegance, and wool’s durability offer unique textures for your creative expression. Cotton’s versatility
What are the different appliqué techniques?
You’ll master two primary appliqué techniques: hand appliqué with methods like needle turn and back basting.
And machine appliqué using straight or zigzag stitches to attach fabric pieces creatively and precisely.
What material is used for applique?
Fabric becomes your canvas when you venture into applique, where cotton, silk, wool, and blended materials transform ordinary projects into extraordinary art.
You’ll weave magic with lightweight cottons, sturdy linens, and vibrant batiks, each stitch telling a story.
What is needed for applique?
You’ll need cotton fabric scraps, fusible web, stabilizers, sharp scissors, an iron, cutting mat, rotary cutter, thread, and needles.
Whether you’re hand-sewing or using a machine, these tools will help you create stunning applique designs.
What are three examples of applique?
You’ll love creating applique designs like a quilt patch showcasing wildflowers, a playful T-shirt with a cartoon character, or a decorative pillow featuring intricate geometric shapes.
These designs add personality and charm to your textile projects.
What equipment is used for applique?
Picture a cozy crafting corner where you’re ready to transform fabric.
You’ll want sharp scissors, a reliable iron, a cutting mat, rotary cutter, sewing machine, stabilizers, fusible web, pins, and various threads to bring your applique vision to life.
Conclusion
Imagine your fabric as a blank canvas waiting to transform!
Mastering the materials used in applique opens up a world of creative possibilities.
You’ll find that choosing the right cotton scraps, fusible web, and tools isn’t just technical—it’s an art form.
Whether you’re a beginner or seasoned crafter, understanding what materials are used in applique will elevate your textile design from ordinary to extraordinary.
Your creativity is the only limit!

