This site is supported by our readers. We may earn a commission, at no cost to you, if you purchase through links.
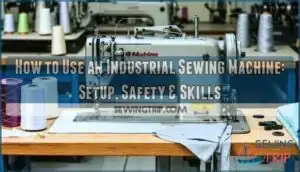
But that power demands respect and precision. Threading techniques matter. Tension settings determine whether you’re producing impeccable seams or wasting expensive fabric. The distance between skilled operation and costly mistakes often comes down to understanding what’s happening inside that iron frame—how servo motors respond differently than clutch systems, why needle selection transforms your results, and which adjustments turn frustrating tension problems into consistent stitches.
Master these fundamentals, and you’ll attain the kind of production speed and quality that separates hobbyists from professionals.
Table Of Contents
Key Takeaways
- Industrial machines deliver raw mechanical power that demands respect—threading precision, tension calibration, and needle selection separate professional-grade seams from costly fabric waste and equipment damage.
- Machine selection isn’t one-size-fits-all; lockstitch specialists handle straight work, overlock machines finish seams, and matching your equipment type to fabric weight (servo motors for control, needle feed for thick materials) determines whether you command the machine or fight it daily.
- Safe, efficient operation hinges on workspace ergonomics and maintenance discipline—proper table setup, foot pedal positioning, daily lint removal, and scheduled oiling prevent the fatigue and breakdowns that sabotage production speed before lunch.
- The industry is evolving fast with automation, AI-driven pattern recognition, and smart manufacturing integration, while demand for certified operators continues to grow with 10,000 annual openings and the global market projected to reach 18 million units by 2035.
Choosing The Right Industrial Sewing Machine
Picking the right industrial machine isn’t like grabbing any old model off the shelf—it’s about matching power, purpose, and price to what you’re actually going to sew.
You’ll need to think through machine types, must-have features, the materials you work with, and what you can afford.
Let’s break down what matters most so you can make a choice that sets you up for success.
Types of Industrial Sewing Machines
When you step into industrial sewing, you’re not looking at one machine that does it all—you’re choosing from a lineup of specialists, each one built to dominate a specific task. Lockstitch machines own straight stitch work, while overlock machines finish seams like nobody’s business.
Need to tame leather or multiple layers? Needle feed systems grip from above and below. Zigzag machines manage stretch fabrics, and each one’s engineered for heavy-duty sewing that’ll outlast anything in your home studio.
Key Features to Consider
After settling on a machine type, the next step is figuring out which features actually give you control—not just the ability to turn it on.
Servo motors give you silent precision and automatic thread cutters—clutch motors just roar.
Speed settings matter when you’re pushing thousands of stitches per minute on heavy-duty sewing. Thread control and stitch quality separate industrial sewing machines that last decades from ones that’ll fight you daily.
Matching Machines to Materials and Tasks
Your machine’s power means nothing if you’re running a needle-feed lockstitch through canvas when you needed a walking foot, or forcing denim through a machine built for silk charmeuse.
Fabric selection drives your entire machine operation strategy—thick materials demand high presser foot pressure and specific stitch optimization, while delicate weaves need calibrated tension and gentle material management.
Match your sewing technology to the task, and you’ll transform chaos into precision industrial sewing machine operation.
Cost Factors and Brand Comparisons
The first question when shopping for a machine? What you’re willing to spend. The price range is wide: the Singer Heavy Duty 4423 starts around $210, while the Juki TL-2000Qi tops out at $5,999.
Here’s how the market breaks down:
- Basic lockstitch machines ($200–$500) manage heavy-duty sewing with solid brand loyalty from Singer and Janome
- Mid-range commercial sewing equipment ($1,000–$2,000) adds computerized controls and automatic features
- Specialized machines like the RELIABLE 2200SZ ($2,000–$6,000) deliver industrial sewing machine operation for upholstery and leather
- Market trends show automation driving prices up 15–20% annually, making budget planning critical for sewing machine selection
Considering the cost of industrial machines involves evaluating sewing machine prices to make informed decisions.
Your investment shapes your capability—choose wisely.
Setting Up Your Industrial Sewing Workspace
Your workspace isn’t just where you sew—it’s where you command precision and power. Getting the setup right means your machine runs smoothly, your body stays safe, and your work hits professional standards every time.
Here’s what you need to dial in before you fire up that motor.
Table, Motor, and Power Requirements
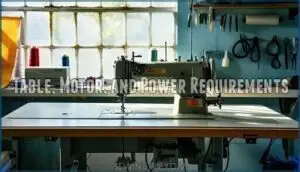
Power up an industrial sewing machine without the right setup and you’ll quickly learn these workhorses don’t tolerate guesswork. The three-legged stool of success? A sturdy table, the motor that matches your work, and electrical specs that line up with what’s actually coming out of your wall. You’re looking at 110V or 220V—not interchangeable, not negotiable.
Servo motors hum along with surgical precision, perfect for detailed work. Clutch motors? They’re the muscle when you need brute force through heavy material.
| Component | Servo Systems | Clutch Motors |
|---|---|---|
| Power Consumption | Energy-efficient, variable speed | Higher consumption, constant draw |
| Noise Level | Nearly silent operation | Loud, industrial hum |
| Control | Precise, automatic features | Manual, heavy-duty sewing focus |
| Best For | Detailed industrial sewing techniques | Weaving and thick materials |
Your table setup anchors everything—motor mounted underneath, head positioned for control, voltage requirements matched to your shop’s electrical capacity.
Safe Machine Placement and Ergonomics
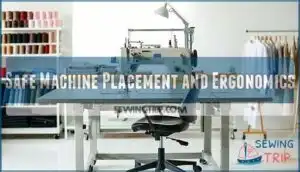
Your machine’s wired up—now where you put it matters more than you’d think. Bad placement means fighting fatigue all day, and by lunch your seams will show it.
Position your sewing machine so the foot pedal sits naturally under your dominant foot, workspace lighting eliminates shadows across your needle plate, and seating ergonomics let you maintain straight posture without reaching.
Operator safety demands an ergonomic workspace where industrial machines don’t fight your body—textile manufacturing thrives on stamina, and sewing technology only amplifies what your positioning allows.
Essential Accessories and Tools
The right machine sits useless without the accessories that translate its brute force into controlled, professional results. Think of these tools as the difference between owning a race car and actually knowing how to drive it.
Stock your workspace with quality thread types matched to your fabric weight, machine oils formulated for servo motors, interchangeable presser feet for specialized seams, spare bobbin cases, and backup needles—because when your needle feed jams mid-production, you’ll master downtime or let it master you.
Operating an Industrial Sewing Machine Safely
Once your workspace is ready, mastering the actual operation is where your power as an industrial sewer really begins to take shape.
The foot pedal, threading system, and safety protocols aren’t just technical steps—they’re your gateway to precision and confidence at speed.
Let’s break down exactly how to command your machine safely and effectively.
Threading and Bobbin Winding Techniques
If you’ve ever stared at an industrial machine wondering where the thread’s supposed to go, you’re not alone—threading these beasts is simpler than it looks once you know the trick. Here’s your roadmap to mastering Industrial Threading and Bobbin Management:
- Clip your old thread at the spindle and tie on fresh thread with a basic knot—let Sewing technology pull it through the path for you
- Check Thread Tension as you guide it past each guide point toward the needle feed
- For the bobbin, use Automatic Winding features, then thread it forming a "9" shape with the tail
Get this right and you’ll save yourself plenty of frustration later—plus your thread trimmer will keep running like it should on those industrial machines.
Bottom line: threading properly is basic upkeep you can’t skip.
Using The Foot Pedal and Controls
Your foot pedal isn’t just a gas pedal—it’s a three-zone command center that controls lifting, stitching, and backstitching all in one motion. Press lightly to raise the presser foot, deeper to engage your servo motor, and tap the heel for automatic reverse.
Speed Adjustment happens through your Control Panel or Motor Settings—dial in your comfort zone and let Foot Pedal Techniques build muscle memory. This is power you can feel.
Stitch Selection and Adjustment
Stitch length, tension, and pressure form the holy trinity of seam quality—master these adjustments and you’ll transform raw fabric into impeccable construction.
Start with stitch length: your lockstitch or overlock machine’s dial controls the distance between needle punctures. Tension control balances your thread types—top and bobbin must pull evenly.
Adjust fabric settings and presser foot pressure to match your material’s weight, then let your servo motor maintain consistent sewing speed while the needle feed grips without puckering.
Best Practices for Safe Operation
Raw power means nothing without control—especially when your industrial machine is hammering out hundreds of stitches per minute. Miss the basics of safe operation and that power becomes a liability fast.
Cut the power and unplug before you touch anything for maintenance. And don’t even think about sewing over pins while your servo motor is screaming at full speed.
Operator training in machine safety tips and hazard prevention keeps garment manufacturing efficient, while workplace ergonomics protect you during heavy-duty sewing marathons. Know your emergency procedures cold.
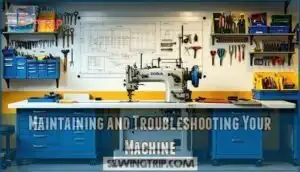
Maintaining and Troubleshooting Your Machine
Your industrial machine won’t run forever on autopilot—keeping it in fighting shape means getting your hands dirty with regular upkeep and knowing when something’s gone sideways.
A well-maintained machine is your ticket to uninterrupted production and fewer costly breakdowns. Here’s what you need to master to keep your workhorse running smooth.
Regular Cleaning and Oiling Procedures
Your industrial machine stays reliable with simple upkeep. Skip the routine cleaning and oiling, though, and you’ll watch that workhorse turn into a maintenance nightmare.
Daily care and proper lubrication stop expensive production halts before they start in textile and garment work.
Here’s what you need to lock down:
- Brush out lint daily from the bobbin case and feed dogs—heavyduty sewing accumulates debris fast
- Oil according to your manual’s intervals—most industrial machines need a few drops in designated spots every 8 hours of operation
- Use proper cleaning solutions for stubborn residue, never harsh solvents that damage sewing technology components
Replacing Needles and Presser Feet
After you’re comfortable with your cleaning and oiling routine, the next practical step is mastering needle and presser foot swaps—both prevent stitch issues and fabric damage.
Changing an industrial needle is straightforward: loosen the setscrew, pull out the old needle (flat side facing back), then install the new one the same way. Presser feet swap out using the same basic method.
Match your needle size to your fabric weight—that’s where sewing technology reviews and manufacturer specs come in handy. Presser adjustment matters too: tighter pressure for thick materials, lighter for delicates.
| Component | When to Replace |
|---|---|
| Industrial Needle | Every 8 hours of heavy-duty sewing or when dull |
| Presser Foot | When switching fabric types or noticing feed issues |
| Needle for Denim | Before starting textile production runs |
| Standard Presser | After garment construction batches |
Common Issues and Quick Fixes
Even with proper needle and presser foot swaps, tension issues and thread breakage will test your patience—about 83% of industrial sewing projects hit snags from incorrect tension alone. When you spot puckering or loose loops, re-thread both upper and bobbin systems first. Fabric jamming usually means incorrect threading (62% of cases) or lint clogging your feed dogs. Skipped stitches? Check needle installation and presser foot pressure before assuming timing faults.
- Thread breakage: Swap to compatible needle-thread combos—mismatches cause 61% of breaks
- Tension problems: Clean lint from tension discs—fixes 40% of inconsistent stitches
- Fabric jamming: Remove debris from feed dogs—resolves 70% of feed issues
- Skipped stitches: Adjust presser pressure—weak pressure causes uneven formation in 32% of operations
Regular maintenance is vital to prevent issues, and checking for thread tension issues can help resolve problems.
When to Call for Professional Service
Sometimes you’ll exhaust your own toolkit—strange grinding noises, timing that’s drifted off-spec, or motor issues that won’t resolve with standard cleaning—and that’s when a certified technician becomes your best investment.
Service contracts with maintenance scheduling prevent emergency fixes that halt garment manufacturing. For textile production operations, technical support ensures your industrial machines stay production-ready.
Machine repair specialists manage fabric management calibrations and timing adjustments that protect your bottom line.
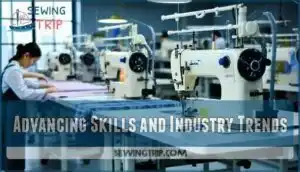
Advancing Skills and Industry Trends
Once you’ve got the basics down, it’s time to think bigger. The industry’s evolving fast, and there’s real opportunity if you know where to look.
Let’s break down what it takes to level up your skills and where this field is headed.
Specialized Industrial Sewing Techniques
Mastering your machine’s basics is one thing, but tapping into specialized techniques—like precision topstitching, blind hemming, or flat-felling seams—unlocks the kind of speed and consistency that separates hobbyists from professionals.
You’ll need to master stitch formation control and fabric management across different industrial machines—lockstitch for clean topstitching, overlock for material finishing, and understanding how thread tension affects your sewing speed.
Servo motors paired with thread trimmers let you execute complex techniques with surgical precision.
Workforce Training and Certification Options
Training programs can change careers. The 192-hour Fundamentals of Industrial Sewing & Production course teaches you single-needle, serger, and coverstitch machines—the core skills you’ll need for garment manufacturing and textile production.
Apprentice programs combining 2,000+ hours of hands-on experience with skill certification achieve 91% retention rates. Industry partnerships between workforce development agencies and textile manufacturing leaders create pathways into garment construction careers.
With 10,000 annual operator openings nationwide and training initiatives expanding through community colleges, you’re stepping into a market hungry for certified professionals who understand sewing technology and production workflows.
Emerging Technology in Sewing Machines
Automation isn’t just knocking on the door of industrial sewing—it’s already rewiring the factory floor with computerized controls, IoT sensors, and AI-driven pattern recognition that turn traditional machines into smart manufacturing hubs.
You’ll find servo motors now paired with robotics integration for automated cutting and digital patterns that communicate directly with overlock and lockstitch heads.
AI sewing technology reviews show smart fabrics being tracked through textile production lines, while garment manufacturing systems predict thread tension before you even notice the problem.
Market Growth and Future Opportunities
The global market hit 13 million units and $6.9 billion in 2024, with projections climbing to 18 million units by 2035. Servo-driven lockstitch and overlock machines are leading this industry expansion, particularly as automation drives North America toward $720 million by 2033.
Nearshoring trends and new fabric handling tech are changing how the industry views sewing equipment. Smart controls are stepping up to handle the push for personalized production at scale.
Frequently Asked Questions (FAQs)
How do I transition from home sewing to industrial?
Your shift starts with understanding speed control—servo motors let you dial back the power, while clutch motors demand immediate finesse.
Start practicing fabric management on straight stitch lockstitch machines before advancing to overlock or thread trimmer features.
Industrial sewing basics reward patience over home machine conversion habits.
What fabric thickness can industrial machines handle?
You’d think industrial machines eat canvas for breakfast—and you’re right. These powerhouses process everything from whisper-thin silk to leather thick as a leather jacket.
Though heavy-duty lockstitch and overlock models like the Sailrite LSZ1 truly shine on dense material where home machines surrender.
Can I use my own thread brands?
You can absolutely use your preferred thread brands with industrial machines. Thread compatibility matters more than the brand name—just match thread quality and weight to your fabric management needs.
Lockstitch machines like the Pfaff Ambition or Sailrite LSZ1 work with most quality threads.
How loud are industrial sewing machines really?
The truth about industrial acoustics? Motor types make all the difference. Clutch motors roar like freight trains, while servo motors whisper during fabric manipulation—almost silent.
Machine vibration and sound reduction features separate ear-splitting chaos from manageable noise levels.
What insurance or permits do I need?
You’ll need Business Liability insurance and Equipment Insurance to protect your operation.
Depending on location, Workplace Permits might be required. Industrial Compliance standards apply to fabric processing and weaving facilities.
Some employers require Sewing Certifications for professional credibility.
Conclusion
Yes, industrial machines feel intimidating at first—that speed, that noise, that unforgiving power. But intimidation fades fast once you’ve threaded your first bobbin correctly and watched twelve layers of canvas transform into a perfect seam.
Using an industrial sewing machine isn’t about taming some wild beast; it’s about partnership. You provide the precision, the machine provides the muscle.
Industrial sewing isn’t about taming a beast—it’s a partnership where you bring precision and the machine brings muscle
Maintain that relationship through regular cleaning and tension checks, and you’ll find yourself working faster, cleaner, and with more confidence than you ever thought possible. The machine doesn’t slow down for mistakes—so don’t make them.
- https://www.gminsights.com/industry-analysis/industrial-sewing-machine-market
- https://straitsresearch.com/report/industrial-sewing-machine-market
- https://www.indexbox.io/blog/industrial-sewing-machine-united-states-market-overview-2024-3/
- https://uk.finance.yahoo.com/news/industrial-sewing-machines-market-report-151700247.html
- https://www.nebraskaquiltcompany.com/blogs/welcome-to-nqc/brother-and-singer-a-comparison-of-industrial-sewing-machines-1

