This site is supported by our readers. We may earn a commission, at no cost to you, if you purchase through links.
Adjust the height and width to create a perfect replica of your frame. You’ll want to pad the form strategically to mimic your unique curves.
Pin fabric directly onto the form, experimenting with draping techniques that’ll make your garments fit like a glove. Take your time positioning each piece, using pins to shape and mold the fabric precisely.
Learn to transfer your draped designs onto pattern paper, turning those fabric experiments into wearable masterpieces. Ready to transform your sewing game?
Table Of Contents
- Key Takeaways
- What is a Dress Form?
- Selecting The Right Dress Form
- Essential Tools for Using a Dress Form
- Preparing Your Dress Form
- Basic Draping Techniques on a Dress Form
- Fitting Garments on a Dress Form
- Creating Custom Patterns Using a Dress Form
- Advanced Dress Form Techniques
- Maintaining and Storing Your Dress Form
- Maximizing Efficiency With Your Dress Form
- Frequently Asked Questions (FAQs)
- Conclusion
Key Takeaways
- You’ll transform your sewing skills by choosing a dress form that precisely matches your body measurements, ensuring your garments fit like a glove and capture your unique proportions.
- Learn to strategically pad and customize your dress form, turning it from a generic mannequin into a personalized tool that reflects your exact body shape and enables professional-level garment design.
- Master draping techniques by treating your dress form as a creative canvas, using pins, fabric manipulation, and careful positioning to sculpt designs that move from flat patterns to three-dimensional masterpieces.
- Invest time in maintaining your dress form through regular cleaning, careful storage, and periodic measurement updates, treating it as a precision instrument that’ll support your sewing journey for years to come.
What is a Dress Form?
If you want to elevate your sewing skills from amateur to professional, a dress form is your secret weapon in garment design and fitting.
This three-dimensional model of your body allows you to pin, drape, and perfect clothing with precision, giving you the power to create custom-fitted outfits that look like they’ve walked straight off a designer runway.
Definition and Purpose
In the intricate world of sewing, a dress form emerges as your silent, steadfast companion—a three-dimensional dressmaking mannequin that transforms garment creation.
This human model isn’t just a static display, but a powerful fitting tool designed to elevate your sewing skills from amateur to professional.
Your new design aid offers incredible benefits:
- Precision Engineering: Transform patterns with surgical accuracy
- Creative Playground: Visualize fabric drapes before the first cut
- Fitting Wizard: Eliminate awkward self-pinning struggles
- Skill Amplifier: Master complex garment construction techniques
Think of your sewing dummy as more than an alteration assistant—it’s a canvas for creativity, a technical partner that helps you understand fabric behavior, body proportions, and design potential.
Achieving perfect fits requires understanding dress form basics. Whether you’re a hobbyist or aspiring designer, a dress form becomes your most trusted sewing ally.
Types of Dress Forms
Your dressmaking journey starts with choosing the right dress form—the unsung hero of sewing success.
From adjustable dress forms that flex with your measurements to professional dress forms boasting collapsible shoulders, you’ve got options.
Display forms showcase garments, while bifurcated forms tackle pants and shorts fitting.
Half-scale dressmaking mannequins let you prototype complex designs without breaking the bank.
Whether you’re a DIY enthusiast or a budding designer, there’s a female dress form waiting to become your sewing sidekick. Pick wisely, and watch your creative vision come to life, with the right dress form being a crucial part of your sewing success.
Materials Used in Dress Forms
After exploring dress form types, you’ll find materials are the backbone of your sewing companion.
Your perfect dress form combines strength, flexibility, and precision through innovative materials:
- Metal frames for lightweight mobility
- Foam density enabling custom padding
- Fiberglass durability with pinnable surfaces
- Wood types offering classic elegance
- Plastic design balancing affordability
Each material brings unique qualities to your craft.
Imagine a dress form that’s part tool, part canvas—ready to transform your creative vision.
Whether you’re a hobbyist or pro, selecting the right material means crafting garments that fit like a dream, turning your sewing space into a personalized workshop of possibilities.
Benefits of Using a Dress Form
Ready to supercharge your sewing skills? A dress form is your backstage pass to professional garment creation.
These three-dimensional design partners transform how you approach clothing construction, offering improved accuracy and enhanced visualization of body measurements.
Couture Quality
Whether you’re stitching a simple top or dreaming up complex clothing designs, your dress form becomes the silent expert guiding your creative exploration. With benefits like accurate fitting and time savings, it’s an indispensable tool for any sewing project.
Selecting The Right Dress Form
You’ll want to pick a dress form that matches your body like a perfect fitting glove, ensuring your sewing projects look professionally crafted.
Whether you’re a beginner or a seasoned seamstress, choosing the right dress form can transform your garment-making experience from frustrating guesswork to precise, confident creation.
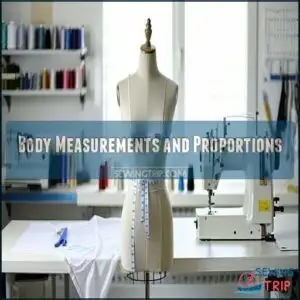
Body Measurements and Proportions
By the time you master dress form measurements, you’ll transform your sewing skills from amateur to professional. Your body measurements are the blueprint for selecting the perfect dress form, capturing every unique curve and contour.
- Feel the excitement of creating garments that fit like a second skin
- Embrace your individual body proportions with confidence
- Discover the magic of precision tailoring
Capture key Measurement Accuracy points: bust, waist, and hip dimensions. Measure yourself in fitted clothing, using a flexible tape measure that hugs your body without pinching. Torso Length matters, so note your shoulder width and vertical proportions.
Your ideal dress form isn’t just a tool—it’s a canvas for Body Customization, reflecting your unique silhouette with professional-grade precision.
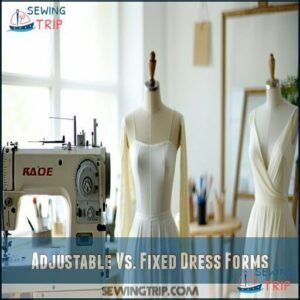
Adjustable Vs. Fixed Dress Forms
Every sewist dreams of a dress form that adapts like a chameleon to their creative vision. Your perfect dress form is more than a mannequin—it’s a silent sewing companion ready to elevate your craft.
Adjustable forms offer unparalleled flexibility with:
- Precision measurement dials
- Height-adjustable features
- Collapsible shoulders
- Budget-friendly customization
- Easy body shape modifications
- Portable workspace design
These transformative tools let you tweak measurements with a simple turn of a dial, ensuring your garments fit like a second skin. Professional adjustable dress forms cater to unique body shapes, giving you the power to create custom-fitted masterpieces.
Unlike rigid fixed forms, adjustable dress forms become an extension of your design process—dynamic, responsive, and ready to bring your sartorial dreams to life.
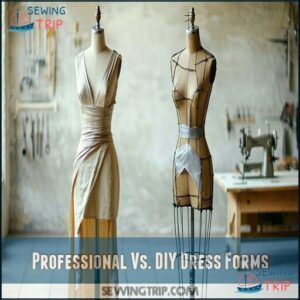
Professional Vs. DIY Dress Forms
Two paths diverge in the sewing world: professional dress forms and DIY alternatives. Each offers unique benefits that’ll transform your crafting journey.
Professional forms bring precision to your fingertips:
- Durability that withstands countless projects
- Accuracy rivaling industry standards
- Professional finish that screams expert craftsmanship
DIY dress forms provide budget-friendly customization, letting you sculpt a form matching your exact measurements. While professional models from Wolf deliver pinpoint accuracy, homemade versions offer creative control.
For those needing to replicate body shapes, forms can be used for fitting purposes. Your skill level, project complexity, and wallet will guide your choice. Whether you’re a precise professional or a resourceful hobbyist, there’s a dress form waiting to elevate your sewing game.
Budget Considerations
Addressing dress form budget considerations doesn’t mean sacrificing quality.
DIY alternatives range from $50-$150, perfect for hobbyists watching their wallet. Professional models might seem pricey, but smart shoppers explore rental options and second-hand finds.
Your sewing skills matter more than a fancy form, so prioritize long-term value over immediate costs. Compare reviews, look for versatile models with adjustable padding materials, and remember: a strategic investment beats a cheap shortcut.
Whether you’re crafting a custom bodice or experimenting with design, your dress form is your creative partner – choose wisely.
Essential Tools for Using a Dress Form
You’ll need a few key tools to transform your dress form from a basic mannequin into your personal sewing sidekick.
Gather your measuring tape, sharp scissors, fabric markers, and some padding materials to customize and conquer your garment design adventures, using these tools to make your dress form a personal sewing sidekick.
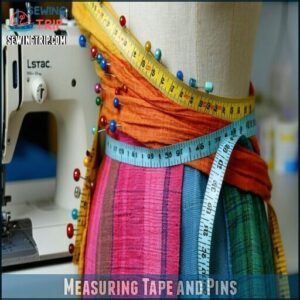
Measuring Tape and Pins
Let’s kick off your sewing precision with measuring tape and pins – your dynamic duo for dress form mastery.
When draping fabric, choose curved measuring tapes that hug your dress form’s contours, capturing accurate body measurements without distortion.
Glass-head pins become your secret weapon, sitting visibly on fabric and preventing accidental losses during intricate pinning.
Master pin placement by strategically positioning them perpendicular to seam lines, ensuring your fabric stays put while you craft your design.
Professional sewists know these tools transform a blank dress form into a precise fitting blueprint.
With the right measuring tape and carefully selected pins, you’ll elevate your garment construction from amateur to artisan.
For specialized projects, consider using a flexible measuring tool for precision.
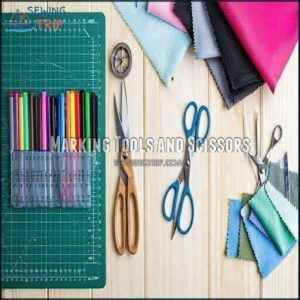
Marking Tools and Scissors
Precision reigns supreme in dress form sewing, where your scissors become trusted allies in fabric transformation. Like a sculptor with fine chisels, you’ll need an arsenal of marking tools to bring your design visions to life.
- Dressmaker’s shears: Your cutting champions, slicing through fabric with laser-sharp accuracy
- Fabric markers: Leaving crystal-clear pattern lines that guide your creative journey
- Tracing wheels: Transferring intricate details with surgical precision
- Embroidery scissors: Conquering tight corners and delicate fabric work
Pro tip: Quality scissors aren’t just tools—they’re investments that turn raw fabric into wearable masterpieces. Creating your own dress form allows you to capture exact body measurements for a truly custom fit.
Padding Materials
After wielding your scissors with precision, you’re ready to transform your dress form into a custom body double.
Padding materials are your secret weapon for creating a perfect fit.
| Material | Density | Cost | Flexibility |
|---|---|---|---|
| Foam | High | $$ | Moderate |
| Fleece | Low | $ | High |
| Batting | Medium | $ | Versatile |
| Muslin | Low | $ | Precise |
Layer polyester fiberfill strategically, matching padding density to your fabric’s weight. You can find a variety of dress form paddings online.
Your dress form will soon mirror your unique curves like a professional’s dream, with the right padding and adjustments, it will be a professional’s dream.
Transform your dress form into a precision sewing companion that mirrors your body’s unique canvas—your creative potential awaits!
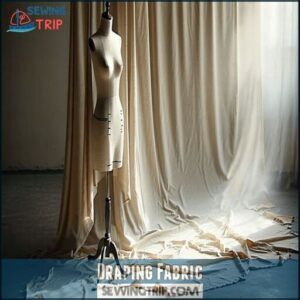
Draping Fabric
After padding your dress form, unfold your muslin fabric and get ready to transform flat material into wearable art.
Your draping canvas awaits! Master these key techniques:
- Smooth fabric across the form
- Pin with strategic precision
- Trace bias lines confidently
- Mark seam allowances carefully
Draping fabric is where design visualization meets hands-on creativity. Each carefully placed pin tells a story of potential, turning simple muslin into a blueprint for your next stunning garment, which is a result of strategic precision.
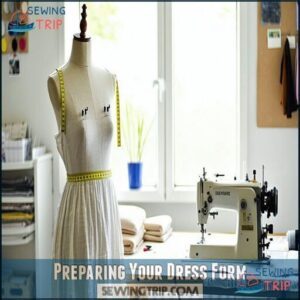
Preparing Your Dress Form
You’ll transform your generic dress form into a custom sewing companion that mimics your unique body shape.
By carefully adjusting height, adding strategic padding, and marking critical body lines, you’ll create a personalized fitting tool that’ll make your sewing projects look professionally finished.
Adjusting Height and Measurements
Your dress form’s height matters more than you think!
Transform your sewing game by matching the stand’s dimensions to your unique body blueprint.
| Measurement | Target | Tip |
|---|---|---|
| Shoulder Height | Exact Match | Use sturdy shoes |
| Torso Length | Precise Alignment | Measure twice |
| Bust Placement | Center Point | Eye-level check |
| Waist Definition | Natural Curve | Adjust carefully |
| Shoulder Slope | True Angle | Use spirit level |
Every inch counts when creating perfectly fitted garments. It is crucial to have a precise alignment and exact match for the best results.
Adding Padding for Custom Fit
After dialing in your dress form’s height, it’s time to sculpt its shape to match your unique body measurements.
Think of padding like body contouring for your sewing companion.
Here’s your body-mapping strategy:
- Select soft foam or quilted batting that hugs curves gently
- Layer padding like an artist builds a sculpture
- Use a fitted bra as your foundational base
- Secure layers with plastic wrap for smooth draping
- Trim and shape padding for precision
Your dress form will transform from generic to personalized, creating a mirror image of your torso.
Strategically adding padding guarantees measurement accuracy, turning your form into a true body double that’ll make every garment fit like a glove.
Pro sewists know: customization is key to professional results.
Marking Key Body Lines
After painstakingly sculpting your dress form’s shape, it’s time to map out its landscape like a precision navigator. Your dress form isn’t just a mannequin—it’s a blueprint for garment perfection.
Unleash your inner sewing cartographer with these key body line strategies:
- Center front and back lines create symmetrical guidance
- Shoulder lines define critical structural points
- Bust point markers guarantee accurate fit
- Hipline tracking establishes garment balance
Strategic marking transforms your dress form from a basic stand to a professional measurement instrument. Use narrow twill tape and contrasting pins to chart your body’s unique topography. Pro tip: Mark only one side to save time—your body’s blueprint will speak volumes about fit and design.
By precisely outlining body measurements and proportions, you’ll craft garments that hug every curve with professional finesse.
Creating a Fabric Cover
Your dress form’s fabric cover is its shield against wear and potential stains.
Transform your sewing companion with a customized armor that elevates pattern drafting precision.
A DIY approach allows you to capture exact measurements for a perfect fit.
| Material | Form Type | Pin Strategy | Durability | Care Level |
|---|---|---|---|---|
| Cotton Duck | Foam | Tight Grip | High | Medium |
| Muslin | Professional | Secure Edges | Medium | Low |
| Linen | Display | Gentle Press | Low | High |
With the right cover, you’ll protect your dress form and craft like a pro, ensuring a perfect fit and using the right material for your needs.
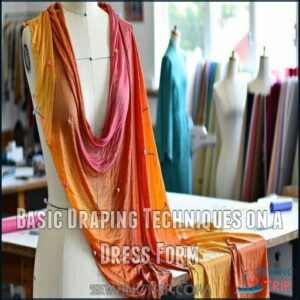
Basic Draping Techniques on a Dress Form
You’re about to learn the art of draping fabric that’ll transform your sewing skills from amateur to pro.
With a dress form as your trusty sidekick, you’ll master pinning, shaping, and creating stunning garments that fit like a dream.
Pinning and Shaping Fabric
Ready to discover your fabric’s hidden potential? After prepping your dress form, it’s time to master pinning and shaping like a pro.
Your secret weapons?
- Strategic pin placement
- Precise fabric tension
- Smooth grain alignment
When draping, think of yourself as a fabric whisperer. Each pin guides your material into perfect form, revealing the garment’s true silhouette.
Work from the center outwards, letting the bias grain flow naturally. Keep tension even, avoiding bunching or twisting. Your dress form becomes a canvas, and you’re the artist sculpting fabric’s destiny, using strategic pin placement.
Creating Darts and Pleats
Every master of fabric knows: creating darts and pleats transforms flat materials into sculptural masterpieces.
On your dress form, you’ll learn dart manipulation techniques that sculpt precise contours and pleat variations that breathe life into garments.
Pinch, fold, and secure strategically—each move carves volume and defines shape.
These shaping techniques aren’t just technical skills; they’re your secret weapons for design integration that turns ordinary fabric into extraordinary fashion statements, utilizing sculptural masterpieces to elevate your work.
Marking Seam Lines
After crafting darts that shape your fabric, it’s time to map out your masterpiece’s blueprint.
Marking seam lines transforms your dress form into a precision canvas:
- Use sharp fabric markers for crisp lines
- Trace pinned edges with confident strokes
- Highlight natural fabric intersection points
- Capture garment contours with expert skill
Grab your bias tape and pins to outline key seam paths.
A steady hand and keen eye will guide your cord marking technique, ensuring your pattern transfer captures every subtle curve.
Your dress form becomes the roadmap to sewing perfection—where creativity meets technical mastery.
Transferring Drapes to Pattern Paper
After marking your seam lines on the muslin, it’s time to immortalize your design.
Lay the fabric flat on pattern paper and grab your tracing wheel. Press firmly, revealing every curve and contour hidden in your drape.
Trace around edges with a sharp pencil, connecting the dots of your fabric’s unique landscape. Don’t forget those seam allowances—they’re your pattern’s secret weapon, and help you to reveal every detail.
Fitting Garments on a Dress Form
You’ll transform your sewing game by learning how to fit garments perfectly on a dress form, turning potential wardrobe mishaps into professional-looking masterpieces.
With just a few strategic pins and careful adjustments, you’ll be able to spot and fix fit issues that would’ve previously gone unnoticed, giving your homemade clothes that polished, store-bought look, and achieving a professional-looking finish.
Pinning Patterns to The Form
After mastering draping techniques, your pattern pinning game becomes an art form.
Master these five pro moves:
- Match centerlines precisely to dress form guidelines
- Angle pins at 45 degrees for ideal fabric tension
- Secure curves perpendicularly to maintain seam accuracy
- Work from top to bottom with steady pressure
- Prevent fabric distortion by treating each pin like a strategic placement
Think of pinning as a puzzle: your goal is supporting the fabric’s natural flow without warping delicate design lines, which is a key part of the pinning process.
Identifying Fit Issues
When you’re pinning a garment to your dress form, become a fit detective with laser-sharp observation skills.
Scan for trouble spots like uneven bust darts, misaligned sleeves, and fabric pooling around body landmarks.
Check the fabric’s drape scrupulously—tight zones, loose areas, and seam placement will reveal themselves quickly.
Your keen eye catches subtle pattern alignment issues that transform a good design into a great one, with attention to laser-sharp observation skills.
Making Adjustments and Alterations
When you spot fitting issues on your dress form, it’s time to become a garment detective.
Color-code your pins: red for tight spots, blue for extra room. Gently smooth seams and reshape darts with precision, transforming your muslin mockups into perfect patterns.
Work methodically from shoulders down, keeping proportions true.
Snap progress photos or sketch changes in your sewing journal—your roadmap to design refinement. Each small tweak brings you closer to that professional-quality fit you’re chasing, through a process of careful observation and precision.
Testing Different Fabric Types
After perfecting your pattern, it’s time to become a fabric whisperer on your dress form. Think of each textile as a unique character with its own personality and performance.
- Explore drape qualities by testing lightweight chiffon against structured denim
- Analyze fabric weight and its impact on garment silhouette
- Predict print distortion and texture effects before cutting
- Use muslin covers for risk-free design previews
- Experiment with stretch analysis to understand body-hugging challenges
Your dress form becomes a canvas for fabric storytelling, revealing how different materials will behave before the first cut. By strategically pinning various textiles and observing their flow and conformity, you’ll discover the secrets of fabric selection and master the art of garment fitting.
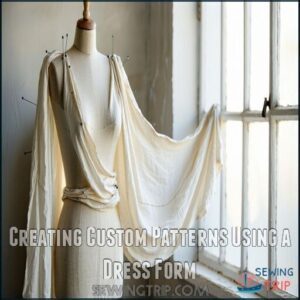
Creating Custom Patterns Using a Dress Form
You’ll transform your sewing skills by mastering custom pattern creation using a dress form, turning an ordinary mannequin into your personal design partner.
With strategic fabric draping and precise pinning, you’ll discover the secrets of professional garment making right in your own creative space.
Draping Basic Bodice and Skirt Blocks
Your dress form transforms into a canvas where fabric tells a story of fit and form.
When draping basic bodice and skirt blocks, you’ll discover a world of pattern-making magic.
- Choose lightweight muslin for precise draping
- Map body landmarks with strategic pinning
- Smooth fabric to reveal natural silhouettes
- Trace seamlines with surgical precision
- Experiment with fabric’s dynamic movement
Imagine turning flat fabric into a three-dimensional blueprint that hugs every curve perfectly.
Bodice draping isn’t just a technique—it’s an art form where your dress form becomes your silent partner.
By understanding how fabric whispers its secrets across the mannequin, you’ll develop skills that separate amateur sewists from professionals.
The key? Patience, practice, and a willingness to let your dress form guide your hands through the intricate dance of pattern creation.
Developing Sleeves and Collars
Your dress form becomes a sculptural playground when developing sleeves and collars. Master draping techniques by strategically positioning muslin fabric, creating seamless pattern integration that transforms ordinary garments into couture masterpieces.
| Technique | Challenge | Pro Tip |
|---|---|---|
| Sleeve Draping | Achieving Perfect Fit | Add 3/4" ease at cap |
| Collar Placement | Balancing Neckline | Mark precise anchor points |
| Asymmetrical Design | Creating Unique Silhouettes | Experiment with unconventional angles |
Position sleeve cap darts strategically—one inch from shoulder points—and fold carefully to maintain smooth lines. By understanding how fabric moves and shapes around the dress form, you’ll discover the secrets of professional garment construction, turning your sewing skills from amateur to extraordinary.
Designing Unique Style Lines
After mastering sleeves, your dress form becomes a playground for design innovation.
Harness your creativity by transforming basic patterns into extraordinary garments with these draping techniques:
- Trace unexpected diagonal seams that challenge traditional silhouettes
- Create architectural drama through asymmetrical pleats
- Sculpt curved panels that dance along the body’s natural contours
- Layer contrasting shapes to craft trend-defying masterpieces
Your fabric is a canvas, and the dress form is your palette for couture-worthy design magic.
Transform flat fabric into living art, one strategic pin at a time.
Refining and Finalizing Patterns
After forging unique style lines, you’ll sculpt your pattern into a masterpiece. Your dress form becomes your blueprint for perfection.
Pin that muslin mockup with laser precision, tracing fabric’s dance across curves and capturing every subtle nuance.
Pattern truing transforms rough sketches into wearable art. Make final adjustments, true those seam allowances, and align grainlines with surgical accuracy. Your garment’s destiny lives in these precise moments, where precision is key.
Advanced Dress Form Techniques
You’ve mastered the basics of dress forms, but now it’s time to level up your sewing game with advanced techniques that’ll transform your designs from good to jaw-dropping.
Whether you’re ready to tackle asymmetrical styles, create couture details, or experiment with fabric manipulation, these pro-level dress form techniques will help you push the boundaries of your creative potential.
Draping Complex Designs
After crafting perfect patterns, you’re ready to push design boundaries with complex draping techniques.
Your dress form becomes a sculptor’s canvas for transforming fabric into architectural wonders.
- Experiment with fabric weights to create unexpected textures
- Challenge traditional silhouettes through precise pinning
- Layer materials strategically for dimensional depth
- Break pattern rules with innovative draping approaches
Think of your dress form as a blank stage where fabric performs, revealing intricate design possibilities through bold, creative manipulation.
Each pin tells a story of couture potential.
Working With Asymmetrical Styles
Tilting design boundaries starts with strategic asymmetry on your dress form.
Experiment with off-center necklines and unbalanced hems that challenge traditional fashion rules. Strategically slant seams—let one shoulder dip while the opposite hem rises.
Use draping techniques to transform flat patterns into dynamic, eye-catching garments. Your dress form becomes the canvas for fabric manipulation, where visual balance meets design complexity, pushing creative limits with each pinned and draped asymmetrical style.
You can even capture exact body measurements using this method to create a truly personalized fit.
Creating Couture Details
After mastering asymmetrical styles, you’re ready to elevate your design game with couture details that’ll make fashion lovers stop and stare.
Your dress form transforms into an artist’s canvas, turning luxury fabrics into wearable art.
- Channel Paris runway techniques with precise draping
- Position hand embroidery and beading with surgical precision
- Create jaw-dropping lace applications that whisper sophistication
Use cotton drill cloth for structural elements and soft muslin for delicate overlays. Pro couturiers know the magic happens when you experiment boldly. Strategically insert cardboard to maintain shape, ensuring each detail catches the eye.
Document every experimental placement – your next breakthrough might be hiding in plain sight. With advanced dress form techniques, you’re not just sewing; you’re sculpting fashion dreams.
Experimenting With Fabric Manipulation
Your dress form becomes a textile playground where fabric morphs from flat to fabulous.
By exploring creative draping techniques, you’ll transform materials like heavy silks and delicate chiffons into wearable art.
Play with pleating, stretching, layering, and sculpting to add volume and texture. Each manipulation reveals a new dimension of your design, turning ordinary fabric into extraordinary fashion statements.
Maintaining and Storing Your Dress Form
Your dress form is more than just a mannequin – it’s your trusty sewing companion that needs some TLC to keep it in top shape.
Protect your investment by learning how to clean, store, and maintain your dress form, ensuring it’ll be ready whenever inspiration strikes for your next creative project.
Cleaning and Dusting
Every precision sewing tool needs some TLC to stay in top shape. Your dress form is no exception!
Keep it pristine with these maintenance must-haves:
- Microfiber cloths for gentle surface cleaning
- Soft-bristled brushes for hard-to-reach curves
- Mild soap solution for deep cleaning
Weekly dust removal is your secret weapon for keeping your dress form razor-sharp.
Mix warm water with a gentle soap for monthly deep cleaning, but steer clear of harsh chemicals that could damage your sewing sidekick. Pay special attention to tricky areas like shoulder seams and tight curves.
Pro tip: Treat your dress form like the precision instrument it is. Regular cleaning preserves its shape, accuracy, and longevity. Your future garments will thank you for the extra care!
Protecting From Damage
A sentinel of style deserves battle-ready protection. Your dress form isn’t just equipment—it’s a precision instrument that demands strategic safeguarding.
To protect your dress form, consider the following precautions:
- Shield the form from direct sunlight to prevent material degradation
- Invest in breathable, custom-fit dust covers during idle periods
- Perform monthly damage inspections using manufacturer’s instructions
- Support the base carefully during transportation
- Use soft microfiber cloths for gentle cleaning and handling
- Check adjustment mechanisms for smooth, unimpeded functionality
Proactive protection transforms your dress form from a simple tool into a reliable creative partner. By implementing these handling precautions, you’ll preserve its accuracy and extend its lifespan. Storage solutions aren’t just maintenance—they’re your commitment to craft excellence.
Proper Storage Techniques
After battling dust and wear in your sewing sanctuary, your dress form deserves some TLC.
Shield it with a breathable cover that keeps grime at bay—think lightweight fabric that breathes like a ninja.
Park your form in a climate-controlled zone between 65-75°F, avoiding direct sunlight’s harsh rays.
Pro tip: Invest in a collapsible model with removable arms for smart, space-saving storage.
Create a dedicated nook that keeps your crafting companion safe, protected, and ready to roll.
Updating Measurements Over Time
Your dress form is a living blueprint of your body’s journey.
Like a trusty companion, it needs regular tune-ups as your silhouette shifts.
Grab your measuring tape quarterly and track those body shape changes with precision.
When weight fluctuates, raid your padding stash and recalibrate your form.
Seasonal variations can play tricks on your measurements, so stay vigilant.
A well-adjusted dress form means garments that hug your curves perfectly, not hang like sad potato sacks, ensuring a trustworthy fit.
Maximizing Efficiency With Your Dress Form
You’ve invested in a dress form, so now it’s time to make it work overtime for your sewing projects.
By mastering workspace organization, time-saving draping techniques, and smart documentation, you’ll transform your dress form from a simple mannequin into your ultimate sewing sidekick.
Organizing Your Workspace
After painstakingly maintaining your dress form, it’s time to transform your sewing workspace into a productivity powerhouse. Think of your area as a strategic command center where efficiency meets creativity.
- Optimize Tool Placement for rapid access
- Create Ergonomic Zones that minimize movement
- Design Supply Inventory with smart shelving
- Establish Lighting Solutions for precision work
Position your dress form as the focal point of an efficiency triangle connecting your cutting table and sewing machine. Keep measuring tape, scissors, and marking tools within arm’s reach.
By thoughtfully organizing your workspace, you’ll streamline your process and turn potential into performance. Your sewing sanctuary isn’t just a room—it’s your creative launching pad.
Time-Saving Draping Tips
Turbocharge your draping skills with laser-focused efficiency tips! Swap traditional pins for pattern weights, cutting down fabric wrestling time.
Pre-cut muslin panels to streamline your workflow and dodge repetitive cutting. Use a sharpie for lightning-fast waistline marking, and leverage colored bias tape as precision alignment guides.
These timesaving draping techniques transform tedious pattern creation into a swift, strategic art. Master minimal seams, simplified silhouettes, and pre-draped elements to revolutionize your dress form approach.
Combining Flat Patternmaking and Draping
Master the art of Pattern Integration by weaving flat patternmaking and draping techniques into a seamless design process.
Your dress form becomes your creative canvas, transforming ideas from 2D to 3D with surgical precision.
- Draft foundational paper patterns
- Transfer patterns to dress form
- Pinpoint fit nuances
- Experiment with fabric flow
- Pivot between techniques fluidly
This Hybrid Technique facilitates Design Innovation, turning ordinary patterns into extraordinary garments with your newfound sewing wizardry.
Documenting Your Process for Future Reference
While crafting unique designs, your draping journey becomes a roadmap of creativity.
Document each step thoroughly with a detailed process log.
| Visual Records | Measurement Tracking | Design Iterations |
|---|---|---|
| Photo logs | Body dimension changes | Pattern refinements |
| Fabric swatches | Fitting adjustments | Style evolution |
| Sketch annotations | Measurement charts | Prototype development |
Capture every detail—your future self will thank you for these invaluable design breadcrumbs.
This process is crucial for design evolution and prototype development, as it allows for a clear understanding of the design process.
Frequently Asked Questions (FAQs)
How do I make a dress form?
The secret to creating your own dress form lies in taking precise body measurements, using duct tape and a tight t-shirt.
Then molding a custom mannequin that’ll revolutionize your sewing projects with perfect fit and style.
What are dress form basics?
A dress form is your 3D sewing buddy that helps you design, fit, and alter garments by mimicking your body shape.
It’s like having a patient mannequin that lets you pin, drape, and perfect your fashion creations.
Can You Make your own dress form?
You can DIY a dress form using duct tape, a t-shirt, stuffing, and a PVC pipe stand.
It’ll help you design and fit clothes perfectly, giving you a custom body double for your sewing projects.
How do I choose a dress form?
When picking a dress form, match it to your body measurements.
Consider adjustability, skill level, and budget.
Look for a form that’ll help you nail your sewing projects and grow your crafting skills.
How do dress forms work?
Like a sculptor’s mannequin comes alive, a dress form becomes your silent sewing partner.
It mimics your body’s unique curves, letting you pin, drape, and tailor garments with precision, transforming flat fabric into wearable art.
How do you align a dress form?
You’ll want to match your dress form’s height to yours.
Then, carefully pad its dimensions to mirror your unique body shape, ensuring seams and hemlines fall precisely where they should on your frame, which is a critical step to ensure the best fit.
How is a dress form used?
Over 70% of fashion designers use dress forms daily.
You’ll leverage this tool to pin patterns, drape fabric, test garment fit, and make precise alterations, transforming your sewing projects from amateur to professional with strategic measurements and creative techniques.
This process will help you achieve professional results by applying creative techniques to your sewing projects.
What are the steps in dressmaking?
You’ll start by choosing a pattern, take precise measurements, select fabric, cut pieces carefully, pin and sew seams.
Make adjustments, add finishing touches like zippers or buttons.
And press for a professional look, which involves precise measurements to ensure a well-fitted outcome.
Is it worth buying a Dressmakers dummy?
You’ll save time and improve your sewing skills with a dressmaker’s dummy.
It’s a game-changer for perfect fits, pattern adjustments, and creative design, making it a worthwhile investment for serious hobbyists and professional sewers, as it allows for perfect fits.
How to pin on a dress form?
Pin carefully into your dress form’s surface, using sharp, rust-free pins at a slight angle.
Distribute pins evenly without stretching fabric, focusing on key design lines and seams for precise garment placement and fitting.
Conclusion
Ultimately, mastering using dress forms steps transforms a novice into a sewing virtuoso.
You’ll discover that precision meets creativity when you confidently drape, pin, and shape fabric on your personalized form.
Whether you’re crafting a simple blouse or an intricate gown, your dress form becomes your most trusted design companion.
Embrace the journey, practice consistently, and watch your sewing skills elevate from amateur to professional-level artistry.
- https://brooksann.com/padding-a-dress-form/
- https://www.instructables.com/How-to-Use-a-Dress-Form/
- https://www.tillyandthebuttons.com/2016/11/dress-form-mannequin.html
- https://royaldressforms.com/blogs/news/10-ways-to-use-the-dress-form
- http://1.bp.blogspot.com/_1eI7tS4s_Bg/TUo7-8e9CbI/AAAAAAAAlRk/gKaE2Y6yAG8/s1600/a3.jpg


