This site is supported by our readers. We may earn a commission, at no cost to you, if you purchase through links.
Natural fibers like cotton absorb dye better than synthetics, which often resist coloring.
The math is simple: your base color + dye color = final result.
White fabrics give the truest dye colors, while colored materials create blended shades (like yellow fabric + blue dye = green result).
Fabric weight matters too—heavier materials typically absorb more dye, creating deeper colors.
The chemistry between your fabric and dye determines your outcome, sometimes with surprising results that can turn your crafting mishaps into happy accidents.
Table Of Contents
Key Takeaways
- Test a small swatch first, so you can predict how your fabric’s original color and material interact with the dye.
- Go for natural fibers like cotton or linen—they absorb dye better and give vibrant, consistent results.
- Light-colored fabrics give truer, more vivid dye colors, while dark fabrics create muted or subtle shades.
- Always factor in pre-existing treatments or finishes on fabric, as they can block dye absorption and impact the outcome.
Original Fabric Color Matters
The original color of your fabric plays a huge role in how dye will look after application.
Darker or vibrant base colors can overpower lighter dyes, making it essential to plan accordingly, considering the complete concepts of color interaction.
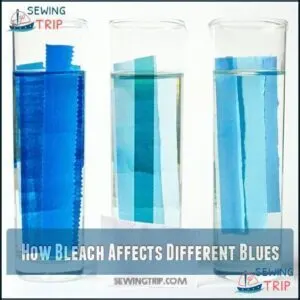
How Bleach Affects Different Blues
Bleaching blue fabrics can lead to surprising outcomes based on the original shade and dye makeup.
Each blue hue reacts differently:
- Royal blues may shift to greenish tones.
- Navy blues often turn purplish or gray, not lighter blue.
- Light blues fade to off-white or pale yellow faster.
- Bleach exposure time heavily affects color shifts.
- Fabric type matters—natural fibers like cotton bleach more predictably than synthetics.
Always test small areas, as undesired color shifts can happen.
Neutralizing bleach effects guarantees controlled results.
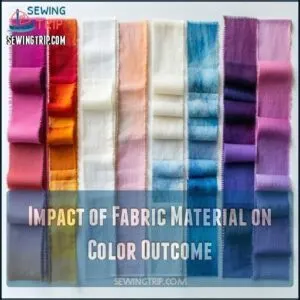
Impact of Fabric Material on Color Outcome
Fabric material plays a huge role in dye outcomes, often more than most expect. Natural fibers, like cotton, have a high fiber dye affinity, meaning they soak up dye easily for bold, rich tones.
On the flip side, synthetic fabrics often show synthetic dye resistance, leading to lighter, uneven results unless specialized dyes are used.
Fabric properties also influence color outcomes. Density affects how well a dye penetrates the weave. Silk is delicate and needs silk temperature control to avoid damage during dyeing. Wool, with its natural oils, requires a wool pre-treatment to guarantee even dye absorption.
Considering fabric value and contrast is also key to achieving visually appealing results.
Keep these in mind when working with fabric:
- **Cotton and linen shine with vibrant shades.
- **Blended fabrics may show muted hues.
- **Tightly woven fabrics slow dye absorption.
- **Heat-sensitive materials require careful handling.
- **Testing swatches helps prevent surprises.
The Role of Original Color Intensity
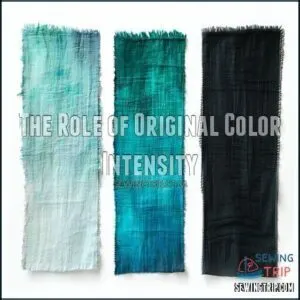
The original color of your fabric is a game-changer in terms of dye outcomes.
Starting with a lighter shade gives you brighter, more vivid results, while darker fabrics limit your options, muting the color depth. Think of it like painting on a canvas: a white base shows every stroke, but a black one absorbs the colors.
Fading effects also vary depending on the original fabric color—darker fabrics lead to subtler shifts, while lighter ones create dramatic changes. Predicting outcomes becomes easier by considering shades and intensity influence, as lighter tones interact better with dye.
Here’s a quick reference to help with color prediction:
| Fabric Color | After Dyeing (Green Dye) | Color Expectation |
|---|---|---|
| White | Bright green | Vibrant transformation |
| Light Blue | Teal green | Moderately deep |
| Black | Forest green | Subtle tone variation |
By understanding the role of original color intensity, you’ll set clear dyeing expectations.
The Bleaching Process Affects Results
Bleaching doesn’t just lighten fabric; it sets the stage for how dye will take to it later.
Factors like exposure time, water temperature, and bleach concentration all influence the final color and fabric quality.
How Long to Leave Bleach on for Desired Color
In the context of bleaching, timing is everything. Leaving bleach on for too long can weaken fabric, while rushing might leave you with an uneven lift.
Start small with short bleach timeframes—about 5 minutes—and check progress often. To soften deeper colors like black, red, or grey, you might need 10–15 minutes, but exceeding 20 minutes risks fabric damage, especially with lighter materials.
Extend bleach duration carefully, using soda ash to improve color shift speed while protecting fabric integrity. **Always monitor progress.
** Short times maintain strength, mid-ranges deliver vibrant changes, and extended times achieve dramatic contrasts while weakening fabric.
- Check every 5 minutes.
- Use cool water to prevent overdrying.
- Avoid bleach on delicate fibers.
Temperature and Bleach Concentration Effects
Managing bleach temperature and concentration is key to predictable color changes. Using Cold Water Bleach (around 25°C) slows reactions, preserving fabric fibers, while Hot Water Risks include rapid Temperature Color Shifts but higher chances of Fabric Damage Threshold being exceeded.
Shorter bleach duration protects your materials from over-bleaching while keeping the process under control.
Diluting bleach properly makes all the difference. Stick to safe Bleach Dilution Ratios, like 1 part bleach to 4 parts water, for gradual fading and fewer surprises later during the dyeing process.
Some materials exhibit inherent bleach resistance, impacting the process.
With careful bleaching, the final color expectations align with your goals, ensuring smooth color change phases and better dye absorption for vibrant results.
Agitation and Rinsing Impact on Color
Proper agitation and rinsing are essential for great color outcomes. Agitation intensity determines whether your dye absorbs evenly or leaves you with blotchy patches. Gently stir the fabric every 5–10 minutes to maintain evenness control and prevent color variation.
When it’s time to rinse, the rinsing temperature matters. Use cold water to lock in color fastness, helping the fabric retain its vibrancy, while warm water might loosen the dye. Rinse thoroughly until the water runs clear—lingering dye affects the final look.
Hard water can complicate things. Minerals in hard water may interfere with dye absorption or even hinder dye removal. For ideal results, consider using specialized dye equipment.
Here’s a quick guide:
- Stir regularly.
- Avoid over-agitation.
- Rinse with cold water.
- Clear water means rinsing’s done.
- Watch for water hardness effects.
Dyeing Over Existing Colors
When dyeing over existing colors, the original shade plays a critical role in determining the final outcome. Understanding how colors interact helps you predict results and avoid unexpected tones.
Color Theory and Predicting Outcome
Understanding color theory is the foundation for predicting color outcomes when dyeing fabric. The color wheel is your best friend—showing how primary and secondary color relationships blend and interact. For example, combining complementary hues like red and green can create richer, deeper tones, while adjacent shades offer smoother transitions.
Here’s a short, engaging blockquote in the same tone as the referenced paragraph:
The color wheel isn’t just theory—it’s your secret weapon for predicting how dyes will transform your fabric.
Start by observing value scales and focusing on each color’s undertones. These subtle details influence fabric’s final appearance.
Testing small swatches is vital since dye interactions differ across materials. Natural fibers like cotton usually absorb dye consistently, but synthetics are less predictable.
Here are essentials for better color prediction in dyeing:
- Study undertones with trial swatches.
- Use color psychology to plan palettes.
- Log dye ratios for consistency.
- Blend complementary hues for bold effects.
- Adjust saturation using light or dark bases.
How to Achieve Pastel Shades
Achieving soft pastel shades like lilac or baby pink requires careful planning and precision.
Your first step is choosing a base fabric—light colors work best, or pre-treat with gentle bleaching to create the perfect canvas.
Dye dilution is key; mix dye with plenty of water—try a 1:15 ratio for a delicate pastel pink result.
Natural fibers, like cotton or silk, absorb dye evenly, giving you consistent tones.
Test your color mixing on fabric scraps first to avoid surprises.
Toning techniques, such as layering diluted dye baths, help refine hues.
Opt for quality pigments specifically designed for pastel hair dye or fabric shades.
Mastering these steps guarantees perfect pastel tones, reflecting current hair color trends and vibrant hair color ideas.
Creating Neon Colors With Dye
Neon colors can make fabrics glow, but precision is key. For the brightest results, start with light-colored fabrics and use fluorescent dyes. These are UV reactive, meaning they shine under blacklight.
Follow these steps to make your neon stand out:
- Pick synthetic fabrics—natural fibers absorb less dye, muting the effect.
- Pre-soak your material in water and vinegar for better dye concentration.
- Mix colors carefully using charts to perfect hues; color theory guides brilliance.
- Protect color fastness by rinsing in cold water and hand-washing.
These tips guarantee bold, glowing fabrics!
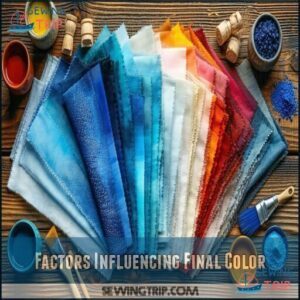
Factors Influencing Final Color
The final color of your fabric depends on several key factors, including material type, weave, and dye quality.
Understanding how these elements interact helps you predict results and avoid unexpected surprises, which is a complete concept to consider when working with fabrics.
The Importance of Fabric Type and Weave
The type of fabric and how it’s woven can make or break your dyeing project.
Natural fibers like cotton shine with high fiber dye affinity, absorbing colors deeply. Meanwhile, synthetic fabrics resist dye, often leading to faded results unless paired with synthetic dye.
Tight weave density effects can block dye, causing uneven hues. Understanding how the weave impacts drape is essential for achieving the desired outcome.
Testing swatches and addressing pre-treatment needs—like soaking—are essential.
| Factor | Effect on Dyeing | Quick Tip |
|---|---|---|
| Natural Fibers | Deep color absorption | Opt for cotton or linen |
| Synthetic Fabrics | Fades or patches | Use synthetic dyes |
| Tight Weave Density | Risk of uneven color | Test small areas first |
| Blended Fabrics | Unpredictable results | Pre-wash for consistency |
How to Account for Fabric Finish and Treatments
While fabric type determines your dyeing foundation, those invisible finish treatments can make or break your color results. Manufacturing processes often leave chemicals that create significant absorption barriers.
To overcome finish interference and guarantee even dyeing:
- Strip manufacturer’s treatments by washing with hot water and 1/4 cup white vinegar
- Tackle stubborn water-repellent finishes with mild dish soap scrubbing
- Always test a small corner for treatment compatibility before full dyeing
- Consider commercial fabric prep solutions that target specific finish types
- Monitor potential shrinkage during treatment removal (allow extra fabric!)
Fabric treatments account for 35-75% of manufacturing costs, and these invisible finishes dramatically affect how evenly dye penetrates. Many of these processes are part of textile finishing, which aims to improve the fabric’s appeal. Pre-dye removal techniques must match your specific fabric’s finishing chemicals. Remember that some highly processed fabrics will never fully accept dye, so don’t waste expensive colorants on treatments designed specifically to repel moisture. Patience during preparation prevents uniformity challenges later.
The Impact of Dye Brand and Quality
While fabric treatments can block dye absorption, your choice of dye brand plays an equally significant role in your project’s success.
The difference between premium and budget dyes isn’t just price—it’s pigment concentration and color vibrancy. Higher-quality brands contain more concentrated dye particles that penetrate fibers thoroughly, creating richer, longer-lasting colors.
Always check lightfastness ratings to confirm your creation won’t fade after a few washes. Dye consistency varies dramatically between manufacturers.
What’s labeled "Crimson Red" by one brand might appear completely different from another’s version. Brand reputation matters—established companies typically maintain stricter quality control standards.
Consider exploring different fabric dye brands to find your preferred option. Before committing to a full project, conduct dye testing on small fabric swatches.
This simple step helps you evaluate dye quality and predict color outcomes before investing time in your main piece.
Achieving Desired Colors With Dye
You’ll get more predictable results in your dyeing projects when you match the right dye type to your fabric and follow proper preparation steps.
Testing small swatches first will save you from the disappointment of unexpected colors that can turn a simple weekend project into what many crafters call a "learning experience".
This will help you achieve better outcomes by ensuring that your project turns out as expected, rather than resulting in a potentially disappointing "learning experience".
Tips for Getting Consistent Results
With the right approach, you can turn fabric dyeing from guesswork into a science. After understanding color influences, consistency becomes your next challenge.
For predictable dyeing results every time:
- Create a "dye journal" recording exact formulas, temperatures, and timing
- Use kitchen scales for precise measurements of dye powders (never eyeball amounts)
- Always test dye mixtures on fabric swatches before committing to full projects
- Prepare fibers properly by washing to remove sizing, oils and residues
- Maintain consistent dye bath temperatures throughout the process
Temperature substantially impacts dye saturation—too cold and colors won’t penetrate fibers properly. For ideal color outcomes, use thermometers to monitor your dye baths. Many beginners find cotton is ideal due to its affordability and ease of dyeing. Remember that dyeing techniques work differently across fabric types, so document what works for your specific materials to achieve consistent results and understand the importance of temperature control.
How to Fix Unwanted Color Outcomes
After achieving consistent results, you’ll occasionally encounter disappointing color outcomes. Don’t worry—unwanted results aren’t permanent disasters.
When your dyeing project goes wrong, you have several effective options:
- Apply color removers like Rit Color Remover for a fresh start without fiber damage
- Try neutralizing agents such as color correction toners to balance unwanted undertones
- Use toning techniques with diluted complementary colors to adjust off-hues
- Consider redyeing options with darker shades to cover mistakes completely
Before attempting fabric rescue, perform a dyeing results analysis on a small swatch. This fabric outcomes assessment guarantees you won’t worsen the situation.
For stubborn issues, vinegar works well for color adjustment of natural fibers, while synthetic fabrics may require specialized color adjustment methods. Temperature control during correction is vital—too hot can set unwanted colors permanently, making temperature control crucial for a successful color adjustment.
Experimenting With Natural Dyes and Ingredients
From your kitchen pantry to vibrant fabrics, natural dyes offer an eco-friendly alternative to commercial products.
Elderberries create purples and pinks, while avocado skins yield subtle pinks with brown undertones.
You’ll find mordant alternatives like alum or vinegar essential for proper color fastness – they help plant-based dyes bond permanently with fibers.
For ideal dyeing techniques, experiment with pH adjustments: add baking soda to darken colors or vinegar to brighten them.
Different fabric types absorb natural dyes uniquely, so document your dyeing results analysis for consistent outcomes.
Try combining ingredients like turmeric and red cabbage to discover unexpected color outcomes through fabric experimentation.
Food waste dyes from onion skins and marigold flowers produce beautiful yellows and oranges while promoting sustainability.
Many resources offer detailed dye instructions.
The perfect natural dyeing project balances science and creativity – methodical yet wonderfully unpredictable.
Frequently Asked Questions (FAQs)
What to expect when dying your hair for the first time?
By coincidence, your first hair dye experience will likely involve some surprise.
You’ll see immediate color change, though results may differ from box images.
Expect some mess and a need for regular maintenance afterward.
What color should you dye first?
For your first hair dye experience, choose a shade within two levels of your natural color.
This creates a subtle change that’s easier to maintain and reduces potential damage to your hair.
How to know what color to dye hair?
Like a painter selecting colors for their canvas, choose hair dye based on your skin undertone.
Check your wrist veins—blue suggests cool tones, green indicates warm.
Your natural base color also affects the final result.
Should you go darker or lighter with hair color as you age?
As you age, consider going lighter rather than darker.
Softer hues frame your face more flatteringly, while very dark colors can emphasize fine lines and create harsh contrasts against maturing skin tones, this can be particularly problematic as very dark colors can have a pronounced effect.
What should I know before dyeing my hair?
Diving into the colorful world of hair transformation requires homework.
Consult a stylist about your skin tone, maintenance commitment, and expected results.
Pre-wash with clarifying shampoo and bring reference photos to your appointment, which will help achieve the desired results.
What is normal color of urine?
Your urine should typically be pale yellow to amber in color. Darker yellow often indicates dehydration, while clear urine might mean you’re overhydrated. Significant color changes warrant medical attention.
What colors are used in fabric dyeing?
A splash of color changes everything" rings true in fabric dyeing.
You’ll find primary colors (red, blue, yellow), secondary colors (green, orange, purple), and specialty dyes including neon, metallic, and earth tones.
What factors should you consider when choosing a dye?
Consider fabric type, pre-existing color, and dye quality when choosing a dye.
Natural fabrics like cotton absorb better, while synthetics need specialized dyes.
Test small swatches first to verify color vibrancy and compatibility.
Do dyes and fabrics turn different colors?
Fabrics transform uniquely with dyes, like snowflakes under different skies.
Natural fibers absorb colors vibrantly, while synthetics often resist or lighten.
Pre-treatment, fiber content, and dye type all shape the final shade you’ll achieve, considering the unique properties of natural fibers.
How do I create custom dye colors?
To create custom dye colors, mix dyes gradually, blending small amounts until you achieve your desired shade.
Test on fabric swatches to check results, as fiber types, dye concentration, and processing time all affect final colors.
Conclusion
Think of dyeing fabric like mixing paints on a canvas; your base color defines the possibilities.
By considering your fabric’s original shade, material, and any prior treatments, you’ll better predict what color to expect when dyeing.
Natural fibers and light colors are easier to work with, while techniques like bleaching or layering dyes add complexity.
Always test on a small piece first, and embrace the unexpected—it’s all part of creating unique, vibrant results suited to your vision.
- https://www.ritdye.com/2020/03/04/overdyeing-patterns/
- https://www.empire.edu/blog/beauty-tips/does-hair-color-damage-your-hair
- https://www.ids.trade/files/news/2002/ITTR_Dyeing%20and%20Finishing.PDF
- https://dormeuil.com/blogs/news/dyeing-wool-the-art-of-colouring-cloth-for-suits?srsltid=AfmBOoq_xmLLfN8xjr1amrib0TXFu6ZjI6vfu7qqrlcFKtgl-6e1Ubyt
- https://www.britannica.com/topic/textile/Textile-finishing-processes

