This site is supported by our readers. We may earn a commission, at no cost to you, if you purchase through links.
Think of it as your backstage crew, preventing puckering, stopping wrinkles, and ensuring perfect design placement. You’ll find that using a basting box gives you peace of mind, like when your GPS finally says, "You’ve arrived!"
Whether you use free online designs or create your own with best embroidery software, it’s a must-have trick in your embroidery toolkit
. Ready to explore the magic of mastering fabric stability?
Table Of Contents
- Key Takeaways
- What is an Embroidery Basting Box
- Why Use a Basting Stitch in Embroidery
- Types of Basting Boxes for Embroidery
- Finding or Creating a Basting Stitch Embroidery File
- Fabrics Suitable for Basting Boxes
- How to Add a Basting Box for Embroidery
- Removing a Basting Box After Embroidery
- Tips and Considerations for Using a Basting Box
- Frequently Asked Questions (FAQs)
- Conclusion
Key Takeaways
- Think of a basting box as a safety net for your embroidery projects, keeping your fabric from wandering off like a dog without a leash. It’s all about fabric stability and preventing those sneaky puckers that can ruin a design.
- You’ll find a basting box especially handy when working with delicate or stretchy fabrics. It’s like having your own fabric whisperer, ensuring everything stays put and looks as sharp as a newly ironed shirt.
- If you’re getting fancy with software, you can create custom basting boxes tailored to your project. It’s like customizing your pizza toppings—why settle for less when you can have it just the way you want it?
- Removing the basting stitches is as satisfying as popping bubble wrap. Use a seam ripper or small scissors for a clean finish, freeing your beautiful design from its temporary restraints.
What is an Embroidery Basting Box
Think of an embroidery basting box as your trusty assistant on the sewing journey, keeping your fabric steady and puckering at bay while you focus on the art.
It’s like having training wheels for embroidery; you stitch a simple rectangle to pin down your fabric before executing your design masterpiece.
Definition and Purpose of Basting
An embroidery basting box is your sneak peek to perfect design placement and fabric stability. It’s like a blueprint for your embroidery adventures, preventing that pesky fabric movement.
Here’s how it helps:
- Design Placement: Guarantees precision.
- Fabric Movement: Keeps it steady.
- Hoop Security: A solid grip.
- Stitch Types: Guides your stitches.
Explore these basting techniques for magical stitching!
Benefits of Using a Basting Box
Oftentimes, using a basting box can work wonders for your embroidery projects.
It helps stabilize the fabric, reducing pesky thread tangles and ensuring your design stitches out with precision.
Plus, the basting box gives you a handy preview of your embroidery placement before you even start stitching.
It’s a simple trick that can elevate your embroidery skills in no time!
How to Create a Basting Box Design
Creating a basting box design can be a breeze with the right tools.
Use basting box software to adjust the stitch density, size, and shape. Consider embroidery software for custom basting stitches, or explore free basting designs online.
This approach makes sure your embroidery blank stays put, preventing fabric from floating about like a mischievous ghost, and ensures a successful embroidery process.
Why Use a Basting Stitch in Embroidery
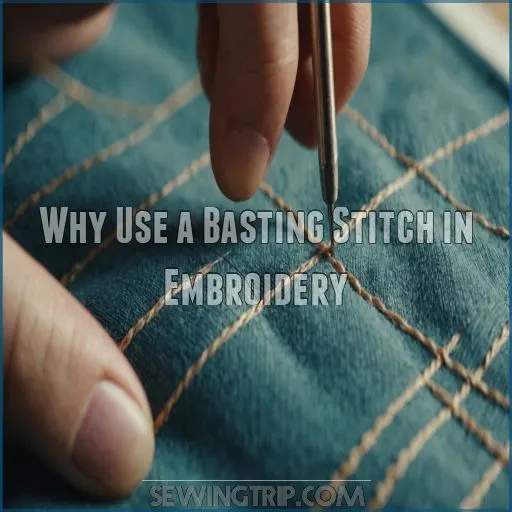
Using a basting stitch in embroidery might seem like giving your project a safety net—it helps keep your fabric in place, reducing those annoying puckers and wrinkles.
Imagine it as your project’s bodyguard, even letting you peek into your design’s future position before committing to the final stitch!
Preventing Fabric Movement and Puckering
Embroidery’s secret weapon against fabric mishaps is the basting stitch. Imagine avoiding fabric puckering like a pro!
Keep fabric still by mastering:
- Fabric tension control.
- Expert hooping techniques.
- Right stabilizer choice.
- Stitch density management.
It’s not just about sewing; you’re orchestrating a harmonious dance of fabric types and embroidery supplies for flawless stitching, especially when mastering basic flower embroidery
.
Holding Water-Soluble Toppings in Place
Imagine your embroidery basting box as the superhero cape for water-soluble toppings.
It’s there to save the day by holding the topping securely in place. A perimeter baste with a running stitch prevents pesky movement as you stitch.
Once your masterpiece is done, topping removal becomes a breeze!
Embrace this stabilizer choice for perfect, puck-free designs.
Previewing Design Placement Before Stitching
Before you start your embroidery project, the basting stitch helps make sure perfect design placement.
It’s like a trusty roadmap for your embroidery machine, guiding the needle and preventing fabric shift.
By using embroidery software, you can preview and adjust designs, making sure hoop alignment and ideal fabric tension.
So, why not give yourself this stitchy advantage?
Types of Basting Boxes for Embroidery
Choosing the right basting box can feel like picking between a trusty old sweater and a new tech gadget; each has its own perks.
You will find two main types of basting boxes. You will find hoop basting boxes that snugly fit around your hoop, while design basting boxes trace your design’s outline, making it easier for you to decide based on your project’s specific needs.
Hoop Basting Box Vs Design Basting Box
The "hoop basting box" stitches a box around the entire hoop, while the "design basting box" stitches a box just around the design.
The design basting box is better for smaller projects where the fabric doesn’t fill the hoop.
The hoop basting box provides more overall stability.
Choosing the Right Basting Box for Your Project
Choosing the right embroidery basting box can feel like picking the perfect pair of shoes—it’s all about fit.
Consider fabric type, design size, hoop size, and stitch density to suit your project goals.
Whether you’re taming a stubborn fabric or conquering an ambitious design, basting boxes are your trusty sidekick in the embroidery craft.
Customizing Basting Box Designs With Software
Tinkering with software tools can elevate your embroidery art by customizing basting box designs to your heart’s desire.
- Explore software for basting box variations and stitch customization.
- Tailor designs to match your personal preferences.
- Enjoy the creative freedom of design flexibility, enhancing your embroidery skill and inspiring new ideas.
Let software be your muse!
Finding or Creating a Basting Stitch Embroidery File
Looking for that perfect basting stitch file to keep your embroidery snug?
Whether you’re snagging a free download online or tinkering with software to craft one yourself, it’s easier than finding a needle in a haystack—oops, wrong craft!
Free Basting Stitches for Machine Embroidery
Ever wondered how to get those perfect stitches without tearing your hair out? Free basting stitch resources are your new best friends in the embroidery process.
As a versatile craft, embroidery can personalize items, making each one unique, and mastering basic stitches like the running stitch and backstitch forms the foundation of embroidery designs.
Check out Best Basting Stitch Sites to snag designs that’ll hold your fabric like a pro. It’s like having a mini safety net for your projects, ensuring smoother embroidery.
Creating a Basting Box With Embroidery Software
Creating a basting box with embroidery software is as easy as pie!
Start by exploring programs like Embrilliance Essentials, which lets you add or customize basting boxes effortlessly.
For added control, tweak stitch density and box types to fit your design.
Embroidery enthusiasts, with the right software recommendations and a pinch of creativity, you’ll sew like a pro!
Importing Basting Stitch Designs From Websites
Once you’ve mastered creating basting boxes with software, explore websites offering free basting box designs.
Handy sites provide various design formats for straightforward importing, like those found on top sites for free in-the-hoop designs
. Take care with legal considerations, ensuring you’re using designs legally.
This embroidery hack simplifies your workflow, offering customization options that can elevate your projects while minimizing headaches. It’s like having a secret embroidery chef at your fingertips, which can be a great workflow booster.
Fabrics Suitable for Basting Boxes
When talking about basting boxes, not all fabrics are created equal.
From stable wovens to stretchy knits, the right fabric can make all the difference in getting those stitches to lay just right.
Let’s explore the fabrics that play nicely with basting – you might be surprised at how versatile this handy technique can be.
Stable Fabrics for Embroidery
You’ve nailed basting stitch creation; now, let’s make sure your embroidery life is smooth by picking stable fabrics.
Here’s a quick guide:
- Fabric Weight: Opt for medium-weight fabrics that won’t distort.
- Hooping Techniques: Make sure you have snug, even tension.
- Stabilizer Options: Use tear-away stabilizers for easy removal.
Master these for perfect stitching every time!
Knit Fabrics and Basting Boxes
Imagine your knit fabric rolling like a mischievous kitten. A basting box can tame that wild child, ensuring stability.
Consider basting box size and hooping techniques to match your project’s stitch density and tension adjustments.
Embrace this embroidery adventure with confidence; soon, you’ll be the master of cross stitch and embroidery fun, making knits behave impeccably (Source).
Sheer or Delicate Fabrics and Basting
Handling sheer or delicate fabrics in embroidery requires a gentle touch.
Consider using a thin stabilizer to avoid puckering and a smaller basting box size to secure your fabric without stress.
Remember, thread tension plays a pivotal role—keep it light and breezy.
Embrace this careful approach, and you’ll transform embroidery mistakes into embroidery joy and embroidery love with every stitch.
Heavyweight Fabrics and Basting Boxes
Switching from delicate fabrics to heavyweight ones requires a new mindset.
When working with heavyweight fabrics and basting boxes, you need the right ingredients for success: precise tension, firm hooping, and mindful stitch density.
- Choose quality threads.
- Balance hooping and fabric tension.
- Use a sturdy chain stitch for support.
Stretch Fabrics and Basting Boxes
Stretch fabrics can be a real tough nut to crack when embroidering. Use a basting box to keep them in line, ensuring smooth stitches. Always match the box size to your design.
Keep the hooping technique gentle to avoid fabric rolls. And for removal tips, patience is key!
| Stretch Fabric Types | Basting Box Size | Hooping Techniques |
|---|---|---|
| Knit | Small | Gentle |
| Jersey | Medium | Securely fit |
| Lycra | Large | Lightly press |
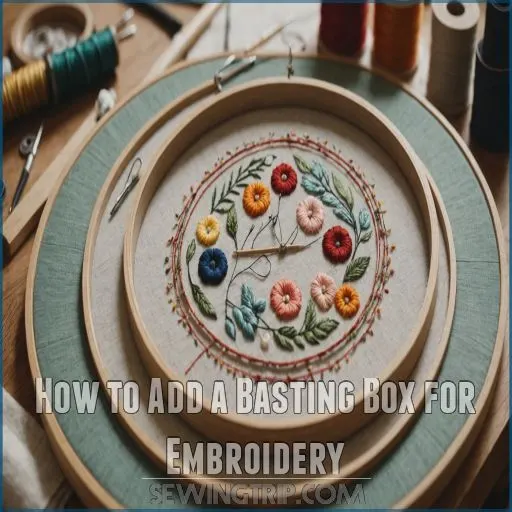
How to Add a Basting Box for Embroidery
Adding a basting box to your embroidery process can feel like prepping your fabric with a seatbelt—it’s all about securing everything firmly in place before you hit "go."
With just a bit of planning and practice, you’ll breeze through setting your fabric and design area perfectly, ensuring smooth stitching every time.
Preparing Your Fabric for Embroidery
Preparing your fabric for embroidery is a key step. The key is to create a basting box – a rectangle of long stitches that secures your fabric to the stabilizer. This prevents puckering, distortion, and fabric shifting during stitching.
- Use software to digitize a custom basting box design.
- Stitch a pre-made basting box design before your main embroidery.
- Adjust the basting stitch length and placement to suit your fabric.
Placing Fabric in the Hoop With a Basting Box
You’ve got the fabric pressed and ready; now it’s time to hoop it right with a basting box.
Make sure your hoop size matches your project to maintain proper fabric tension.
Place the fabric, stabilizer, and faux leather (if using) snugly in. A proper basting box placement keeps everything secure, saving you from reaching for the seam ripper later (Source).
Marking Your Design Area With a Basting Box
Marking your design area with a basting box is essential for perfect embroidery. Here’s how to master it:
- Choose Hoop Size: Make sure the hoop size complements your design and fabric type, preventing annoying puckers.
- Align Design Size: Position the box around your design’s perimeter for exact placement.
- Adjust Stitch Density: Use longer stitches for easy removal, keeping tension intact.
Creating Basting Stitches With Your Sewing Machine
Think you’re ready? Let’s add those basting stitches.
Before we start, it’s essential to understand that basting is a temporary straight stitch that holds fabric layers together until the final seam is sewn, as seen in various hand and machine stitching techniques. This step is important for achieving a professional finish in home decor projects, quilting, and serging.
Set your sewing machine to the longest stitch length, usually around 4 to 5, which you can find in the sewing machine stitches library
. Adjust the tension a bit loose for easy removal later.
| Setting | Purpose | Tip |
|---|---|---|
| Stitch Length | Long | 4-5 |
| Tension | Loose | Easy removal |
| Placement | Edge | Precise line |
Needle in, fabric aligned, and go!
Securing the Basting Stitches
To secure those basting stitches effectively, consider the following tips.
First, adjust your basting stitch tension to make sure stitches are snug but removable.
Second, select the ideal basting box size for your project to keep materials steady.
Finally, check your basting stitch density and placement to avoid fabric puckering.
It’s like orchestrating a fabric symphony, ensuring harmony in every stitch!
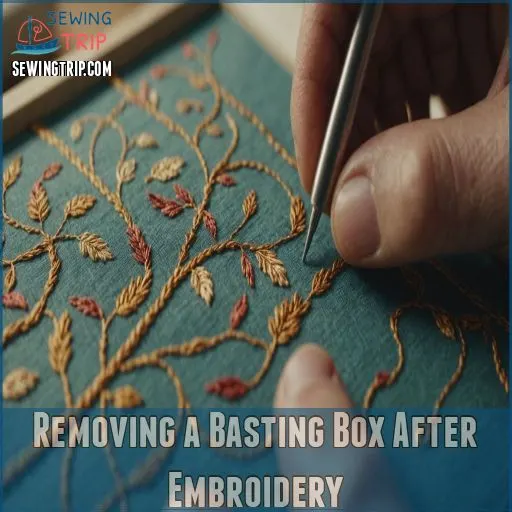
Removing a Basting Box After Embroidery
After completing your embroidery masterpiece, it’s time to remove the basting box, a task that’s as satisfying as peeling plastic off a new phone.
Use a seam ripper or small scissors to carefully snip away those temporary stitches, and you’ll reveal your beautifully secured design beneath beneath
Using a Seam Ripper to Remove Basting Stitches
You’ve secured your masterpiece with a basting box, and it’s time for the grand reveal.
Grab your trusty seam ripper, your best partner in basting box removal.
Carefully slide its pointed end under the basting threads and gently lift.
Remember, patience is key to avoiding fabric damage.
It’s as satisfying as peeling stickers, but without the sticky mess!
Removing Basting Stitches With Small Scissors
Don’t want to snag your fabric? Ditch the seam ripper and reach for those tiny appliqué scissors instead.
Carefully snip the basting stitches close to the fabric, working in small sections to avoid pulling or snagging.
Just like organizing your supplies in a sewing storage box, taking the time to carefully remove basting stitches can make a big difference in the overall quality of your embroidery.
With a gentle touch, you’ll have that basting box removed in no time – no fuss, no mess!
Tips for Removing Basting Stitches Quickly
Mastering the art of removing basting stitches is easier than you think! Let your seam ripper tricks shine while you tackle efficient basting removal.
Here’s how to make quick stitch removal a breeze:
- Loosen threads with a seam ripper.
- Use thread removal tools for stubborn bits.
- Gently tug from one end.
- Keep calm and keep going!
Tips and Considerations for Using a Basting Box
When you’re working with a basting box, it’s essential to choose the right fabrics. Avoid fabrics that hold on to needle holes like a friend clinging to old jeans.
Keep your stitching smooth and tangle-free by using basting boxes to minimize distortion and prevent thread knots.
It’s a simple way to make sure your embroidery project stays frustration-free.
Avoiding Fabrics That Retain Needle Holes
After removing your basting box, it’s time to select fabrics wisely to avoid unwanted needle holes.
Swap leather for non-puncture materials like vinyl substitutes. Try cardstock replacements for sturdier projects, this saves headaches and guarantees smooth stitching adventures without those pesky holes haunting your masterpiece.
Who wants holes anyway? Not you, my stitch-savvy friend!
Minimizing Fabric Distortion With Basting Boxes
Shifting gears from avoiding needle holes, let’s talk minimizing fabric distortion with basting boxes. You know, they’re your best friend when hooping techniques threaten to twist your cotton in knots! Choose the right basting box type; it stabilizes those tricky fabric types and manages stitch density.
While a sewing box can be a great companion for storing your embroidery essentials, a basting box is specifically designed for keeping fabric distortion at bay. A well-organized sewing box with portability can also help you stay on top of your embroidery projects.
Keep thread tension steady, and watch your designs stay sharp and true.
Preventing Thread Tangles With Basting Boxes
Wrestling with thread tangles? Don’t fret! A basting box can save the day.
Consider these tips:
- Adjust basting box tension for smooth stitches.
- Choose compatible thread types to reduce snags.
- Match hoop size to your project’s dimensions for better control.
- Opt for the right stabilizer choice and stitch density to prevent knots.
Keep stitching frustration-free!
Frequently Asked Questions (FAQs)
What is a basting box?
A basting box uses long stitches to secure fabric to stabilizer before embroidery.
Think of it as your project’s friendly chaperone, preventing fabric from wandering mid-design and ensuring everything stays smooth and in place.
It was changed to use double line breaks.
How do you use a basting box in a sewing machine?
So you fancy a basting box, huh?
Load it onto your machine, stitch it before your main design, and watch it secure fabric and stabilizer like a pro.
It’s the trusty sidekick every embroiderer swears by.
Can you add a basting box to an embroidery design?
Yes, you can add a basting box to an embroidery design using software like Embrilliance Essentials.
It creates a long-running stitch around your design, securing fabric to stabilizer and ensuring everything stays put during embroidery.
Can you use a basting stitch for embroidery?
Why even bother with a basting stitch in embroidery?
It keeps your fabric secure and designs aligned, like training wheels for stitches.
The basting stitch’s simplicity hides its genius, helping reduce puckering and ensuring crisp designs.
What is the point of basting sewing?
Basting in sewing is like a trial run for your stitches.
It temporarily holds fabric layers together, letting you check fit and alignment before going permanent.
It’s your safety net, especially with tricky, slippery fabrics, allowing for a test of the trial run.
What is the difference between a regular seam and a basting seam?
A regular seam is permanent, securing fabric pieces together tightly.
A basting seam, on the other hand, is temporary, used to hold pieces in place until final stitching.
It’s like a dress rehearsal before the real performance, where the temporary stitch is likened to preparation before the final real performance.
What is basting thread used for?
Picture a safety net for your sewing project.
Basting thread temporarily holds fabric layers together, letting you adjust before committing to final stitches.
It’s easy to remove, making corrections a breeze and saving you headaches later .
What does a basting stitch look like?
A basting stitch looks like long, loose stitches that temporarily hold fabric pieces together.
It’s often sewn with contrasting thread for easy removal later.
This stitch makes garment fitting a breeze, letting you adjust without commitment, making garment fitting a breeze.
How long do basting stitches typically last?
It turns out, about 85% of sewing projects involve basting stitches by machine.
Typically, these stitches last until you’re ready to sew your final seam.
Their longevity depends on the fabric type and handling.
Can basting boxes be used on stretchy fabrics?
You can use basting boxes on stretchy fabrics to secure layers, especially with stabilizers.
They help prevent shifting during stitching.
Just remember, using a longer stitch or zigzag can accommodate elasticity without causing puckering.
What are the ideal stitch lengths for a basting box?
Ever wondered about the perfect stitch length for a basting box?
Aim for 7mm for most embroidery projects.
It’s long enough to hold but easy to remove.
This keeps your designs looking sharp and hassle-free (Source).
Can basting boxes be used for machine applique projects?
Basting boxes can be a game-changer for machine applique projects.
The perforated edges make needle-turn applique a breeze, and the portability is a lifesaver.
Just clip the basting stitches as you go for a seamless finish.
How do basting boxes affect the final embroidered design?
Imagine your stitching as a 90s mixtape.
Basting boxes keep the tracklist smooth.
They lock fabric in place, reducing shifts and distortion, ensuring your intricate designs stay sharp and aligned.
Giving your project a polished finish is the ultimate goal, and basting boxes help achieve that.
Conclusion
Think of an embroidery basting box as the scaffolding for your creative masterpiece, keeping everything in place as you craft your fabric art.
With the benefits like preventing puckering and securing those tricky water-soluble toppings, it’s an unsung hero in your embroidery journey.
Mastering the art of using a basting box helps your projects turn out just right. With these tips and a bit of practice, you’ll find both confidence and precision in your stitching adventures.

